
Winter Kale Pot Gardening: Imagine stepping outside on a crisp winter morning and harvesting fresh, vibrant kale right from your own patio! No more sad, wilted greens from the grocery store. This isn’t just a dream; it’s an achievable reality with a few simple tricks and a little DIY spirit. For centuries, cultivating food close to home has been a cornerstone of self-sufficiency and a connection to nature. From ancient Roman rooftop gardens to the victory gardens of wartime, growing your own food has always been a way to ensure access to fresh, healthy produce.
But let’s face it, not everyone has acres of land for a sprawling garden. That’s where the beauty of Winter Kale Pot Gardening comes in! I’m going to show you how to create a thriving kale garden in pots, even in the chilliest months. This DIY guide is perfect for apartment dwellers, balcony gardeners, or anyone who wants to extend their growing season. Why buy expensive, often tasteless, kale when you can easily grow your own, packed with flavor and nutrients? Plus, there’s something incredibly satisfying about nurturing a plant from seed to table. So, grab your gloves, and let’s get started on this rewarding and delicious project!
DIY Winter Kale Pot Gardening: A Guide to Bountiful Greens!
Hey there, fellow gardening enthusiasts! Are you craving fresh, homegrown greens even when the frosty winds of winter are howling? Well, you’re in luck! I’m going to walk you through a super rewarding DIY project: growing kale in pots during the winter. It’s easier than you think, and the satisfaction of harvesting your own vibrant kale leaves in the dead of winter is simply unmatched. Let’s get started!
Choosing the Right Kale Variety
First things first, not all kale varieties are created equal when it comes to winter hardiness. Some are more resilient to the cold than others. Here are a few of my personal favorites that thrive in cooler temperatures:
* Dwarf Blue Curled Vates: This is a classic choice, known for its compact size and excellent cold tolerance. It’s perfect for smaller pots and produces abundant, tightly curled leaves.
* Red Russian: This variety boasts beautiful, flat, fringed leaves with a reddish-purple hue. It’s not only delicious but also adds a splash of color to your winter garden. Red Russian kale is also known for its slightly sweeter flavor after a frost.
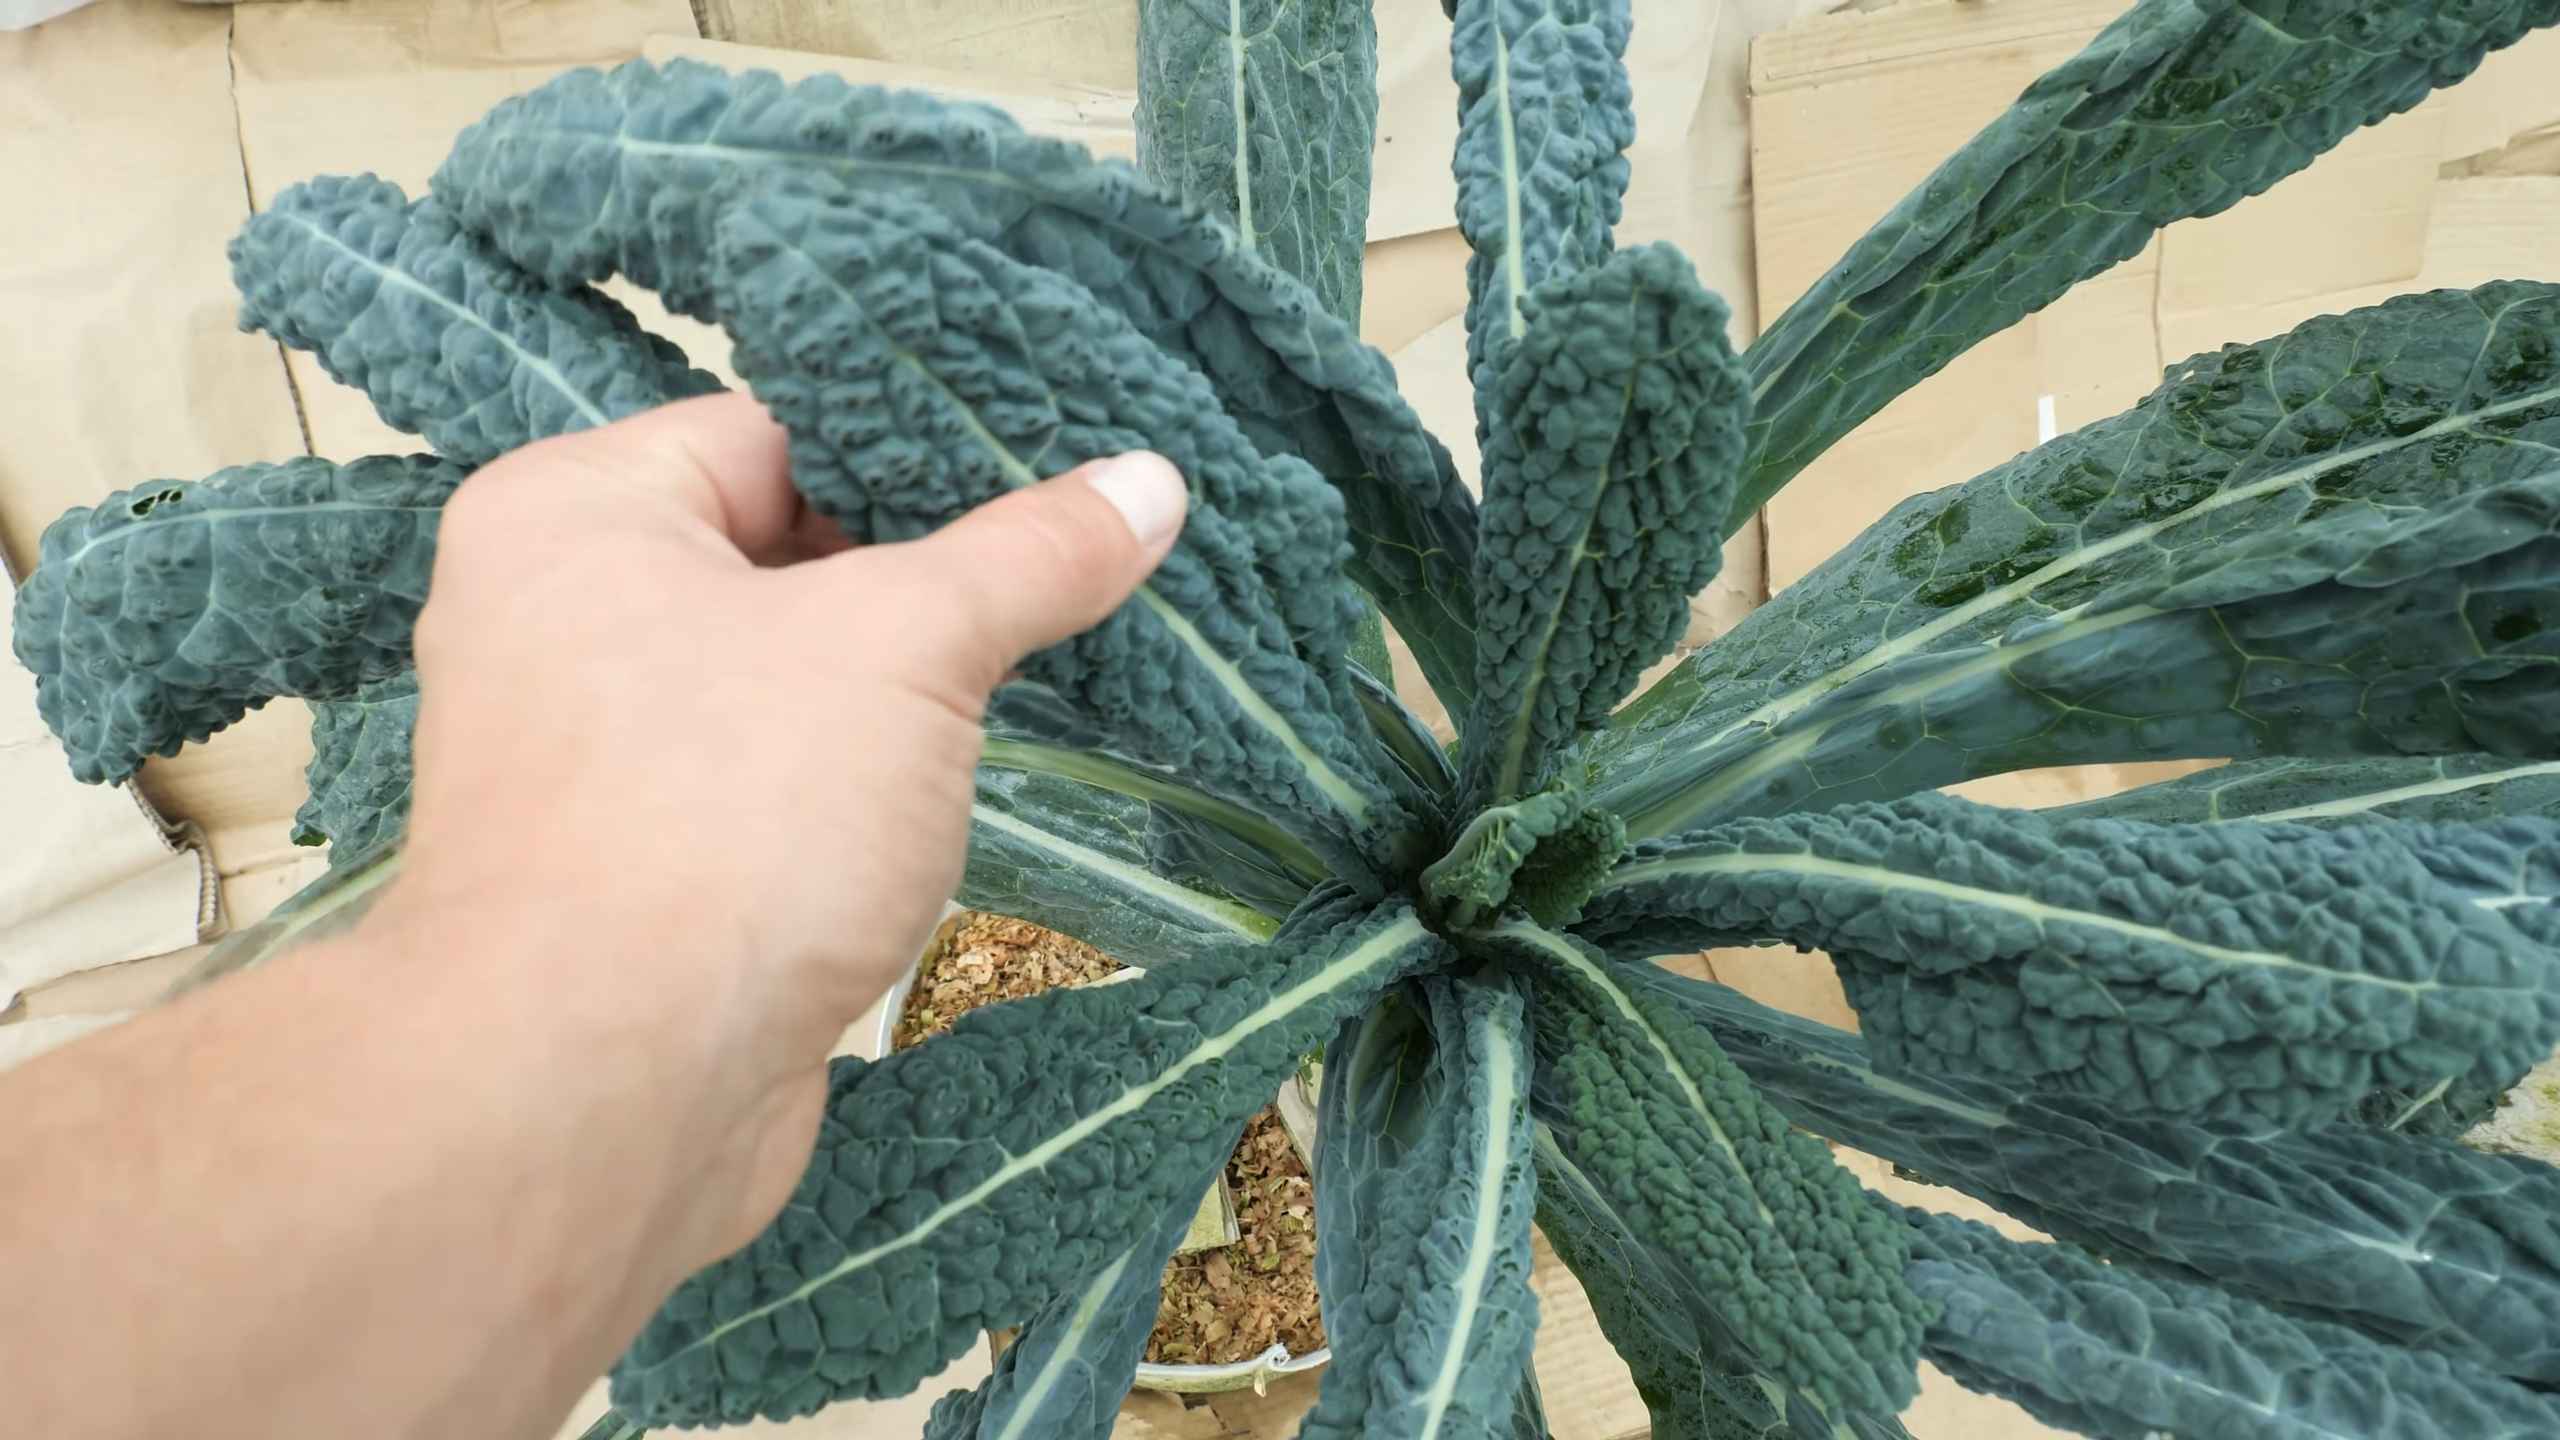
* Lacinato (Dinosaur) Kale: With its dark green, almost black, bumpy leaves, Lacinato kale is a striking addition to any garden. It’s incredibly hardy and has a slightly nutty flavor.
* Winterbor: As the name suggests, Winterbor is specifically bred for winter growing. It’s extremely cold-hardy and produces large, frilly leaves.
Gathering Your Supplies
Okay, now that we’ve picked our kale varieties, let’s gather everything we need. Here’s a checklist to make sure you’re all set:
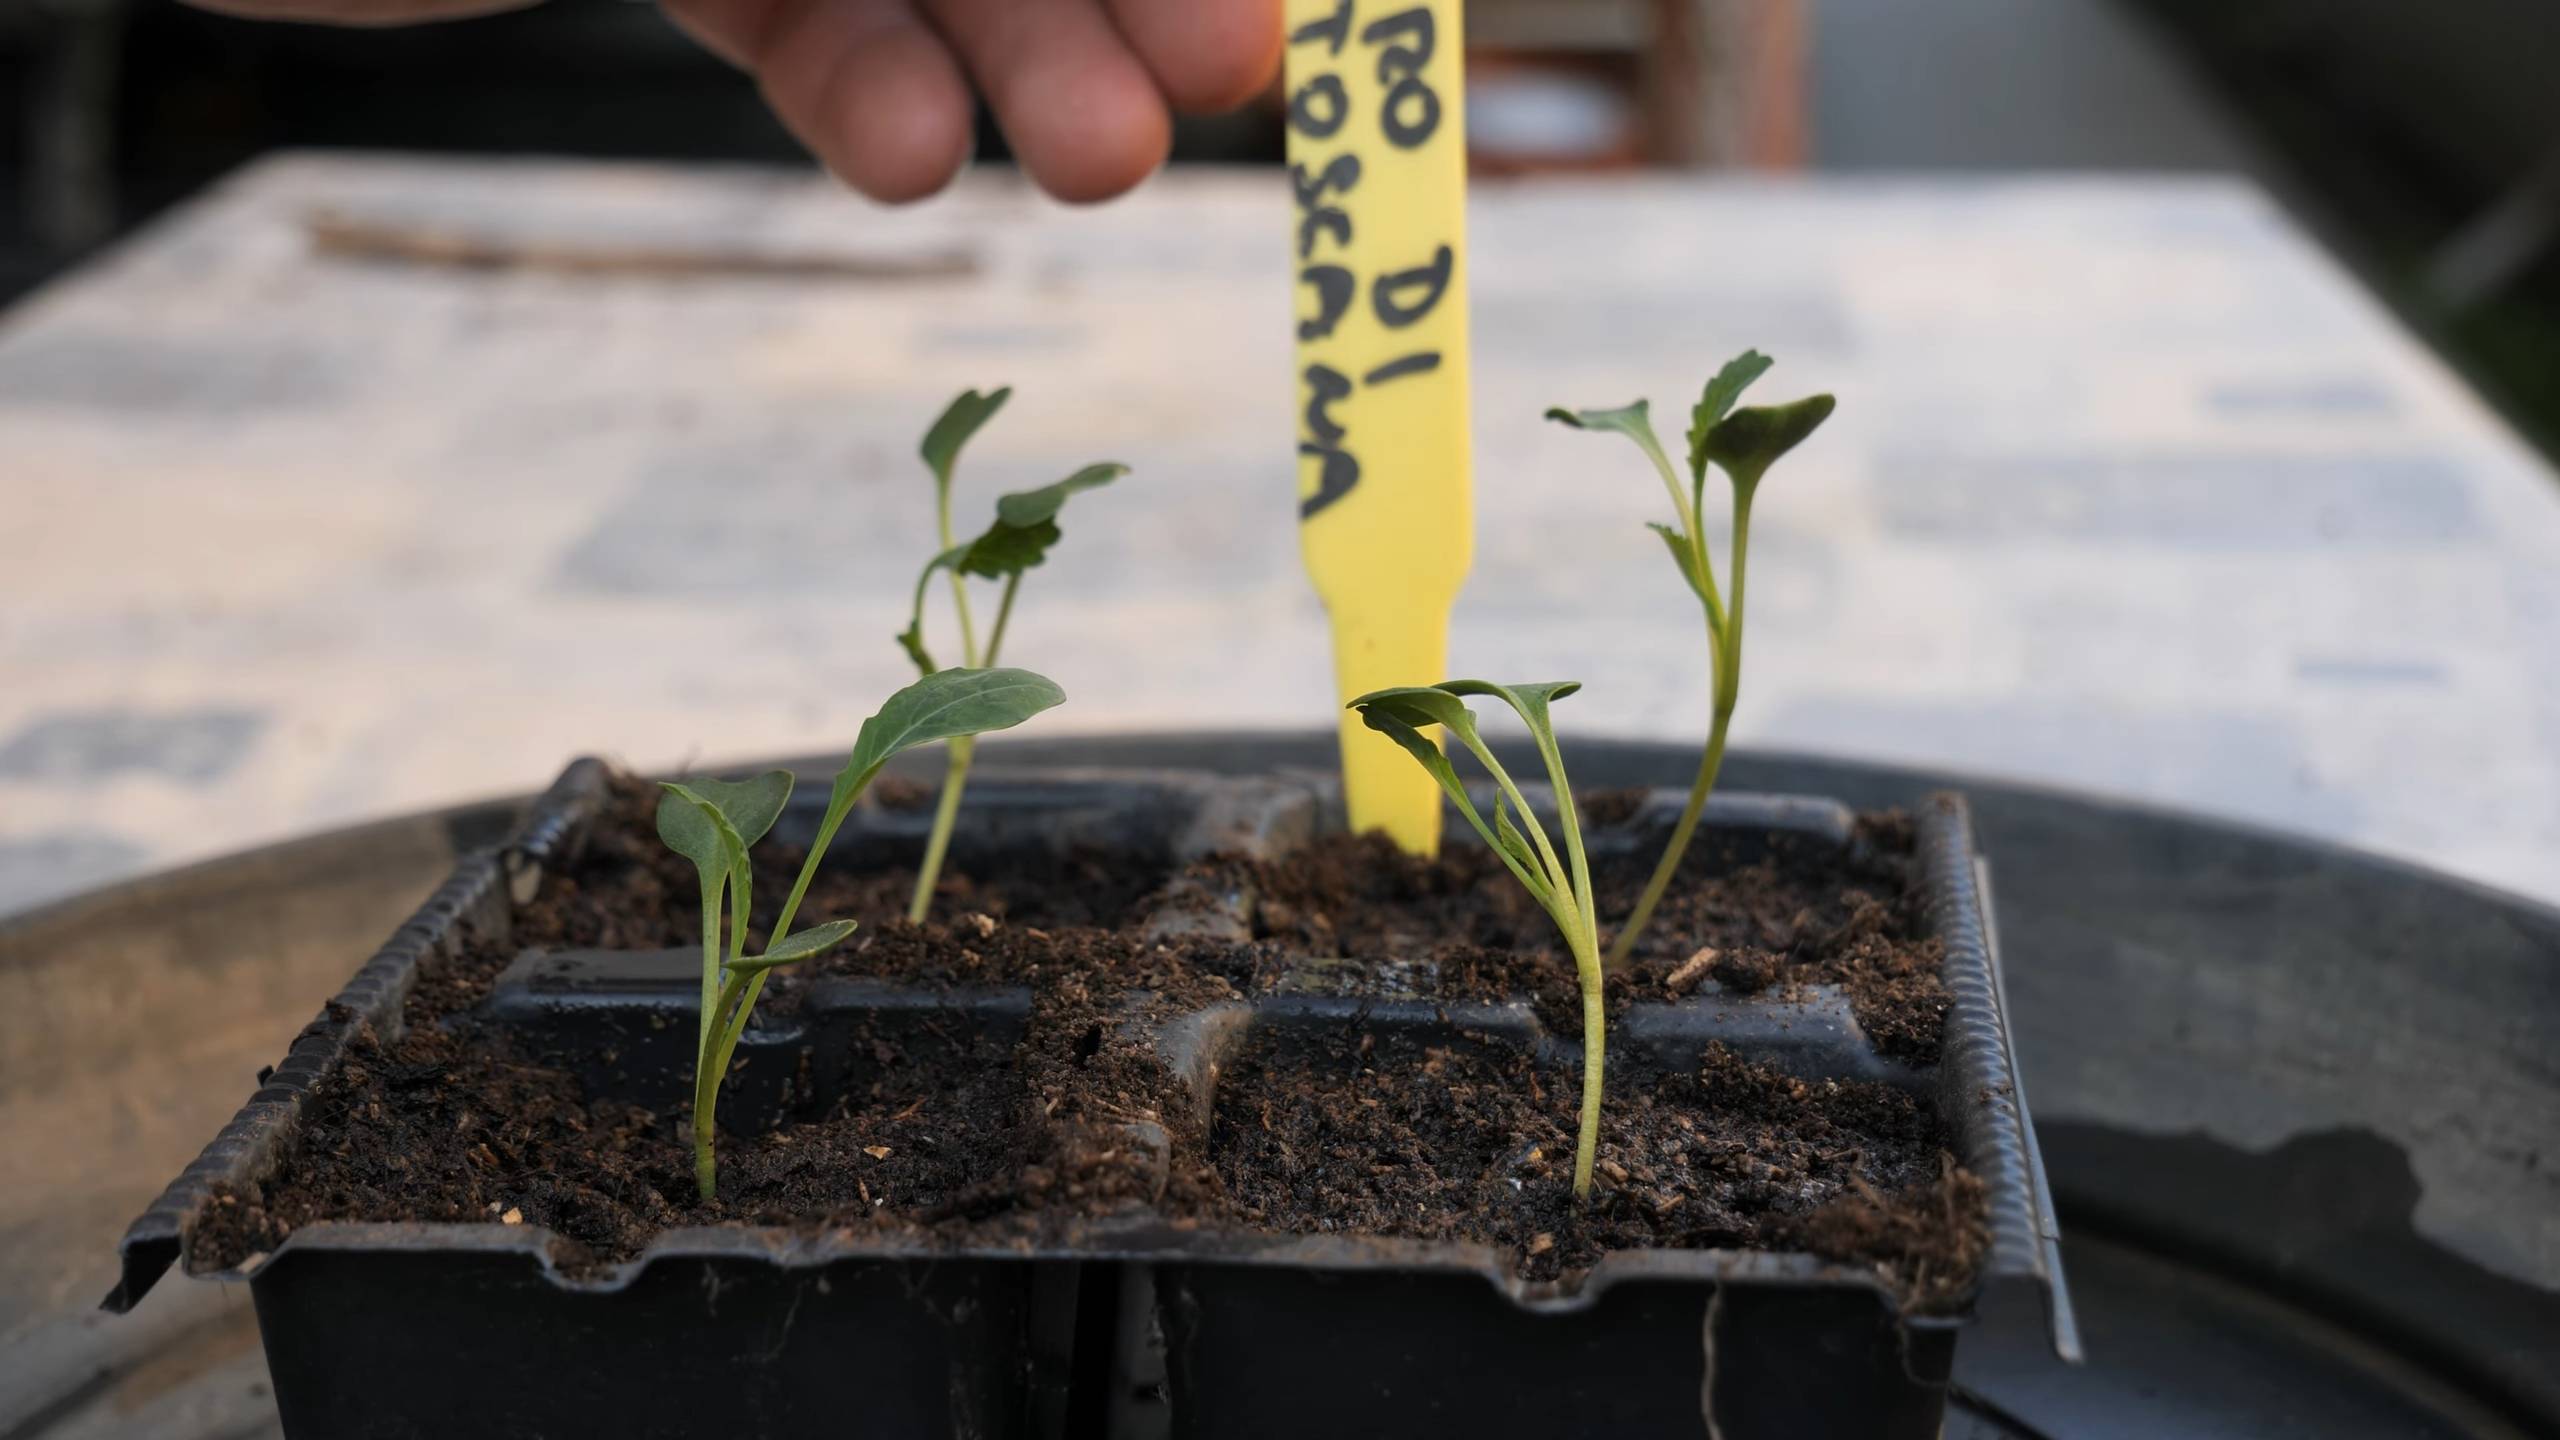
* Kale Seeds or Seedlings: You can start from seeds or purchase seedlings from your local nursery. If you’re starting from seeds, I recommend starting them indoors about 6-8 weeks before your first expected frost.
* Pots: Choose pots that are at least 12 inches in diameter and depth. This will give your kale plants enough room to grow. Make sure the pots have drainage holes!
* Potting Mix: Use a high-quality potting mix that’s well-draining and rich in organic matter. Avoid using garden soil, as it can compact in pots and hinder drainage.
* Slow-Release Fertilizer: A slow-release fertilizer will provide your kale plants with a steady supply of nutrients throughout the winter.
* Watering Can or Hose: Essential for keeping your kale plants hydrated.
* Mulch (Optional): Mulch helps to retain moisture in the soil and protect the roots from extreme temperatures. Straw, wood chips, or shredded leaves work well.
* Row Covers or Cold Frames (Optional): For extra protection against harsh weather, you can use row covers or cold frames.
* Gardening Gloves: To keep your hands clean and protected.
Planting Your Kale
Alright, let’s get our hands dirty! Here’s how to plant your kale in pots:
1. Prepare the Pots: Fill your pots with potting mix, leaving about an inch or two of space at the top.
2. Plant Seeds or Seedlings:
* From Seeds: Sow the seeds about 1/2 inch deep and 1-2 inches apart. Gently cover them with potting mix and water thoroughly.
* From Seedlings: Dig a hole in the potting mix that’s slightly larger than the root ball of the seedling. Carefully remove the seedling from its container and gently loosen the roots. Place the seedling in the hole and backfill with potting mix. Water thoroughly.
3. Add Slow-Release Fertilizer: Sprinkle a slow-release fertilizer around the base of the plants, following the instructions on the fertilizer package.
4. Mulch (Optional): Apply a layer of mulch around the plants to help retain moisture and protect the roots.
5. Water Thoroughly: Water the plants thoroughly after planting.
Caring for Your Winter Kale
Now that your kale is planted, it’s time to provide it with the care it needs to thrive throughout the winter.
1. Sunlight: Kale needs at least 6 hours of sunlight per day. Place your pots in a sunny location, such as a south-facing patio or balcony. If you don’t have enough sunlight, you can supplement with grow lights.
2. Watering: Water your kale plants regularly, especially during dry spells. The soil should be consistently moist but not waterlogged. Check the soil moisture by sticking your finger into the soil. If the top inch feels dry, it’s time to water.
3. Fertilizing: Kale is a heavy feeder, so it needs regular fertilization. In addition to the slow-release fertilizer you added at planting, you can also supplement with a liquid fertilizer every 2-3 weeks. Follow the instructions on the fertilizer package.
4. Pest Control: Keep an eye out for pests, such as aphids, cabbage worms, and slugs. Handpick any pests you find or use an organic insecticide, such as insecticidal soap or neem oil.
5. Protection from Extreme Weather: If you live in an area with harsh winters, you may need to provide extra protection for your kale plants. You can use row covers or cold frames to protect them from frost, snow, and wind.
6. Pruning: Remove any yellowing or damaged leaves to encourage new growth.
Harvesting Your Kale
The best part of growing kale is, of course, harvesting it! You can start harvesting kale leaves when they are about 4-6 inches long.
1. Harvesting Technique: Harvest the outer leaves first, leaving the inner leaves to continue growing. This will allow you to harvest kale continuously throughout the winter.
2. How to Harvest: Use a sharp knife or scissors to cut the leaves off at the base of the plant.
3. When to Harvest: Harvest kale in the morning, after the dew has dried. This will help to prevent the leaves from wilting.
4. Storage: Store kale leaves in the refrigerator for up to a week.
Troubleshooting Common Problems
Even with the best care, you might encounter a few challenges along the way. Here are some common problems and how to address them:
* Yellowing Leaves: This could be a sign of nutrient deficiency, overwatering, or underwatering. Check the soil moisture and fertilize if necessary.
* Pest Infestations: As mentioned earlier, keep an eye out for pests and take action promptly.
* Slow Growth: This could be due to insufficient sunlight, poor soil, or cold temperatures. Make sure your kale plants are getting enough sunlight and nutrients, and protect them from extreme weather.
* Bolting (Going to Seed): Kale can bolt in warm weather. If your kale starts to bolt, harvest the leaves immediately, as they will become bitter.
Extending the Harvest
Want to keep your kale harvest going even longer? Here are a few tips:
* Succession Planting: Plant new kale seeds or seedlings every few weeks to ensure a continuous supply of fresh greens.
* Overwintering: In mild climates, you can overwinter your kale plants and harvest them again in the spring. Simply protect them from frost and snow.
* Saving Seeds: If you want to save seeds from your kale plants, allow a few plants to bolt and produce seeds. Collect the seeds when they are dry and store them in a cool, dry place.
Enjoying Your Homegrown Kale
Now that you’ve harvested your delicious, homegrown kale, it’s time to enjoy it! Kale is incredibly versatile and can be used in a variety of dishes. Here are a few ideas:
* Salads: Massage kale leaves with olive oil and lemon juice to make a delicious and healthy salad.
* Smoothies: Add kale to your smoothies for a boost of nutrients.
* Soups and Stews: Kale adds a hearty and nutritious element to soups and stews.
* Sautéed Kale: Sauté kale with garlic and olive oil for a simple and flavorful side dish.
* Kale Chips: Bake kale leaves with olive oil and salt for a healthy and crispy snack.
Conclusion
Growing kale in pots during the winter is a rewarding and relatively easy DIY project. With a little care and attention, you can enjoy fresh, homegrown greens even when the weather outside is frightful. So, grab your pots, seeds, and potting mix, and get ready to enjoy a bountiful winter harvest! Happy gardening!
Conclusion
So, there you have it! Transforming your winter kale into a thriving pot garden is not just a fun project; it’s a rewarding experience that brings fresh, nutritious greens right to your doorstep, even when the weather outside is frightful. We’ve walked you through the simple steps, highlighting the ease and accessibility of this DIY trick. Forget expensive grocery store kale that’s traveled miles and lost its vibrancy. With a little effort, you can cultivate your own supply of crisp, flavorful kale, bursting with vitamins and minerals.
Why is this a must-try? Because it’s sustainable, cost-effective, and incredibly satisfying. Imagine stepping outside on a chilly winter morning and harvesting fresh kale for your smoothie, salad, or stir-fry. The taste is unparalleled, and the knowledge that you grew it yourself adds an extra layer of enjoyment. Plus, it’s a fantastic way to extend your growing season and enjoy the benefits of gardening year-round.
But don’t stop there! Experiment with different varieties of kale. Lacinato (dinosaur) kale offers a unique texture and slightly sweeter flavor, while Red Russian kale adds a beautiful splash of color to your garden and dishes. Consider companion planting with herbs like thyme or rosemary, which can help deter pests and enhance the flavor of your kale. You can also try succession planting, sowing new seeds every few weeks to ensure a continuous harvest throughout the winter. For those with limited space, dwarf kale varieties are perfect for smaller pots or balconies.
And if you’re feeling adventurous, why not try growing other winter greens alongside your kale? Spinach, chard, and collard greens are all excellent choices that thrive in similar conditions. You can create a vibrant and diverse winter pot garden that provides a constant supply of fresh, healthy produce.
We’re confident that you’ll find this DIY trick to be a game-changer for your winter meals. It’s a simple, effective, and enjoyable way to bring the bounty of the garden into your home, even when the snow is falling.
Don’t just take our word for it, though. We encourage you to give this winter kale pot gardening a try. It’s easier than you think, and the rewards are well worth the effort. Once you’ve experienced the joy of harvesting your own fresh kale in the middle of winter, you’ll never look at grocery store kale the same way again.
We’re eager to hear about your experiences! Share your photos, tips, and challenges in the comments below. Let’s create a community of winter kale gardeners and inspire others to embrace the joys of homegrown produce. What varieties did you choose? What challenges did you face, and how did you overcome them? Your insights can help others succeed and make their winter kale pot gardening experience even more rewarding. So, grab your pots, soil, and kale seeds, and let’s get growing!
Frequently Asked Questions (FAQ)
What kind of pot is best for growing winter kale?
The ideal pot for winter kale should be at least 12 inches in diameter and 12 inches deep. This provides ample space for the roots to grow and allows for good drainage. Choose a pot made from a durable material like plastic, terracotta, or ceramic. Make sure the pot has drainage holes to prevent waterlogging, which can lead to root rot. Dark-colored pots can absorb more heat from the sun, which can be beneficial in colder climates, but be mindful of overheating on sunny days.
What type of soil should I use for my winter kale pot garden?
Use a high-quality potting mix that is well-draining and rich in organic matter. Avoid using garden soil, as it can become compacted in pots and hinder drainage. Look for a potting mix that contains ingredients like peat moss, perlite, vermiculite, and compost. You can also amend your potting mix with additional compost or aged manure to provide extra nutrients for your kale. A slightly acidic to neutral pH (around 6.0 to 7.0) is ideal for kale.
How much sunlight does winter kale need?
Kale thrives in full sun, which means at least 6 hours of direct sunlight per day. However, during the winter months, sunlight can be limited. If you don’t have a spot that receives full sun, try to provide at least 4 hours of direct sunlight or supplement with grow lights. Rotate your pots regularly to ensure that all sides of the plants receive adequate sunlight.
How often should I water my winter kale?
Water your kale regularly, keeping the soil consistently moist but not waterlogged. Check the soil moisture by sticking your finger about an inch deep into the soil. If it feels dry, it’s time to water. Water deeply, allowing the water to drain out of the drainage holes. Avoid watering the foliage, as this can promote fungal diseases. Reduce watering during periods of heavy rain or snow.
How do I fertilize my winter kale?
Kale is a heavy feeder, so it’s important to fertilize it regularly. Use a balanced, water-soluble fertilizer or an organic fertilizer like fish emulsion or compost tea. Fertilize every 2-3 weeks, following the instructions on the fertilizer package. Avoid over-fertilizing, as this can lead to excessive foliage growth and reduced flavor.
What are some common pests and diseases that affect winter kale?
Common pests that can affect winter kale include aphids, cabbage worms, and flea beetles. Inspect your plants regularly for signs of infestation and take action promptly. You can control aphids with a strong spray of water or insecticidal soap. Cabbage worms can be handpicked or controlled with Bacillus thuringiensis (Bt). Flea beetles can be deterred with row covers or insecticidal soap. Common diseases that can affect winter kale include downy mildew and black rot. Prevent these diseases by providing good air circulation, avoiding overhead watering, and removing any infected leaves promptly.
How do I harvest my winter kale?
You can begin harvesting kale leaves as soon as they are large enough to eat, typically when they are about 4-6 inches long. Harvest the outer leaves first, leaving the inner leaves to continue growing. Use a sharp knife or scissors to cut the leaves close to the stem. Avoid harvesting more than one-third of the plant at a time, as this can stress the plant and reduce its productivity.
Can I grow winter kale indoors?
Yes, you can grow winter kale indoors, but it requires adequate light and ventilation. Place your kale pots near a sunny window or use grow lights to provide sufficient light. Ensure good air circulation to prevent fungal diseases. Monitor the soil moisture and water regularly. You may also need to fertilize more frequently, as indoor plants tend to deplete nutrients more quickly.
What are some good companion plants for winter kale?
Good companion plants for winter kale include herbs like thyme, rosemary, and sage, which can help deter pests. Garlic and onions can also help repel pests and improve the flavor of kale. Marigolds are another excellent companion plant, as they attract beneficial insects that prey on pests. Avoid planting kale near other members of the brassica family, such as broccoli, cabbage, and cauliflower, as they can attract the same pests and diseases.
How long will my winter kale pot garden last?
With proper care, your winter kale pot garden can last throughout the winter months and even into the early spring. The lifespan of your kale plants will depend on the variety, the growing conditions, and your harvesting practices. Regularly remove any yellowing or damaged leaves to promote healthy growth. If your kale plants start to bolt (produce flower stalks), it’s a sign that they are nearing the end of their life cycle. You can still harvest the leaves, but they may become more bitter.
Leave a Comment