
Tomato propagation tips are your secret weapon to unlocking a never-ending supply of juicy, homegrown tomatoes! Imagine biting into a sun-ripened tomato, bursting with flavor, knowing you nurtured it from a tiny cutting. That’s the magic we’re about to explore together. For centuries, gardeners have passed down the art of propagating plants, a practice rooted in resourcefulness and a deep connection to nature. Think of the ancient Egyptians, carefully cultivating crops along the Nile, or the ingenious methods used in traditional Chinese agriculture.
But why should you care about tomato propagation? Well, let’s face it, buying seedlings every year can get expensive. Plus, sometimes you find that perfect tomato variety, the one that tastes like sunshine and summer, and you want to keep it going forever! That’s where these simple DIY tricks come in. I’m going to show you how to easily clone your favorite tomato plants, saving you money and ensuring a bountiful harvest year after year. These tomato propagation tips are so easy, even a beginner can master them. Get ready to turn a single tomato plant into a thriving tomato empire!

DIY Tomato Propagation: Cloning Your Favorite Varieties!
Hey there, fellow gardening enthusiasts! Ever wished you could magically multiply your best-producing tomato plants? Well, guess what? You practically can! Today, I’m going to walk you through the super rewarding process of tomato propagation, specifically using cuttings. It’s easier than you think, and it’s a fantastic way to preserve your favorite varieties, get a head start on the growing season, and even share plants with friends. Let’s get our hands dirty!
Why Propagate Tomatoes from Cuttings?
Before we dive in, let’s quickly cover why this method is so awesome:
* Cloning Your Champions: You get genetically identical copies of your best plants. If you have a tomato that’s disease-resistant, incredibly flavorful, or a prolific producer, you can replicate those exact traits.
* Faster Growth: Cuttings often mature faster than plants grown from seed. They already have a head start because they’re not starting from scratch.
* Cost-Effective: No need to buy more seedlings! You can create new plants from existing ones.
* Space Saving: If you only have space for a few mature plants, you can still propagate many cuttings to get a larger harvest.
* Easy to Learn: Seriously, once you get the hang of it, it’s a breeze!
What You’ll Need
Here’s your shopping list for tomato propagation success:
* A Healthy Tomato Plant: Choose a plant that’s vigorous and free from disease.
* Sharp, Clean Pruning Shears or Knife: Sterilize them with rubbing alcohol to prevent spreading disease.
* Rooting Hormone (Optional but Recommended): This helps stimulate root growth. I personally love using a powdered rooting hormone, but liquid works too.
* Rooting Medium: You have a few options here:
* Seed Starting Mix: This is a lightweight, well-draining mix perfect for delicate roots.
* Perlite or Vermiculite: These are inert materials that provide excellent aeration and drainage.
* Coco Coir: A sustainable option made from coconut husks.
* A Combination: I often use a mix of seed starting mix and perlite for the best results.
* Small Pots or Trays: Choose pots that are about 2-3 inches in diameter.
* Clear Plastic Bags or a Humidity Dome: To create a humid environment.
* Spray Bottle with Water: For misting the cuttings.
* Warm, Bright Location: Indirect sunlight is ideal. Avoid direct sun, which can scorch the cuttings.
* Labels: To keep track of your different tomato varieties.
Taking the Cuttings
This is where the magic begins!
1. Choose Your Shoots: Look for suckers or side shoots that are growing between the main stem and a branch. These are ideal for propagation. They should be about 4-6 inches long and have several leaves. You can also use the top growth of the tomato plant.
2. Make the Cut: Using your sterilized pruning shears or knife, make a clean cut just below a leaf node (the point where a leaf grows from the stem). A 45-degree angle cut is often recommended, but a straight cut works just fine too. The key is to make a clean cut to minimize the risk of infection.
3. Prepare the Cutting: Remove the lower leaves from the cutting, leaving only the top 2-3 leaves. This will prevent the leaves from rotting in the rooting medium and encourage the plant to focus its energy on root development.
4. Apply Rooting Hormone (Optional): Dip the cut end of the stem into the rooting hormone powder. Tap off any excess. If you’re using liquid rooting hormone, follow the instructions on the label.
5. Plant the Cutting: Make a hole in your rooting medium with a pencil or your finger. Gently insert the cutting into the hole, making sure that the lowest leaf node is buried in the medium.
6. Water Gently: Water the rooting medium gently to settle the soil around the cutting. Avoid overwatering, which can lead to rot.
7. Create a Humid Environment: Place the pot or tray inside a clear plastic bag or under a humidity dome. This will help keep the humidity high, which is essential for root development. If using a plastic bag, make a few small holes for ventilation.
8. Label Your Cuttings: Don’t forget to label each pot with the tomato variety and the date you took the cutting. This will help you keep track of your progress.
Caring for Your Cuttings
Now comes the waiting game, but don’t worry, it’s not too long!
1. Maintain Humidity: Keep the humidity high by misting the cuttings with water every day or two. If you’re using a plastic bag, you may need to open it occasionally to prevent condensation from building up too much.
2. Provide Indirect Light: Place the cuttings in a warm, bright location that receives indirect sunlight. Avoid direct sun, which can scorch the leaves.
3. Check for Rooting: After about 1-2 weeks, gently tug on the cuttings to see if they have rooted. If you feel resistance, that means roots have formed! You can also gently remove a cutting from the pot to check for roots.
4. Gradually Acclimate: Once the cuttings have rooted, gradually acclimate them to lower humidity levels. You can do this by opening the plastic bag or humidity dome for longer periods each day.
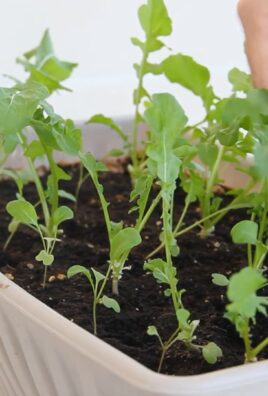
5. Transplant: After a week or two of acclimation, you can transplant the cuttings into larger pots or directly into your garden.
Troubleshooting
Sometimes things don’t go exactly as planned. Here are a few common issues and how to address them:
* Cuttings Rotting: This is usually caused by overwatering or poor drainage. Make sure your rooting medium is well-draining and avoid overwatering. You can also try using a fungicide to prevent rot.
* Cuttings Wilting: This is usually caused by low humidity. Make sure the cuttings are in a humid environment. You can also try misting them more frequently.
* No Root Development: This can be caused by a number of factors, including low light, low humidity, or lack of rooting hormone. Make sure the cuttings are in a warm, bright location with high humidity, and consider using rooting hormone. Also, make sure the cuttings are from a healthy plant.
* Fungus Gnats: These tiny flies can be a nuisance. They’re attracted to moist soil. Let the top of the soil dry out between waterings, and consider using yellow sticky traps to catch the adults.
Advanced Tips and Tricks
Want to take your tomato propagation skills to the next level? Here are a few extra tips:
* Bottom Heat: Using a heat mat can help speed up root development.
* Air Layering: This is another method of propagation that involves rooting a stem while it’s still attached to the parent plant.
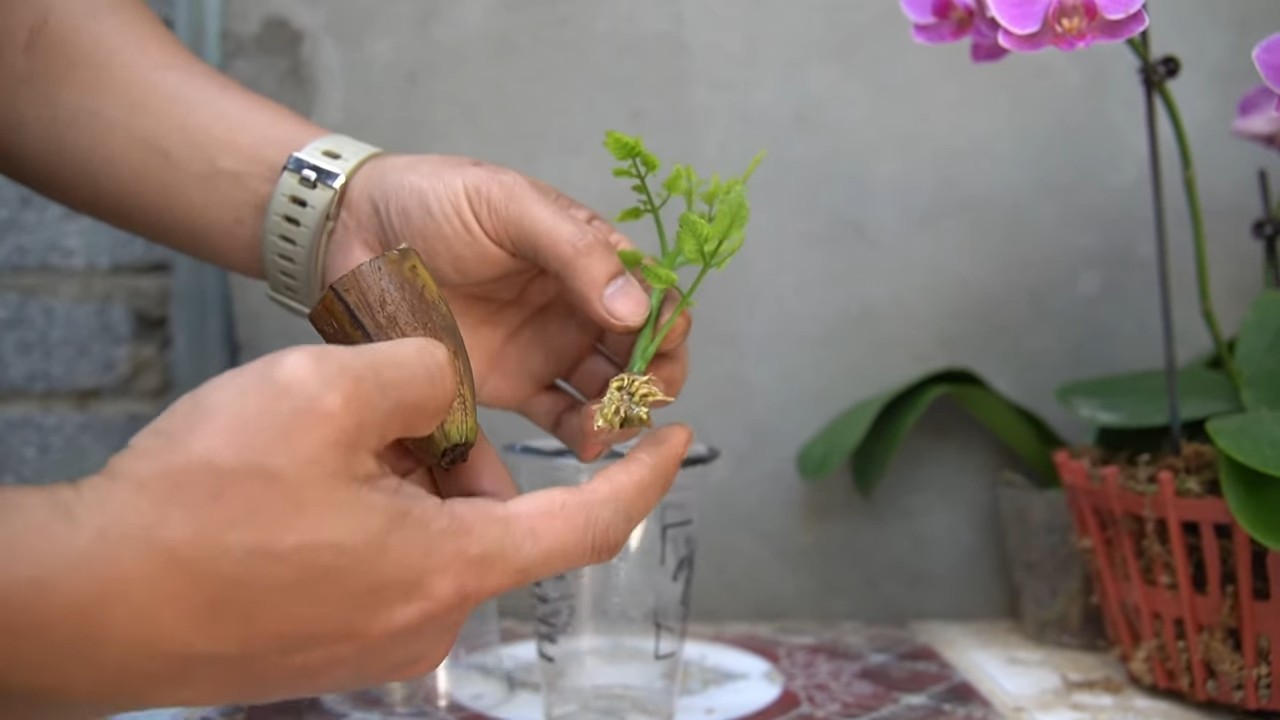
* Water Propagation: Some people have success rooting tomato cuttings in water. Simply place the cutting in a glass of water, making sure that the leaves are above the water line. Change the water every few days. Once roots have formed, transplant the cutting into soil. I personally prefer using a rooting medium, but water propagation is worth a try!
* Experiment with Different Rooting Mediums: Try different combinations of seed starting mix, perlite, vermiculite, and coco coir to see what works best for you.
* Take Cuttings at Different Times of the Year: You can take tomato cuttings at any time of the year, but the best time is usually in the spring or early summer.
* Use a Grow Light: If you don’t have a sunny location, you can use a grow light to provide the cuttings with the light they need.
* Be Patient: Rooting cuttings can take time, so don’t get discouraged if you don’t see results immediately. Just keep providing the cuttings with the right conditions, and they will eventually root.
Choosing the Right Tomato Variety for Propagation
While you can propagate most tomato varieties from cuttings, some are easier than others. Determinate tomatoes (those that grow to a certain size and then stop) tend to be a bit more challenging than indeterminate tomatoes (those that continue to grow and produce fruit throughout the season). Indeterminate varieties like ‘Cherry’, ‘Roma’, ‘Beefsteak’, and ‘Brandywine’ are generally good choices for propagation. Heirloom varieties are also often propagated to preserve their unique traits.
Hardening Off Your Tomato Starts
Before transplanting your newly rooted tomato cuttings directly into your garden, it’s crucial to “harden them off.” This process gradually acclimates the plants to the outdoor environment, reducing the risk of shock and ensuring a smoother transition.
1.
Conclusion
So, there you have it! Mastering tomato propagation from cuttings is not just a cost-effective way to expand your garden; it’s a deeply rewarding experience that connects you more intimately with the growing process. Forget endlessly buying seedlings from the nursery each spring. With this simple DIY trick, you can essentially create an endless supply of your favorite tomato varieties, all from a single, healthy mother plant.
Why is this a must-try? Because it’s efficient, economical, and environmentally friendly. You’re reducing waste by utilizing existing plant material, saving money on purchasing new plants, and ensuring you have a consistent supply of tomatoes that you know and love. Plus, it’s incredibly satisfying to watch a tiny cutting transform into a thriving, fruit-bearing plant.
But the beauty of tomato propagation lies in its adaptability. Feel free to experiment with different types of cuttings. While we’ve focused on using suckers, you can also try propagating from stem cuttings taken from the main plant. Just ensure the cuttings are healthy and free from disease.
Consider the environment too. While this method works well indoors with grow lights, you can also adapt it for outdoor propagation in a shaded, protected area. The key is to maintain consistent moisture and humidity levels.
And don’t be afraid to get creative with your rooting medium. While we recommended a simple potting mix, you can also try using perlite, vermiculite, or even a combination of these materials. Each medium offers different drainage and aeration properties, so experiment to see what works best for you.
Furthermore, think about the varieties you want to propagate. Are you a fan of heirloom tomatoes? Or perhaps you prefer the disease resistance of hybrid varieties? Tomato propagation allows you to preserve and multiply your favorite types, ensuring you always have a supply of the tomatoes you love.
We encourage you to embrace this DIY trick and embark on your own tomato propagation journey. It’s a fantastic way to learn more about plant biology, develop your gardening skills, and enjoy a bountiful harvest of delicious, homegrown tomatoes.
Don’t just take our word for it – give it a try! We’re confident that you’ll be amazed by the results. And most importantly, we want to hear about your experiences. Share your successes, your challenges, and your tips in the comments below. Let’s create a community of tomato propagation enthusiasts and learn from each other. What varieties did you propagate? What rooting medium did you use? What challenges did you face, and how did you overcome them? Your insights could be invaluable to other gardeners.
So, grab your clippers, prepare your rooting medium, and get ready to experience the magic of tomato propagation. Happy gardening!
Frequently Asked Questions (FAQ)
What exactly is tomato propagation, and why should I do it?
Tomato propagation is the process of creating new tomato plants from existing ones, typically through cuttings. Instead of relying solely on seeds or purchasing seedlings, you can essentially clone your favorite tomato plants. This is beneficial for several reasons: it’s cost-effective, allowing you to expand your garden without spending a fortune on new plants; it ensures you have a consistent supply of your preferred tomato varieties; and it’s an environmentally friendly way to reduce waste by utilizing existing plant material. Plus, it’s a fascinating and rewarding gardening experience!
What type of tomato cuttings work best for propagation?
The most common and often most successful type of cutting for tomato propagation is a sucker. Suckers are the small shoots that grow in the “armpit” between the main stem and a branch. They tend to root easily and quickly. However, you can also propagate from stem cuttings taken from the main plant. Choose healthy, vigorous stems that are free from disease. The ideal cutting should be about 4-6 inches long and have several leaves. Remove the lower leaves to prevent them from rotting when placed in the rooting medium.
What is the best rooting medium for tomato cuttings?
A well-draining potting mix is generally a good choice for rooting tomato cuttings. You can also use perlite, vermiculite, or a combination of these materials. The key is to provide a medium that retains moisture but doesn’t become waterlogged, as this can lead to root rot. Some gardeners even have success with rooting cuttings in water, although this method can sometimes result in weaker root systems. If you choose to root in water, be sure to transplant the cuttings into soil as soon as roots develop.
How long does it take for tomato cuttings to root?
The time it takes for tomato cuttings to root can vary depending on factors such as temperature, humidity, and the variety of tomato. Generally, you can expect to see roots developing within 1-2 weeks. Keep the cuttings consistently moist and provide them with indirect light. You can gently tug on the cuttings after a week or so to check for resistance, which indicates that roots have formed.
What are the ideal conditions for rooting tomato cuttings?
Tomato cuttings thrive in warm, humid conditions. A temperature of around 70-75°F (21-24°C) is ideal. You can increase humidity by covering the cuttings with a plastic bag or dome, creating a mini-greenhouse effect. Be sure to vent the bag or dome regularly to prevent the buildup of excess moisture, which can lead to fungal diseases. Provide the cuttings with bright, indirect light. Avoid direct sunlight, which can scorch the leaves.
How do I care for tomato cuttings after they have rooted?
Once the cuttings have developed a healthy root system, they are ready to be transplanted into individual pots. Use a well-draining potting mix and water the plants thoroughly. Gradually acclimate the plants to outdoor conditions before transplanting them into your garden. This process, known as hardening off, helps the plants adjust to the sun, wind, and temperature fluctuations. Start by placing the plants outdoors for a few hours each day, gradually increasing the amount of time they spend outside over the course of a week or two.
Can I propagate any type of tomato?
Yes, you can propagate most types of tomatoes from cuttings, including heirloom varieties, hybrid varieties, and cherry tomatoes. However, keep in mind that some varieties may be easier to propagate than others. Experiment with different types to see what works best for you.
What are some common problems I might encounter when propagating tomato cuttings, and how can I solve them?
Some common problems include root rot, fungal diseases, and wilting. Root rot is caused by overwatering or poor drainage. To prevent root rot, use a well-draining rooting medium and avoid overwatering. Fungal diseases can be prevented by providing good air circulation and avoiding excessive humidity. If you notice any signs of fungal disease, such as mold or mildew, remove the affected leaves and treat the cuttings with a fungicide. Wilting can be caused by insufficient moisture or excessive heat. Keep the cuttings consistently moist and provide them with shade during the hottest part of the day.
Is tomato propagation from cuttings better than starting from seed?
Both methods have their advantages and disadvantages. Starting from seed allows you to grow a wider variety of tomatoes, as you are not limited to the varieties you already have. However, it can take longer to get a harvest from seed, and the plants may not be true to type, especially if you are growing heirloom varieties. Tomato propagation from cuttings allows you to quickly and easily create new plants from your favorite varieties, ensuring that they are genetically identical to the parent plant. However, it does require you to have an existing tomato plant to take cuttings from. Ultimately, the best method for you will depend on your individual needs and preferences.
Can I propagate tomatoes in the fall or winter?
Yes, you can propagate tomatoes in the fall or winter, especially if you have access to indoor grow lights. This allows you to get a head start on the growing season and have transplants ready to go into the garden in the spring. Just be sure to provide the cuttings with adequate light, warmth, and humidity.

Leave a Comment