
Sweet Potato Yield Booster: Are you dreaming of a bountiful harvest of sweet potatoes, but your garden is giving you more vine than tubers? I understand the frustration! There’s nothing quite as disappointing as putting in the hard work and not seeing the sweet, earthy rewards. For generations, gardeners have sought the secrets to maximizing their yields, and while modern techniques offer some advantages, the core desire remains the same: to coax the most out of our precious plants.
Sweet potatoes, a staple in many cultures around the world, have a rich history dating back thousands of years. From their origins in South America to their widespread cultivation today, these nutritious tubers have been a vital food source. But getting a truly impressive harvest can sometimes feel like a mystery. That’s where a little DIY magic comes in!
This article is packed with simple, yet effective, tricks and hacks to act as your very own sweet potato yield booster. We’ll explore easy-to-implement techniques that will help you unlock the full potential of your sweet potato plants. Forget complicated methods and expensive products! I’m going to share some of my favorite DIY secrets that will have you harvesting a bumper crop in no time. Get ready to transform your garden and enjoy the sweet taste of success!
Unlock a Bumper Crop: My Secret Sweet Potato Yield Booster DIY!
Hey there, fellow gardeners! I’m so excited to share a little secret I’ve discovered that has seriously boosted my sweet potato harvests. I’m talking about a simple, DIY soil amendment that you can whip up at home using ingredients you probably already have. Get ready to say hello to bigger, healthier, and more abundant sweet potatoes!
Why Sweet Potatoes Need a Boost
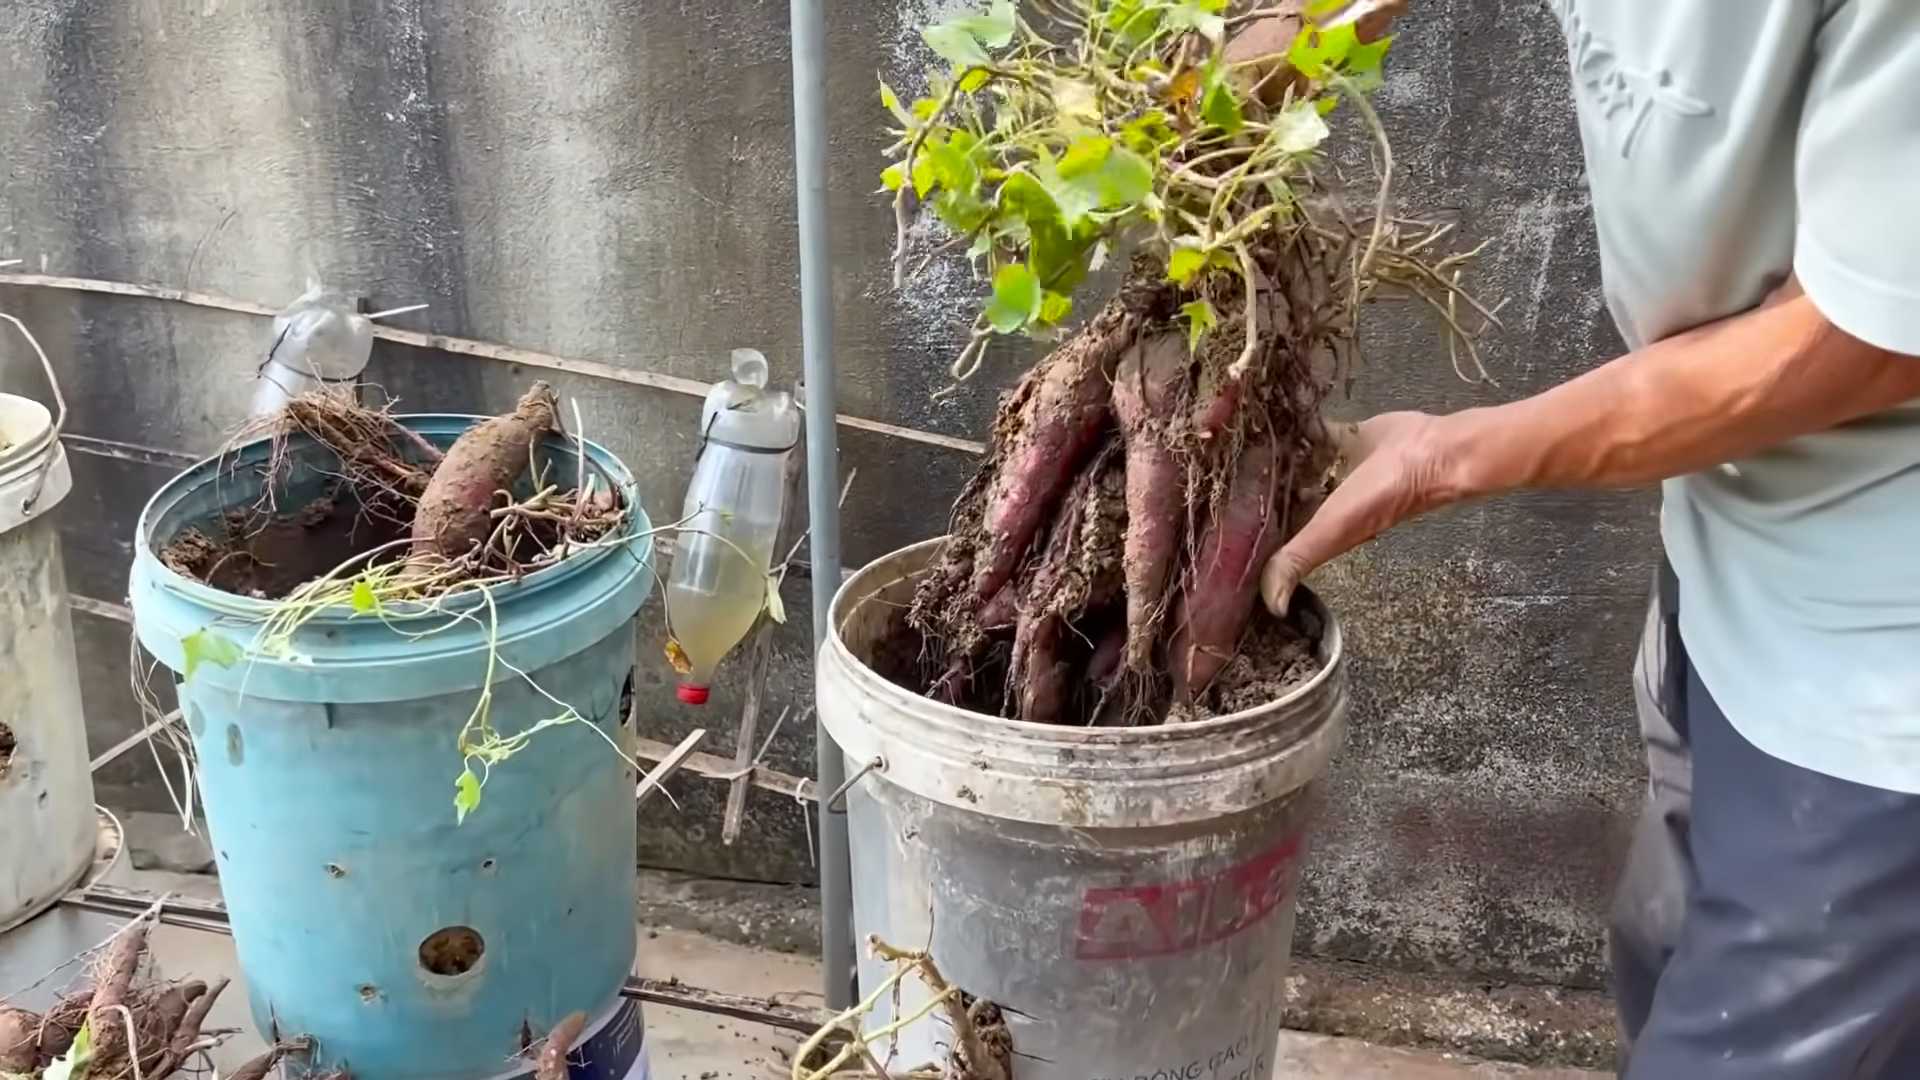
Sweet potatoes are relatively easy to grow, but they are heavy feeders, meaning they need a good supply of nutrients to thrive. They particularly love phosphorus and potassium, which are essential for root development and overall plant health. While your soil might already contain some of these nutrients, supplementing with a targeted booster can make a huge difference in your yield.
This DIY booster focuses on providing those key nutrients in a readily available form, helping your sweet potatoes reach their full potential. Plus, it’s a much more sustainable and cost-effective option than buying commercial fertilizers.
The Magic Ingredients
Before we dive into the how-to, let’s talk about what makes this booster so effective. We’ll be using a combination of readily available ingredients, each playing a crucial role:
* Bone Meal: This is our primary source of phosphorus. Bone meal is made from ground animal bones and is a slow-release fertilizer, meaning it provides a steady supply of phosphorus over time.
* Wood Ash: Wood ash is rich in potassium, another essential nutrient for sweet potato development. Make sure to only use ash from untreated wood, as other materials can contain harmful chemicals.
* Epsom Salts: Epsom salts (magnesium sulfate) provide magnesium, which is important for chlorophyll production and overall plant health. Magnesium deficiency can lead to yellowing leaves and stunted growth.
* Compost: Compost is the foundation of healthy soil. It provides a wide range of nutrients, improves soil structure, and helps retain moisture.
* Banana Peels: Banana peels are a fantastic source of potassium and other micronutrients. They also break down quickly in the soil, providing a readily available boost.
Assembling Your Sweet Potato Booster: The Recipe
Okay, let’s get down to business! Here’s the recipe for my sweet potato yield booster. This recipe is designed for approximately 10 sweet potato plants. Adjust the quantities accordingly based on the number of plants you’re growing.
* 1 cup bone meal
* 1 cup wood ash (from untreated wood only!)
* 1/2 cup Epsom salts
* 2 cups well-rotted compost
* 3-4 banana peels, chopped
Step-by-Step Instructions: Creating the Booster
Now, let’s walk through the process of creating this amazing booster. It’s super easy, I promise!
1. Gather Your Ingredients: Make sure you have all the ingredients listed above ready to go. This will make the process much smoother.
2. Prepare the Banana Peels: Chop the banana peels into small pieces. This will help them break down more quickly in the soil. You can also dry them in the sun or in a low oven to speed up the decomposition process. If you dry them, you can crush them into a powder for easier mixing.
3. Combine the Dry Ingredients: In a large bucket or container, combine the bone meal, wood ash, and Epsom salts. Mix them thoroughly to ensure an even distribution of nutrients.
4. Add the Compost: Add the compost to the dry ingredients and mix well. The compost will help bind the ingredients together and provide a base for the booster.
5. Incorporate the Banana Peels: Finally, add the chopped banana peels (or dried banana peel powder) to the mixture and mix everything together thoroughly. Make sure the banana peels are evenly distributed throughout the booster.
6. Let it “Cook” (Optional): For best results, let the mixture sit for a few days (or even a week) before using it. This will allow the ingredients to start breaking down and interacting with each other, making the nutrients more readily available to your plants. Store the mixture in a cool, dry place.
Applying the Booster: Feeding Your Sweet Potatoes
Now that you’ve created your sweet potato booster, it’s time to put it to work! Here’s how I apply it to my plants:
1. Timing is Key: I apply the booster at two key stages: at planting time and again about 4-6 weeks later, when the plants are actively growing.
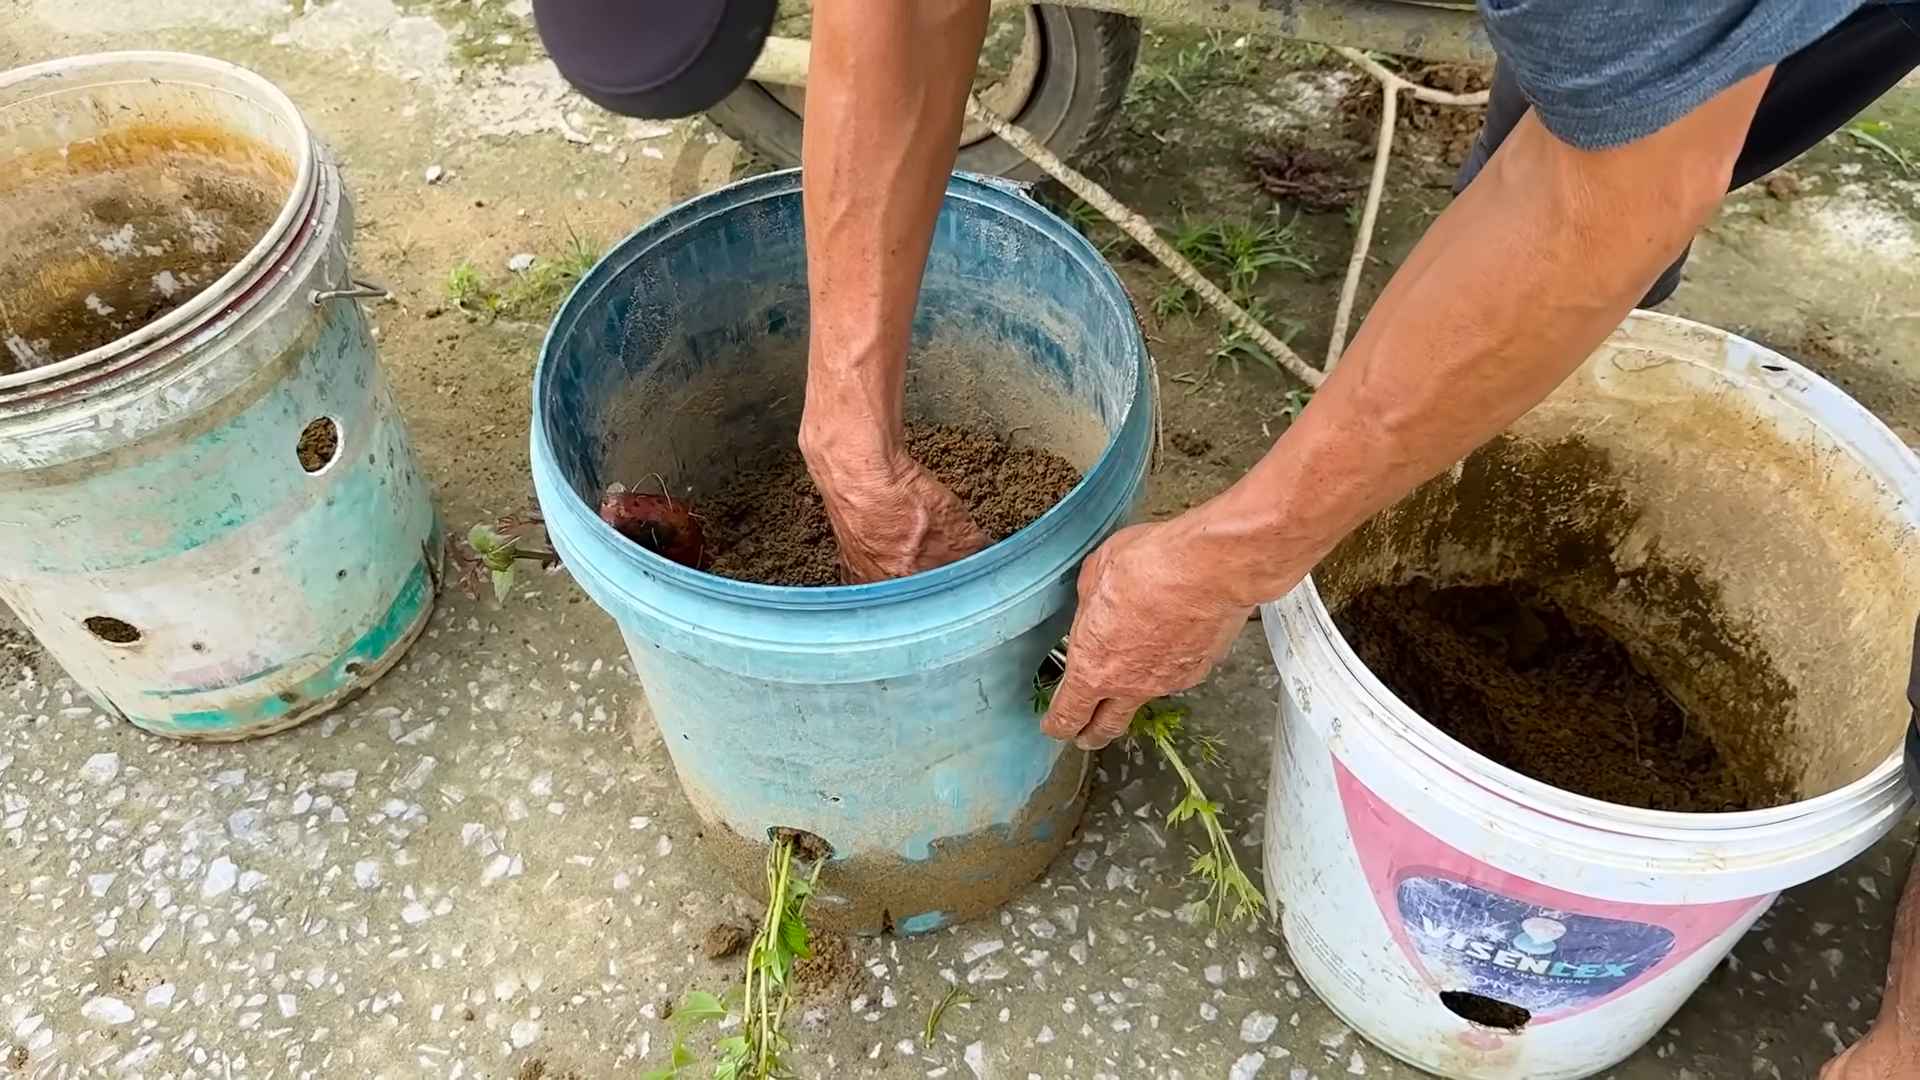
2. At Planting Time: When you’re planting your sweet potato slips (the sprouts that grow from sweet potatoes), dig a hole that’s slightly larger than the root ball. Mix about 1/4 cup of the booster into the soil at the bottom of the hole. This will provide a nutrient-rich environment for the roots to establish themselves.
3. Plant Your Slip: Place the sweet potato slip in the hole and backfill with soil. Water thoroughly.
4. Side-Dressing (4-6 Weeks Later): Once your sweet potato plants are actively growing (about 4-6 weeks after planting), it’s time for a second application of the booster. This is called side-dressing.
5. Apply the Booster: Gently sprinkle about 1/4 cup of the booster around the base of each plant, being careful not to get it on the leaves.
6. Water Thoroughly: Water the plants thoroughly after applying the booster. This will help the nutrients soak into the soil and reach the roots.
Tips for Success: Maximizing Your Sweet Potato Harvest
Here are a few extra tips to help you get the most out of your sweet potato harvest:
* Choose the Right Variety: Different sweet potato varieties have different growing requirements and yields. Do some research to find a variety that’s well-suited to your climate and growing conditions.
* Provide Plenty of Sunlight: Sweet potatoes need at least 6-8 hours of sunlight per day to thrive. Choose a sunny location for your sweet potato patch.
* Well-Drained Soil is Crucial: Sweet potatoes don’t like soggy soil. Make sure your soil is well-drained to prevent root rot. Amend heavy clay soil with compost or other organic matter to improve drainage.
* Water Regularly: Sweet potatoes need consistent moisture, especially during hot, dry weather. Water deeply and regularly, but avoid overwatering.
* Control Weeds: Weeds can compete with sweet potatoes for nutrients and water. Keep your sweet potato patch weed-free by hand-pulling or using a hoe.
* Cure Your Sweet Potatoes: After harvesting your sweet potatoes, cure them for 7-10 days in a warm, humid place. This will help them develop their sweetness and improve their storage life.
Troubleshooting: Addressing Common Sweet Potato Problems
Even with the best care, sweet potatoes can sometimes encounter problems. Here are a few common issues and how to address them:
* Yellowing Leaves: Yellowing leaves can be a sign of nutrient deficiency, particularly magnesium deficiency. Make sure you’re providing adequate magnesium by using Epsom salts in your booster.
* Stunted Growth: Stunted growth can be caused by a variety of factors, including poor soil, lack of sunlight, or pest infestations. Make sure your sweet potatoes are getting enough sunlight and nutrients, and check for pests regularly.
* Root Rot: Root rot is caused by overwatering or poorly drained soil. Make sure your soil is well-drained and avoid overwatering.
* Pests: Common sweet potato pests include aphids, flea beetles, and sweet potato weevils. Control pests by hand-picking, using insecticidal soap, or introducing beneficial insects.
Adapting the Recipe: Customizing for Your Garden
This recipe is a great starting point, but you can always adapt it to suit your specific needs and resources. Here are a few ideas:
* Adjust the Ratios: If you know your soil is particularly deficient in a certain nutrient, you can adjust the ratios of the ingredients accordingly. For example, if your soil is low in potassium, you might add more wood ash.
* Use Different Ingredients: You can substitute other ingredients for the ones listed in the recipe. For example, you could use rock phosphate instead of bone meal, or kelp meal instead of Epsom salts.
* Add Other Amendments: You can also add other soil amendments to the booster, such as blood meal (for nitrogen), fish emulsion, or seaweed extract.
Documenting Your Results: Tracking Your Progress
I highly recommend keeping track of your results each year. Note the variety of sweet potato you planted, the weather conditions, and the amount of booster you used. This will help you fine-tune your approach and optimize your sweet potato harvest in the future.
I hope this DIY sweet potato yield booster helps you grow the biggest, healthiest, and most delicious sweet potatoes you’ve ever seen! Happy gardening!
Conclusion
So, there you have it! This simple, yet incredibly effective, DIY sweet potato yield booster is more than just a gardening hack; it’s a pathway to a more abundant and satisfying harvest. We’ve explored how this method leverages readily available resources to create an optimal growing environment for your sweet potatoes, leading to larger, healthier, and more flavorful tubers.
Why is this a must-try? Because it’s economical, environmentally friendly, and, most importantly, it works! Forget expensive fertilizers laden with chemicals. This method harnesses the power of natural ingredients to nourish your sweet potatoes from the ground up. It’s a sustainable approach that benefits both your garden and the planet.
But the beauty of this DIY trick lies not only in its effectiveness but also in its adaptability. Feel free to experiment with variations to suit your specific needs and resources. For instance, if you don’t have access to wood ash, consider using bone meal as a phosphorus source. If you’re composting kitchen scraps, incorporate them into the soil amendment for an extra boost of nutrients. You can also adjust the ratio of ingredients based on your soil’s existing composition. If your soil is already rich in organic matter, you might need less compost.
Consider adding a small amount of Epsom salts (magnesium sulfate) to the soil mixture. Magnesium is crucial for chlorophyll production, which directly impacts the plant’s ability to photosynthesize and produce energy for tuber development. A tablespoon per plant, mixed into the soil amendment, can make a noticeable difference.
Another variation involves the timing of application. While we recommend incorporating the yield booster at planting, you can also side-dress your sweet potato plants with a diluted version of the mixture a few weeks after they’ve established themselves. This provides a mid-season nutrient boost that can further enhance tuber growth. To do this, mix a smaller amount of the ingredients with water and pour it around the base of the plants, being careful not to get it on the foliage.
Don’t be afraid to get creative and tailor this DIY sweet potato yield booster to your unique gardening conditions. The key is to understand the underlying principles – providing essential nutrients, improving soil structure, and promoting healthy root development – and then adapt the recipe accordingly.
We are confident that this DIY trick will significantly improve your sweet potato harvest. But the real magic happens when you share your experiences with others. We encourage you to try this method in your own garden and document your results. Share your photos, tips, and variations on social media using relevant gardening hashtags. Let’s build a community of sweet potato enthusiasts who are passionate about sustainable and effective gardening practices.
So, grab your gardening gloves, gather your ingredients, and get ready to witness the transformative power of this DIY sweet potato yield booster. Your taste buds (and your garden) will thank you! We can’t wait to hear about your success stories. Happy gardening!
Frequently Asked Questions (FAQ)
What exactly does this DIY sweet potato yield booster do?
This yield booster is designed to provide your sweet potato plants with the essential nutrients they need for optimal growth and tuber development. It improves soil structure, enhances water retention, and promotes a healthy root system, all of which contribute to a larger and more abundant harvest. The combination of ingredients provides a balanced supply of nitrogen, phosphorus, and potassium, as well as micronutrients that are often lacking in garden soil.
Can I use this yield booster for other root vegetables besides sweet potatoes?
While this recipe is specifically formulated for sweet potatoes, it can also be beneficial for other root vegetables like potatoes, carrots, and beets. However, you might need to adjust the ratio of ingredients based on the specific nutrient requirements of each vegetable. For example, carrots generally prefer a soil that is lower in nitrogen, so you might want to reduce the amount of compost or other nitrogen-rich ingredients. Always research the specific needs of the vegetables you are growing before applying any soil amendments.
How often should I apply this yield booster?
The primary application should be at planting time, incorporating the mixture into the soil where you will be planting your sweet potato slips. As mentioned in the conclusion, you can also side-dress your plants with a diluted version of the mixture a few weeks after they’ve established themselves. Avoid over-fertilizing, as this can lead to excessive foliage growth at the expense of tuber development. Observe your plants carefully and adjust your feeding schedule accordingly. If your plants are showing signs of nutrient deficiency (e.g., yellowing leaves), you may need to apply the booster more frequently.
What if I don’t have all the ingredients listed in the recipe?
Don’t worry if you’re missing one or two ingredients. The key is to provide a balanced supply of nutrients. If you don’t have wood ash, you can substitute bone meal or rock phosphate as a phosphorus source. If you don’t have compost, you can use well-rotted manure or other organic matter. The most important thing is to use what you have available and adjust the amounts accordingly. Remember that the goal is to improve soil fertility and provide your plants with the nutrients they need to thrive.
Is this yield booster safe for organic gardening?
Yes, this recipe is designed to be safe for organic gardening, as it relies on natural and readily available ingredients. However, it’s important to ensure that the ingredients you use are certified organic if you are strictly adhering to organic gardening principles. For example, make sure your compost is made from organic materials and that your wood ash is from untreated wood.
How much of the yield booster should I use per plant?
A good starting point is to use about one cup of the mixed yield booster per plant, incorporating it into the soil around the planting hole. Adjust the amount based on the size of your planting area and the existing fertility of your soil. If your soil is already rich in organic matter, you might need less. If your soil is sandy or nutrient-poor, you might need more.
Can I use this yield booster in containers?
Yes, this yield booster can be used in containers, but you’ll need to adjust the amount accordingly. Containers have a limited volume of soil, so it’s important to avoid over-fertilizing. Mix a smaller amount of the yield booster into your potting mix before planting your sweet potato slips. You can also side-dress your plants with a diluted version of the mixture throughout the growing season.
What are the signs of over-fertilizing sweet potatoes?
Signs of over-fertilizing include excessive foliage growth, weak stems, and a reduced yield of tubers. The leaves may also become dark green and lush. If you notice these signs, reduce the amount of fertilizer you are using and water your plants thoroughly to help flush out excess nutrients.
How long does it take to see results from using this yield booster?
You should start to see results within a few weeks of planting your sweet potato slips. The plants will appear healthier and more vigorous, and the foliage will be a vibrant green. As the tubers develop, you should notice a significant increase in size and yield compared to plants that were not treated with the yield booster. However, remember that results can vary depending on factors such as soil type, climate, and overall growing conditions.
What if I have clay soil? Will this yield booster still work?
Yes, this yield booster can still work in clay soil, but you may need to amend the soil further to improve drainage and aeration. Clay soil tends to be compacted and poorly drained, which can hinder root growth. Adding organic matter, such as compost or well-rotted manure, can help to break up the clay and improve its structure. You can also consider adding sand or other drainage materials to the soil. The yield booster will provide essential nutrients, but it’s important to address the underlying soil issues to ensure optimal growth.

Leave a Comment