
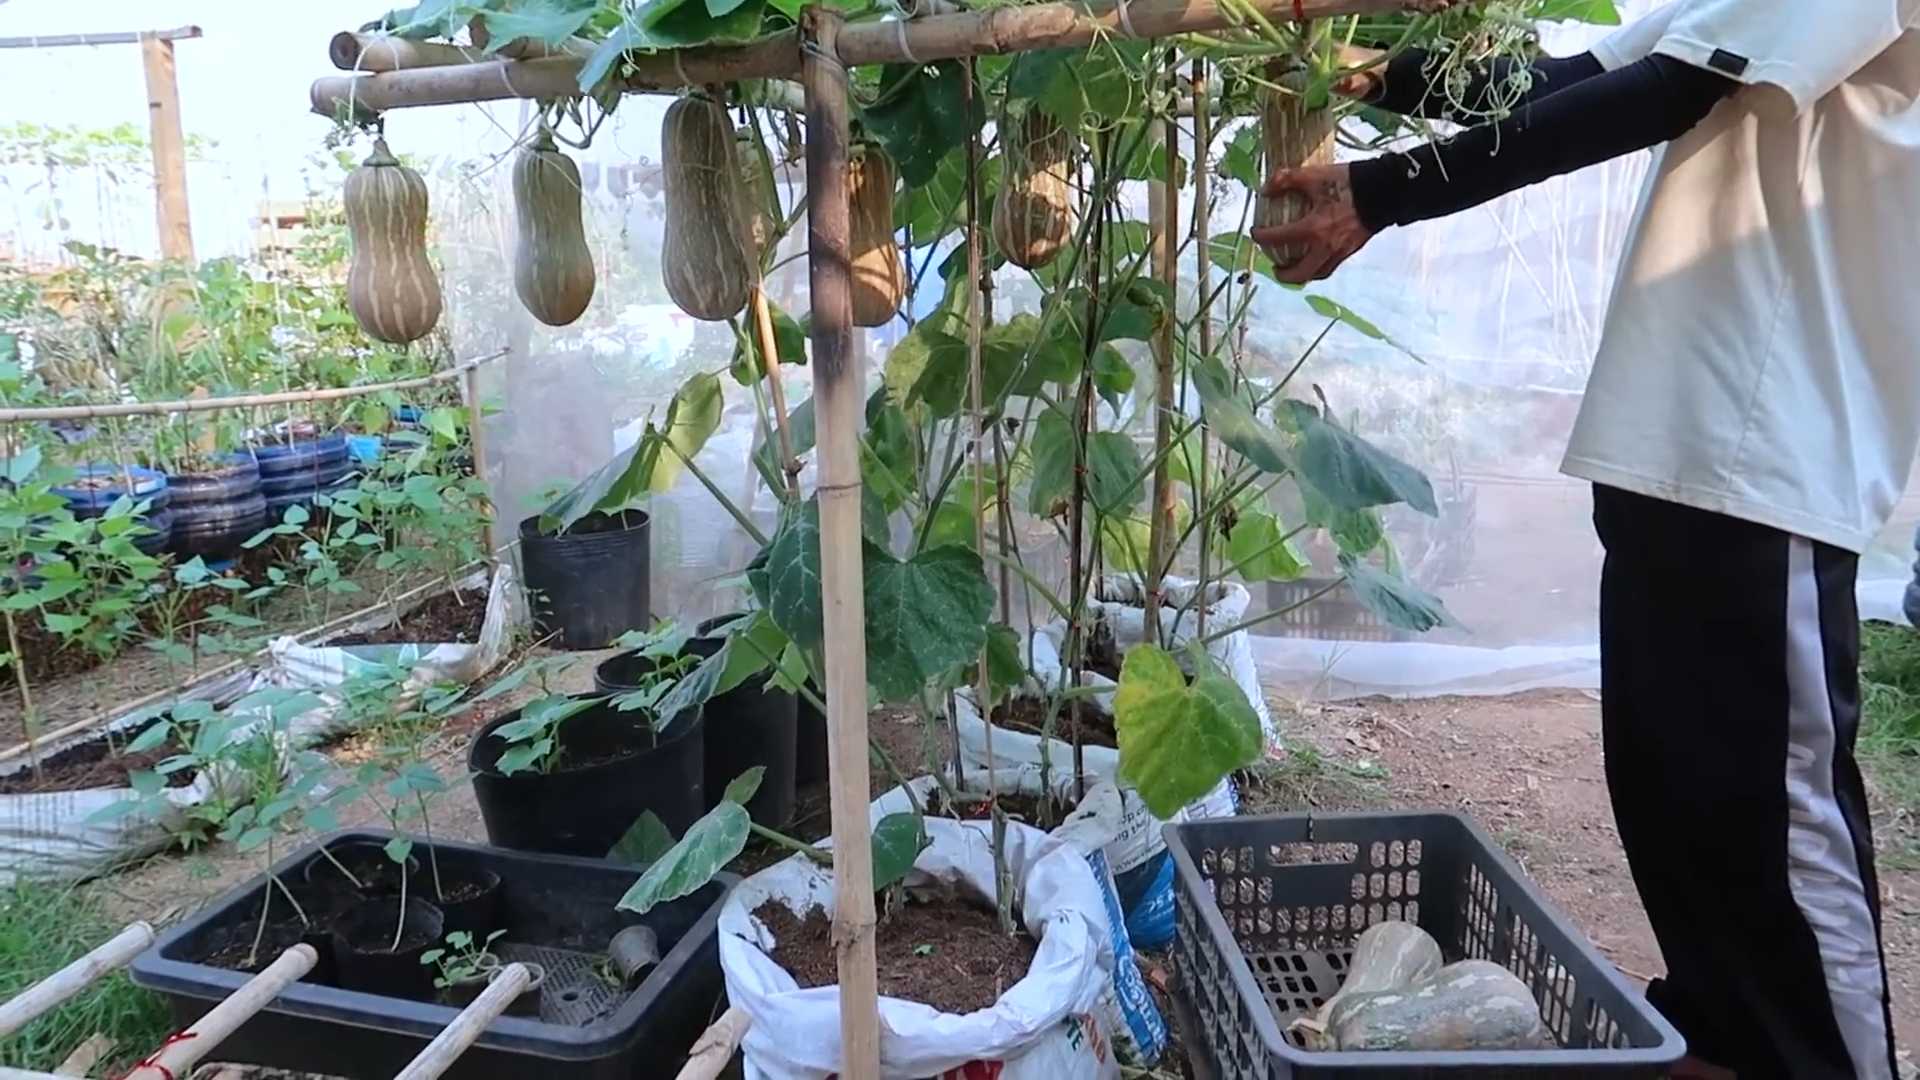
Growing Butternut Squash at Home can seem daunting, but trust me, with a few simple tricks, you’ll be harvesting your own delicious squash before you know it! Imagine the satisfaction of serving a homemade butternut squash soup, knowing you nurtured the star ingredient from seed to table. Forget those bland, store-bought squashes – we’re talking about vibrant, flavorful butternut squash grown with your own two hands.
Butternut squash has a rich history, originating in Central America and making its way to North America in the early 20th century. It quickly became a staple in autumn cuisine, prized for its sweet, nutty flavor and versatility. For generations, gardeners have passed down secrets for cultivating these beauties, and I’m excited to share some of those time-tested tips with you.
Why should you bother learning these DIY tricks? Well, for starters, growing butternut squash at home allows you to control the quality of your food, ensuring it’s free from harmful pesticides and packed with nutrients. Plus, it’s incredibly rewarding! In this article, I’ll guide you through everything from selecting the right seeds to preventing common pests, so you can enjoy a bountiful harvest. Let’s get our hands dirty and unlock the secrets to successful butternut squash gardening!
Unlock the Scrub Daddy’s Full Potential: Clever Cleaning Hacks You Need to Know!
Hey there, fellow cleaning enthusiasts! I’m always on the lookout for ways to make chores easier and more efficient, and let me tell you, the Scrub Daddy has become my absolute go-to. This smiley-faced sponge is more than just cute; it’s a cleaning powerhouse! But did you know there are tons of clever hacks to maximize its cleaning abilities? I’m going to share some of my favorite Scrub Daddy cleaning tips and tricks that will revolutionize your cleaning routine. Get ready to be amazed!
Understanding the Scrub Daddy’s Unique Abilities
Before we dive into the hacks, let’s quickly recap what makes the Scrub Daddy so special. Its FlexTexture material changes based on water temperature. In cold water, it’s firm and great for scrubbing tough messes. In warm water, it becomes soft and absorbent, perfect for gentle cleaning. This versatility is key to many of the hacks I’m about to share.
Hack 1: The Microwave Marvel – Steam Cleaning Made Easy
Microwaves can get incredibly gross, incredibly fast. Splatters, spills, and lingering odors are a common problem. But fear not! The Scrub Daddy can help you clean your microwave with minimal effort.
What you’ll need:
* Scrub Daddy
* Microwave-safe bowl
* Water
* Lemon juice or vinegar (optional, for extra cleaning power)
Step-by-step instructions:
1. Prepare the cleaning solution: Fill the microwave-safe bowl with about 1 cup of water. Add a tablespoon of lemon juice or vinegar if you want to boost the cleaning power and help eliminate odors. I personally love using lemon juice for its fresh scent.
2. Saturate the Scrub Daddy: Thoroughly wet your Scrub Daddy with water. Squeeze out any excess water, but leave it damp.
3. Place everything in the microwave: Put the bowl of water and the damp Scrub Daddy inside the microwave.
4. Microwave for 2-3 minutes: Set the microwave on high for 2-3 minutes. This will create steam inside the microwave, loosening the grime and making it easier to wipe away.
5. Let it sit: After the microwave stops, let it sit for another minute or two. This allows the steam to further penetrate the messes.
6. Wipe it clean: Carefully remove the bowl (it will be hot!). Use the Scrub Daddy to wipe down the interior of the microwave. The softened grime should come off easily. The Scrub Daddy’s shape is perfect for getting into corners and hard-to-reach areas.
7. Rinse and repeat (if necessary): If there are any stubborn spots, re-wet the Scrub Daddy and scrub a little harder. You might need to repeat the steaming process for particularly dirty microwaves.
8. Dry it off: Once you’re satisfied with the cleanliness, use a clean, dry cloth to wipe down the interior of the microwave and remove any remaining moisture.
Hack 2: The Oven Savior – Tackling Baked-On Grease
Ovens are notorious for accumulating baked-on grease and food residue. Cleaning them can be a real pain, but the Scrub Daddy can make the job much easier.
What you’ll need:
* Scrub Daddy
* Baking soda
* Water
* Spray bottle (optional)
* Rubber gloves (recommended)
Step-by-step instructions:
1. Prepare the baking soda paste: In a bowl, mix baking soda with enough water to form a thick paste. The consistency should be similar to toothpaste.
2. Apply the paste to the oven: Using your hands (with gloves on!), spread the baking soda paste all over the interior surfaces of the oven, avoiding the heating elements. Pay special attention to areas with heavy grease buildup. You can also use a spray bottle filled with water to lightly dampen the oven surfaces before applying the paste; this helps the baking soda adhere better.
3. Let it sit overnight: This is the most important step! Allow the baking soda paste to sit in the oven overnight (or for at least 12 hours). This gives the baking soda time to break down the grease and grime.
4. Scrub with the Scrub Daddy: The next day, wet your Scrub Daddy with warm water. Use the firm side of the Scrub Daddy (cold water will help it stay firm) to scrub away the baking soda paste and the loosened grease. You’ll be surprised at how easily the grime comes off!
5. Rinse thoroughly: Use a damp cloth or sponge to rinse away any remaining baking soda residue. You might need to rinse several times to remove all traces of the baking soda.
6. Dry the oven: Once you’ve rinsed the oven thoroughly, use a clean, dry cloth to dry the interior surfaces.
7. For stubborn spots: If there are any stubborn spots that didn’t come off with the baking soda paste and Scrub Daddy, you can try using a commercial oven cleaner. However, I find that the baking soda method works surprisingly well for most messes.
Hack 3: The Grime-Fighting Grout Cleaner
Grout can be a magnet for dirt, mildew, and stains. Cleaning it can be tedious, but the Scrub Daddy’s shape and texture make it ideal for tackling grout lines.
What you’ll need:
* Scrub Daddy
* Baking soda
* White vinegar
* Old toothbrush (optional, for extra scrubbing power)
* Spray bottle
Step-by-step instructions:
1. Prepare the grout cleaning solution: In a bowl, mix baking soda with enough water to form a paste.
2. Apply the paste to the grout: Apply the baking soda paste to the grout lines. You can use your fingers or a small spatula to apply the paste.
3. Spray with vinegar: Fill a spray bottle with white vinegar and spray it onto the baking soda paste. The vinegar will react with the baking soda, creating a fizzing action that helps to loosen the dirt and grime.
4. Let it sit for a few minutes: Allow the mixture to sit for 5-10 minutes.
5. Scrub with the Scrub Daddy: Wet your Scrub Daddy with warm water and use it to scrub the grout lines. The Scrub Daddy’s edges are perfect for getting into the narrow grout lines. For particularly stubborn stains, you can use an old toothbrush to scrub the grout lines before using the Scrub Daddy.
6. Rinse thoroughly: Rinse the area with clean water to remove any remaining baking soda and vinegar residue.
7. Dry the area: Use a clean, dry cloth to dry the grout and tiles.
Hack 4: The Dishwasher Delight – Cleaning Your Dishwasher
Your dishwasher cleans your dishes, but who cleans the dishwasher? Over time, dishwashers can accumulate food particles, grease, and mineral deposits. The Scrub Daddy can help you keep your dishwasher clean and running efficiently.
What you’ll need:
* Scrub Daddy
* White vinegar
* Baking soda
Step-by-step instructions:
1. Remove the dishwasher racks: Take out the dishwasher racks and inspect them for any food particles or debris.
2. Clean the racks with the Scrub Daddy: Use the Scrub Daddy to scrub the dishwasher racks, removing any food particles or debris. Rinse the racks thoroughly with water.
3. Clean the dishwasher interior: Use the Scrub Daddy to wipe down the interior of the dishwasher, paying special attention to the door, seals, and spray arms. Remove any food particles or debris that you find.
4. Clean the filter: Locate the dishwasher filter (usually at the bottom of the dishwasher) and remove it. Rinse the filter thoroughly with water and use the Scrub Daddy to scrub away any food particles or debris.
5. Run a vinegar cycle: Place a dishwasher-safe cup filled with white vinegar on the top rack of the dishwasher. Run the dishwasher on a hot water cycle. The vinegar will help to remove grease, mineral deposits, and odors.
6. Sprinkle with baking soda: After the vinegar cycle, sprinkle a cup of baking soda on the bottom of the dishwasher.
7. Run a short cycle: Run the dishwasher on a short, hot water cycle. The baking soda will help to absorb any remaining odors and leave the dishwasher smelling fresh.
Hack 5: The Veggie Washer – Gentle Produce Cleaning
Did you know you can use your Scrub Daddy to gently clean your fruits and vegetables? Its FlexTexture is gentle enough to remove dirt and debris without damaging delicate produce.
What you’ll need:
* Scrub Daddy
* Water
Step-by-step instructions:
1. Wet the Scrub Daddy: Thoroughly wet your Scrub Daddy with cool water.
2. Gently scrub the produce: Gently scrub the surface of your fruits and vegetables with the damp Scrub Daddy. Pay attention to areas with dirt
Conclusion
So, there you have it! Growing butternut squash at home, while it might seem daunting at first, is a deeply rewarding experience that brings the flavors of fall right to your backyard. We’ve walked through the essential steps, from selecting the right seeds and preparing the soil to nurturing your plants and harvesting your bountiful crop. But why should you take the plunge and embark on this homegrown adventure?
Firstly, the taste of a homegrown butternut squash is simply unparalleled. Forget the bland, mass-produced squash from the grocery store. When you grow your own, you’re in control of the entire process, ensuring that your squash is harvested at peak ripeness, bursting with sweet, nutty flavor and vibrant color. The difference is truly remarkable.
Secondly, growing your own food is an incredibly empowering experience. It connects you to the natural world, teaches you valuable skills, and gives you a sense of accomplishment that’s hard to match. Plus, you’ll know exactly what’s going into your food, free from harmful pesticides and chemicals.
Thirdly, consider the cost savings! While there’s an initial investment in seeds and supplies, you’ll be rewarded with a harvest that can significantly reduce your grocery bill, especially if you’re a butternut squash enthusiast.
But the benefits don’t stop there. Growing butternut squash at home is also a fantastic way to get some exercise, spend time outdoors, and connect with your family. It’s a project that everyone can enjoy, from planting the seeds to harvesting the final product.
Now, let’s talk about variations. While we’ve focused on the traditional butternut squash, don’t be afraid to experiment with different varieties. There’s the ‘Waltham Butternut,’ known for its uniform shape and excellent storage capabilities, or the ‘Honey Nut’ squash, a smaller, sweeter variety that’s perfect for individual servings. You can also try growing different types of winter squash alongside your butternut squash, such as acorn squash or spaghetti squash, to create a diverse and delicious harvest.
Consider companion planting to enhance your butternut squash’s growth. Marigolds can deter pests, while beans can help fix nitrogen in the soil. Experiment with different combinations to see what works best in your garden.
And finally, don’t be afraid to get creative in the kitchen! Butternut squash is incredibly versatile and can be used in a wide range of dishes, from soups and stews to roasted vegetables and even desserts. Try roasting it with herbs and spices, pureeing it into a creamy soup, or using it as a filling for ravioli. The possibilities are endless!
We truly believe that growing butternut squash at home is a must-try for any gardener, whether you’re a seasoned pro or a complete beginner. It’s a rewarding, delicious, and empowering experience that will bring joy to your garden and your table.
So, what are you waiting for? Grab some seeds, prepare your soil, and get ready to embark on your own butternut squash adventure. We can’t wait to hear about your experiences! Share your photos, tips, and recipes in the comments below. Let’s create a community of butternut squash enthusiasts and inspire others to grow their own food. Happy gardening!
Frequently Asked Questions (FAQ)
1. How much space does a butternut squash plant need?
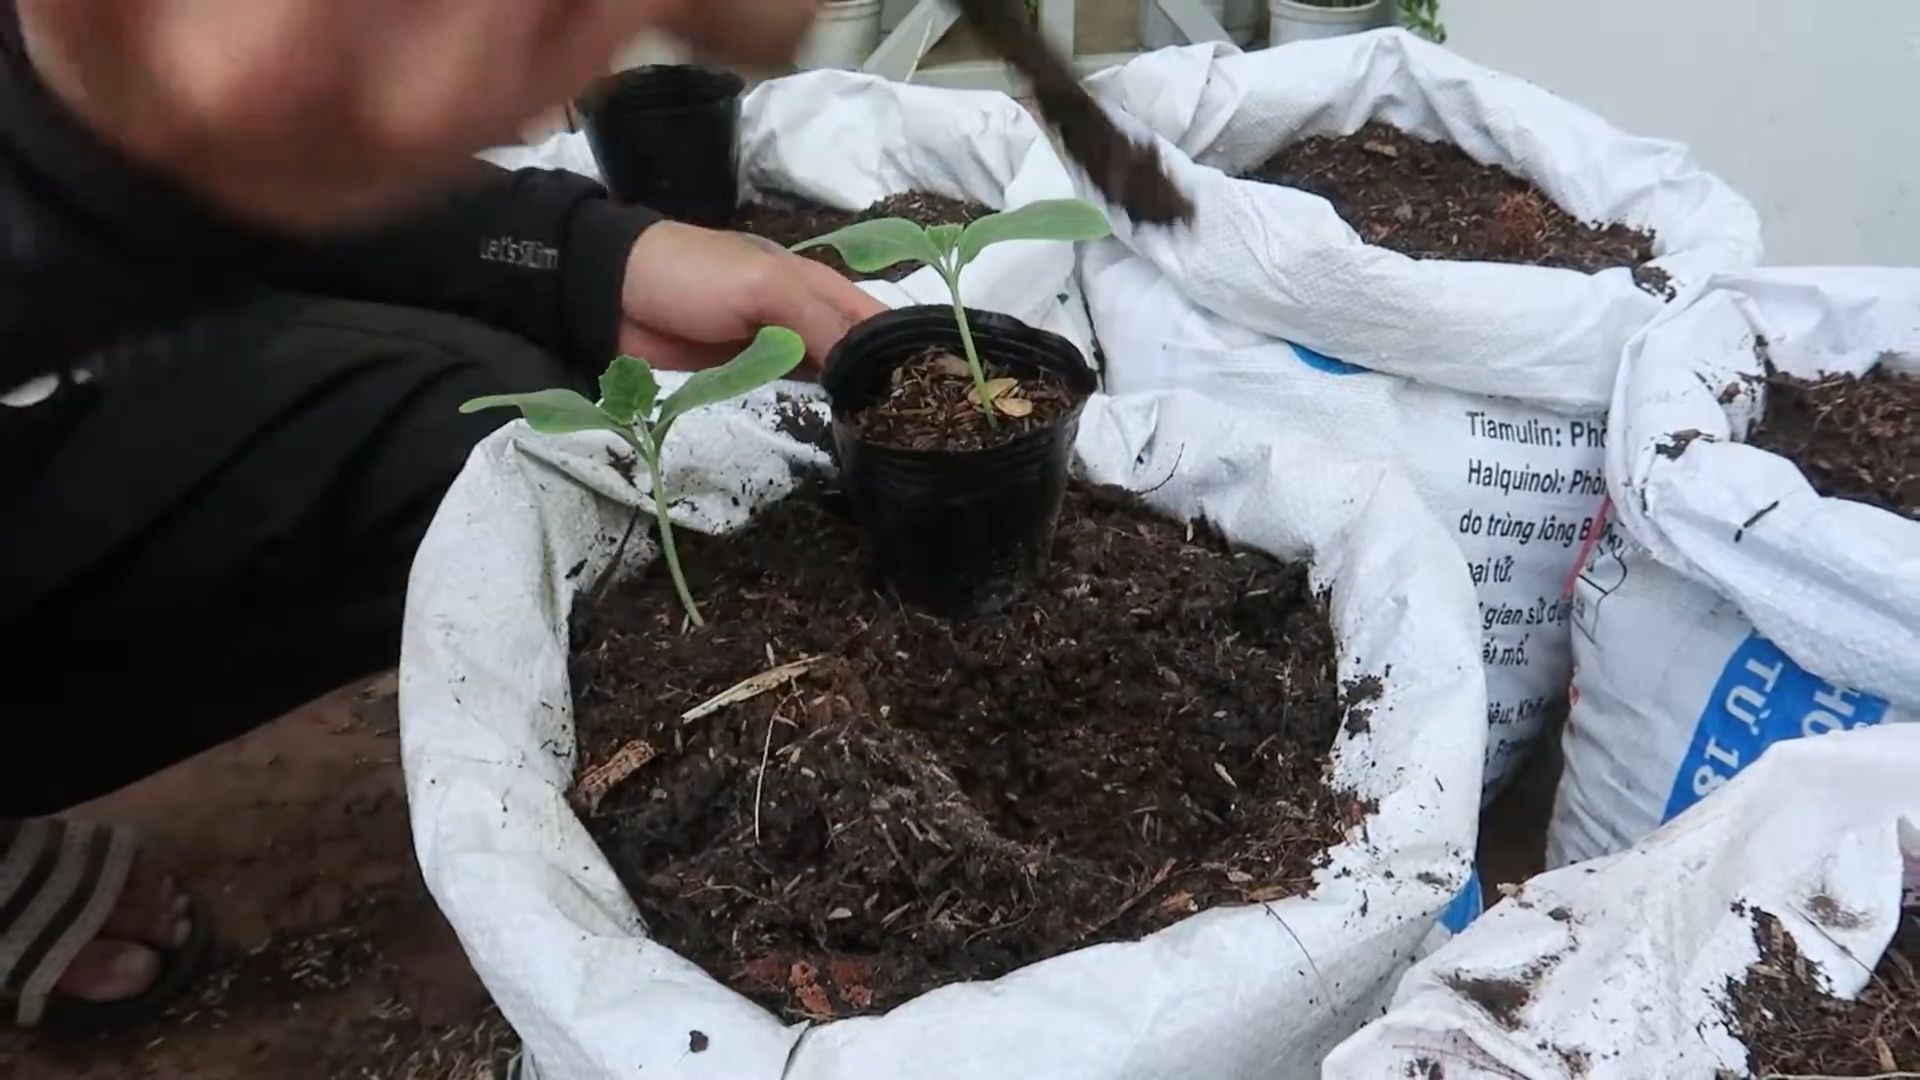
Butternut squash plants are vining plants, meaning they spread out quite a bit. Each plant typically needs at least 6-8 square feet of space to grow comfortably. If you’re planting in rows, space the rows about 8-10 feet apart. This allows for adequate sunlight and airflow, which are crucial for healthy growth and preventing diseases. Consider using a trellis to train the vines vertically if you have limited space. This can also improve air circulation and reduce the risk of fungal problems.
2. What kind of soil is best for growing butternut squash?
Butternut squash thrives in well-drained, fertile soil that is rich in organic matter. Before planting, amend your soil with compost or well-rotted manure to improve its structure and nutrient content. The ideal soil pH for butternut squash is between 6.0 and 7.0. You can test your soil pH with a home testing kit or by sending a sample to your local agricultural extension office. If your soil is too acidic, you can add lime to raise the pH. If it’s too alkaline, you can add sulfur to lower the pH.
3. How often should I water my butternut squash plants?
Butternut squash plants need consistent moisture, especially during hot, dry weather. Water deeply and regularly, aiming for about 1-2 inches of water per week. Water at the base of the plants to avoid wetting the foliage, which can increase the risk of fungal diseases. Mulching around the plants with straw or wood chips can help retain moisture in the soil and suppress weeds. Check the soil moisture regularly by sticking your finger about an inch into the soil. If it feels dry, it’s time to water.
4. When should I harvest my butternut squash?
Butternut squash is typically ready to harvest in the fall, about 90-100 days after planting. The best way to tell if a butternut squash is ripe is to check the color of the skin. It should be a deep tan color, and the stem should be dry and hard. You can also try pressing your fingernail into the skin. If it’s difficult to pierce, the squash is likely ripe. Use a sharp knife or pruning shears to cut the squash from the vine, leaving about 2-3 inches of stem attached. This will help prevent rot and extend the storage life of the squash.
5. How do I store butternut squash after harvesting?
Butternut squash can be stored for several months if stored properly. Cure the squash by placing it in a warm, dry place (around 80-85°F) for about 1-2 weeks. This allows the skin to harden and helps prevent rot. After curing, store the squash in a cool, dry place (around 50-60°F) with good ventilation. Avoid storing squash near apples or pears, as these fruits release ethylene gas, which can cause the squash to ripen and spoil more quickly. Check your squash regularly for any signs of rot or spoilage.
6. What are some common pests and diseases that affect butternut squash plants?
Common pests that can affect butternut squash plants include squash bugs, squash vine borers, and aphids. Squash bugs can be controlled by handpicking them off the plants or using insecticidal soap. Squash vine borers can be prevented by wrapping the base of the stems with aluminum foil or netting. Aphids can be controlled by spraying the plants with a strong stream of water or using insecticidal soap. Common diseases that can affect butternut squash plants include powdery mildew and downy mildew. These diseases can be prevented by providing good air circulation, avoiding overhead watering, and using a fungicide if necessary.
7. Can I grow butternut squash in containers?
Yes, you can grow butternut squash in containers, but you’ll need a large container (at least 20 gallons) with good drainage. Choose a bush variety of butternut squash, which is more compact than vining varieties. Fill the container with a high-quality potting mix and provide regular watering and fertilization. You may also need to provide support for the vines as they grow. Container-grown butternut squash may not produce as many fruits as those grown in the ground, but it’s still a great option for gardeners with limited space.
8. How can I improve pollination of my butternut squash plants?
Butternut squash plants have separate male and female flowers. Pollination is necessary for the female flowers to develop into fruits. If you’re not seeing many fruits developing, it could be due to poor pollination. You can improve pollination by hand-pollinating the flowers. Use a small paintbrush to transfer pollen from the male flowers to the female flowers. You can also attract pollinators to your garden by planting flowers that attract bees and other beneficial insects.
9. What are some good companion plants for butternut squash?
Good companion plants for butternut squash include marigolds, nasturtiums, beans, corn, and radishes. Marigolds and nasturtiums can help deter pests, while beans can help fix nitrogen in the soil. Corn can provide support for the vines, and radishes can help break up the soil. Avoid planting butternut squash near potatoes or fennel, as these plants can inhibit its growth.
10. Can I save seeds from my butternut squash to plant next year?
Yes, you can save seeds from your butternut squash to plant next year, but keep in mind that if your squash was cross-pollinated with another variety, the seeds may not produce true-to-type plants. To save seeds, allow the squash to fully ripen on the vine. Then, cut it open and scoop out the seeds. Rinse the seeds thoroughly and spread them out on a paper towel to dry. Once the seeds are completely dry, store them in an airtight container in a cool, dry place.

Leave a Comment