
Sage Container Gardening: Unlock the secrets to growing this fragrant and flavorful herb right on your patio, balcony, or even windowsill! Have you ever dreamed of snipping fresh sage leaves to add a burst of earthy goodness to your favorite dishes? Well, dream no more! This DIY guide is your passport to a thriving sage garden, no matter how limited your space may be.
For centuries, sage has been revered not only for its culinary uses but also for its medicinal and spiritual properties. From ancient Roman rituals to traditional Native American ceremonies, sage has held a place of honor in various cultures. Now, you can bring this rich history and aromatic charm into your own home.
In today’s fast-paced world, access to fresh, high-quality herbs can be a challenge. Store-bought sage often lacks the vibrant flavor and aroma of homegrown varieties. Plus, let’s be honest, who wants to pay a premium for wilted herbs when you can easily cultivate your own? That’s where sage container gardening comes in! I’m going to show you simple, effective techniques to nurture healthy sage plants in containers, ensuring a constant supply of fresh herbs right at your fingertips. Get ready to transform your small space into a fragrant oasis and elevate your culinary creations with the magic of homegrown sage!
DIY Sage Container Garden: A Beginner’s Guide
Hey there, fellow garden enthusiasts! I’m so excited to share my experience with creating a thriving sage container garden. Sage is not only a fantastic herb for cooking, adding a savory depth to dishes, but it’s also incredibly beautiful and relatively easy to grow, even if you don’t have a sprawling backyard. This guide will walk you through every step, from choosing the right container to harvesting your fragrant sage leaves. Let’s get our hands dirty!
Choosing the Right Container and Soil
Before we even think about planting, we need to set the stage for success. This means selecting the perfect container and soil mix for our sage.
* **Container Size:** Sage needs room to grow, so opt for a container that’s at least 12 inches in diameter and 12 inches deep. This will give the roots plenty of space to spread out.
* **Drainage:** This is absolutely crucial! Sage hates soggy roots. Make sure your container has drainage holes at the bottom. If it doesn’t, you’ll need to drill some.
* **Material:** Terracotta pots are a great choice because they’re porous and allow the soil to breathe. Plastic pots are also fine, but they tend to retain more moisture, so be extra careful not to overwater.
* **Soil:** Don’t use garden soil! It’s often too dense and doesn’t drain well in containers. Instead, use a high-quality potting mix specifically formulated for containers. You can also amend it with perlite or vermiculite to improve drainage. I personally like to add a bit of compost for extra nutrients.
Planting Your Sage
Now for the fun part! Let’s get our sage planted.
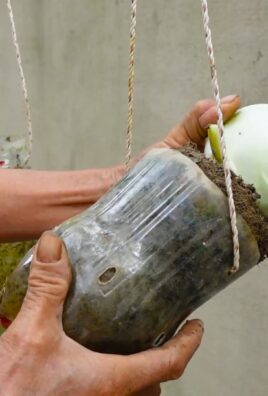
1. **Gather Your Supplies:** You’ll need your chosen container, potting mix, sage seedlings (or seeds, if you’re feeling patient!), a trowel, and a watering can.
2. **Prepare the Container:** Place a layer of gravel or broken pottery shards at the bottom of the container to further improve drainage. This is optional, but I find it helps.
3. **Fill with Potting Mix:** Fill the container with potting mix, leaving about an inch or two of space at the top.
4. **Plant the Sage:**
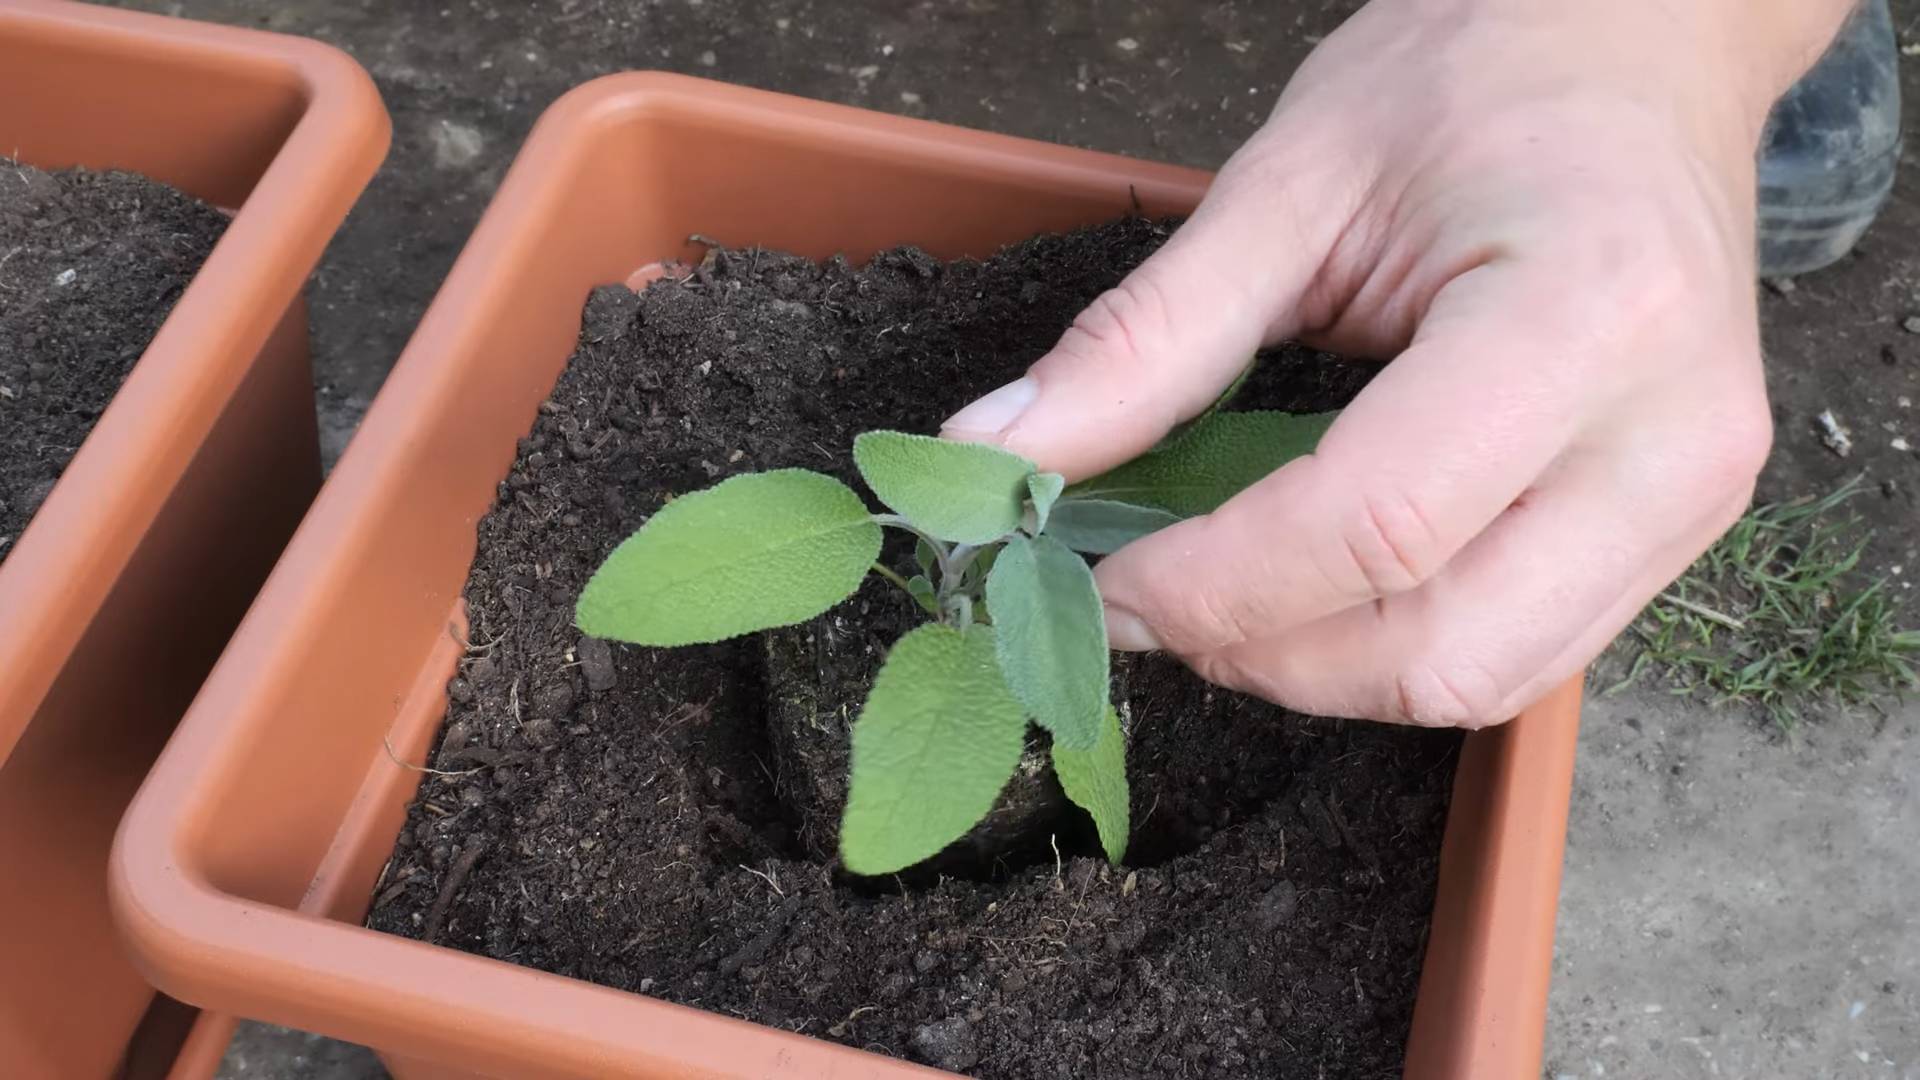
* **From Seedlings:** Gently remove the sage seedling from its nursery pot. Loosen the roots slightly with your fingers. Dig a hole in the potting mix that’s large enough to accommodate the root ball. Place the seedling in the hole and backfill with potting mix, gently firming the soil around the base of the plant.
* **From Seeds:** Sow the seeds according to the package instructions. Generally, you’ll want to sow them about 1/4 inch deep. Keep the soil consistently moist until the seeds germinate. Be patient – it can take a few weeks for them to sprout.
5. **Water Thoroughly:** Water the newly planted sage thoroughly until water drains out of the drainage holes. This helps settle the soil and gets the roots off to a good start.
6. **Choose a Sunny Location:** Sage thrives in full sun, meaning at least 6-8 hours of direct sunlight per day. Place your container in a sunny spot in your garden or on your patio.
Caring for Your Sage
Once your sage is planted, it’s important to provide it with the right care to ensure it grows healthy and strong.
* **Watering:** Sage is drought-tolerant, so it doesn’t need a lot of water. Water only when the top inch of soil feels dry to the touch. Overwatering is a common mistake that can lead to root rot. During hot, dry weather, you may need to water more frequently.
* **Fertilizing:** Sage doesn’t need a lot of fertilizer. In fact, too much fertilizer can actually make it less flavorful. I recommend fertilizing once or twice during the growing season with a balanced, slow-release fertilizer. Follow the package instructions carefully.
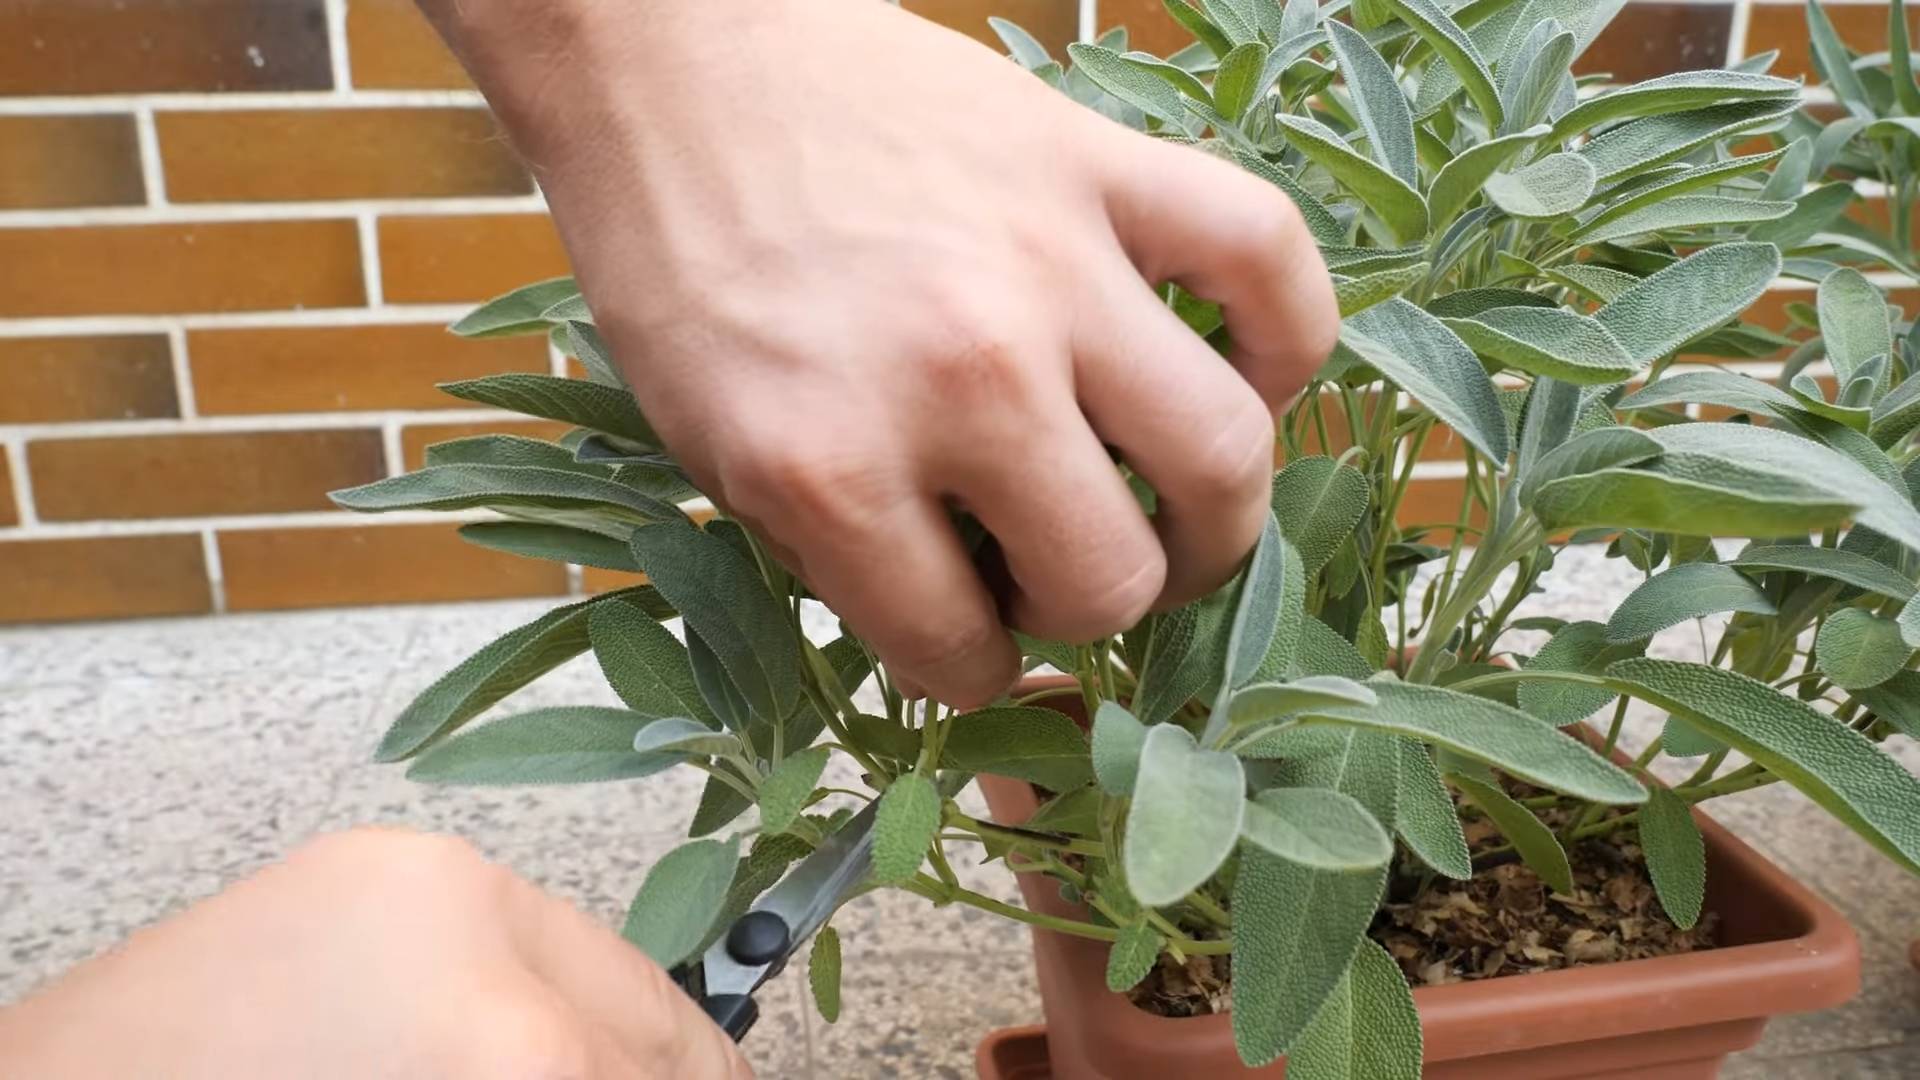
* **Pruning:** Pruning is essential for keeping your sage plant healthy and productive. Prune regularly to remove dead or damaged leaves and to encourage bushier growth. You can also prune to shape the plant. I usually prune mine in the spring and again in the late summer.
* **Pest and Disease Control:** Sage is generally resistant to pests and diseases. However, it can sometimes be affected by aphids, spider mites, or powdery mildew. If you notice any signs of pests or diseases, treat them promptly with an appropriate organic insecticide or fungicide. Neem oil is a great option for many common garden pests.
* **Overwintering:** Sage is a perennial herb, meaning it can live for several years. In colder climates, you’ll need to protect your sage plant during the winter. You can either bring the container indoors or insulate it with burlap or straw. I usually bring mine indoors and place it near a sunny window.
Harvesting Your Sage
Now for the best part – harvesting your homegrown sage!
* **When to Harvest:** You can start harvesting sage leaves as soon as the plant is established, usually a few months after planting. The flavor is most intense just before the plant flowers.
* **How to Harvest:** Use scissors or pruning shears to snip off individual leaves or entire stems. Avoid cutting more than one-third of the plant at a time.
* **Using Fresh Sage:** Fresh sage leaves can be used in a variety of dishes, such as soups, stews, sauces, and stuffings. They can also be used to make sage tea.
* **Drying Sage:** To dry sage, tie the stems together in small bundles and hang them upside down in a cool, dry, well-ventilated place. Once the leaves are completely dry, crumble them and store them in an airtight container. You can also dry sage leaves in a dehydrator or oven.
Troubleshooting
Even with the best care, you might encounter a few challenges along the way. Here are some common problems and how to fix them:
* **Yellowing Leaves:** This could be a sign of overwatering, underwatering, or nutrient deficiency. Check the soil moisture and adjust your watering accordingly. If the soil is dry, water thoroughly. If the soil is soggy, allow it to dry out before watering again. You may also need to fertilize the plant.
* **Leggy Growth:** This is usually caused by insufficient sunlight. Move the container to a sunnier location.
* **Powdery Mildew:** This is a fungal disease that appears as a white, powdery coating on the leaves. Improve air circulation around the plant and treat with an organic fungicide.
* **Pests:** Inspect your plant regularly for pests such as aphids or spider mites. Treat infestations with an appropriate organic insecticide.
Propagating Sage
Want more sage plants? Propagating sage is surprisingly easy!
* **Stem Cuttings:** This is the easiest method. Take a 4-6 inch stem cutting from a healthy plant. Remove the lower leaves and dip the cut end in rooting hormone (optional, but it helps). Plant the cutting in a pot filled with moist potting mix. Cover the pot with a plastic bag to create a humid environment. Keep the soil moist and place the pot in a warm, bright location. Roots should develop in a few weeks.
* **Layering:** Bend a low-growing stem to the ground and bury a portion of it in the soil. Weigh it down with a rock or brick. Keep the soil moist. Once roots have developed, you can cut the stem from the parent plant and transplant it to a new location.
Sage Varieties to Consider
While common sage (Salvia officinalis) is a great choice, there are many other varieties to explore!
* **Purple Sage:** Offers beautiful purple foliage and a slightly milder flavor.
* **Golden Sage:** Features variegated leaves with golden edges, adding visual interest to your garden.
* **Tricolor Sage:** Boasts leaves with green, white, and purple hues.
* **Pineapple Sage:** Has a distinct pineapple aroma and flavor, perfect for teas and desserts.
Enjoy Your Homegrown Sage!
Growing your own sage in a container is a rewarding experience. Not only will you have a fresh supply of this flavorful herb at your fingertips, but you’ll also enjoy the beauty and fragrance of this wonderful plant. So, get started today and enjoy the fruits (or rather, leaves!) of your labor. Happy gardening!
Conclusion
So, there you have it! Transforming your outdoor space with a thriving sage container garden is not only achievable but also incredibly rewarding. We’ve explored the simple steps, from selecting the right container and soil to providing the perfect sunlight and watering schedule. But why is this DIY project a must-try?
Firstly, growing your own sage offers unparalleled freshness. Imagine stepping outside and snipping a few sprigs of fragrant sage to elevate your next culinary creation. The aroma alone is enough to invigorate the senses, and the flavor is far superior to anything you can find pre-packaged at the grocery store.
Secondly, a sage container garden is a beautiful and practical addition to any patio, balcony, or deck. The silvery-green foliage adds a touch of elegance, and the occasional blooms attract pollinators like bees and butterflies, creating a vibrant and buzzing ecosystem right outside your door. It’s a win-win for both you and the environment.
Thirdly, and perhaps most importantly, this project is incredibly accessible. You don’t need a sprawling garden or years of experience to succeed. With a few basic supplies and a little bit of care, you can cultivate a thriving sage plant that will provide you with fresh herbs for months to come.
Looking for variations? Consider planting different varieties of sage in separate containers to create a diverse and aromatic collection. Try pairing common sage with purple sage for a visual contrast, or experiment with pineapple sage for a hint of fruity sweetness. You can also incorporate other herbs like rosemary, thyme, and oregano into your container garden to create a Mediterranean-inspired oasis. Another great variation is to use repurposed containers. Old buckets, watering cans, or even wooden crates can be transformed into charming planters with a little creativity. Just be sure to drill drainage holes to prevent waterlogging.
Don’t be afraid to experiment with different soil mixes to find what works best for your climate and growing conditions. Some gardeners prefer a slightly acidic soil, while others find that a neutral pH is ideal. The best way to learn is to try different things and observe how your sage plant responds.
We are confident that you’ll find this DIY sage container garden project to be both enjoyable and fulfilling. It’s a fantastic way to connect with nature, enhance your culinary skills, and add a touch of beauty to your outdoor space.
So, what are you waiting for? Grab a container, some soil, and a sage plant, and get started today! We encourage you to share your experiences with us. Post photos of your sage container garden on social media using #SageContainerGarden and let us know what tips and tricks you’ve discovered along the way. We can’t wait to see what you create! Let’s spread the joy of fresh, homegrown sage together!
Frequently Asked Questions (FAQ)
What is the best type of container for growing sage?
The best type of container for growing sage is one that is at least 12 inches in diameter and has good drainage holes. Sage needs room for its roots to grow, and proper drainage is essential to prevent root rot. Terracotta pots are a popular choice because they are porous and allow for good air circulation, but plastic or glazed ceramic pots can also be used. Just make sure that whatever container you choose has adequate drainage. Consider the aesthetic of your outdoor space as well. A rustic terracotta pot might complement a traditional garden, while a sleek, modern container might be a better fit for a contemporary patio.
What kind of soil should I use for my sage container garden?
Sage prefers well-draining soil that is slightly acidic to neutral in pH. A good potting mix specifically formulated for herbs is a great option. You can also create your own mix by combining equal parts of potting soil, perlite, and compost. The perlite will help to improve drainage, while the compost will provide essential nutrients. Avoid using garden soil, as it can be too heavy and may not drain well in a container.
How much sunlight does sage need?
Sage thrives in full sun, which means it needs at least 6-8 hours of direct sunlight per day. If you live in a particularly hot climate, you may want to provide some afternoon shade to prevent the leaves from scorching. If you don’t have a sunny spot, you can supplement with grow lights. Place your sage container garden in the sunniest location you have available. If you notice that your sage plant is becoming leggy or the leaves are pale, it may not be getting enough sunlight.
How often should I water my sage plant?
Water your sage plant when the top inch of soil feels dry to the touch. Avoid overwatering, as this can lead to root rot. Sage is relatively drought-tolerant, so it’s better to err on the side of underwatering than overwatering. The frequency of watering will depend on the weather, the size of your container, and the type of soil you are using. During hot, dry weather, you may need to water your sage plant every day. In cooler, wetter weather, you may only need to water it once a week.
Do I need to fertilize my sage plant?
Sage doesn’t require heavy fertilization, but a light feeding every few weeks during the growing season can help to promote healthy growth. Use a balanced liquid fertilizer diluted to half strength. Avoid over-fertilizing, as this can lead to leggy growth and a decrease in flavor. Organic fertilizers, such as compost tea or fish emulsion, are also good options.
How do I harvest sage?
You can start harvesting sage leaves as soon as the plant is established, which is usually about 6-8 weeks after planting. To harvest, simply snip off the leaves with scissors or pruning shears. Avoid removing more than one-third of the plant at a time, as this can stress the plant. The best time to harvest sage is in the morning, after the dew has dried. This is when the leaves are at their most flavorful.
How do I overwinter my sage plant?
Sage is a perennial herb, which means it can live for several years. In colder climates, you will need to overwinter your sage plant indoors. Before the first frost, bring your container indoors and place it in a sunny location. Water sparingly during the winter months, allowing the soil to dry out between waterings. You can also prune back the plant to encourage new growth in the spring. Once the weather warms up in the spring, you can move your sage plant back outdoors.
Can I grow sage from seed?
Yes, you can grow sage from seed, but it can be a bit more challenging than starting with a transplant. Sow the seeds indoors 6-8 weeks before the last frost. Keep the soil moist and warm, and the seeds should germinate in about 2-3 weeks. Once the seedlings are large enough to handle, transplant them into individual pots. Harden off the seedlings before planting them outdoors.
What are some common problems with sage plants?
Some common problems with sage plants include root rot, powdery mildew, and spider mites. Root rot is caused by overwatering, so be sure to allow the soil to dry out between waterings. Powdery mildew is a fungal disease that can be treated with a fungicide. Spider mites are tiny pests that can be controlled with insecticidal soap. Regularly inspect your sage plant for signs of pests or diseases, and take action promptly to prevent them from spreading.
Can I use sage for medicinal purposes?
Sage has been used for medicinal purposes for centuries. It is believed to have anti-inflammatory, antioxidant, and antimicrobial properties. Sage tea is often used to soothe sore throats and relieve digestive problems. However, it is important to consult with a healthcare professional before using sage for medicinal purposes, especially if you are pregnant, breastfeeding, or taking any medications.
Leave a Comment