
Propagate Fast Growing Plants June – sounds like a secret mission, right? Well, in a way, it is! It’s your mission to transform your garden into a lush, vibrant paradise, and I’m here to equip you with the ultimate DIY tricks to make it happen, especially during this prime growing month.
For centuries, gardeners have passed down the art of propagation, a technique as old as gardening itself. Think of ancient civilizations nurturing their crops, carefully selecting and multiplying their best plants. It’s a tradition rooted in resourcefulness and a deep connection to nature. Today, we’re carrying on that legacy, but with a modern twist!
Why bother with propagating fast growing plants, you ask? Because who doesn’t want more of their favorite blooms and foliage without breaking the bank? Imagine filling your garden with stunning hydrangeas, vibrant petunias, or fragrant herbs, all from a single parent plant. Plus, it’s incredibly rewarding to nurture new life and watch your garden flourish. This June, I’m going to show you simple, effective DIY methods to propagate fast growing plants June, saving you money and giving you the satisfaction of creating a thriving garden oasis. Get ready to roll up your sleeves and let’s get growing!
Propagating Fast-Growing Plants in June: A DIY Guide
Hey there, fellow plant enthusiasts! June is prime time for propagating many of our favorite fast-growing plants. The warmer weather and longer days give cuttings the perfect boost to root quickly and establish themselves. I’m going to walk you through a few simple methods that I’ve found incredibly successful. Let’s get our hands dirty and multiply those green beauties!
Choosing Your Propagation Method
Before we dive into the specifics, let’s briefly touch on the methods we’ll be covering. The best method depends on the plant you’re propagating, but I’ll focus on stem cuttings, layering, and division – all fantastic options for fast-growing plants.
* **Stem Cuttings:** This is probably the most common and versatile method. You simply take a cutting from a stem, remove the lower leaves, and root it in water or soil.
* **Layering:** This involves rooting a stem while it’s still attached to the parent plant. It’s a great option for plants with long, flexible stems.
* **Division:** This is perfect for plants that grow in clumps. You simply divide the clump into smaller sections, each with its own roots and shoots.
Propagating with Stem Cuttings
This is my go-to method for many plants, especially those with soft stems. It’s quick, easy, and usually has a high success rate.
Materials You’ll Need:
* Sharp, clean pruning shears or a knife
* Rooting hormone (optional, but it speeds things up!)
* Small pots or containers
* Well-draining potting mix (I like a mix of perlite, vermiculite, and peat moss)
* A clear plastic bag or humidity dome (to create a humid environment)
* Water
Step-by-Step Instructions:
1. **Select a Healthy Stem:** Choose a healthy, non-flowering stem from your plant. Look for stems that are actively growing and free from pests or diseases. The ideal stem should be about 4-6 inches long.
2. **Take the Cutting:** Using your clean pruning shears or knife, make a clean cut just below a node (the point where a leaf or bud grows). This is where the roots will emerge.
3. **Prepare the Cutting:** Remove the leaves from the lower half of the cutting. This prevents them from rotting when they’re in contact with the soil or water. Leaving a few leaves at the top helps the cutting photosynthesize.
4. **Apply Rooting Hormone (Optional):** Dip the cut end of the stem into rooting hormone powder or gel. This encourages faster root development. If you don’t have rooting hormone, don’t worry – many plants will root just fine without it.
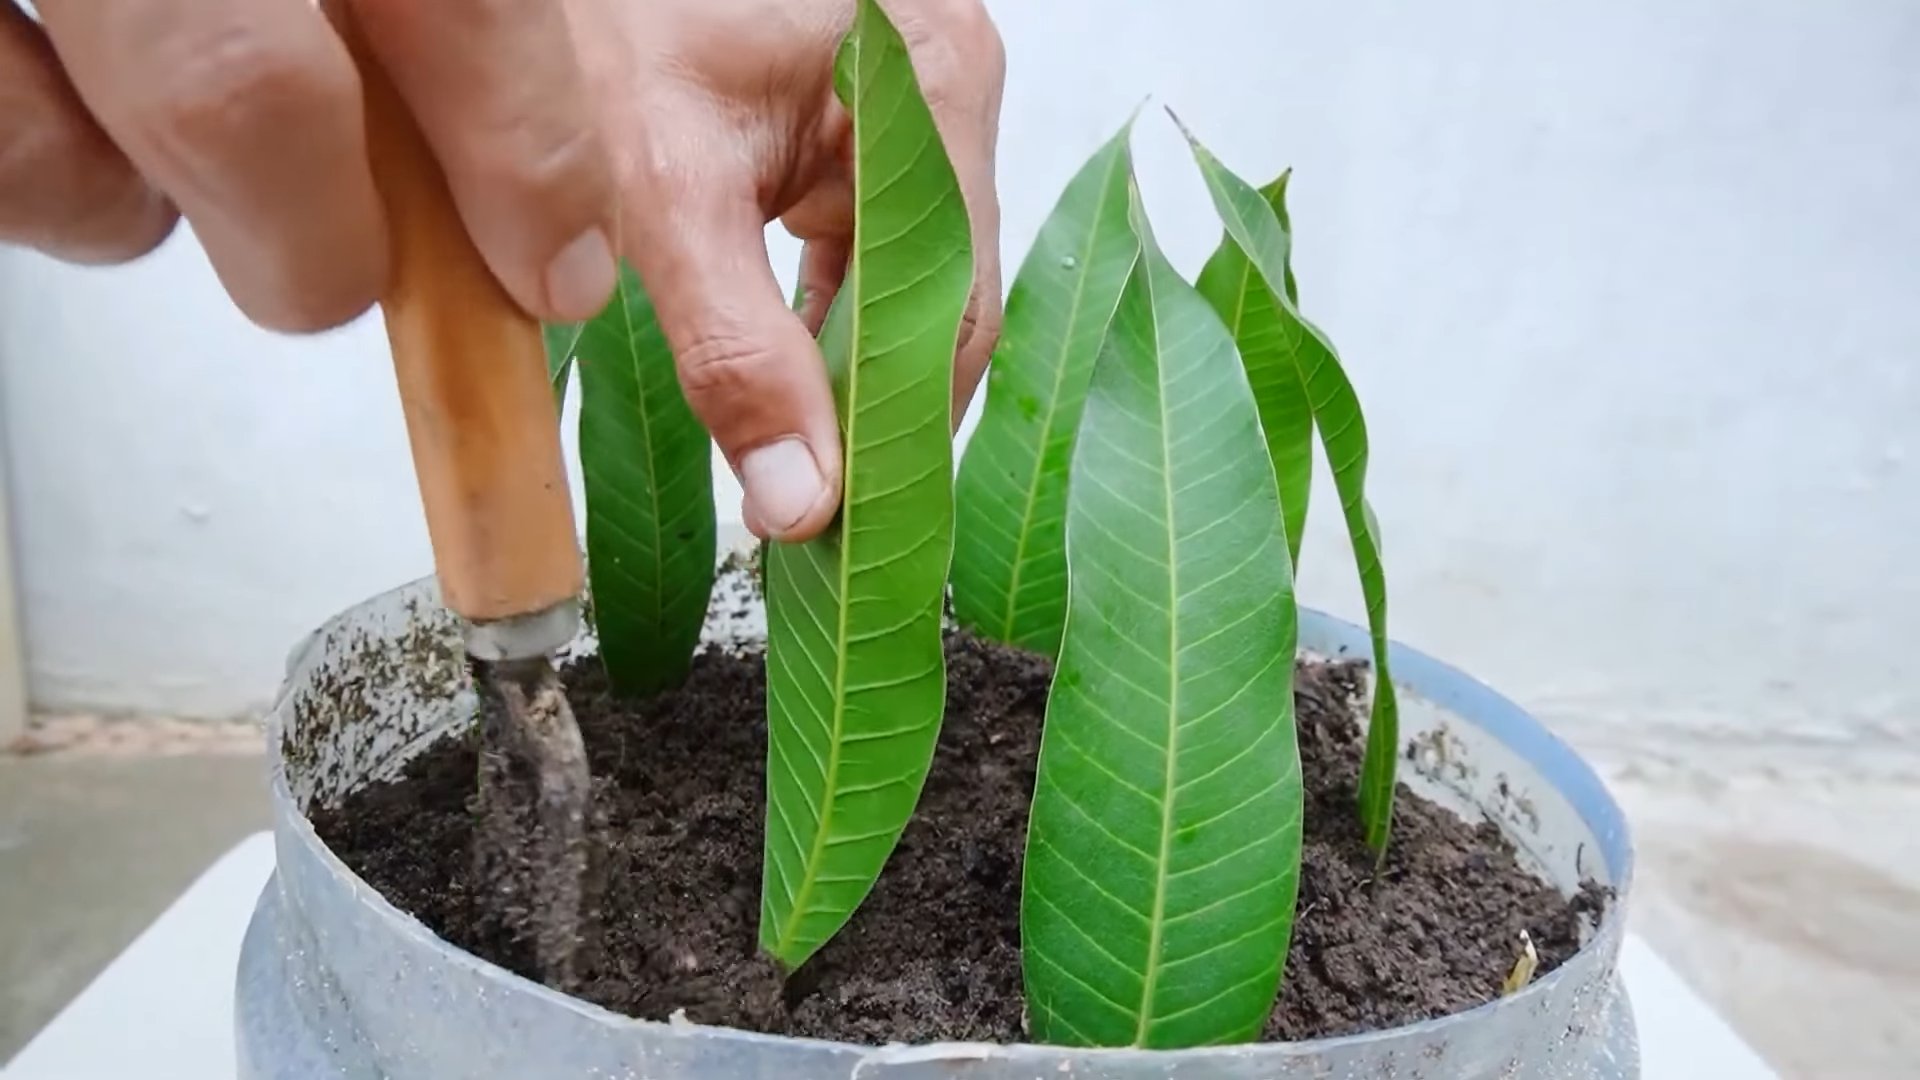
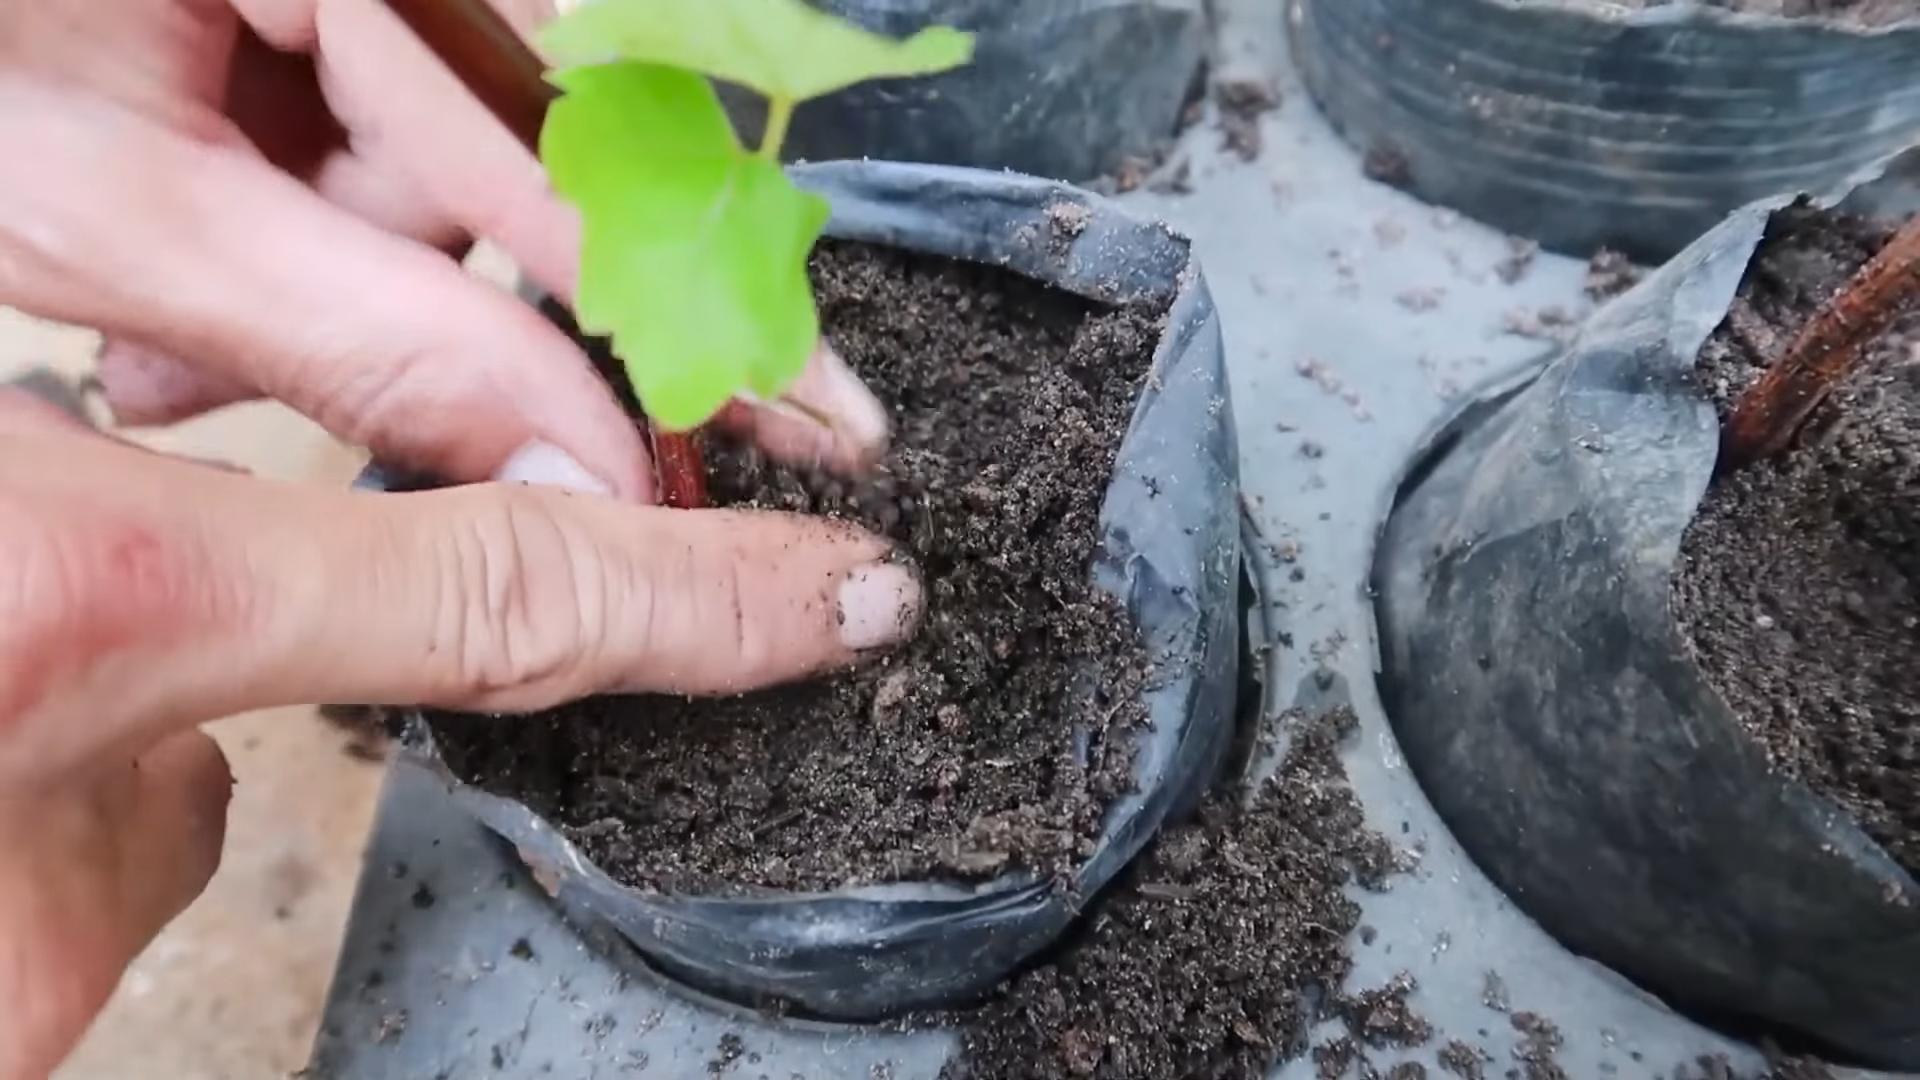
5. **Plant the Cutting:** Fill your small pot with well-draining potting mix. Make a small hole in the center of the soil and gently insert the cutting, burying the bottom node.
6. **Water Thoroughly:** Water the cutting thoroughly until the soil is evenly moist.
7. **Create a Humid Environment:** Place the pot inside a clear plastic bag or under a humidity dome. This helps to keep the humidity high, which is crucial for root development. Make sure the bag isn’t touching the leaves to prevent rot. You can also mist the inside of the bag with water.
8. **Provide Indirect Light:** Place the cutting in a warm location with bright, indirect light. Avoid direct sunlight, which can scorch the leaves.
9. **Monitor and Water:** Check the cutting regularly to make sure the soil stays moist. Water when the top inch of soil feels dry. You may need to mist the cutting occasionally to maintain humidity.
10. **Check for Roots:** After a few weeks (usually 2-4 weeks), gently tug on the cutting. If you feel resistance, it means roots have formed!
11. **Acclimatize the Cutting:** Once the cutting has rooted, gradually acclimatize it to lower humidity by removing the plastic bag or humidity dome for increasing periods each day over the course of a week.
12. **Transplant:** Once the cutting is well-rooted and acclimatized, you can transplant it into a larger pot or directly into the garden.
Propagating by Layering
Layering is a fantastic method for plants with long, flexible stems that naturally trail or vine. It’s a bit slower than stem cuttings, but it often results in stronger, more established plants.
Types of Layering
There are several types of layering, but I’ll focus on simple layering, which is the easiest for most home gardeners.
Materials You’ll Need:
* A healthy parent plant with long, flexible stems
* A small pot or container filled with well-draining potting mix
* A sharp knife or pruning shears
* A U-shaped garden staple or rock
Step-by-Step Instructions:
1. **Choose a Stem:** Select a long, healthy stem that can easily be bent down to the soil.
2. **Prepare the Stem:** At the point where the stem will touch the soil, gently scrape or wound the underside of the stem with your knife or pruning shears. This encourages root formation.
3. **Bury the Stem:** Bend the stem down and bury the wounded section in the pot of potting mix. Make sure the stem is in good contact with the soil.
4. **Secure the Stem:** Use a U-shaped garden staple or a rock to hold the stem in place. This prevents it from popping out of the soil.
5. **Water Regularly:** Water the soil regularly to keep it moist.
6. **Wait for Roots to Form:** It will take several weeks or even months for roots to form. You can check for roots by gently tugging on the buried stem. If you feel resistance, it means roots have formed.
7. **Separate the Layered Stem:** Once the stem has rooted, use your pruning shears to cut it from the parent plant.
8. **Transplant:** You can now transplant the newly rooted plant into a larger pot or directly into the garden.
Propagating by Division
Division is a great way to propagate plants that grow in clumps, such as hostas, daylilies, and many ornamental grasses. It’s a simple and effective way to create new plants while also rejuvenating the parent plant.
Materials You’ll Need:
* A healthy, mature clump of the plant you want to divide
* A sharp shovel or spade
* A sharp knife or pruning shears
* Pots or containers filled with well-draining potting mix
Step-by-Step Instructions:
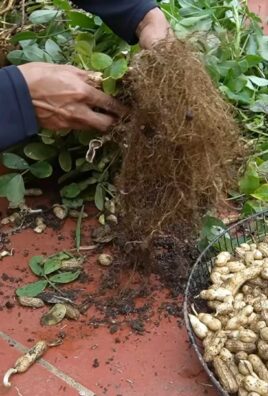
1. **Dig Up the Plant:** Carefully dig up the entire clump of the plant you want to divide. Try to avoid damaging the roots as much as possible.
2. **Clean the Roots:** Gently remove as much soil as possible from the roots so you can see the individual sections.
3. **Divide the Clump:** Use your sharp shovel, knife, or pruning shears to divide the clump into smaller sections. Each section should have its own roots and shoots.
4. **Prepare the Divisions:** Trim any damaged or dead roots from the divisions.
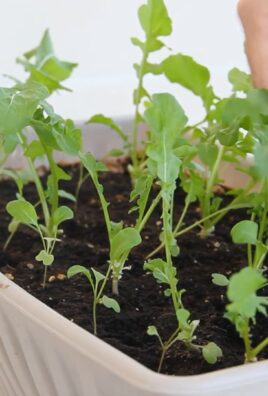
5. **Plant the Divisions:** Plant each division in a pot or container filled with well-draining potting mix.
6. **Water Thoroughly:** Water the divisions thoroughly until the soil is evenly moist.
7. **Provide Shade:** Place the divisions in a shady location for a few days to help them recover from the transplant.
8. **Gradually Acclimatize:** Gradually acclimatize the divisions to more sunlight over the course of a week or two.
9. **Care for the New Plants:** Water and fertilize the new plants as needed.
Tips for Success
Here are a few extra tips to help you succeed with propagating fast-growing plants:
* Use clean tools: Always use clean pruning shears or knives to prevent the spread of diseases.
* Choose healthy plants: Start with healthy, vigorous plants for the best results.
* Provide adequate moisture: Keep the soil consistently moist, but not waterlogged.
* Provide adequate light: Most cuttings and divisions need bright, indirect light.
* Be patient: It can take several week
Hey there, fellow plant enthusiasts! June is prime time for propagating many of our favorite fast-growing plants. The warmer weather and longer days give cuttings the perfect boost to root quickly and establish themselves. I’m going to walk you through a few simple methods that I’ve found incredibly successful. Let’s get our hands dirty and multiply those green beauties!
Choosing Your Propagation Method
Before we dive into the specifics, let’s briefly touch on the methods we’ll be covering. The best method depends on the plant you’re propagating, but I’ll focus on stem cuttings, layering, and division – all fantastic options for fast-growing plants.
* **Stem Cuttings:** This is probably the most common and versatile method. You simply take a cutting from a stem, remove the lower leaves, and root it in water or soil.
* **Layering:** This involves rooting a stem while it’s still attached to the parent plant. It’s a great option for plants with long, flexible stems.
* **Division:** This is perfect for plants that grow in clumps. You simply divide the clump into smaller sections, each with its own roots and shoots.
Propagating with Stem Cuttings
This is my go-to method for many plants, especially those with soft stems. It’s quick, easy, and usually has a high success rate.
Materials You’ll Need:
* Sharp, clean pruning shears or a knife
* Rooting hormone (optional, but it speeds things up!)
* Small pots or containers
* Well-draining potting mix (I like a mix of perlite, vermiculite, and peat moss)
* A clear plastic bag or humidity dome (to create a humid environment)
* Water
Step-by-Step Instructions:
1. **Select a Healthy Stem:** Choose a healthy, non-flowering stem from your plant. Look for stems that are actively growing and free from pests or diseases. The ideal stem should be about 4-6 inches long.
2. **Take the Cutting:** Using your clean pruning shears or knife, make a clean cut just below a node (the point where a leaf or bud grows). This is where the roots will emerge.
3. **Prepare the Cutting:** Remove the leaves from the lower half of the cutting. This prevents them from rotting when they’re in contact with the soil or water. Leaving a few leaves at the top helps the cutting photosynthesize.
4. **Apply Rooting Hormone (Optional):** Dip the cut end of the stem into rooting hormone powder or gel. This encourages faster root development. If you don’t have rooting hormone, don’t worry – many plants will root just fine without it.
5. **Plant the Cutting:** Fill your small pot with well-draining potting mix. Make a small hole in the center of the soil and gently insert the cutting, burying the bottom node.
6. **Water Thoroughly:** Water the cutting thoroughly until the soil is evenly moist.
7. **Create a Humid Environment:** Place the pot inside a clear plastic bag or under a humidity dome. This helps to keep the humidity high, which is crucial for root development. Make sure the bag isn’t touching the leaves to prevent rot. You can also mist the inside of the bag with water.
8. **Provide Indirect Light:** Place the cutting in a warm location with bright, indirect light. Avoid direct sunlight, which can scorch the leaves.
9. **Monitor and Water:** Check the cutting regularly to make sure the soil stays moist. Water when the top inch of soil feels dry. You may need to mist the cutting occasionally to maintain humidity.
10. **Check for Roots:** After a few weeks (usually 2-4 weeks), gently tug on the cutting. If you feel resistance, it means roots have formed!
11. **Acclimatize the Cutting:** Once the cutting has rooted, gradually acclimatize it to lower humidity by removing the plastic bag or humidity dome for increasing periods each day over the course of a week.
12. **Transplant:** Once the cutting is well-rooted and acclimatized, you can transplant it into a larger pot or directly into the garden.
Propagating by Layering
Layering is a fantastic method for plants with long, flexible stems that naturally trail or vine. It’s a bit slower than stem cuttings, but it often results in stronger, more established plants.
Types of Layering
There are several types of layering, but I’ll focus on simple layering, which is the easiest for most home gardeners.
Materials You’ll Need:
* A healthy parent plant with long, flexible stems
* A small pot or container filled with well-draining potting mix
* A sharp knife or pruning shears
* A U-shaped garden staple or rock
Step-by-Step Instructions:
1. **Choose a Stem:** Select a long, healthy stem that can easily be bent down to the soil.
2. **Prepare the Stem:** At the point where the stem will touch the soil, gently scrape or wound the underside of the stem with your knife or pruning shears. This encourages root formation.
3. **Bury the Stem:** Bend the stem down and bury the wounded section in the pot of potting mix. Make sure the stem is in good contact with the soil.
4. **Secure the Stem:** Use a U-shaped garden staple or a rock to hold the stem in place. This prevents it from popping out of the soil.
5. **Water Regularly:** Water the soil regularly to keep it moist.
6. **Wait for Roots to Form:** It will take several weeks or even months for roots to form. You can check for roots by gently tugging on the buried stem. If you feel resistance, it means roots have formed.
7. **Separate the Layered Stem:** Once the stem has rooted, use your pruning shears to cut it from the parent plant.
8. **Transplant:** You can now transplant the newly rooted plant into a larger pot or directly into the garden.
Propagating by Division
Division is a great way to propagate plants that grow in clumps, such as hostas, daylilies, and many ornamental grasses. It’s a simple and effective way to create new plants while also rejuvenating the parent plant.
Materials You’ll Need:
* A healthy, mature clump of the plant you want to divide
* A sharp shovel or spade
* A sharp knife or pruning shears
* Pots or containers filled with well-draining potting mix
Step-by-Step Instructions:
1. **Dig Up the Plant:** Carefully dig up the entire clump of the plant you want to divide. Try to avoid damaging the roots as much as possible.
2. **Clean the Roots:** Gently remove as much soil as possible from the roots so you can see the individual sections.
3. **Divide the Clump:** Use your sharp shovel, knife, or pruning shears to divide the clump into smaller sections. Each section should have its own roots and shoots.
4. **Prepare the Divisions:** Trim any damaged or dead roots from the divisions.
5. **Plant the Divisions:** Plant each division in a pot or container filled with well-draining potting mix.
6. **Water Thoroughly:** Water the divisions thoroughly until the soil is evenly moist.
7. **Provide Shade:** Place the divisions in a shady location for a few days to help them recover from the transplant.
8. **Gradually Acclimatize:** Gradually acclimatize the divisions to more sunlight over the course of a week or two.
9. **Care for the New Plants:** Water and fertilize the new plants as needed.
Tips for Success
Here are a few extra tips to help you succeed with propagating fast-growing plants:
* Use clean tools: Always use clean pruning shears or knives to prevent the spread of diseases.
* Choose healthy plants: Start with healthy, vigorous plants for the best results.
* Provide adequate moisture: Keep the soil consistently moist, but not waterlogged.
* Provide adequate light: Most cuttings and divisions need bright, indirect light.
* Be patient: It can take several weeks or even months for roots to form, so be patient and don’t give up!
* Experiment: Don’t be afraid to experiment with different methods and plants. Propagation is a learning process, and you’ll get better with practice.
* Humidity is Key: Maintaining high humidity is crucial, especially for stem cuttings. Use a plastic bag, humidity dome, or mist frequently.
* Don’t Overwater: While moisture is important, overwatering can lead to rot. Ensure your potting mix is well-draining.
* Observe Carefully: Keep a close eye on your cuttings or divisions for any signs of pests or diseases. Address any problems promptly.
I hope this guide has given you the confidence to propagate your own fast-growing plants. It’s a rewarding experience to create new plants from your existing
Conclusion
So, there you have it! Propagating fast-growing plants in June doesn’t have to be a daunting task reserved for seasoned gardeners. With this simple, effective DIY trick, you can easily multiply your favorite plants and fill your garden (or home!) with lush greenery without breaking the bank. This method leverages the peak growing season, ensuring your cuttings have the best possible chance of rooting quickly and establishing themselves as healthy, thriving plants.
Why is this DIY trick a must-try? Because it’s incredibly cost-effective. Instead of constantly buying new plants, you can create new ones from existing stock. It’s also a fantastic way to share your favorite plants with friends and family, spreading the joy of gardening. Furthermore, it’s a sustainable practice that reduces waste and promotes a greener lifestyle. By propagating your own plants, you’re actively contributing to a more environmentally friendly approach to gardening.
But the benefits don’t stop there. This method is also incredibly rewarding. There’s something truly special about nurturing a tiny cutting into a fully grown plant. It’s a tangible demonstration of your gardening skills and a constant reminder of the power of nature.
Looking for variations? Absolutely! While this method works wonders for many fast-growing plants, you can adapt it to suit different species. For example, some plants might benefit from a rooting hormone to encourage faster root development. Others might prefer a slightly different growing medium, such as a mix of perlite and vermiculite. Experiment and see what works best for your specific plants. You can also try different types of containers, from repurposed plastic bottles to dedicated propagation trays. The key is to provide a warm, humid environment and consistent moisture.
Consider propagating herbs like mint or basil using this method. Imagine having a constant supply of fresh herbs right at your fingertips! Or, try propagating flowering plants like petunias or geraniums to add a burst of color to your garden. The possibilities are endless!
Don’t be afraid to experiment with different techniques and variations to find what works best for you and your plants. The most important thing is to have fun and enjoy the process.
We’re confident that you’ll be amazed at how easy and effective this DIY trick is. So, grab your gardening shears, gather your supplies, and get ready to propagate! We encourage you to try this method and share your experiences with us. Let us know what plants you’ve propagated, what variations you’ve tried, and any tips or tricks you’ve discovered along the way. Share your photos and stories on social media using [Your Hashtag Here] – we can’t wait to see your success! Happy propagating!
FAQ
What exactly does “propagating” mean?
Propagation is simply the process of creating new plants from existing ones. It’s a form of asexual reproduction, meaning that the new plants are genetically identical to the parent plant. This DIY trick focuses on propagation through cuttings, where a piece of the stem or leaf is used to grow a new plant.
What kind of plants can I propagate using this method in June?
June is an ideal time to propagate many fast-growing plants because they are actively growing and have plenty of energy to develop new roots. Some excellent choices include:
* **Herbs:** Mint, basil, rosemary, oregano, thyme
* **Flowers:** Petunias, geraniums, impatiens, begonias, coleus
* **Vegetables:** Tomatoes (suckers), peppers, cucumbers
* **Vines:** Ivy, pothos, wandering jew
* **Shrubs:** Hydrangeas, roses (softwood cuttings)
However, it’s always a good idea to research the specific propagation requirements of the plant you’re interested in. Some plants may require slightly different techniques or conditions.
What materials do I need for this DIY propagation trick?
You’ll need a few basic materials:
* **Sharp, clean pruning shears or scissors:** This is crucial for taking clean cuttings that are less susceptible to disease.
* **Rooting medium:** This can be a mix of potting soil, perlite, and vermiculite, or even just water.
* **Containers:** Small pots, plastic cups, or even repurposed containers will work.
* **Plastic bag or humidity dome:** This helps to create a humid environment that encourages root development.
* **Rooting hormone (optional):** This can speed up the rooting process, but it’s not always necessary.
* **Spray bottle:** For misting the cuttings to keep them moist.
How do I take a cutting from a plant?
The best time to take cuttings is in the morning when the plant is well-hydrated. Choose healthy, non-flowering stems. Use your sharp, clean pruning shears to cut a 4-6 inch section of stem just below a node (the point where leaves grow). Remove the lower leaves from the cutting, leaving only a few leaves at the top. This will prevent the cutting from losing too much moisture.
How do I prepare the rooting medium and plant the cutting?
Moisten your rooting medium thoroughly. If using a rooting hormone, dip the cut end of the stem into the hormone powder or liquid. Make a small hole in the rooting medium and insert the cutting. Gently firm the soil around the cutting to secure it in place.
How do I create a humid environment for the cuttings?
Place the container with the cutting inside a plastic bag or under a humidity dome. This will help to trap moisture and create a humid environment that encourages root development. Make sure the bag or dome doesn’t touch the leaves of the cutting. You can also mist the cuttings regularly with water to keep them moist.
Where should I place the cuttings while they are rooting?
Place the cuttings in a warm, bright location, but avoid direct sunlight. Direct sunlight can scorch the leaves and prevent the cuttings from rooting. A windowsill with indirect sunlight is a good option.
How long does it take for cuttings to root?
The time it takes for cuttings to root can vary depending on the plant species and the environmental conditions. Generally, it takes anywhere from 2-6 weeks for roots to develop. You can check for root development by gently tugging on the cutting. If you feel resistance, it means that roots have formed.
How do I care for the cuttings after they have rooted?
Once the cuttings have rooted, you can gradually acclimate them to less humid conditions. Start by removing the plastic bag or humidity dome for a few hours each day, gradually increasing the amount of time over a week or two. Once the cuttings are fully acclimated, you can transplant them into larger pots or directly into the garden.
What if my cuttings don’t root?
Not all cuttings will root successfully. Don’t be discouraged if some of your cuttings fail. There are several reasons why cuttings might not root, including:
* **Poor cutting technique:** Using dull or dirty pruning shears can introduce disease.
* **Incorrect rooting medium:** Some plants prefer a specific type of rooting medium.
* **Insufficient humidity:** Cuttings need a humid environment to prevent them from drying out.
* **Too much or too little light:** Direct sunlight can scorch the leaves, while too little light can prevent root development.
* **Overwatering or underwatering:** The rooting medium should be moist, but not soggy.
If your cuttings don’t root, try again with fresh cuttings and adjust your technique based on the potential causes listed above.
Can I propagate plants in water instead of soil?
Yes, you can propagate many plants in water. Simply place the cuttings in a glass or jar of water, making sure that the leaves are not submerged. Change the water every few days to prevent algae growth. Once the roots are about an inch long, you can transplant the cuttings into potting soil.
Is it really worth the effort to propagate my own plants?
Absolutely! Propagating your own plants is a rewarding and cost-effective way to expand your garden and share your favorite plants with others. It’s also a great way to learn more about plants and develop your gardening skills. Plus, it’s a sustainable practice that reduces waste and promotes a greener lifestyle. Give it a try – you might be surprised at how easy and fun it is!
Leave a Comment