
No Garden Vegetable Growing? No problem! I know, I know, the dream of plucking a sun-ripened tomato straight from the vine feels miles away when you’re staring at a tiny balcony or a concrete jungle. But trust me, you don’t need acres of land to enjoy the incredible satisfaction of growing your own food. For centuries, people have found ingenious ways to cultivate edibles in limited spaces, from ancient rooftop gardens in bustling cities to resourceful container gardening techniques passed down through generations.
The truth is, the desire to connect with nature and nourish ourselves with fresh, homegrown produce is deeply ingrained in us. But modern living often presents challenges, and lack of space is a big one! That’s why I’m so excited to share these amazing DIY tricks and hacks that will empower you to start no garden vegetable growing, even if you think you have absolutely no space.
Imagine the joy of snipping fresh herbs for your dinner, or the pride of serving a salad made with lettuce you grew yourself. These aren’t just dreams; they’re achievable realities with a little creativity and the right know-how. This article is your guide to unlocking the secrets of no garden vegetable growing, transforming even the smallest spaces into thriving edible oases. Let’s get our hands dirty (metaphorically, if you prefer!) and start growing!
Grow Your Own Salad Indoors: A Beginner’s Guide
Hey there, fellow plant enthusiasts! Ever dreamt of having fresh, crisp salad greens right at your fingertips, even without a garden? Well, you’re in the right place! I’m going to walk you through a super easy and rewarding DIY project: growing your own salad indoors. Trust me, it’s simpler than you think, and the taste of homegrown lettuce is unbeatable.
What You’ll Need
Before we dive in, let’s gather our supplies. Don’t worry, you probably have a lot of this stuff lying around already!
* **Seeds:** Opt for loose-leaf lettuce varieties like Black Seeded Simpson, Salad Bowl, or Red Sails. They’re quick to mature and easy to harvest. You can also try spinach, arugula, or even some herbs like basil or parsley.
* **Containers:** You can use almost anything! Recycled plastic containers (yogurt tubs, takeout containers), window boxes, or even a dedicated seed starting tray will work. Just make sure they have drainage holes.
* **Potting Mix:** This is crucial! Don’t use garden soil; it’s too heavy and compacts easily. Choose a good quality potting mix specifically formulated for containers.
* **Grow Lights (Optional but Recommended):** While a sunny windowsill can work, grow lights will give you much better results, especially during the darker months. A simple LED shop light is perfect.
* **Spray Bottle:** For misting the seedlings.
* **Watering Can or Pitcher:** For watering the mature plants.
* **Small Shovel or Spoon:** For handling the potting mix.
* **Labels and a Marker:** To keep track of what you’ve planted.
* **A Well-Ventilated Space:** Good airflow is important to prevent mold and mildew.
Getting Started: Planting Your Seeds
Okay, let’s get our hands dirty! This is the fun part.
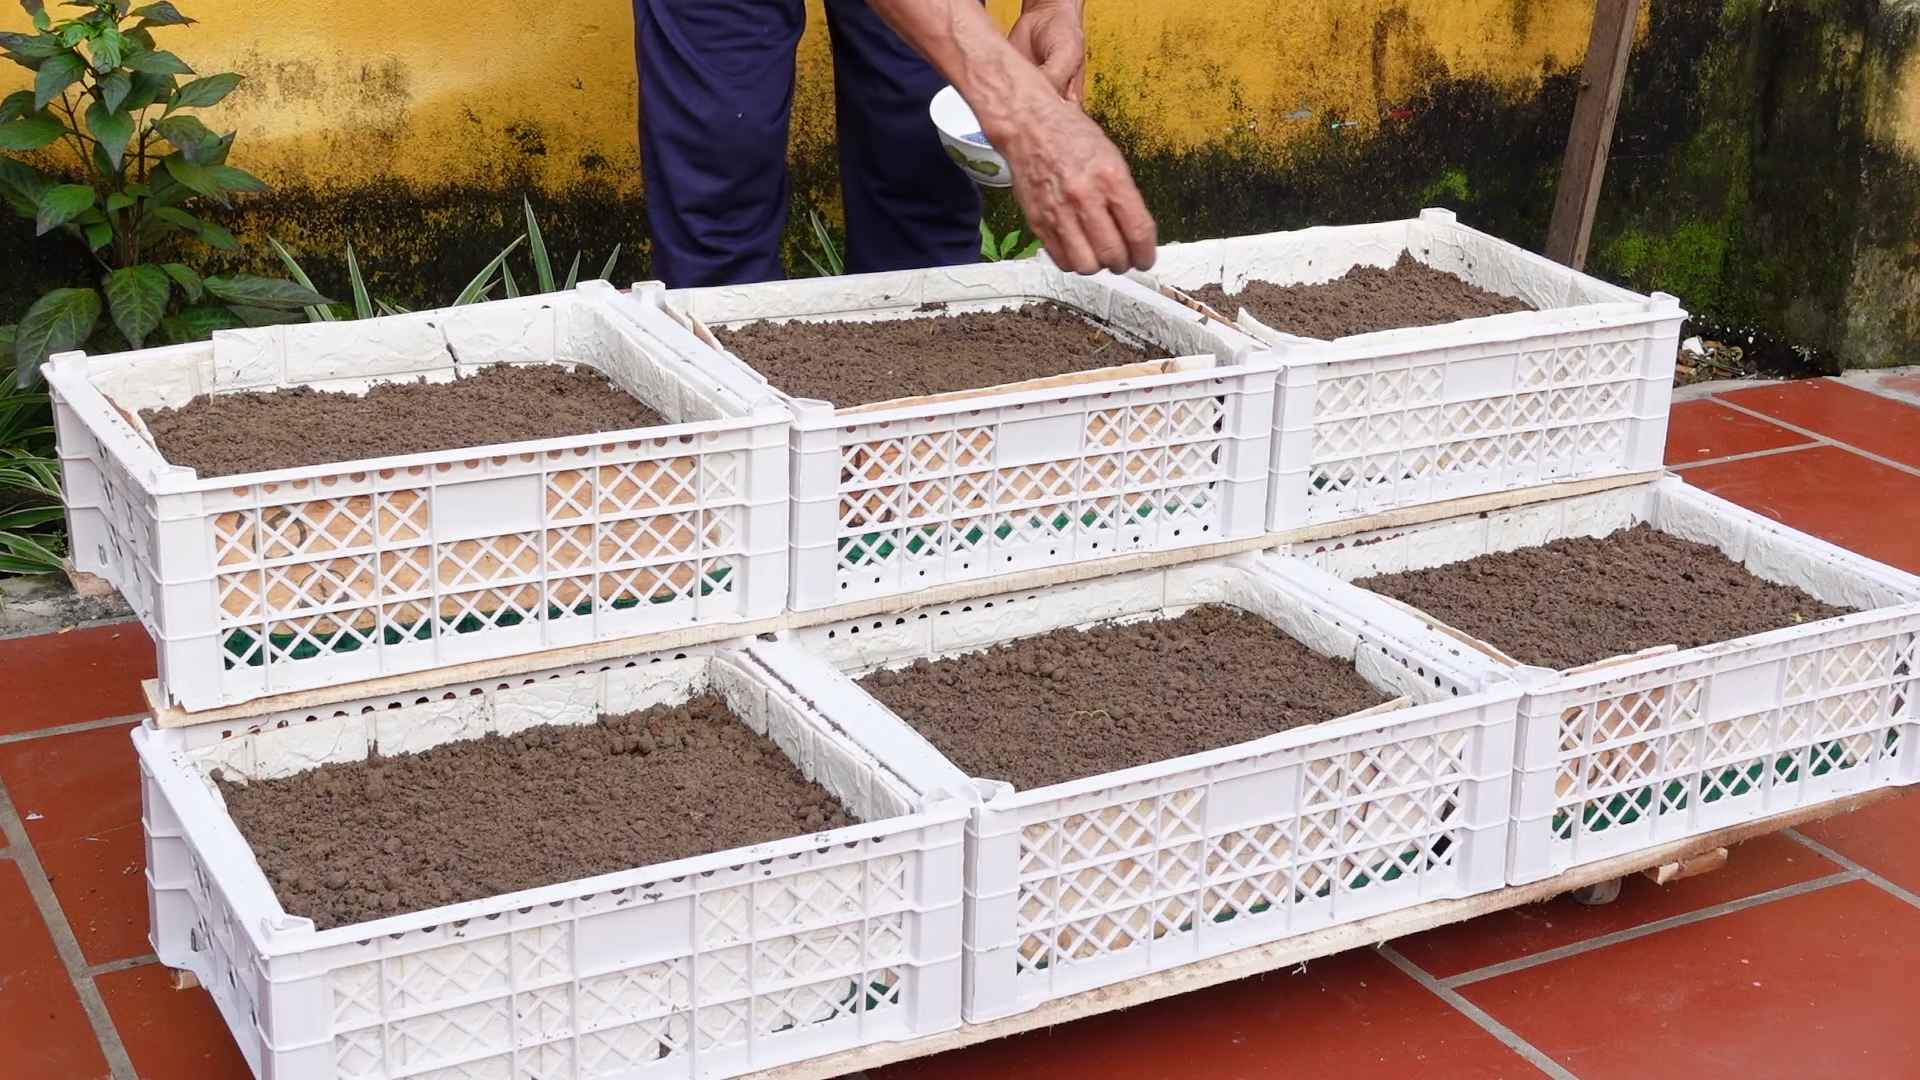
1. **Prepare Your Containers:** First, make sure your containers are clean. If you’re using recycled containers, wash them thoroughly with soap and water. If your container doesn’t have drainage holes, carefully poke a few in the bottom. This is essential to prevent waterlogging and root rot.
2. **Fill with Potting Mix:** Now, fill your containers with potting mix, leaving about an inch of space at the top. Gently pat down the soil to remove any large air pockets, but don’t compact it too much. You want it to be loose and airy.
3. **Sow the Seeds:** This is where the magic happens! Sprinkle the lettuce seeds evenly over the surface of the soil. Lettuce seeds are tiny, so don’t worry about spacing them perfectly. A light sprinkling is all you need. For other greens like spinach or arugula, you can space them a little further apart.
4. **Cover Lightly:** Gently cover the seeds with a very thin layer of potting mix. You can also use vermiculite, which helps retain moisture. The key is to not bury the seeds too deep; they need light to germinate.
5. **Water Gently:** Use your spray bottle to mist the soil thoroughly. You want the soil to be moist, but not soaking wet. Be careful not to dislodge the seeds.
6. **Label Your Containers:** Don’t forget to label each container with the type of lettuce or greens you planted and the date. This will help you keep track of your progress.
7. **Provide Light and Warmth:** Place your containers in a warm, well-lit location. If you’re using grow lights, position them a few inches above the soil surface. If you’re relying on natural light, choose a south-facing windowsill that gets at least 6 hours of sunlight per day.
Nurturing Your Seedlings: The First Few Weeks
Now comes the waiting game! But don’t worry, you’ll see sprouts in no time.
1. **Maintain Moisture:** Keep the soil consistently moist, but not soggy. Check the soil moisture daily and mist with your spray bottle as needed.
2. **Provide Adequate Light:** If you’re using grow lights, keep them on for about 12-16 hours per day. If you’re using natural light, rotate the containers regularly to ensure even growth.
3. **Thinning (Optional):** Once the seedlings have their first true leaves (the second set of leaves that appear after the initial seed leaves), you can thin them out if they’re too crowded. This will give the remaining plants more room to grow. To thin, simply snip off the unwanted seedlings at the soil line with a pair of scissors. Don’t pull them out, as this can disturb the roots of the remaining plants.
4. **Ventilation:** Ensure good airflow around your seedlings. This will help prevent fungal diseases. You can open a window for a few hours each day or use a small fan to circulate the air.
5. **Fertilizing (Optional):** If you notice your seedlings are looking pale or growing slowly, you can give them a light feeding of liquid fertilizer diluted to half strength. Choose a fertilizer that’s specifically formulated for leafy greens.
Harvesting Your Bounty: Enjoying Your Fresh Greens
This is the moment you’ve been waiting for! Harvesting your own salad greens is incredibly satisfying.
1. **When to Harvest:** You can start harvesting your lettuce when the leaves are about 4-6 inches long. For loose-leaf varieties, you can harvest individual leaves as needed, leaving the rest of the plant to continue growing. This is called “cut-and-come-again” harvesting.
2. **How to Harvest:** Use a pair of scissors or a sharp knife to cut the leaves about an inch above the soil line. Be careful not to damage the remaining plant.
3. **Washing and Storing:** Wash your harvested greens thoroughly with cold water to remove any dirt or debris. Pat them dry with a paper towel or use a salad spinner. Store the greens in a plastic bag in the refrigerator. They should stay fresh for several days.
4. **Successive Planting:** To ensure a continuous supply of fresh greens, sow a new batch of seeds every few weeks. This is called successive planting.
Troubleshooting: Common Problems and Solutions
Even with the best intentions, things can sometimes go wrong. Here are a few common problems you might encounter and how to fix them:
* **Leggy Seedlings:** This means your seedlings are stretching towards the light and becoming tall and spindly. The solution is to provide more light. Move your containers closer to the grow lights or to a sunnier location.
* **Yellowing Leaves:** This can be caused by a number of factors, including overwatering, underwatering, nutrient deficiencies, or pests. Check the soil moisture and adjust your watering accordingly. If you suspect a nutrient deficiency, give your plants a light feeding of liquid fertilizer. Inspect your plants for pests and treat them accordingly.
* **Mold or Mildew:** This is usually caused by poor ventilation and high humidity. Improve airflow by opening a window or using a fan. You can also try spraying your plants with a solution of baking soda and water.
* **Pests:** Aphids, spider mites, and whiteflies are common pests that can infest indoor plants. Inspect your plants regularly and treat them with insecticidal soap or neem oil if you find any pests.
Choosing the Right Container
The container you choose plays a vital role in the success of your indoor salad garden. Here’s a breakdown of different options:
* **Recycled Containers:** Yogurt tubs, takeout containers, and plastic bottles can all be repurposed as planters. Just make sure they are clean and have drainage holes. These are a great eco-friendly and budget-friendly option.
* **Window Boxes:** These are perfect for growing a variety of salad greens in a small space. They can be placed on a windowsill or hung from a railing.
* **Seed Starting Trays:** These trays have individual cells that are ideal for starting seeds. They are also lightweight and easy to move around.
* **Self-Watering Containers:** These containers have a reservoir that holds water and gradually releases it to the soil. This can help prevent overwatering and underwatering.
* **Hanging Baskets:** These are a fun and unique way to grow salad greens indoors. They can be hung from a ceiling or a wall.
Selecting the Best Potting Mix
The potting mix you use is just as important as the container. Here’s what to look for:
* **Lightweight and Well-Draining:** The potting mix should be lightweight and well-draining to prevent waterlogging.
* **Nutrient-Rich:** The potting mix should contain essential nutrients to support plant growth.
* **Sterile:** The potting mix should be sterile to prevent diseases and pests.
* **pH-Balanced:** The potting mix should have a pH of around 6.0 to 7.0, which is ideal for most salad greens.
Avoid using garden soil in containers, as it is too heavy and compacts easily. This can suffocate the roots and prevent them from growing properly.
Optimizing Light for Indoor Growth
Light is essential for photosynthesis, the process by which
Conclusion
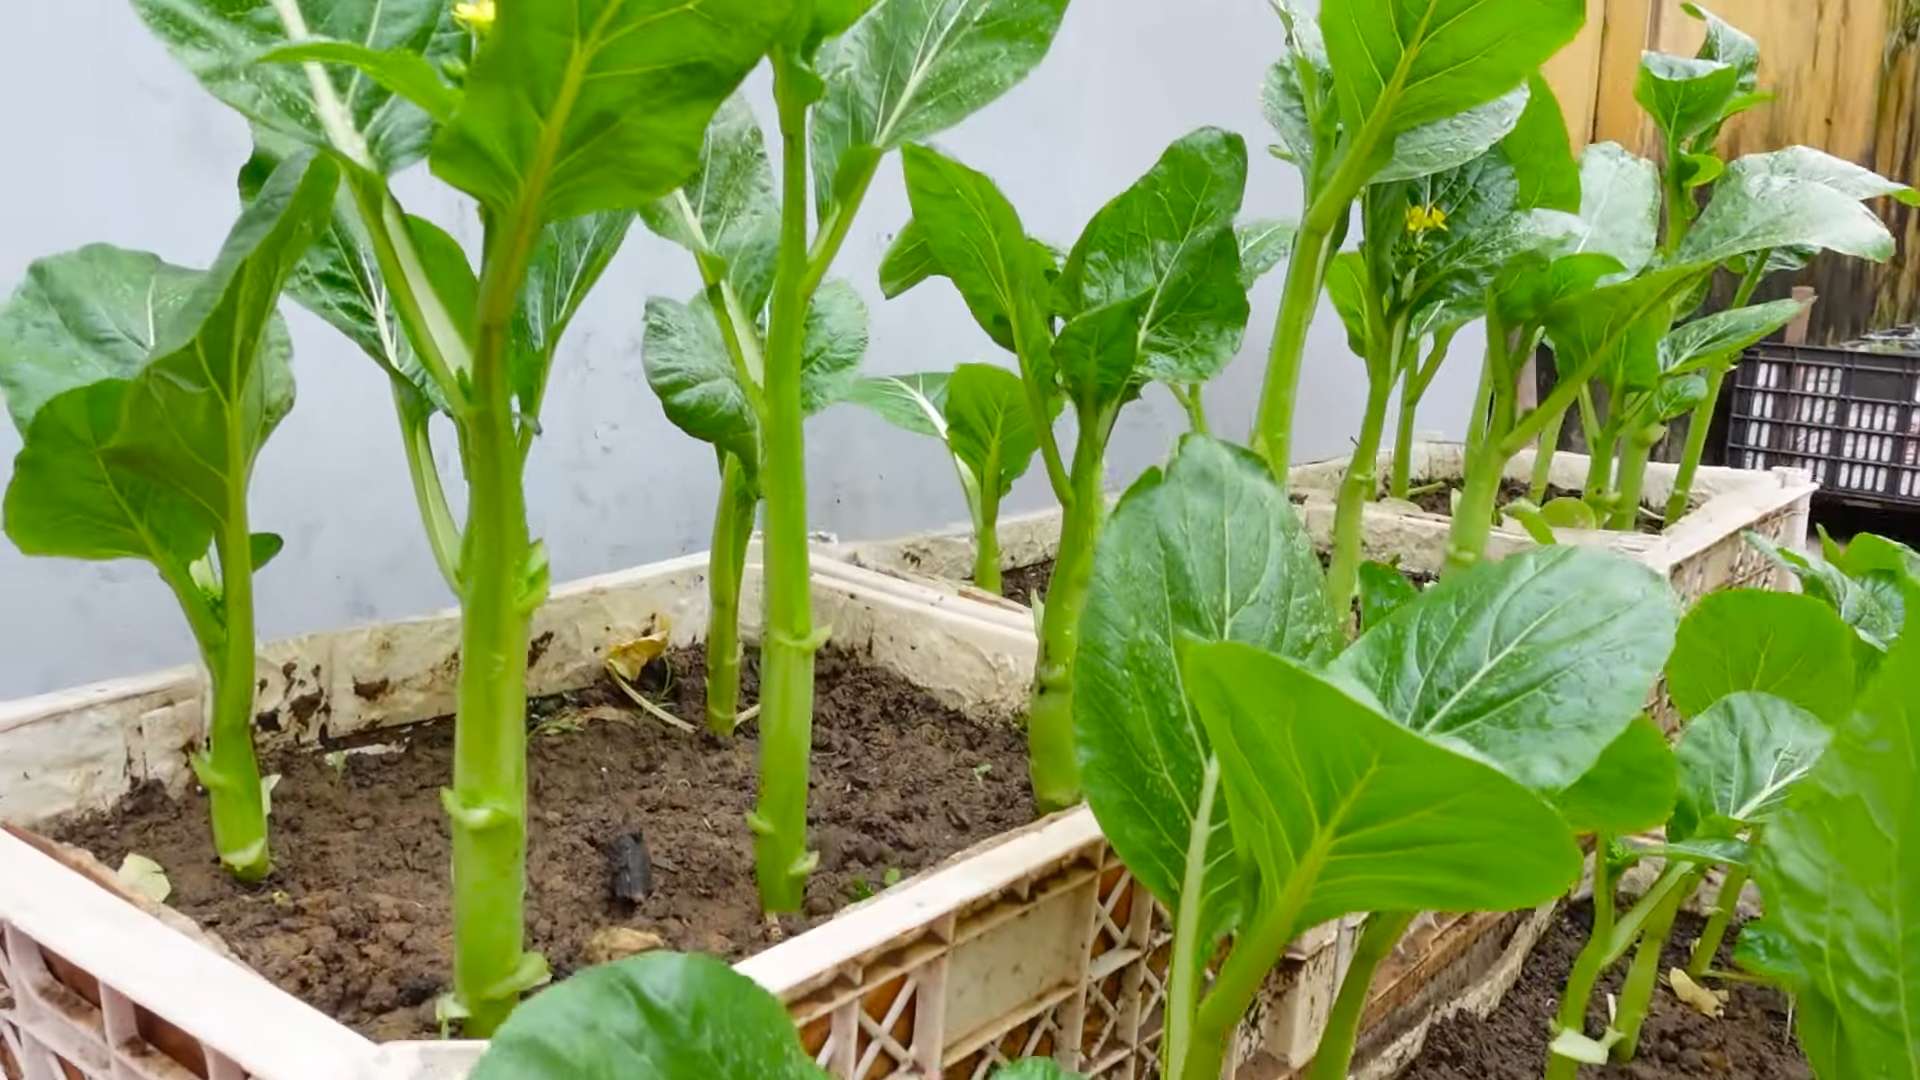
So, there you have it! Transforming your kitchen scraps into a thriving supply of fresh vegetables, even without a traditional garden, is not just a possibility, it’s a delightful reality waiting to be unlocked. This DIY approach to vegetable propagation is more than just a clever trick; it’s a sustainable, cost-effective, and incredibly rewarding way to connect with your food source. Imagine the satisfaction of snipping fresh scallions grown from the discarded roots you were about to toss, or adding vibrant, leafy greens to your salad, all cultivated from the base of a romaine lettuce heart.
This method isn’t just about saving money (though that’s certainly a perk!). It’s about reducing food waste, embracing a more eco-conscious lifestyle, and experiencing the magic of watching new life sprout from what was once considered refuse. It’s a fantastic project for families, offering a hands-on learning experience about plant life cycles and the importance of sustainability. Plus, it’s a great conversation starter!
Why is this DIY trick a must-try? Because it’s accessible to everyone, regardless of space or gardening experience. It requires minimal effort and resources, and the results are genuinely impressive. You’ll be amazed at how quickly and easily you can regrow many common vegetables.
Ready to take your kitchen scraps to the next level? Consider experimenting with different types of vegetables. While we’ve focused on some of the easiest options, don’t be afraid to try regrowing celery, bok choy, or even ginger. You can also explore different growing mediums. While water propagation is a great starting point, you can eventually transplant your regrown vegetables into soil for even more robust growth. Think about using different containers too – upcycled jars, repurposed plastic containers, or even dedicated propagation stations can all work wonders.
Variations to consider:
* Hydroponics: Take your regrowing game to the next level by exploring simple hydroponic setups. This involves growing your vegetables in nutrient-rich water without soil, which can accelerate growth and yield impressive results.
* Vertical Gardening: If you’re short on horizontal space, consider creating a vertical garden using stacked planters or hanging baskets. This is a great way to maximize your growing area and add a touch of greenery to your home.
* Composting: Even the scraps that aren’t suitable for regrowing can still be put to good use! Start a compost bin to recycle your food waste and create nutrient-rich soil for your other plants.
We’re confident that you’ll find this DIY vegetable regrowing trick to be a game-changer. It’s a simple yet powerful way to reduce waste, save money, and enjoy fresh, homegrown produce, even without a traditional garden. So, gather your kitchen scraps, grab a jar of water, and get ready to witness the magic of regeneration.
Don’t just take our word for it – try it yourself! We’re eager to hear about your experiences. Share your photos, tips, and successes in the comments below. Let’s create a community of resourceful gardeners who are passionate about sustainable living and the joy of growing their own food, one kitchen scrap at a time. Let us know which vegetables you had the most success with, any challenges you faced, and any creative variations you’ve discovered. Happy regrowing! This **no garden vegetable growing** method is a game changer.
Frequently Asked Questions (FAQ)
What vegetables can I regrow from scraps?
Many vegetables can be successfully regrown from scraps. Some of the easiest and most popular options include:
* **Green Onions/Scallions:** Simply place the root end in a glass of water, ensuring the green shoots are above the waterline. Change the water every day or two.
* **Lettuce (Romaine, Butterhead):** Place the lettuce heart in a shallow bowl of water. New leaves will sprout from the center.
* **Celery:** Similar to lettuce, place the celery base in a shallow bowl of water. New stalks will emerge from the center.
* **Bok Choy:** Follow the same method as lettuce and celery.
* **Garlic:** Plant a single clove (with the root end facing down) in soil.
* **Ginger:** Plant a piece of ginger with visible buds in soil.
* **Potatoes:** Plant potatoes that have sprouted eyes in soil. Cut larger potatoes into pieces, ensuring each piece has at least one eye.
* **Sweet Potatoes:** Suspend a sweet potato in a jar of water, with the bottom half submerged. Sprouts will emerge from the top.
* **Leeks:** Place the root end in water, similar to green onions.
* **Fennel:** Place the base in water, and new shoots will grow.
* **Avocado:** While it takes patience, you can sprout an avocado pit by suspending it in water using toothpicks.
How long does it take to see results?
The time it takes to see results varies depending on the vegetable and the growing conditions. Generally, you can expect to see new growth within a few days to a week for vegetables like green onions, lettuce, and celery. Other vegetables, like ginger and potatoes, may take a few weeks to sprout.
What kind of water should I use?
Tap water is generally fine for regrowing vegetables. However, if your tap water is heavily chlorinated, it’s best to let it sit out for 24 hours before using it to allow the chlorine to dissipate. Filtered water is also a good option.
How often should I change the water?
It’s important to change the water regularly to prevent the growth of bacteria and algae. Change the water every day or two for vegetables like green onions and lettuce. For other vegetables, you can change the water every few days.
Can I transplant the regrown vegetables into soil?
Yes, you can transplant the regrown vegetables into soil once they have developed roots. This will allow them to grow more vigorously and produce a larger yield. Choose a well-draining potting mix and a pot that is appropriately sized for the vegetable.
What kind of soil should I use?
Use a well-draining potting mix that is rich in nutrients. You can also amend the soil with compost or other organic matter.
How much sunlight do the regrown vegetables need?
Most regrown vegetables need at least 6 hours of sunlight per day. Place them in a sunny location, such as a windowsill or a balcony. If you don’t have enough natural light, you can supplement with grow lights.
What if my vegetables start to rot?
If your vegetables start to rot, it’s likely due to overwatering or poor drainage. Make sure the water is changed regularly and that the soil is well-draining. You can also try adding a small amount of hydrogen peroxide to the water to help prevent rot.
Can I regrow vegetables indefinitely?
While you can regrow some vegetables multiple times, the yield and quality may decrease with each successive regrowth. It’s best to start with fresh scraps for optimal results.
Is this method suitable for all climates?
This method is generally suitable for most climates, as it can be done indoors. However, you may need to adjust the growing conditions depending on your climate. For example, if you live in a cold climate, you may need to provide supplemental heat and light.
What about pests and diseases?
While regrowing vegetables indoors minimizes the risk of pests and diseases, it’s still possible for them to occur. Inspect your plants regularly for signs of pests or diseases, and take appropriate action if necessary. You can use organic pest control methods, such as neem oil or insecticidal soap.
Can I use this method to grow a full garden?
While this method is a great way to supplement your diet and reduce food waste, it’s unlikely to provide enough produce to sustain a full garden. However, it’s a great starting point for learning about gardening and can be combined with other gardening methods to create a more comprehensive food production system.
What are the benefits of regrowing vegetables from scraps?
There are many benefits to regrowing vegetables from scraps, including:
* Reducing food waste
* Saving money
* Enjoying fresh, homegrown produce
* Learning about gardening
* Connecting with your food source
* Promoting sustainability
* Creating a fun and educational activity for families
Is it safe to eat vegetables regrown from scraps?
Yes, it is generally safe to eat vegetables regrown from scraps, as long as you follow proper hygiene practices. Wash the vegetables thoroughly before eating them. If you are concerned about pesticides or other contaminants, you can choose to use organic vegetables for regrowing.
Where can I find more information about regrowing vegetables from scraps?
There are many resources available online and in libraries that can provide more information about regrowing vegetables from scraps. You can also find helpful tips and advice from other gardeners in online forums and communities.
Leave a Comment