
Maximize Tomato Production – isn’t that the dream of every home gardener? I know it’s mine! There’s nothing quite like biting into a sun-ripened, juicy tomato you’ve grown yourself. But let’s be honest, sometimes our tomato plants seem to have other ideas, producing a measly handful of fruit despite our best efforts.
For centuries, gardeners have been experimenting with ways to coax more tomatoes from their plants. From ancient Incan agricultural techniques to modern-day hydroponics, the quest to maximize tomato production has been a constant. Think about it – tomatoes, originating in South America, were carefully cultivated and improved over generations, eventually making their way to Europe and then the rest of the world. Each culture has added its own twist to tomato growing, resulting in a wealth of knowledge we can tap into today.
That’s why I’ve put together this guide filled with easy-to-implement DIY tricks and hacks. Whether you’re a seasoned gardener or just starting out, these tips will help you understand the secrets to abundant tomato harvests. We’ll cover everything from soil preparation and pruning techniques to watering strategies and pest control, all designed to help you get the most out of your tomato plants. Because let’s face it, who wouldn’t want a bumper crop of delicious, homegrown tomatoes to enjoy all summer long? Let’s get started!
Maximize Your Tomato Harvest: A DIY Guide to Tomato Trellising and Pruning
Hey fellow gardeners! Are you dreaming of a bountiful tomato harvest, overflowing with juicy, sun-ripened goodness? I know I am! But sometimes, our tomato plants need a little help to reach their full potential. That’s where trellising and pruning come in. These techniques not only support your plants but also improve air circulation, reduce disease, and ultimately, lead to more tomatoes! Let’s dive into how you can maximize your tomato production with these simple DIY methods.
Why Trellis and Prune Your Tomatoes?
Before we get started, let’s quickly understand why trellising and pruning are so beneficial:
* Improved Air Circulation: Trellising lifts the plant off the ground, allowing air to circulate freely. This helps to dry out the leaves quickly after rain or watering, reducing the risk of fungal diseases like blight.
* Better Sunlight Exposure: By supporting the plant vertically, trellising ensures that all parts of the plant receive adequate sunlight. Sunlight is crucial for photosynthesis, which fuels tomato production.
* Easier Harvesting: No more bending over and searching through a tangled mess of vines! Trellised tomatoes are easier to spot and harvest.
* Reduced Disease: Keeping the foliage off the ground minimizes contact with soil-borne diseases. Pruning further enhances air circulation and removes potential disease entry points.
* Increased Yield: By directing the plant’s energy into fruit production rather than vegetative growth, trellising and pruning can significantly increase your tomato yield.
Choosing the Right Trellis System
There are several trellising options available, each with its own pros and cons. Here are a few popular choices:
* Stake Trellising: This is the simplest and most economical method. You simply drive a sturdy stake into the ground next to the tomato plant and tie the main stem to the stake as it grows.
* Cage Trellising: Tomato cages are readily available at garden centers. They provide good support but can be flimsy and may not be strong enough for large, indeterminate tomato varieties.
* Florida Weave Trellising: This method involves driving stakes into the ground in a row and weaving twine between the stakes to support the plants. It’s a good option for rows of tomatoes.
* Suspended Trellising: This involves hanging strings or wires from an overhead structure and tying them to the tomato plants. It’s a great option for greenhouses or high tunnels.
For this guide, I’m going to focus on **stake trellising** and **cage trellising** as they are the most accessible and easiest to implement for most home gardeners.
Section 1: Stake Trellising – A Simple and Effective Method
Stake trellising is my go-to method for determinate tomato varieties (those that grow to a certain size and then stop). It’s simple, inexpensive, and effective.
Materials You’ll Need:
* Sturdy stakes (at least 6 feet tall) – I prefer wooden stakes, but metal or bamboo stakes will also work.
* Soft twine or plant ties – Avoid using wire, as it can damage the plant stems.
* Hammer or mallet (for driving the stakes into the ground)
Step-by-Step Instructions:
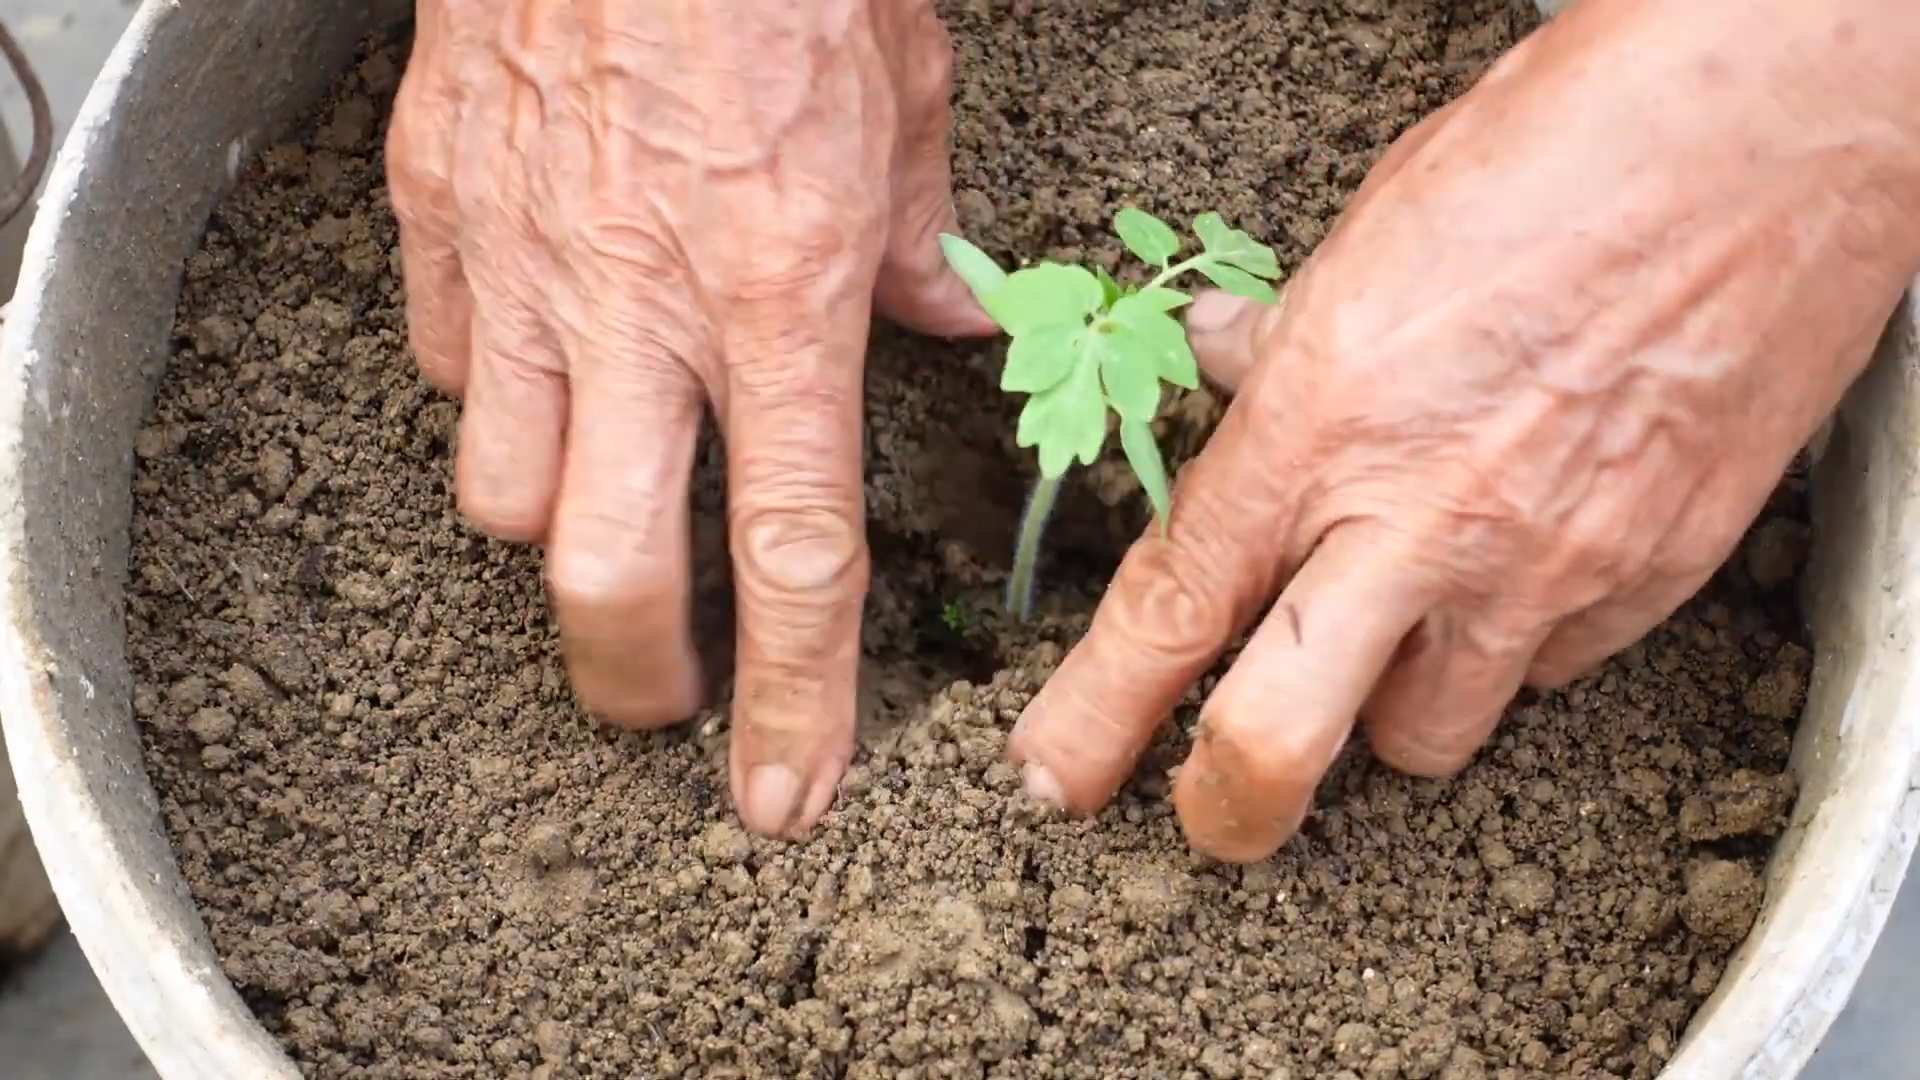
1. Plant Your Tomato Seedling: First, plant your tomato seedling in your garden bed or container. Make sure the soil is well-draining and amended with compost or other organic matter.
2. Insert the Stake: Immediately after planting, drive the stake into the ground about 2-3 inches away from the tomato plant. Be careful not to damage the roots. The stake should be deep enough to provide stable support. I usually aim for at least a foot deep.
3. Tie the Main Stem: As the tomato plant grows, gently tie the main stem to the stake using soft twine or plant ties. Make sure the ties are loose enough to allow for stem growth and prevent girdling. I usually tie the stem every 6-8 inches.
4. Continue Tying: Continue tying the main stem to the stake as the plant grows taller. Regularly check the ties to ensure they are not too tight and adjust them as needed.
5. Prune as Needed: While stake trellising is simple, it often requires more pruning to maintain a single or double leader. We’ll cover pruning in more detail later.
Section 2: Cage Trellising – A Convenient Option
Cage trellising is a great option for both determinate and indeterminate tomato varieties. It provides good support and requires less pruning than stake trellising.
Materials You’ll Need:
* Tomato cages (choose sturdy cages that are tall enough for your tomato variety)
* Optional: Stakes for extra support (especially for indeterminate varieties)
Step-by-Step Instructions:
1. Plant Your Tomato Seedling: Plant your tomato seedling in your garden bed or container, just like with stake trellising.
2. Place the Cage: Immediately after planting, place the tomato cage over the seedling. Gently spread the branches of the seedling to fit inside the cage.
3. Secure the Cage (Optional): For indeterminate varieties or in windy areas, you may want to secure the cage to the ground with stakes. This will prevent the cage from tipping over under the weight of the plant.
4. Guide the Branches: As the tomato plant grows, gently guide the branches through the openings in the cage. This will help to keep the plant contained and prevent it from sprawling.
5. Prune as Needed: Cage trellising generally requires less pruning than stake trellising, but you may still want to remove suckers (more on that later) to improve air circulation and direct energy into fruit production.
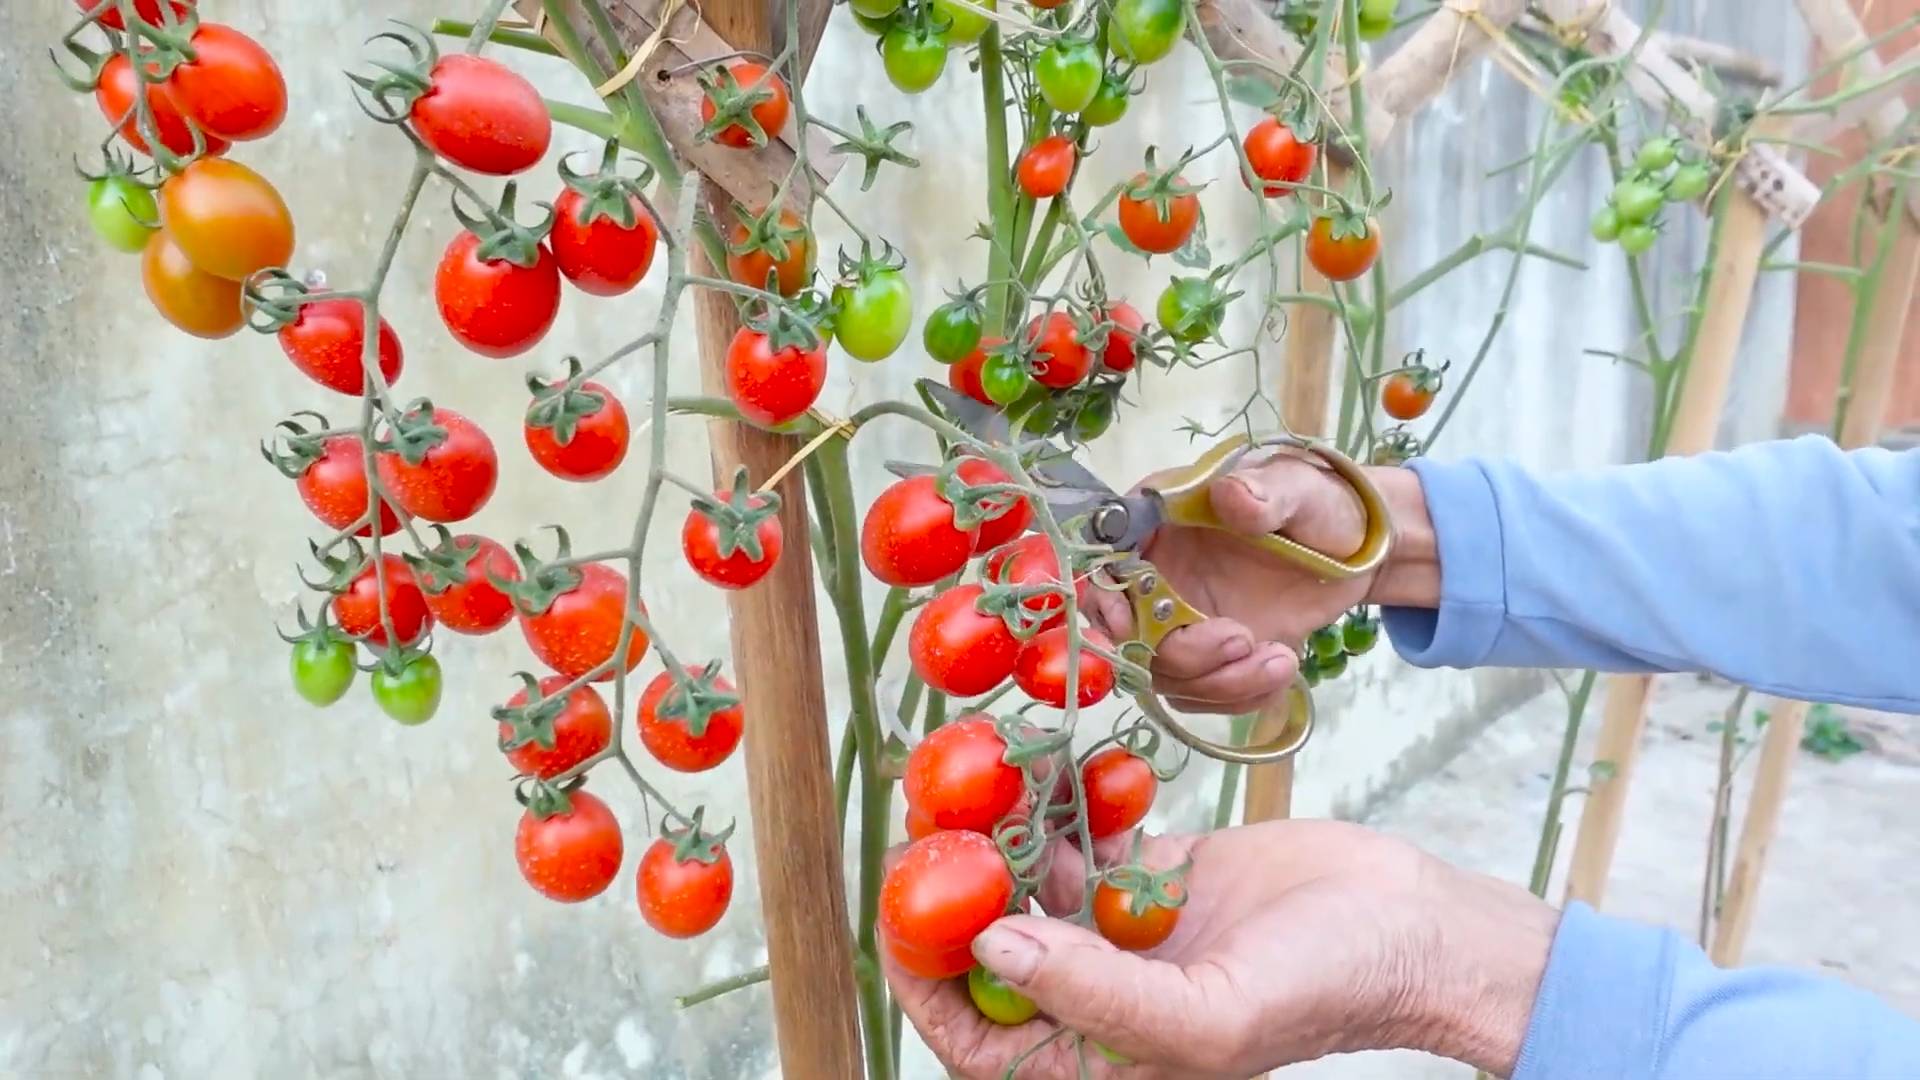
Section 3: The Art of Tomato Pruning
Now that we’ve covered trellising, let’s talk about pruning. Pruning is the process of removing unwanted growth from the tomato plant to improve air circulation, reduce disease, and increase fruit production.
Understanding Tomato Growth Habits
Before you start pruning, it’s important to understand the different growth habits of tomato plants:
* Determinate Tomatoes: These tomatoes grow to a certain size and then stop. They produce all of their fruit at once and are often used for canning. Determinate tomatoes generally require less pruning.
* Indeterminate Tomatoes: These tomatoes continue to grow and produce fruit throughout the growing season. They require more pruning to maintain their shape and prevent them from becoming overgrown.
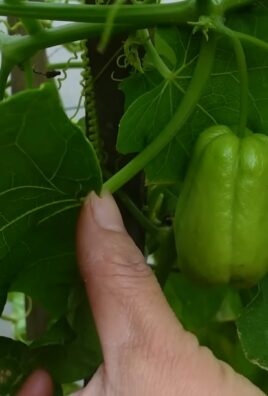
Identifying Suckers
The key to tomato pruning is identifying and removing “suckers.” Suckers are small shoots that grow in the “crotch” between the main stem and a branch. They are essentially new stems that will produce their own leaves, flowers, and fruit. If left unchecked, suckers can quickly turn your tomato plant into a tangled mess.
Pruning Techniques
Here are a few common pruning techniques:
* Removing Suckers: The most common pruning technique is to remove suckers. Simply pinch or cut them off with your fingers or pruning shears. It’s best to remove suckers when they are small (2-3 inches long) to avoid stressing the plant.
* Topping the Plant: For indeterminate tomatoes, you can “top” the plant towards the end of the growing season. This involves cutting off the top of the main stem to encourage the plant to focus its energy on ripening the existing fruit.
* Removing Yellowing or Diseased Leaves: Regularly remove any yellowing or diseased leaves to improve air circulation and prevent the spread of disease.
Pruning for Stake Trellising
When using stake trellising, I typically prune my tomato plants to a single or double leader. This means I remove all of the suckers except for one or two that I allow to grow into additional main stems. This helps to keep the plant manageable and allows for better air circulation.
Pruning for Cage Trellising
When using cage trellising, I generally prune less aggressively. I still remove suckers that are growing near the base of the plant to improve air circulation, but I allow more suckers to grow higher up in the cage. This helps to fill out the cage and maximize fruit production.
Section 4: Tips for Success
Here are a few additional tips to help you maximize your tomato harvest:
* Choose the Right Tomato Variety: Select tomato varieties that are well-suited to your climate and growing conditions.
* Start with Healthy Seedlings: Start your tomato seedlings indoors 6-8 weeks before the last frost or purchase healthy seedlings from a reputable nursery.
* Provide Adequate Sunlight: Tomatoes need at least 6-8 hours of sunlight per day.
* Water Regularly: Water your tomato plants deeply and regularly, especially during hot, dry weather. Avoid overhead watering, as this can promote fungal diseases.
* Fertilize Properly: Fertilize your tomato plants regularly with a balanced fertilizer or a fertilizer specifically formulated for tomatoes.
* Monitor for Pests and Diseases: Regularly inspect your tomato plants for
Conclusion
So, there you have it! This simple, yet incredibly effective DIY trick to maximize tomato production is a game-changer for any gardener, whether you’re a seasoned pro or just starting out. We’ve walked you through the process, highlighting the science behind why it works and offering practical tips to ensure your success.
But why is this a must-try? Because it’s more than just a gardening hack; it’s an investment in your harvest. Imagine baskets overflowing with juicy, sun-ripened tomatoes, far exceeding what you thought possible. Think of the delicious sauces, salads, and sandwiches you can create, all thanks to your own green thumb and this clever technique. This method isn’t just about quantity; it’s about quality. By encouraging stronger root systems and healthier plants, you’ll be rewarded with tomatoes that are bursting with flavor and packed with nutrients.
Beyond the basic method, there’s room for experimentation. Consider adding a small amount of bone meal to the planting hole to further boost phosphorus levels, which are crucial for root development and flowering. If you’re dealing with acidic soil, a sprinkle of lime can help balance the pH, creating a more favorable environment for your tomato plants. For those in hotter climates, providing some afternoon shade can prevent sunscald and keep your plants thriving. You can also adapt this technique for container gardening, just be sure to choose a large enough pot to accommodate the expanded root system.
Don’t be afraid to get your hands dirty and try this out! The beauty of gardening is in the learning process, and every experiment, successful or not, brings you closer to becoming a more skilled and knowledgeable gardener. We are confident that this DIY trick will significantly improve your tomato yield and the overall health of your plants.
We’re eager to hear about your experiences! Did you notice a significant increase in your tomato production? Did you try any variations on the method? Share your stories, tips, and photos in the comments below. Let’s create a community of tomato-growing enthusiasts and learn from each other’s successes (and even the occasional mishaps!). Your feedback will not only help other gardeners but also inspire us to continue sharing valuable gardening tips and tricks. So, grab your gardening gloves, head out to your garden, and get ready to witness the amazing power of this simple DIY technique. Happy gardening, and may your tomato harvest be bountiful!
Frequently Asked Questions (FAQ)
What exactly does this DIY trick do to maximize tomato production?
This trick primarily focuses on encouraging a more robust root system in your tomato plants. By planting the seedling deeper than usual and removing the lower leaves, you’re burying a portion of the stem. This buried stem then develops into roots, effectively expanding the plant’s ability to absorb water and nutrients from the soil. A larger, healthier root system translates to a stronger, more productive plant that can support a heavier yield of tomatoes. It also helps the plant become more resilient to drought and other environmental stresses.
How deep should I plant the tomato seedling?
You should aim to bury approximately two-thirds of the tomato seedling’s stem. Remove the lower leaves that would be buried underground. The goal is to leave only the top few sets of leaves above the soil line. This ensures that a significant portion of the stem is underground, ready to develop into roots.
What kind of soil is best for this technique?
While this technique works well with most soil types, well-draining soil is crucial. Tomato plants don’t like to sit in soggy soil, as this can lead to root rot. Amend your soil with compost or other organic matter to improve drainage and fertility. If you have heavy clay soil, consider adding sand or perlite to improve drainage. A slightly acidic soil pH (around 6.0 to 6.8) is ideal for tomato plants.
When is the best time to transplant my tomato seedlings using this method?
The best time to transplant your tomato seedlings is after the last frost in your area. Ensure the soil has warmed up to at least 60°F (15°C). Planting too early in cold soil can stunt the growth of your seedlings. Harden off your seedlings for a week or so before transplanting them by gradually exposing them to outdoor conditions.
Can I use this technique for all types of tomato plants?
Yes, this technique is generally suitable for all types of tomato plants, including determinate (bush) and indeterminate (vining) varieties. However, keep in mind that indeterminate varieties will require staking or caging to support their growth.
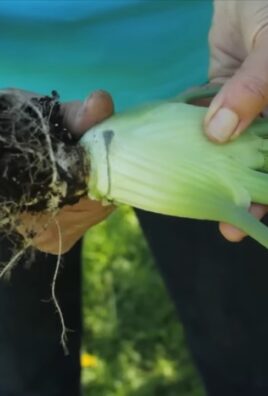
What if the buried stem starts to rot?
While rare, stem rot can occur if the soil is consistently waterlogged. To prevent this, ensure your soil is well-draining and avoid overwatering. If you notice any signs of rot, such as discoloration or softening of the stem, gently remove the affected soil and allow the area to dry out. You can also apply a fungicide specifically designed for tomatoes.
How often should I water my tomato plants after transplanting?
Water your tomato plants deeply and regularly, especially during dry periods. Aim to keep the soil consistently moist but not waterlogged. Water at the base of the plant to avoid wetting the foliage, which can increase the risk of fungal diseases. Mulching around the plants can help retain moisture and suppress weeds.
What kind of fertilizer should I use for my tomato plants?
Use a balanced fertilizer specifically formulated for tomatoes. Look for a fertilizer with a higher phosphorus content (the middle number) to promote root development and flowering. Avoid over-fertilizing, as this can lead to excessive foliage growth at the expense of fruit production. Follow the instructions on the fertilizer package carefully.
How long does it take to see results from this technique?
You should start to see noticeable results within a few weeks of transplanting. The plants will appear healthier and more vigorous, and you may notice an increase in flowering and fruit set. The exact timing will depend on factors such as the variety of tomato, the growing conditions, and the overall health of the plant.
Can I use this method in containers?
Yes, you can definitely use this method in containers. Choose a large container (at least 10 gallons) to provide ample space for the expanded root system. Ensure the container has drainage holes to prevent waterlogging. Use a high-quality potting mix and follow the same planting instructions as for in-ground planting. Container-grown tomatoes may require more frequent watering and fertilization than those grown in the ground.
What are some common problems I might encounter when growing tomatoes, and how can I address them?
Some common problems include blossom end rot (caused by calcium deficiency), tomato hornworms (large green caterpillars that eat the foliage), and fungal diseases such as early blight and septoria leaf spot. Blossom end rot can be prevented by ensuring consistent watering and adding calcium to the soil. Tomato hornworms can be hand-picked or treated with Bacillus thuringiensis (Bt). Fungal diseases can be prevented by providing good air circulation, avoiding overhead watering, and applying a fungicide if necessary.
What if my tomato plants are not producing fruit?
There are several reasons why your tomato plants might not be producing fruit. These include insufficient sunlight, lack of pollination, nutrient deficiencies, and extreme temperatures. Ensure your plants are getting at least 6-8 hours of sunlight per day. Gently shake the plants to encourage pollination. Fertilize with a balanced tomato fertilizer. Protect the plants from extreme heat or cold.
How do I know when my tomatoes are ripe?
The color of the tomato will change from green to the mature color for that variety (red, yellow, orange, etc.). The tomato should also feel slightly soft to the touch. Gently twist the tomato from the vine; if it comes off easily, it’s ripe.
Can I save seeds from my tomatoes to plant next year?
Yes, you can save seeds from heirloom tomato varieties. However, hybrid tomato varieties will not produce true-to-type seeds, meaning the offspring may not have the same characteristics as the parent plant. To save seeds, scoop out the seeds and pulp from a ripe tomato and ferment them in a jar of water for a few days. This will remove the gelatinous coating around the seeds. Rinse the seeds thoroughly and dry them on a paper towel. Store the dried seeds in an airtight container in a cool, dark place.
Leave a Comment