
Basil care in a sunny kitchen doesn’t have to be a daunting task! Imagine stepping into your kitchen, the aroma of fresh basil filling the air, ready to elevate your next culinary masterpiece. But what if I told you that achieving this fragrant dream is easier than you think, even if you’re a complete beginner? For centuries, basil has been cherished not only for its culinary uses but also for its medicinal properties and even its symbolic significance in various cultures, representing love and good fortune.
However, many people struggle to keep their basil plants thriving, especially when confined to the indoors. Yellowing leaves, leggy growth, and a lack of that intense, characteristic flavor are common complaints. That’s where these simple, yet effective, DIY tricks come in! I’m going to share some of my favorite hacks for ensuring your basil care in a sunny kitchen is a resounding success. These tips will help you overcome common challenges, maximize your yield, and enjoy a constant supply of fresh, flavorful basil right at your fingertips. Get ready to transform your kitchen into a basil-growing haven!
DIY: From Kitchen Counter to Thriving Basil Plant
Okay, so you’ve got a basil plant, maybe from the grocery store, maybe a little seedling you nurtured. And you want it to *thrive* on your sunny kitchen counter, not just survive. I get it! I’ve been there. Basil can be a bit finicky, but with a few simple tricks, you can have a constant supply of fresh, fragrant leaves for all your culinary adventures. Let’s dive in!
Understanding Basil’s Needs
Before we get our hands dirty, let’s talk about what basil *really* wants. Think of it as understanding your plant’s love language.
* Sunlight: Basil is a sun-worshipper. It needs at least 6-8 hours of direct sunlight per day. A south-facing window is ideal, but a bright east or west-facing window can also work. If you don’t have enough natural light, consider using a grow light.
* Watering: Basil likes consistently moist soil, but *not* soggy. Overwatering is a common basil killer. The key is to water when the top inch of soil feels dry to the touch.
* Soil: Well-draining soil is crucial. A good potting mix is your best bet. Avoid using garden soil, as it can be too heavy and compact.
* Temperature: Basil loves warmth. Aim for temperatures between 65-80°F (18-27°C). Avoid placing your basil plant near drafts or cold windows.
* Air Circulation: Good air circulation helps prevent fungal diseases. Make sure your basil plant has enough space around it and avoid overcrowding.
* Nutrients: Basil is a relatively heavy feeder. Regular fertilization will keep it happy and productive.
The DIY Basil Care Hack: A Step-by-Step Guide
This isn’t just about watering and hoping for the best. We’re going to create the *perfect* environment for your basil to flourish.
1. Choosing the Right Pot:
* Why it matters: The pot size and material directly impact drainage and root health.
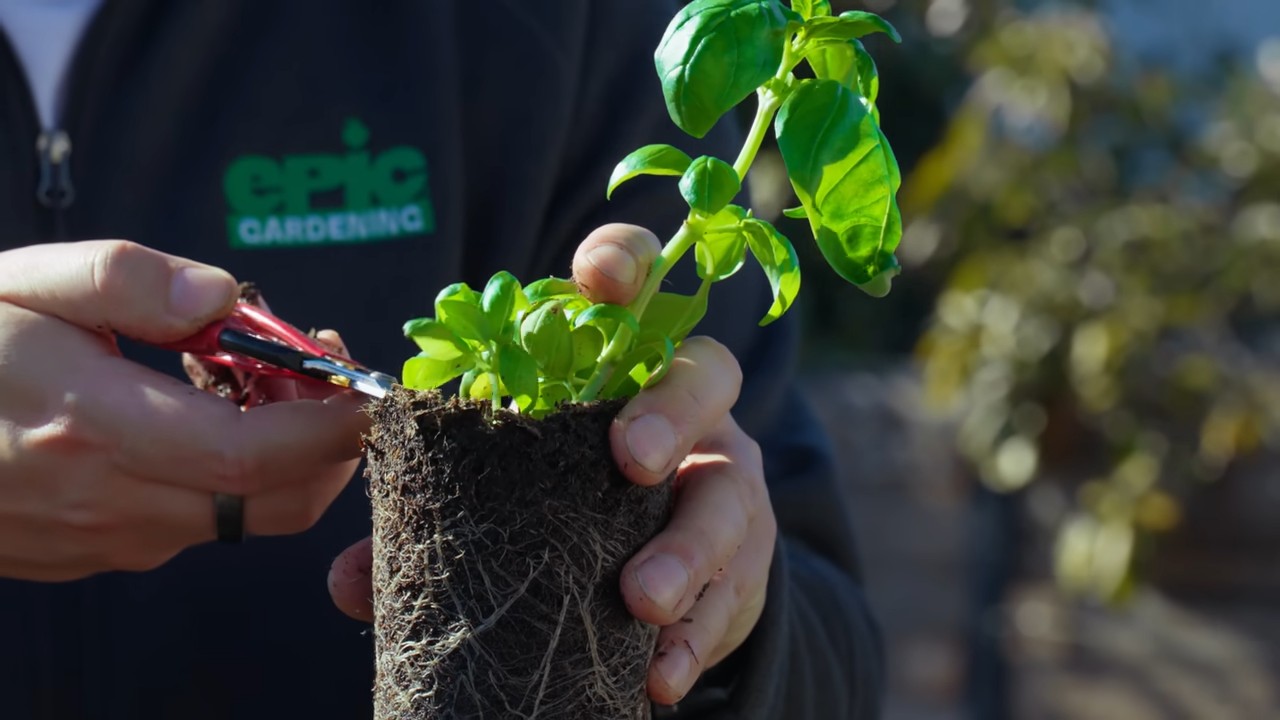
* What to do: If you bought your basil in a small nursery pot, it’s likely root-bound. Gently remove the basil from its current container. Choose a pot that’s at least 6 inches in diameter (bigger is better!) and has drainage holes. Terracotta pots are great because they allow the soil to breathe, but plastic pots work too. Just make sure they have drainage.
* Pro Tip: Before repotting, gently loosen the roots with your fingers. This encourages them to spread out and grow into the new soil.
2. Preparing the Soil:
* Why it matters: The right soil provides essential nutrients and drainage.
* What to do: Use a high-quality potting mix. I like to add a handful of perlite to improve drainage. Mix the perlite thoroughly into the potting mix.
* Pro Tip: Moisten the potting mix slightly before filling the pot. This helps prevent air pockets and ensures even moisture distribution.
3. Repotting Your Basil:
* Why it matters: Giving your basil more space to grow is essential for its health and productivity.
* What to do:
1. Fill the new pot with potting mix, leaving about an inch of space at the top.
2. Create a well in the center of the soil.
3. Gently place the basil plant in the well.
4. Fill in around the plant with more potting mix, gently pressing down to secure it.
5. Water thoroughly until water drains out of the drainage holes.
* Pro Tip: Don’t bury the stem too deep. The top of the root ball should be level with the soil surface.
4. Finding the Perfect Sunny Spot:
* Why it matters: Sunlight is food for your basil!
* What to do: Place your basil plant in the sunniest spot in your kitchen. A south-facing window is ideal. If you don’t have enough natural light, supplement with a grow light.
* Pro Tip: Rotate your basil plant every few days to ensure even growth. This prevents it from leaning towards the light.
5. Watering Like a Pro:
* Why it matters: Consistent moisture is key, but overwatering is a common mistake.
* What to do: Water your basil plant when the top inch of soil feels dry to the touch. Water thoroughly until water drains out of the drainage holes. Avoid getting water on the leaves, as this can promote fungal diseases.
* Pro Tip: Use a watering can with a long spout to water directly at the base of the plant.
6. Fertilizing for Growth:
* Why it matters: Basil needs nutrients to thrive.
* What to do: Fertilize your basil plant every 2-4 weeks with a balanced liquid fertilizer. Follow the instructions on the fertilizer label.
* Pro Tip: Dilute the fertilizer to half strength to avoid burning the roots.
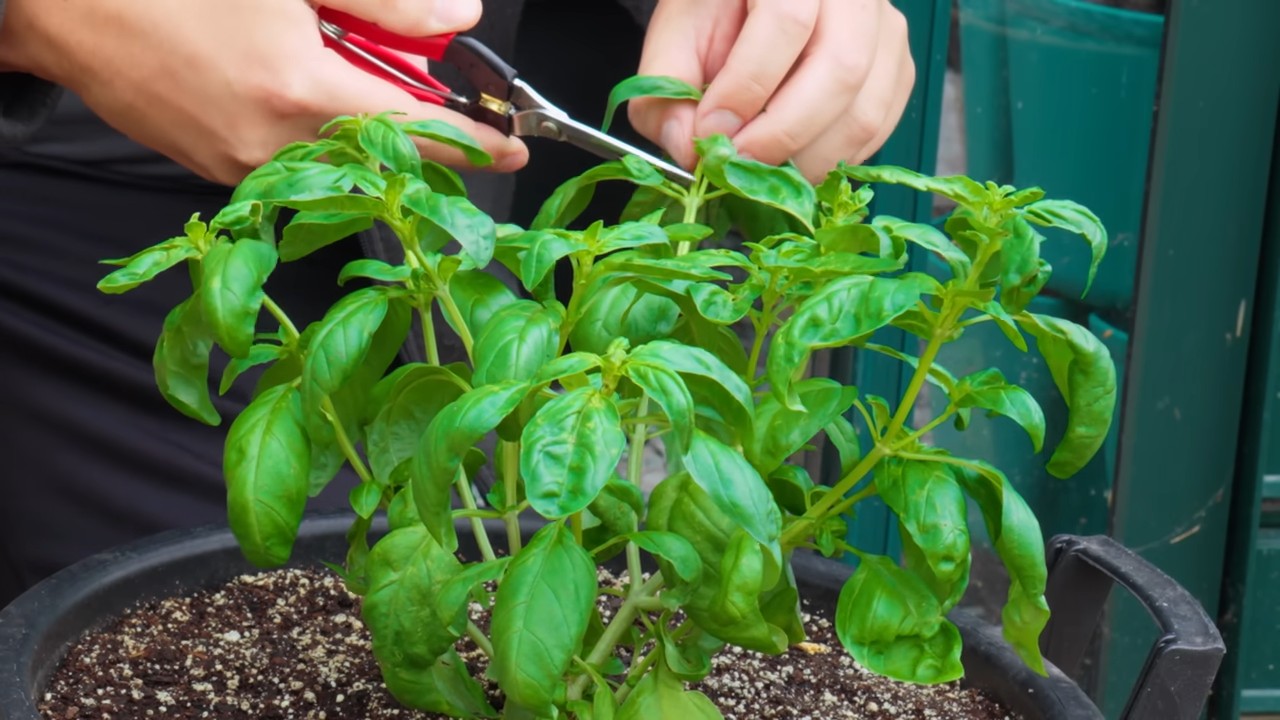
7. Pruning for Bushiness:
* Why it matters: Pruning encourages the plant to grow bushier and produce more leaves.
* What to do: Pinch off the top sets of leaves regularly, especially when the plant starts to flower. This will encourage the plant to produce more side shoots and leaves.
* Pro Tip: When pruning, cut just above a set of leaves. This will encourage new growth from that point.
8. Dealing with Pests and Diseases:
* Why it matters: Pests and diseases can quickly ruin your basil plant.
* What to do: Inspect your basil plant regularly for pests and diseases. Common pests include aphids, spider mites, and whiteflies. Common diseases include fungal diseases like powdery mildew.
* Pro Tip: If you find pests, try spraying the plant with insecticidal soap. For fungal diseases, improve air circulation and avoid getting water on the leaves. You can also use a fungicide if necessary.
9. Harvesting Your Bounty:
* Why it matters: Harvesting encourages continued growth and provides you with fresh basil!
* What to do: Harvest basil leaves as needed. Pinch off the top sets of leaves or cut entire stems.
* Pro Tip: Harvest in the morning, when the essential oils are most concentrated. This will give you the best flavor.
Troubleshooting Common Basil Problems
Even with the best care, sometimes things go wrong. Here’s how to troubleshoot some common basil problems:
* Yellowing Leaves: This can be caused by overwatering, underwatering, nutrient deficiencies, or pests. Check the soil moisture, fertilize if necessary, and inspect for pests.
* Drooping Leaves: This is usually caused by underwatering. Water thoroughly and the leaves should perk up within a few hours.
* Brown Spots on Leaves: This can be caused by fungal diseases or sunburn. Improve air circulation, avoid getting water on the leaves, and move the plant to a less sunny location if necessary.
* Leggy Growth: This is usually caused by insufficient light. Move the plant to a sunnier location or supplement with a grow light.
Extra Tips for Basil Success
* Succession Planting: Plant new basil seeds every few weeks to ensure a continuous supply of fresh basil.
* Pinch Off Flowers: Basil plants will eventually flower, which signals the end of their vegetative growth. Pinch off the flowers to encourage the plant to produce more leaves.
* Propagate from Cuttings: You can easily propagate basil from cuttings. Simply take a cutting from a healthy stem and place it in water. Roots will develop within a few weeks.
* Enjoy Your Basil! Use your fresh basil in all your favorite recipes. It’s delicious in pesto, pasta sauces, salads, and more.
By following these steps, you’ll be well on your way to having a thriving basil plant right on your kitchen counter. Happy growing!
Conclusion
So, there you have it! Transforming your sunny kitchen into a thriving basil haven is not only achievable but incredibly rewarding. This simple DIY trick, focusing on optimizing light and humidity, is a game-changer for anyone who’s struggled to keep their basil plants happy and productive indoors. Forget those leggy, pale basil sprigs of the past; with this method, you’ll be harvesting vibrant, fragrant leaves all season long.
Why is this a must-try? Because it addresses the two most common challenges faced when growing basil indoors: insufficient light and inadequate humidity. By strategically positioning your basil near a sunny window and creating a mini-greenhouse effect with a simple humidity dome (a plastic bag or repurposed container works wonders!), you’re providing the ideal environment for your basil to flourish. This means more flavorful pesto, fresher Caprese salads, and a constant supply of aromatic leaves for all your culinary creations.
But don’t stop there! Experiment with different variations to find what works best for your specific environment. If your kitchen is particularly dry, consider using a small humidifier near your basil plants. You could also try grouping several basil plants together, as they naturally create a more humid microclimate. For those with less-than-ideal sunlight, supplementing with a grow light can make a significant difference. Remember to rotate your basil plants regularly to ensure even light exposure on all sides. Another great tip is to use a well-draining potting mix specifically formulated for herbs to prevent root rot. You can even add a slow-release fertilizer to the soil to provide your basil with a steady supply of nutrients.
This DIY trick isn’t just about growing basil; it’s about connecting with nature, learning about plant care, and enjoying the satisfaction of harvesting your own fresh herbs. It’s a small investment of time and effort that yields a huge return in flavor and enjoyment. Plus, it’s a fantastic way to add a touch of green to your kitchen and brighten up your living space.
We are confident that this method will revolutionize your indoor basil growing experience. We encourage you to try this DIY trick and see the difference for yourself. Don’t be afraid to experiment and adapt the technique to suit your specific needs and conditions.
Most importantly, we want to hear about your experiences! Share your photos, tips, and success stories in the comments below. Let us know what worked for you, what challenges you faced, and any variations you tried. Your feedback will help other readers and contribute to a community of thriving indoor basil growers. Let’s transform kitchens everywhere into fragrant, basil-filled havens! This simple **basil care** technique will make all the difference.
Frequently Asked Questions (FAQ)
Q: How much sunlight does my basil plant really need?
A: Basil thrives in bright, direct sunlight. Ideally, your basil plant should receive at least 6-8 hours of sunlight per day. A south-facing window is usually the best option, but east or west-facing windows can also work if they provide sufficient light. If you don’t have access to a sunny window, consider using a grow light to supplement the natural light. Without enough light, your basil plant will become leggy and produce fewer leaves.
Q: What kind of soil should I use for my basil plant?
A: Basil prefers well-draining soil that is rich in organic matter. A potting mix specifically formulated for herbs is a good choice. You can also amend regular potting soil with compost or other organic materials to improve drainage and fertility. Avoid using heavy, clay-based soils, as they can retain too much moisture and lead to root rot.
Q: How often should I water my basil plant?
A: Water your basil plant when the top inch of soil feels dry to the touch. Avoid overwatering, as this can also lead to root rot. When you water, water deeply, until water drains out of the bottom of the pot. Be sure to empty the saucer underneath the pot to prevent the plant from sitting in water. The frequency of watering will depend on factors such as the size of the pot, the type of soil, and the temperature and humidity of your kitchen.
Q: How can I increase the humidity around my basil plant?
A: Basil prefers a humid environment. If your kitchen is dry, you can increase the humidity around your basil plant by using a humidifier, placing the plant on a tray filled with pebbles and water (making sure the bottom of the pot doesn’t touch the water), or grouping several plants together. The humidity dome mentioned in the article is also a very effective way to create a humid microclimate around your basil plant.
Q: How do I harvest basil leaves without harming the plant?
A: The best way to harvest basil leaves is to pinch or cut them off just above a leaf node (the point where leaves grow out of the stem). This will encourage the plant to branch out and produce more leaves. Avoid removing more than one-third of the plant’s leaves at any one time. Regularly harvesting your basil plant will also help to prevent it from flowering, which can make the leaves taste bitter.
Q: My basil plant is flowering. What should I do?
A: If your basil plant starts to flower, pinch off the flower buds as soon as you see them. Flowering signals to the plant that it’s time to stop producing leaves and focus on reproduction. Removing the flower buds will encourage the plant to continue producing leaves. If the plant has already flowered extensively, you can still harvest the leaves, but they may have a slightly bitter taste.
Q: Why are the leaves on my basil plant turning yellow?
A: Yellowing leaves on a basil plant can be caused by several factors, including overwatering, underwatering, nutrient deficiencies, or pests. Check the soil moisture to make sure you’re not overwatering or underwatering. If the soil is dry, water the plant thoroughly. If the soil is wet, allow it to dry out before watering again. You can also fertilize the plant with a balanced fertilizer to address any nutrient deficiencies. Inspect the plant for pests, such as aphids or spider mites, and treat accordingly.
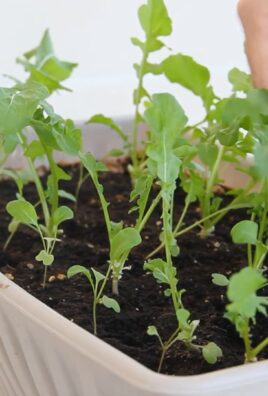
Q: Can I grow basil from seed indoors?
A: Yes, you can easily grow basil from seed indoors. Start the seeds in a seed-starting mix or potting soil. Keep the soil moist and warm, and provide plenty of light. Once the seedlings have developed a few sets of true leaves, you can transplant them into larger pots.
Q: What are some common pests that affect basil plants?
A: Some common pests that affect basil plants include aphids, spider mites, and whiteflies. These pests can suck the sap from the leaves, causing them to become yellow and stunted. You can control these pests by spraying the plant with insecticidal soap or neem oil. You can also try washing the pests off with a strong stream of water.
Q: How can I store fresh basil leaves?
A: Fresh basil leaves are best used immediately, but you can store them for a few days in the refrigerator. Wrap the leaves in a damp paper towel and place them in a plastic bag or container. You can also freeze basil leaves by blanching them for a few seconds in boiling water, then plunging them into ice water. Drain the leaves and freeze them in a single layer on a baking sheet. Once frozen, transfer the leaves to a freezer bag or container. Another option is to make basil pesto and freeze it in ice cube trays.

Leave a Comment