
Cleaner Home Tricks are the secret weapon you need to reclaim your weekends! Forget spending hours scrubbing and stressing – I’m about to share some game-changing DIY hacks that will leave your home sparkling with minimal effort.
For centuries, resourceful homemakers have passed down cleaning tips and tricks, often born out of necessity and a desire to maintain a healthy and welcoming environment. Think about it – before the age of mass-produced cleaning products, people relied on natural ingredients and clever techniques to keep their homes clean. These traditions, often rooted in cultural practices and local resources, are the foundation of many of the DIY solutions we’ll explore today.
Let’s face it, nobody *enjoys* cleaning. But a clean home is more than just aesthetically pleasing; it’s essential for our well-being. It reduces allergens, minimizes the spread of germs, and creates a more peaceful and productive living space. That’s why I’m so excited to show you how to achieve a spotless home without sacrificing your precious time. These cleaner home tricks are designed to be simple, affordable, and effective, using ingredients you probably already have in your pantry. Get ready to say goodbye to endless chores and hello to a cleaner, happier you!
DIY Toilet Bowl Cleaning Power-Up: Harpic Hacks for a Sparkling Throne
Okay, let’s be honest, cleaning the toilet isn’t anyone’s favorite chore. But a sparkling clean toilet bowl is a must-have for a hygienic and pleasant bathroom. And while Harpic is a fantastic product on its own, I’ve discovered some clever ways to boost its cleaning power and tackle even the most stubborn stains. Get ready to transform your toilet cleaning routine!
Understanding Harpic and Its Cleaning Power
Before we dive into the hacks, let’s quickly recap why Harpic is a go-to for many of us. It’s formulated with powerful cleaning agents designed to dissolve limescale, rust, and other tough stains that accumulate in the toilet bowl. It also disinfects, killing germs and bacteria, leaving your toilet not just clean, but truly hygienic.
Hack #1: The Overnight Soak for Stubborn Stains
This is my secret weapon for tackling those really tough, set-in stains that just won’t budge with regular cleaning. It requires a little patience, but the results are totally worth it.
What you’ll need:
* Harpic toilet cleaner (the original or your preferred variant)
* Toilet brush
* Gloves (essential for protecting your hands!)
Step-by-step instructions:
1. Apply Harpic generously: Squirt a generous amount of Harpic under the rim of the toilet bowl, ensuring it coats all surfaces, especially the stained areas. Don’t be shy! You want a good layer of the cleaner working its magic.
2. Let it soak overnight: This is the key! Leave the Harpic to soak overnight, or for at least 8 hours. This allows the powerful cleaning agents to penetrate and break down the stubborn stains.
3. Scrub thoroughly: The next morning (or after the soaking period), put on your gloves and grab your toilet brush. Scrub the entire bowl vigorously, paying extra attention to the areas where the stains were most prominent. You should see the stains lifting away easily.
4. Flush and admire: Flush the toilet to rinse away the cleaner and loosened stains. You should be left with a sparkling clean toilet bowl! If any stubborn residue remains, repeat the scrubbing process.
Hack #2: The Baking Soda Boost for Extra Cleaning Oomph
Baking soda is a natural cleaning powerhouse, and when combined with Harpic, it creates a fizzing action that helps to lift away dirt and grime. This is a great option for general cleaning and freshening up your toilet bowl.
What you’ll need:
* Harpic toilet cleaner
* Baking soda
* Toilet brush
* Gloves
Step-by-step instructions:
1. Sprinkle baking soda: Sprinkle about half a cup of baking soda into the toilet bowl, making sure to coat the sides and bottom.
2. Add Harpic: Squirt Harpic around the rim and into the bowl, on top of the baking soda. You’ll notice a fizzing reaction as the two ingredients combine.
3. Let it fizz: Allow the mixture to fizz for about 30 minutes. This gives the baking soda and Harpic time to work together to loosen dirt and stains.
4. Scrub and flush: Put on your gloves and scrub the toilet bowl thoroughly with your toilet brush. Then, flush the toilet to rinse away the cleaner and debris.
Hack #3: The Vinegar Power Wash for Limescale Removal
Vinegar is another natural cleaning agent that’s particularly effective at dissolving limescale. Combining it with Harpic creates a potent cleaning solution that can tackle even the toughest limescale buildup.
What you’ll need:
* Harpic toilet cleaner
* White vinegar
* Toilet brush
* Gloves
Step-by-step instructions:
1. Pour in vinegar: Pour about one cup of white vinegar into the toilet bowl.
2. Add Harpic: Squirt Harpic around the rim and into the bowl, on top of the vinegar.
3. Let it sit: Allow the mixture to sit for about 15-20 minutes.
4. Scrub and flush: Put on your gloves and scrub the toilet bowl thoroughly with your toilet brush, paying special attention to areas with limescale buildup. Then, flush the toilet to rinse away the cleaner and debris.
Hack #4: The Borax Booster for Disinfection and Stain Removal
Borax is a natural mineral with excellent cleaning and disinfecting properties. Adding it to Harpic can help to boost its stain-removing power and provide extra disinfection.
What you’ll need:
* Harpic toilet cleaner
* Borax
* Toilet brush
* Gloves
Step-by-step instructions:
1. Sprinkle Borax: Sprinkle about a quarter cup of Borax into the toilet bowl.
2. Add Harpic: Squirt Harpic around the rim and into the bowl, on top of the Borax.
3. Let it sit: Allow the mixture to sit for about 30 minutes.
4. Scrub and flush: Put on your gloves and scrub the toilet bowl thoroughly with your toilet brush. Then, flush the toilet to rinse away the cleaner and debris.
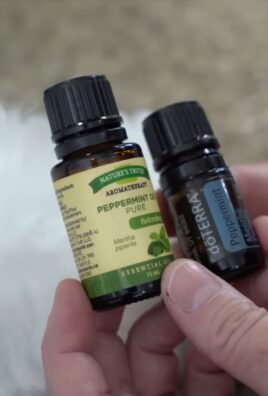
Hack #5: The Essential Oil Infusion for a Fresh Scent
While Harpic does a great job of cleaning, sometimes you want an extra boost of freshness. Adding a few drops of your favorite essential oil can leave your bathroom smelling amazing.
What you’ll need:
* Harpic toilet cleaner
* Essential oil (tea tree, lavender, eucalyptus, or lemon are good choices)
* Toilet brush
* Gloves
Step-by-step instructions:
1. Clean with Harpic: First, clean your toilet bowl as usual with Harpic.
2. Add essential oil: After flushing, add 5-10 drops of your chosen essential oil to the toilet bowl.
3. Let it sit: Allow the essential oil to sit in the bowl for a few minutes to infuse the water with its scent.
4. Flush again: Flush the toilet one more time to release the fragrance into the air.
Hack #6: Targeting the Toilet Rim for a Complete Clean
The rim of the toilet bowl is often overlooked, but it can harbor bacteria and grime. Here’s how to give it a thorough cleaning using Harpic.
What you’ll need:
* Harpic toilet cleaner
* Old toothbrush or small scrub brush
* Gloves
Step-by-step instructions:
1. Apply Harpic under the rim: Carefully squirt Harpic under the rim of the toilet bowl, ensuring it coats all surfaces.
2. Scrub with a brush: Use an old toothbrush or small scrub brush to scrub the underside of the rim, paying attention to any areas with buildup or stains.
3. Let it sit: Allow the Harpic to sit for about 15-20 minutes.
4. Rinse and flush: Rinse the rim thoroughly with water, using the toilet brush to help dislodge any remaining debris. Then, flush the toilet.
Important Safety Tips
* Always wear gloves: Harpic contains chemicals that can irritate your skin, so it’s essential to wear gloves when cleaning.
* Ventilate the bathroom: Open a window or turn on the exhaust fan to ensure proper ventilation while cleaning.
* Never mix Harpic with bleach: Mixing Harpic with bleach can create dangerous fumes.
* Keep out of reach of children and pets: Harpic is a chemical product and should be stored safely out of reach of children and pets.
* Read the product label: Always read and follow the instructions on the Harpic product label.
Maintaining a Clean Toilet Bowl
Once you’ve achieved a sparkling clean toilet bowl, it’s important to maintain it with regular cleaning. Here are a few tips:
* Clean your toilet bowl at least once a week: Regular cleaning will prevent stains and buildup from accumulating.
* Use a toilet bowl cleaner regularly: Use Harpic or another toilet bowl cleaner as part of your regular cleaning routine.
* Flush after each use: Flushing after each use will help to prevent stains from setting in.
* Consider using toilet bowl cleaning tablets: Toilet bowl cleaning tablets can help to keep your toilet bowl clean and fresh between cleanings.
Troubleshooting Common Toilet Bowl Problems
* Hard water stains: If you have hard water, you may notice stubborn stains in your toilet bowl. Try using vinegar or a limescale remover to tackle these stains.
* Rust stains: Rust stains can be caused by iron in your water supply. Try using a rust remover or a solution of lemon juice and salt to remove these stains.
* Mold and mildew: Mold and
Conclusion
So, there you have it! This simple yet incredibly effective DIY trick for a cleaner home is more than just a cleaning hack; it’s a game-changer for your living space and your well-being. We’ve shown you how to create a powerful, natural cleaning solution using ingredients you likely already have in your pantry. Forget about harsh chemicals and expensive store-bought cleaners – this method is not only budget-friendly but also environmentally conscious.
Why is this a must-try? Because it simplifies your cleaning routine, reduces your exposure to harmful substances, and leaves your home sparkling clean with a fresh, natural scent. Imagine the satisfaction of knowing you’re creating a healthier environment for yourself and your family, all while saving money and reducing waste. This DIY cleaner is a testament to the fact that effective cleaning doesn’t have to be complicated or expensive.
But the beauty of this DIY approach lies in its versatility. Feel free to experiment with different essential oils to create your signature scent. Lavender, lemon, eucalyptus, and tea tree oil are all excellent choices, each offering unique aromatherapy benefits in addition to their cleaning properties. You can also adjust the concentration of ingredients to suit your specific cleaning needs. For tougher stains, a slightly stronger solution might be necessary, while for everyday cleaning, a milder concentration will suffice.
Consider adding a tablespoon of borax to the mixture for extra cleaning power, especially for tackling stubborn grime in bathrooms or kitchens. Another variation involves infusing vinegar with citrus peels for a few weeks before using it in the cleaner. This adds a delightful citrusy aroma and enhances the cleaning properties of the vinegar.
We’re confident that once you try this DIY cleaner, you’ll never go back to store-bought alternatives. It’s a simple, effective, and sustainable way to maintain a cleaner home.
Don’t just take our word for it – give it a try! We encourage you to experiment with the recipe, find your perfect scent combination, and discover the joy of cleaning with natural ingredients.
And most importantly, we want to hear about your experience! Share your results, variations, and tips in the comments below. Let’s build a community of DIY cleaning enthusiasts and inspire each other to create healthier, happier homes. Your feedback will not only help others but also contribute to refining this already amazing DIY cleaner. So go ahead, embrace the power of DIY, and transform your cleaning routine today! Let us know how this DIY trick for a cleaner home has worked for you!
Frequently Asked Questions (FAQ)
What exactly are the benefits of using a DIY cleaner compared to store-bought options?
DIY cleaners offer a multitude of advantages. Firstly, they are significantly more cost-effective. You’re using ingredients you likely already have, avoiding the markup associated with commercial cleaning products. Secondly, you have complete control over the ingredients, eliminating exposure to harsh chemicals, artificial fragrances, and potentially harmful additives. This is particularly beneficial for individuals with sensitivities, allergies, or young children. Thirdly, DIY cleaners are environmentally friendly. You’re reducing plastic waste from packaging and minimizing the release of harmful chemicals into the environment. Finally, the satisfaction of creating your own cleaning solution is an added bonus!
Can I use this DIY cleaner on all surfaces in my home?
While this DIY cleaner is generally safe for most surfaces, it’s always a good idea to test it in an inconspicuous area first, especially on delicate materials like wood, marble, or granite. The vinegar content, while effective for cleaning, can potentially damage certain surfaces over time. For these surfaces, consider using a diluted solution or opting for a cleaner specifically designed for them. For example, a mixture of water and mild dish soap is often a safer choice for wood floors.
How long does this DIY cleaner last?
The shelf life of this DIY cleaner depends on the ingredients used. Generally, a vinegar-based cleaner will last for several months, as vinegar is a natural preservative. However, if you’re using fresh ingredients like citrus peels, the cleaner may have a shorter shelf life. It’s best to store the cleaner in a cool, dark place and check for any signs of spoilage, such as discoloration or an unusual odor. To maximize its shelf life, use distilled water and store it in an airtight container. We recommend making smaller batches to ensure freshness.
What essential oils are best to use in this DIY cleaner?
The best essential oils for your DIY cleaner depend on your personal preferences and the desired cleaning properties. Lavender is known for its calming scent and antibacterial properties. Lemon is a powerful degreaser and has a refreshing aroma. Tea tree oil is a potent antiseptic and antifungal agent. Eucalyptus is effective for disinfecting and has a stimulating scent. Peppermint is a natural insect repellent and has a refreshing aroma. Experiment with different combinations to find your favorite scent and cleaning power. Always use pure, high-quality essential oils for the best results.
Can I use this cleaner in a spray bottle?
Absolutely! In fact, using a spray bottle is the most convenient way to apply this DIY cleaner. Make sure to use a clean, empty spray bottle and label it clearly to avoid any confusion. A spray bottle allows you to easily target specific areas and control the amount of cleaner you’re using. It’s also a great way to distribute the cleaner evenly across surfaces.
What if I don’t have vinegar? Can I substitute it with something else?
While vinegar is a key ingredient in this DIY cleaner due to its acidity and cleaning properties, you can substitute it with lemon juice in a pinch. Lemon juice also has natural cleaning and disinfecting properties. However, keep in mind that lemon juice is more acidic than vinegar, so use it sparingly and test it on an inconspicuous area first. Another alternative is using a diluted solution of hydrogen peroxide, but be cautious as it can have a bleaching effect on some surfaces.
How do I deal with the vinegar smell?
The vinegar smell is a common concern when using vinegar-based cleaners. However, the smell typically dissipates quickly after the cleaner dries. To minimize the odor, you can add essential oils to the mixture. Citrus oils like lemon, orange, or grapefruit are particularly effective at masking the vinegar smell. You can also open windows and ventilate the area while cleaning. Another tip is to use distilled white vinegar, which has a milder odor than other types of vinegar.
Is this DIY cleaner safe for pets and children?
This DIY cleaner is generally safer for pets and children than store-bought cleaners, as it doesn’t contain harsh chemicals or artificial fragrances. However, it’s still important to exercise caution. Keep the cleaner out of reach of children and pets, and avoid spraying it directly on them. If your pet or child ingests the cleaner, contact a veterinarian or poison control center immediately. Essential oils can also be toxic to pets, so research which oils are safe to use around them.
Can I use this cleaner to clean my toilet?
Yes, this DIY cleaner can be used to clean your toilet. The vinegar and essential oils will help to disinfect and deodorize the toilet bowl. Simply spray the cleaner into the bowl, let it sit for a few minutes, and then scrub with a toilet brush. For tougher stains, you can add a tablespoon of baking soda to the bowl before spraying the cleaner.
What are some other uses for this DIY cleaner?
This DIY cleaner is incredibly versatile and can be used for a variety of cleaning tasks around the home. It’s effective for cleaning countertops, sinks, showers, toilets, floors, windows, and mirrors. You can also use it to clean appliances like refrigerators, ovens, and microwaves. It’s a great all-purpose cleaner that can replace many of your store-bought cleaning products.

Leave a Comment