
Growing Sweet Potatoes Apartment can seem like a far-fetched dream, especially if you’re picturing sprawling vines taking over your limited space. But guess what? I’m here to tell you that fresh, homegrown sweet potatoes are totally achievable, even without a backyard! For centuries, sweet potatoes have been a staple in diets around the world, from their origins in Central and South America to becoming a beloved comfort food in countless cultures. They’re packed with nutrients and offer a delicious, earthy sweetness that’s hard to resist.
But why bother with the effort of growing them yourself? Well, imagine biting into a sweet potato you nurtured from sprout to harvest, knowing exactly where it came from and what went into it. Plus, let’s be honest, store-bought sweet potatoes can sometimes be bland and disappointing. This DIY guide will unlock the secrets to successfully growing sweet potatoes apartment, transforming your windowsill or balcony into a mini sweet potato farm. I’ll share simple, step-by-step instructions and clever hacks to maximize your yield, regardless of your living situation. Get ready to enjoy the satisfaction of harvesting your own delicious, homegrown sweet potatoes – it’s easier than you think!
Growing Sweet Potatoes in Your Apartment: A Beginner’s Guide
Hey there, fellow plant enthusiasts! Ever thought about growing your own sweet potatoes, even without a sprawling garden? Well, guess what? You absolutely can! I’m going to walk you through the process of cultivating these delicious and nutritious tubers right in your apartment. It’s easier than you might think, and the satisfaction of harvesting your own homegrown sweet potatoes is truly rewarding.
Choosing Your Sweet Potato Variety
Before we dive into the nitty-gritty, let’s talk about sweet potato varieties. While most sweet potatoes will grow indoors, some are better suited for container gardening than others. Look for varieties that are known to be more compact or bush-like. Here are a few suggestions:
- Beauregard: A classic choice, known for its orange flesh and reliable growth.
- Garnet: Another popular option with vibrant red skin and sweet, moist flesh.
- Japanese Sweet Potato (Muraski): This variety has purple skin and white flesh. It tends to be drier and nuttier than orange varieties.
- Bush Porto Rico: As the name suggests, this is a bush-type sweet potato, making it ideal for containers.
I personally recommend starting with Beauregard or Garnet, as they are readily available and relatively easy to grow.
Sprouting Your Sweet Potato Slip
The first step in growing sweet potatoes is to sprout slips. Slips are the leafy shoots that grow from the sweet potato itself, and these are what you’ll plant in your container.
- Choose a Healthy Sweet Potato: Select a firm, unblemished sweet potato from your local grocery store or farmer’s market. Organic is always a good choice to avoid any growth inhibitors.
- Prepare the Sweet Potato: There are two main methods for sprouting slips:
- Water Method: Insert toothpicks around the middle of the sweet potato. Suspend the sweet potato in a jar or glass filled with water, ensuring that the bottom half is submerged. Place the jar in a warm, sunny location.
- Soil Method: Bury the sweet potato horizontally in a container filled with moist potting mix, leaving the top third exposed. Place the container in a warm, sunny location.
I prefer the water method because you can visually monitor the root and slip development.
- Wait for Sprouts: Be patient! It can take several weeks for sprouts to appear. Keep the water level consistent and change it every few days to prevent mold growth. For the soil method, keep the soil consistently moist.
- Harvest the Slips: Once the slips are 4-6 inches long, they’re ready to be harvested. Gently twist or cut them off the sweet potato.
- Root the Slips (Optional but Recommended): Place the harvested slips in a glass of water, ensuring that the bottom inch or two is submerged. This will encourage root development, which will give your slips a head start when you plant them in soil. Wait for the roots to grow to about an inch long.
Preparing Your Container and Soil
Now that you have your sweet potato slips, it’s time to prepare their new home!
- Choose a Large Container: Sweet potatoes need plenty of room to grow. Select a container that is at least 10-12 gallons in size. A larger container is always better, as it will allow the sweet potatoes to develop more fully. I recommend using a plastic container with drainage holes.
- Ensure Proper Drainage: Drainage is crucial to prevent root rot. Make sure your container has adequate drainage holes. If not, drill a few extra holes in the bottom.
- Select a Well-Draining Potting Mix: Use a high-quality potting mix that is well-draining and rich in organic matter. Avoid using garden soil, as it can be too heavy and compact for container gardening. I like to use a mix of potting soil, compost, and perlite.
- Fill the Container: Fill the container with the potting mix, leaving a few inches of space at the top.
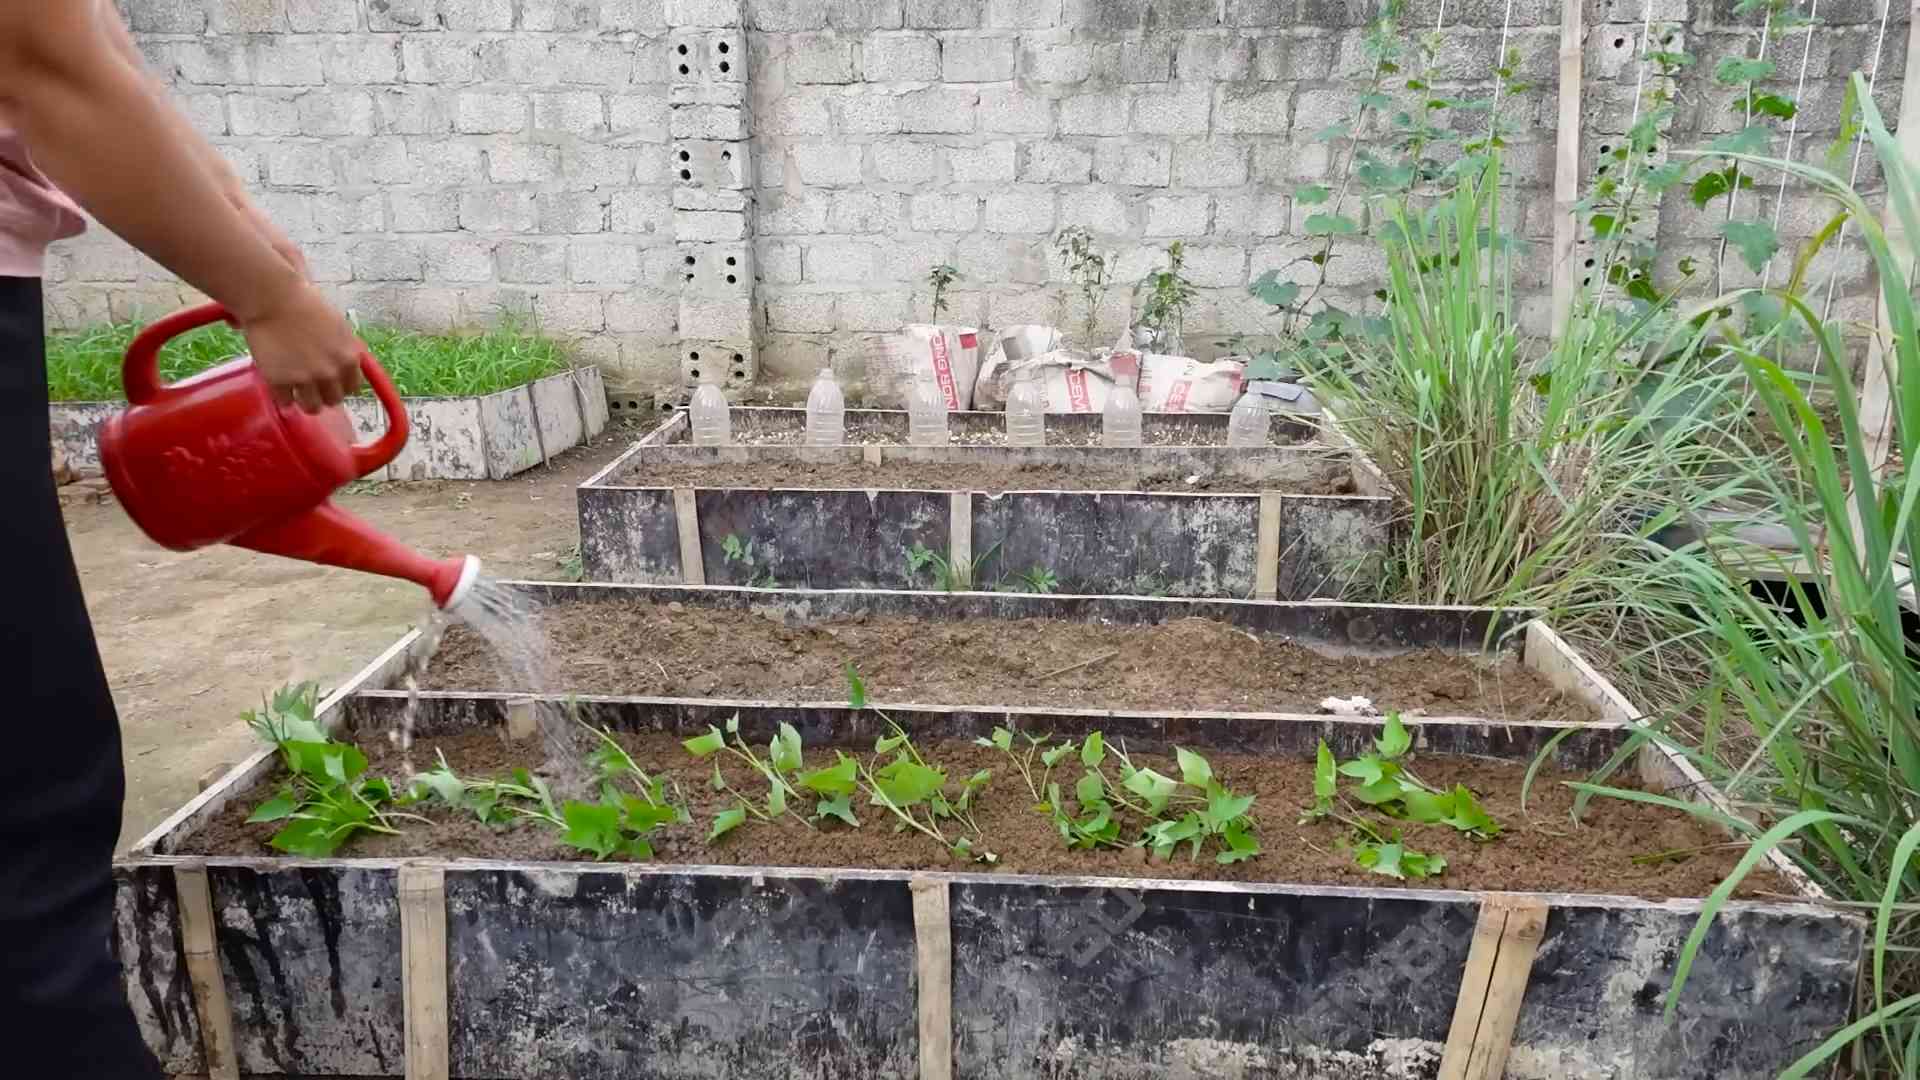
Planting Your Sweet Potato Slips
With your container ready, it’s time to plant your sweet potato slips!
- Water the Soil: Thoroughly water the potting mix in the container before planting. This will help to settle the soil and provide moisture for the slips.
- Plant the Slips: Dig small holes in the soil, spaced about 12 inches apart. Gently place the sweet potato slips in the holes, ensuring that the roots are covered with soil.
- Water Again: Water the newly planted slips gently but thoroughly.
- Provide Support (Optional): If your slips are particularly tall or leggy, you may want to provide them with some support, such as small stakes or trellises.
Caring for Your Sweet Potato Plants
Now comes the ongoing care to ensure your sweet potato plants thrive.
- Sunlight: Sweet potatoes need at least 6-8 hours of direct sunlight per day. Place your container in the sunniest spot in your apartment. If you don’t have enough natural sunlight, you can supplement with grow lights.
- Watering: Water your sweet potato plants regularly, keeping the soil consistently moist but not waterlogged. Check the soil moisture level daily and water when the top inch of soil feels dry to the touch.
- Fertilizing: Sweet potatoes are heavy feeders, so they need regular fertilization. Use a balanced liquid fertilizer every 2-3 weeks. Follow the instructions on the fertilizer label. I like to use a fertilizer that is specifically formulated for vegetables.
- Pruning: Pruning is not essential, but it can help to keep your plants tidy and encourage bushier growth. You can trim back any long or unruly vines.
- Pest Control: Keep an eye out for pests, such as aphids, spider mites, and whiteflies. If you notice any pests, treat them promptly with an insecticidal soap or neem oil.
- Temperature: Sweet potatoes thrive in warm temperatures, ideally between 70-85°F (21-29°C). Protect your plants from cold drafts and sudden temperature changes.
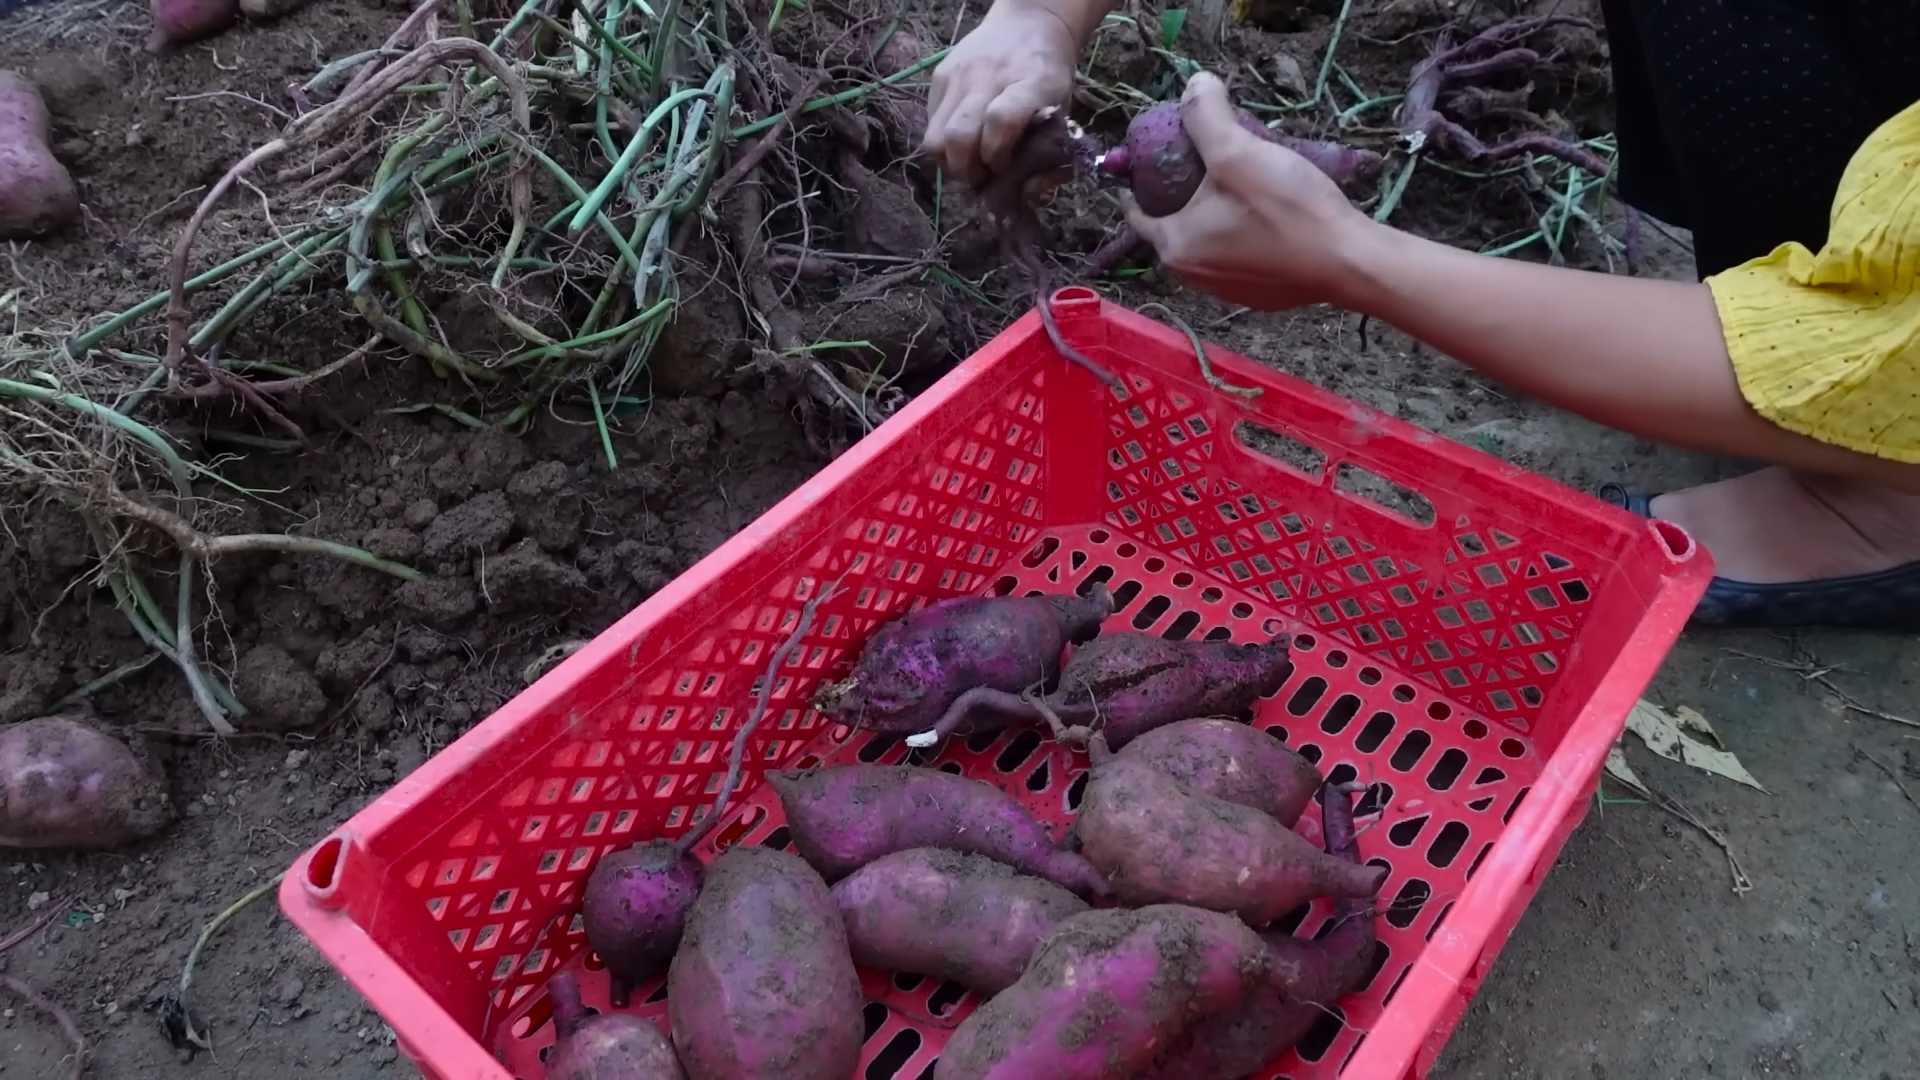
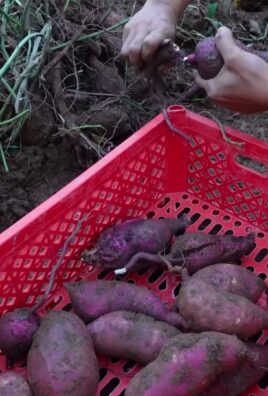
Harvesting Your Sweet Potatoes
The most exciting part! Harvesting your homegrown sweet potatoes.
- Timing: Sweet potatoes typically take 3-4 months to mature. You’ll know they’re ready to harvest when the leaves start to turn yellow and die back.
- Harvesting: Gently dig around the base of the plant, being careful not to damage the sweet potatoes. Use your hands to loosen the soil and carefully lift the sweet potatoes out of the container.
- Curing: Curing is an important step in the sweet potato harvesting process. It helps to improve the flavor and storage life of the sweet potatoes. To cure your sweet potatoes, place them in a warm, humid location (80-85°F or 27-29°C) for 7-10 days. A garage or shed can work well.
- Storing: After curing, store your sweet potatoes in a cool, dry, and dark place. They should last for several months.
Troubleshooting
Even with the best care, you might encounter some challenges. Here are a few common problems and how to address them:
- Yellowing Leaves: This could be a sign of overwatering, underwatering, or nutrient deficiency. Check the soil moisture level and adjust your watering accordingly. Fertilize your plants with a balanced fertilizer.
- Slow Growth: This could be due to insufficient sunlight, poor soil, or cold temperatures. Make sure your plants are getting enough sunlight and that the soil is well-draining and rich in nutrients. Keep your plants warm.
- Pests: Inspect your plants regularly for pests and treat them promptly with an appropriate insecticide.
- Root Rot: This is caused by overwatering and poor drainage. Make sure your container has adequate drainage holes and that the soil is well-draining. Avoid overwatering.
Enjoying Your Homegrown Sweet Potatoes
Congratulations! You’ve successfully grown sweet potatoes in your apartment. Now it’s time to enjoy the fruits (or rather, tubers) of your labor. Sweet potatoes can be baked, roasted, mashed, fried, or used in a variety of other dishes. They’re a delicious and nutritious addition to any meal.
I hope this guide has inspired you to try growing your own sweet potatoes. It’s a rewarding experience that will bring a little bit of the garden into your apartment. Happy growing!
Conclusion
So, there you have it! Growing sweet potatoes in an apartment might seem like a far-fetched dream, but with a little know-how and a dash of patience, you can transform your indoor space into a mini sweet potato farm. This DIY trick isn’t just about saving money; it’s about connecting with nature, even within the confines of your apartment walls. It’s about experiencing the satisfaction of nurturing a plant from sprout to harvest, and enjoying the unparalleled flavor of homegrown sweet potatoes.
Why is this a must-try? Because it’s surprisingly easy, incredibly rewarding, and adds a unique touch of green to your living space. Forget bland, store-bought sweet potatoes – imagine the vibrant orange flesh and subtly sweet taste of your own organically grown crop. Think of the conversations it will spark, the envy of your friends, and the sheer joy of sharing your harvest with loved ones.
But the fun doesn’t stop there! Feel free to experiment with different varieties of sweet potatoes. Beauregard, with its classic orange flesh, is always a reliable choice. But why not try a Japanese sweet potato with its purple skin and creamy white interior? Or perhaps a Garnet sweet potato, known for its deep red hue and moist texture? The possibilities are endless!
Consider using different containers as well. While a large pot is ideal, you can also use grow bags, repurposed buckets, or even a stylish planter that complements your apartment decor. Just ensure that your chosen container has adequate drainage to prevent waterlogging.
Another variation to explore is the use of different growing mediums. While a standard potting mix works well, you can also incorporate compost, perlite, or vermiculite to improve drainage and aeration. Experiment with different combinations to find what works best for your sweet potatoes and your growing environment.
Don’t be afraid to get creative with your support system. As your sweet potato vines grow, they’ll need something to climb on. A simple trellis, a bamboo stake, or even a repurposed ladder can provide the necessary support. You can even train the vines to grow along a windowsill or balcony railing, adding a touch of natural beauty to your apartment.
This DIY trick for growing sweet potatoes in an apartment is more than just a gardening project; it’s an adventure. It’s a chance to learn, to experiment, and to connect with the natural world in a meaningful way. So, what are you waiting for? Grab a sweet potato, gather your supplies, and get ready to embark on this exciting journey.
We’re confident that you’ll be amazed by the results. And once you’ve harvested your first crop of homegrown sweet potatoes, we encourage you to share your experience with us. Post photos of your sweet potato vines, share your tips and tricks, and let us know what you’ve learned along the way. Together, we can create a community of apartment gardeners who are passionate about growing their own food and sharing their knowledge with others.
So, go ahead, give it a try! You might just discover your green thumb and unlock a whole new world of culinary possibilities. Happy growing!
Frequently Asked Questions (FAQ)
Q: What kind of sweet potato should I use to start growing?
A: You can use any sweet potato you find at the grocery store, but organic sweet potatoes are often recommended as they are less likely to be treated with sprout inhibitors. Look for sweet potatoes that are firm and free from blemishes or soft spots. Beauregard is a popular and reliable variety to start with.
Q: How long does it take to grow sweet potatoes from slips?
A: It typically takes around 3-4 months from planting the slips to harvesting the sweet potatoes. The exact time will depend on factors such as the variety of sweet potato, the growing conditions, and the amount of sunlight your plants receive. Be patient, and you’ll be rewarded with a bountiful harvest.
Q: How much sunlight do sweet potatoes need when grown indoors?
A: Sweet potatoes need at least 6-8 hours of direct sunlight per day to thrive. If you don’t have a sunny windowsill, you can supplement with grow lights. Position the grow lights about 6-12 inches above the plants and keep them on for 12-14 hours per day.
Q: What kind of soil is best for growing sweet potatoes in containers?
A: A well-draining potting mix is essential for growing sweet potatoes in containers. You can use a standard potting mix or create your own by combining equal parts of potting soil, compost, and perlite or vermiculite. This will provide the necessary nutrients and drainage for healthy root development.
Q: How often should I water my sweet potato plants?
A: Water your sweet potato plants regularly, keeping the soil consistently moist but not waterlogged. Check the soil moisture level by sticking your finger into the soil. If the top inch feels dry, it’s time to water. Avoid overwatering, as this can lead to root rot.
Q: How do I know when my sweet potatoes are ready to harvest?
A: Sweet potatoes are typically ready to harvest when the vines start to turn yellow and die back. You can also gently dig around the base of the plant to check the size of the sweet potatoes. They should be at least a few inches long and have a firm texture.
Q: Can I grow sweet potatoes in water only?
A: While you can sprout sweet potatoes in water to produce slips, they cannot be grown to full maturity in water alone. They need to be transplanted into soil to develop into полноценные sweet potatoes. The water method is primarily for propagating slips.
Q: What are some common problems when growing sweet potatoes in an apartment, and how can I solve them?
A: Some common problems include pests (like aphids or spider mites), lack of sunlight, and overwatering. To combat pests, use insecticidal soap or neem oil. Ensure adequate sunlight or supplement with grow lights. Adjust your watering schedule to prevent overwatering and root rot.
Q: Can I eat the sweet potato leaves?
A: Yes, sweet potato leaves are edible and nutritious! They can be cooked like spinach or other leafy greens. They have a mild, slightly sweet flavor and are a great addition to salads, stir-fries, and soups. Just make sure to wash them thoroughly before eating.
Q: How do I cure sweet potatoes after harvesting?
A: Curing sweet potatoes is essential for improving their flavor and storage life. After harvesting, gently brush off any excess soil and place the sweet potatoes in a warm, humid place (around 80-85°F and 85-90% humidity) for 7-10 days. This allows the skins to harden and the starches to convert to sugars, resulting in a sweeter, more flavorful sweet potato. After curing, store them in a cool, dry place (around 55-60°F) for several months.

Leave a Comment