
Growing Strawberries at Home can feel like a distant dream if you’ve only ever bought them from the store. But what if I told you that juicy, red, sun-ripened strawberries are totally within your reach, even if you don’t have acres of land? For centuries, cultivating strawberries has been a cherished tradition, from the ancient Romans who appreciated their medicinal properties to the European royalty who cultivated them in elaborate gardens. Now, it’s your turn to join this sweet legacy!
Let’s face it, store-bought strawberries often lack that intense flavor and freshness we crave. Plus, with rising grocery costs, wouldn’t it be amazing to have a sustainable source of delicious berries right outside your door? That’s where these DIY tricks and hacks come in. I’m going to share simple, effective methods for growing strawberries at home, whether you have a sprawling garden, a sunny balcony, or just a windowsill. Get ready to ditch the bland berries and embrace the joy of harvesting your own homegrown goodness!
DIY Floating Shelves: A Simple Guide to Stylish Storage
Hey there, fellow DIY enthusiasts! I’m so excited to share this project with you – building your own floating shelves! They’re a fantastic way to add a touch of modern elegance and extra storage to any room. Plus, it’s a surprisingly easy project that you can tackle in a weekend. Let’s get started!
What You’ll Need: The Shopping List
Before we dive in, let’s gather all the necessary materials. This will save you time and frustration later on.
* **Lumber:** This is the heart of your shelves! I recommend using hardwood like oak, maple, or walnut for a sturdy and beautiful finish. Pine is a more budget-friendly option, but it might require more sanding and finishing. Decide on the length, depth, and thickness of your shelves based on your needs and the space you have. For this guide, I’m assuming you’re making shelves that are about 36 inches long, 8 inches deep, and 1.5 inches thick.
* **Metal Shelf Brackets (Hidden):** These are the secret to the floating effect! Make sure you choose brackets that are rated to hold the weight you plan to put on your shelves. Look for heavy-duty, concealed shelf supports. The length of the bracket should be about 2/3 the depth of your shelf for optimal support.
* **Wood Screws:** You’ll need these to attach the brackets to the wall and the shelves to the brackets. Choose screws that are long enough to securely fasten the brackets to the wall studs (or use appropriate wall anchors if you can’t find studs) and to attach the shelves to the brackets without going all the way through the wood.
* **Wood Glue:** This will help create a stronger bond between the shelf and the bracket.
* **Wood Filler (Optional):** If you’re using pine or have any imperfections in your wood, wood filler will help you create a smooth, flawless finish.
* **Sandpaper:** You’ll need various grits of sandpaper, starting with a coarser grit (like 80 or 100) to remove any rough spots and ending with a finer grit (like 220) for a smooth finish.
* **Primer (Optional):** If you’re painting your shelves, primer will help the paint adhere better and provide a more even finish.
* **Paint or Stain:** Choose a paint or stain that complements your décor.
* **Polyurethane or Varnish (Optional):** This will protect your shelves from scratches and moisture.
* **Safety Glasses:** Always protect your eyes when working with power tools.
* **Dust Mask:** Protect your lungs from sawdust.
* **Measuring Tape:** Essential for accurate measurements.
* **Pencil:** For marking measurements.
* **Level:** To ensure your shelves are perfectly level.
* **Stud Finder:** To locate wall studs for secure mounting.
* **Drill:** With various drill bits for pilot holes and driving screws.
* **Sander (Optional):** A power sander will save you a lot of time and effort.
* **Clamps:** To hold the shelves in place while the glue dries.
* **Rag or Cloth:** For wiping away excess glue and applying stain or polyurethane.
Phase 1: Preparing the Wood
This is where we transform the raw lumber into beautiful shelf blanks.
1. **Cut the Wood to Size:** If your lumber isn’t already the correct size, use a saw to cut it to the desired length and depth. Make sure your cuts are straight and accurate. I like to use a miter saw for this, but a circular saw or even a hand saw will work.
2. **Sand the Wood:** This is a crucial step for achieving a smooth, professional finish. Start with a coarser grit sandpaper (80 or 100) to remove any rough spots, splinters, or imperfections. Then, gradually move to finer grits (120, 180, and finally 220) to create a silky-smooth surface. If you’re using a power sander, be careful not to apply too much pressure, as this can create unevenness. Remember to sand with the grain of the wood.
3. **Fill Imperfections (Optional):** If you’re using pine or have any knots or imperfections in your wood, apply wood filler to these areas. Let the wood filler dry completely according to the manufacturer’s instructions, and then sand it smooth.
4. **Prime the Wood (Optional):** If you’re planning to paint your shelves, apply a coat of primer. This will help the paint adhere better and provide a more even finish. Let the primer dry completely before moving on to the next step.
Phase 2: Installing the Brackets
This is where we attach the hidden brackets to the wall, creating the foundation for our floating shelves.
1. **Locate Wall Studs:** Use a stud finder to locate the wall studs where you want to mount your shelves. It’s crucial to attach the brackets to the studs for maximum support. If you can’t find studs in the desired location, you’ll need to use appropriate wall anchors that are rated to hold the weight you plan to put on your shelves.
2. **Mark Bracket Locations:** Use a pencil to mark the locations of the bracket mounting holes on the wall. Make sure the brackets are evenly spaced and aligned. I usually place the first bracket about 4-6 inches from the end of the shelf and then space the remaining brackets evenly along the length of the shelf.
3. **Drill Pilot Holes:** Drill pilot holes at the marked locations. This will make it easier to drive the screws and prevent the wood from splitting. Make sure the pilot holes are slightly smaller than the diameter of the screws you’ll be using.
4. **Attach the Brackets to the Wall:** Use wood screws to attach the brackets to the wall studs (or wall anchors). Make sure the brackets are securely fastened and level. Use a level to double-check the alignment. This is a critical step, so take your time and make sure everything is perfect.
Phase 3: Attaching the Shelves to the Brackets
Now for the exciting part – attaching the shelves to the brackets and seeing your vision come to life!
1. **Mark Bracket Locations on the Shelves:** Place the shelves on the installed brackets and mark the locations of the bracket mounting holes on the underside of the shelves.
2. **Drill Pilot Holes in the Shelves:** Drill pilot holes at the marked locations on the underside of the shelves. Again, make sure the pilot holes are slightly smaller than the diameter of the screws you’ll be using.
3. **Apply Wood Glue to the Brackets:** Apply a thin layer of wood glue to the top of the brackets. This will help create a stronger bond between the shelves and the brackets.
4. **Attach the Shelves to the Brackets:** Carefully place the shelves onto the brackets, aligning the pilot holes with the bracket mounting holes. Use wood screws to attach the shelves to the brackets. Make sure the screws are long enough to securely fasten the shelves to the brackets without going all the way through the wood.
5. **Clamp the Shelves (Optional):** If you have clamps, use them to clamp the shelves to the brackets while the glue dries. This will help ensure a strong and secure bond.
6. **Wipe Away Excess Glue:** Use a damp rag or cloth to wipe away any excess glue that squeezes out from between the shelves and the brackets.
7. **Let the Glue Dry:** Allow the glue to dry completely according to the manufacturer’s instructions. This is important for ensuring a strong and durable shelf.
Phase 4: Finishing Touches
This is where we add the final touches to make your floating shelves truly shine.
1. **Sand the Shelves (Lightly):** Once the glue is dry, lightly sand the shelves with a fine-grit sandpaper (220) to remove any imperfections or rough spots.
2. **Clean the Shelves:** Use a clean cloth to remove any dust or debris from the shelves.
3. **Paint or Stain the Shelves:** Apply your chosen paint or stain to the shelves. Follow the manufacturer’s instructions for application and drying time. I usually apply two coats of paint or stain for a richer, more durable finish.
4. **Apply Polyurethane or Varnish (Optional):** If you want to protect your shelves from scratches and moisture, apply a coat of polyurethane or varnish. This will also give your shelves a beautiful sheen. Follow the manufacturer’s instructions for application and drying time.
5. **Let the Finish Dry Completely:** Allow the paint, stain, or polyurethane to dry completely before placing anything on your shelves.
And there you have it! Your very own DIY floating shelves! I hope you enjoyed this project as much as I do. Now, go ahead and decorate your shelves with your favorite books, plants, and decorative items. Enjoy your stylish and functional new storage space! Remember to always consider the weight capacity of your shelves and brackets to avoid any accidents. Happy DIY-ing!
Conclusion
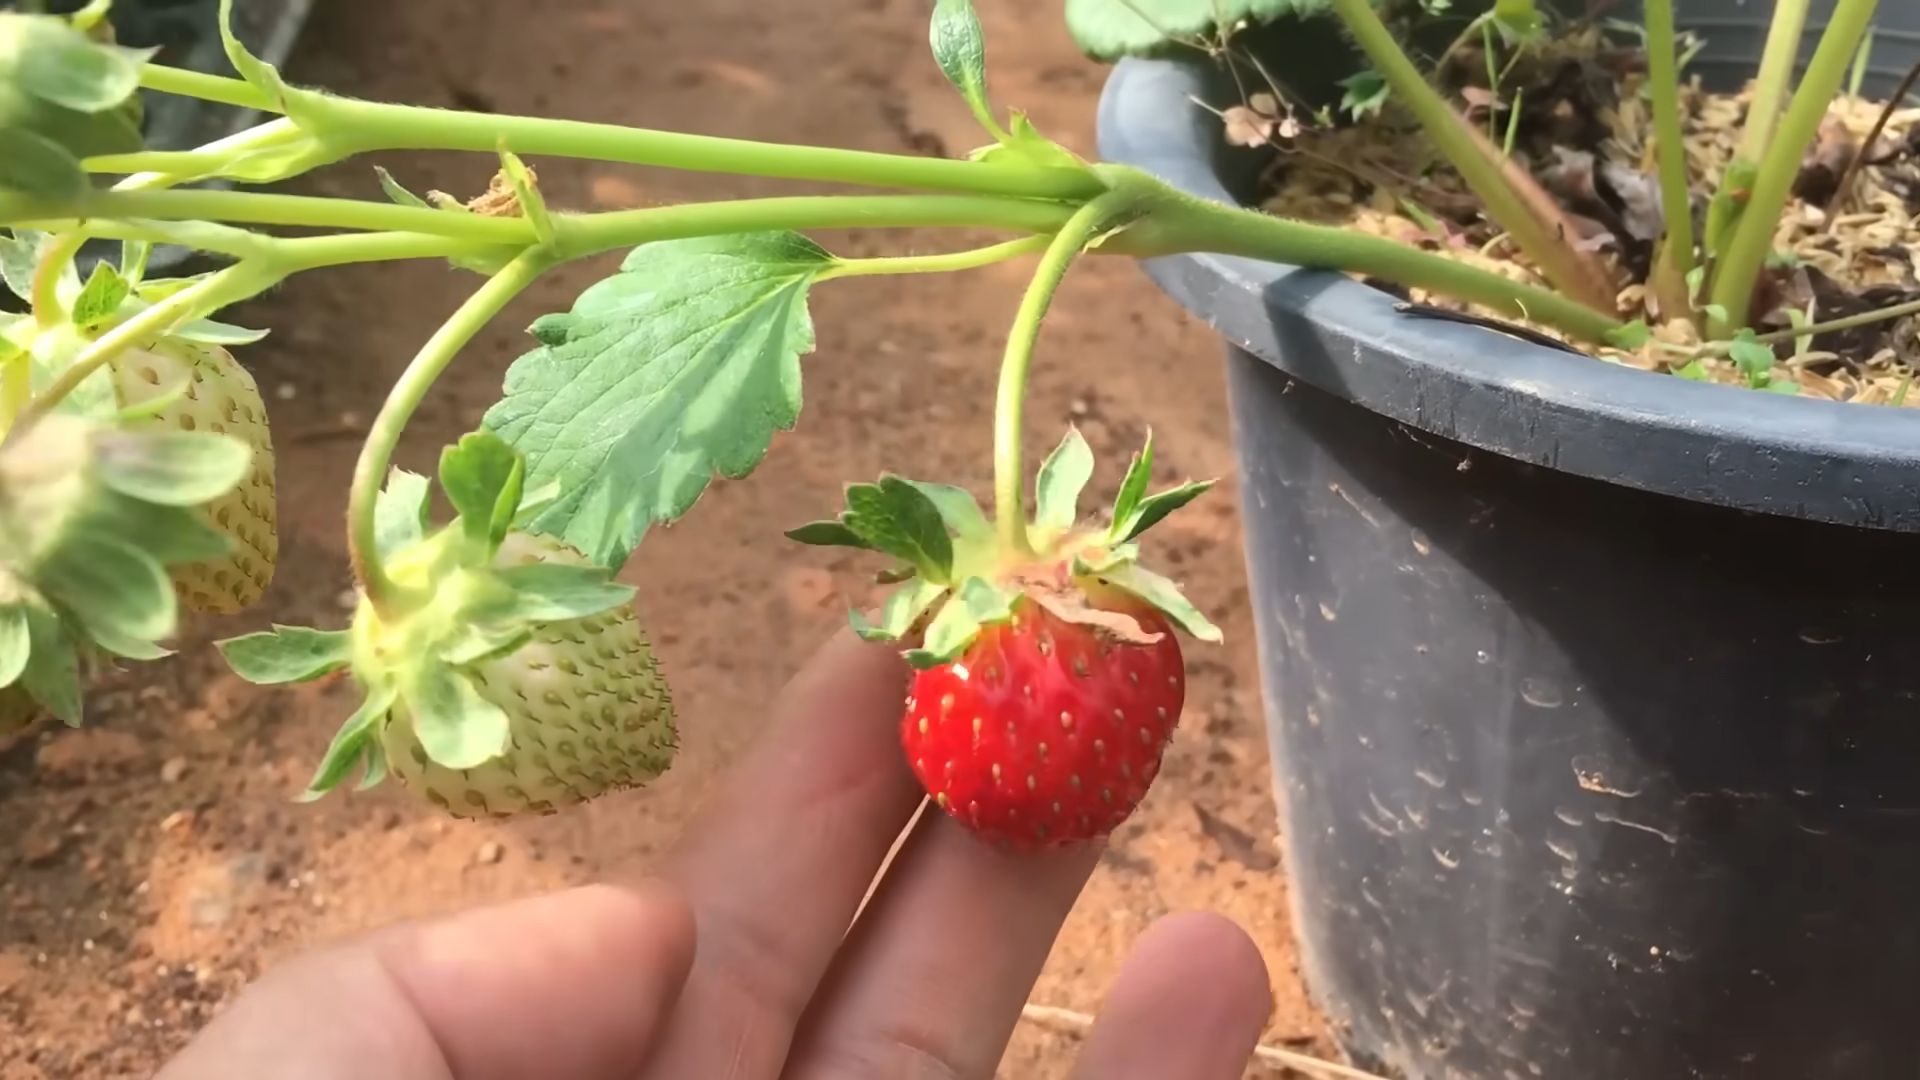
So, there you have it! Growing strawberries at home, especially using our simple DIY trick, is more than just a gardening project; it’s an investment in fresh, flavorful, and healthy eating. Forget those bland, store-bought berries that lack the vibrant taste of summer. With a little effort and our easy-to-follow method, you can cultivate a thriving strawberry patch right in your own backyard, balcony, or even windowsill.
Why is this DIY method a must-try? Because it simplifies the process, making it accessible to even the most novice gardener. It maximizes space, allowing you to grow more strawberries in a smaller area. And, most importantly, it puts you in control of what goes into your food. You can avoid harmful pesticides and fertilizers, ensuring that your family enjoys the purest, most natural strawberries possible.
But the fun doesn’t stop there! Feel free to experiment with different varieties of strawberries to find your personal favorites. Try alpine strawberries for their intense flavor, or everbearing varieties for a continuous harvest throughout the season. You can also explore different container options, from hanging baskets to repurposed buckets, adding a touch of creativity to your strawberry garden. Consider companion planting with herbs like basil or thyme to deter pests and enhance the flavor of your berries.
Don’t be afraid to get your hands dirty and embrace the joy of growing your own food. The satisfaction of picking a sun-ripened strawberry, still warm from the sun, and popping it into your mouth is an experience that simply can’t be replicated. It’s a taste of summer, a connection to nature, and a reminder of the simple pleasures in life.
We wholeheartedly encourage you to try this DIY trick for growing strawberries at home. We are confident that you will be amazed by the results. And once you’ve harvested your first batch of delicious berries, we want to hear all about it! Share your experiences, your successes, and even your challenges in the comments below. Let’s build a community of strawberry enthusiasts, sharing tips and tricks to help each other grow the best berries possible. Happy gardening!
Frequently Asked Questions (FAQs)
What is the best time of year to start growing strawberries?
The best time to plant strawberries depends on your climate and the type of strawberry you’re growing. Generally, early spring or late fall are ideal. In warmer climates, fall planting allows the plants to establish roots before the heat of summer. In colder climates, spring planting gives the plants a head start before the winter freeze. Bare-root strawberries are typically planted in early spring, while potted strawberries can be planted throughout the growing season.
What kind of soil do strawberries need?
Strawberries thrive in well-drained, slightly acidic soil with a pH between 5.5 and 6.5. Amend your soil with compost or other organic matter to improve drainage and fertility. Avoid heavy clay soils, as they can retain too much water and lead to root rot. A soil test can help you determine the pH and nutrient levels of your soil and make necessary adjustments.
How much sunlight do strawberries need?
Strawberries need at least 6-8 hours of direct sunlight per day to produce a good crop of berries. Choose a sunny location for your strawberry patch, and make sure the plants are not shaded by trees or buildings. If you’re growing strawberries in containers, you can move them around to ensure they get enough sunlight.
How often should I water my strawberry plants?
Water your strawberry plants regularly, especially during dry periods. The soil should be consistently moist but not waterlogged. Water deeply and less frequently, rather than shallowly and more often. Avoid overhead watering, as it can promote fungal diseases. Drip irrigation or soaker hoses are ideal for watering strawberries.
What kind of fertilizer should I use for strawberries?
Fertilize your strawberry plants in early spring and again after the first harvest. Use a balanced fertilizer with equal amounts of nitrogen, phosphorus, and potassium. Avoid over-fertilizing, as it can lead to excessive foliage growth and fewer berries. Organic fertilizers, such as compost tea or fish emulsion, are also excellent choices.
How do I protect my strawberries from pests and diseases?
Strawberries are susceptible to various pests and diseases, including slugs, snails, aphids, and fungal diseases. Use organic pest control methods, such as hand-picking pests, using diatomaceous earth, or spraying with insecticidal soap. To prevent fungal diseases, ensure good air circulation around the plants and avoid overhead watering. Consider using row covers to protect your plants from pests and birds.
How do I know when my strawberries are ripe?
Strawberries are ripe when they are fully red and slightly soft to the touch. The berries should also detach easily from the plant. Avoid picking strawberries that are still white or green, as they will not ripen further after being picked.
How do I store my harvested strawberries?
Store your harvested strawberries in the refrigerator in a single layer in a container lined with paper towels. Do not wash the strawberries until just before you are ready to eat them, as washing them can cause them to spoil more quickly. Strawberries can also be frozen for later use.
Can I grow strawberries in containers?
Yes, strawberries grow very well in containers. Choose a container that is at least 12 inches deep and wide, and use a well-draining potting mix. Container-grown strawberries may need to be watered more frequently than those grown in the ground.
What are the different types of strawberries?
There are three main types of strawberries: June-bearing, everbearing, and day-neutral. June-bearing strawberries produce a large crop of berries in a short period of time, typically in June. Everbearing strawberries produce two or three smaller crops of berries throughout the growing season. Day-neutral strawberries produce berries continuously throughout the growing season, regardless of day length.
How do I overwinter my strawberry plants?
In colder climates, strawberry plants need to be protected from the winter freeze. Mulch the plants with straw or leaves to insulate the roots. Container-grown strawberries can be moved to a sheltered location, such as a garage or shed. In milder climates, strawberries may not need any winter protection.
My strawberry plants are producing runners. Should I remove them?
Runners are horizontal stems that grow from the main strawberry plant. They can be used to propagate new strawberry plants. If you want to propagate new plants, allow the runners to root in the soil. If you don’t want to propagate new plants, remove the runners to encourage the main plant to produce more berries.
Why are my strawberries small and not very flavorful?
Small, less flavorful strawberries can be caused by several factors, including insufficient sunlight, poor soil fertility, and overcrowding. Make sure your plants are getting enough sunlight and that the soil is well-drained and fertile. Thin out the plants if they are overcrowded. Also, ensure you are watering adequately, especially during fruit development.
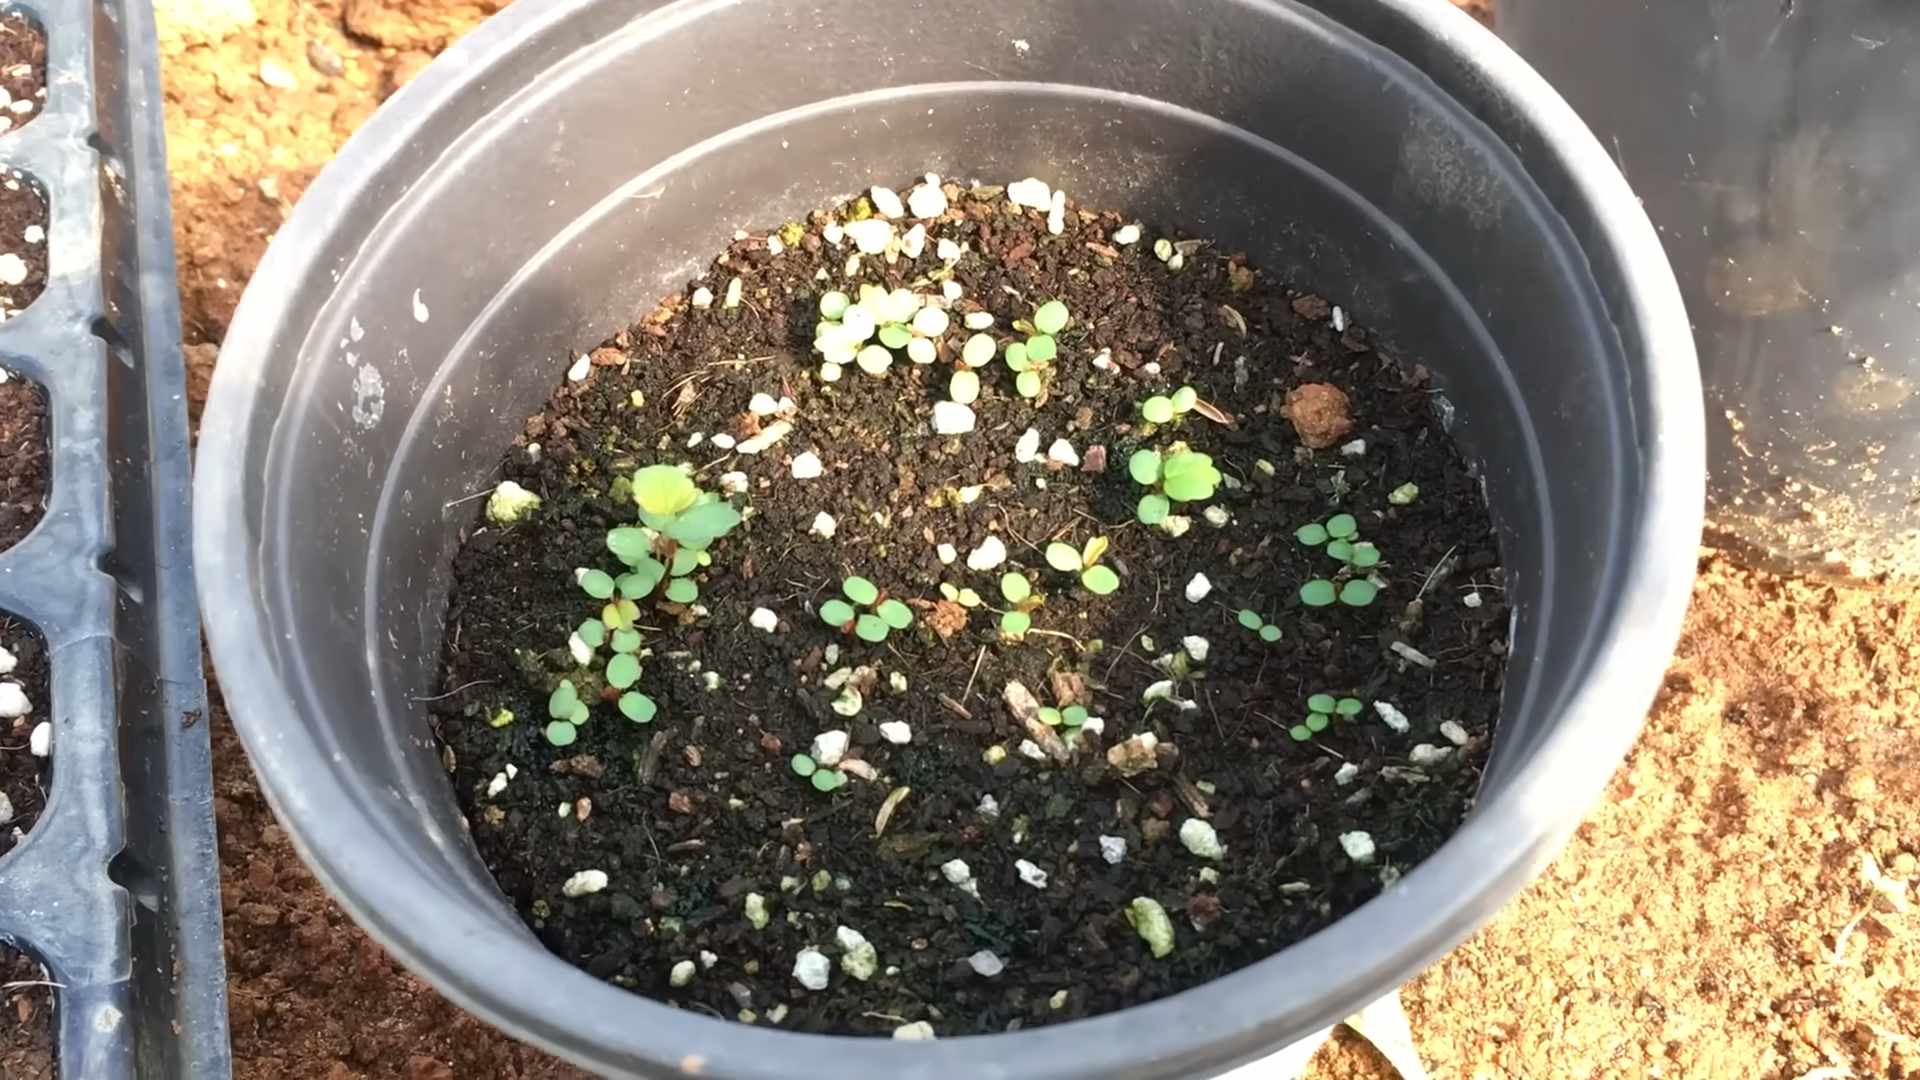
Can I grow strawberries from seed?
While possible, growing strawberries from seed can be challenging and time-consuming. It’s generally easier to start with bare-root plants or potted plants. If you do choose to grow from seed, start the seeds indoors several weeks before the last frost.

Leave a Comment