
Growing Pineapples at Home might seem like an exotic dream reserved for tropical climates, but I’m here to tell you it’s absolutely achievable, even if you’re miles away from Hawaii! Imagine the satisfaction of slicing into a juicy, homegrown pineapple, knowing you nurtured it from start to finish. Forget those expensive supermarket pineapples – this DIY guide will empower you to cultivate your own sweet, tangy delights right in your backyard or even on your sunny windowsill.
The pineapple, a symbol of hospitality and welcome, has a rich history. Originating in South America, it was quickly embraced by explorers and traders, eventually spreading across the globe. In colonial America, pineapples were so rare and prized that they were often rented out as status symbols for parties! While we no longer need to rent them, the allure of this tropical fruit remains strong.
Why should you embark on this growing pineapples at home adventure? Well, besides the obvious bragging rights, it’s a fantastic way to connect with nature, learn about plant life cycles, and enjoy the unparalleled flavor of a freshly grown fruit. Plus, it’s a surprisingly easy and rewarding project. Many people are intimidated by the thought of growing tropical fruits, but with a few simple tricks and hacks, you’ll be harvesting your own pineapples in no time. Let’s dive in and unlock the secrets to successfully growing pineapples at home!
Growing Pineapples at Home: A Tropical Treat You Can DIY!
Okay, so you want to grow pineapples at home? Awesome! It’s totally doable, and honestly, there’s something incredibly satisfying about harvesting your own tropical fruit. It might seem intimidating, but trust me, with a little patience and the right steps, you’ll be enjoying homegrown pineapple before you know it. Let’s dive in!
What You’ll Need
Before we get started, let’s gather all the necessary supplies. Having everything ready will make the process much smoother.
* A Fresh Pineapple: This is the most important ingredient! Look for a ripe pineapple with healthy, green leaves. The fruit should smell sweet and fragrant.
* A Sharp Knife: A good, sharp knife is essential for cleanly removing the top of the pineapple.
* Potting Soil: Use a well-draining potting mix. A mix specifically designed for tropical plants is even better.
* A Pot: Choose a pot that’s at least 6-8 inches in diameter. This will give the pineapple crown enough room to develop roots.
* Water: Regular tap water is fine, but letting it sit out for a day or two to dechlorinate is even better.
* Rooting Hormone (Optional): While not strictly necessary, rooting hormone can help speed up the rooting process.
* Spray Bottle (Optional): For misting the leaves.
* Gloves (Optional): If you have sensitive skin, gloves can protect your hands from the pineapple’s sap.
Preparing the Pineapple Crown
This is the first crucial step. We need to carefully separate the leafy top (the crown) from the fruit without damaging it.
1. Twist and Pull (or Cut): The easiest method is to firmly grasp the leaves of the pineapple crown and twist it off the fruit. If it doesn’t come off easily, don’t force it! Instead, use your sharp knife to carefully cut the crown off, leaving about an inch of fruit attached.
2. Remove the Excess Fruit: Using your knife, carefully remove any remaining fruit from the base of the crown. This is important because the fruit can rot and cause the crown to fail. I usually trim it back until I see the little root buds starting to appear.
3. Peel Back the Lower Leaves: Gently peel back the bottom few layers of leaves from the base of the crown. This will expose the root nodes, which are the little brown bumps that will eventually turn into roots. Be careful not to damage these nodes.
4. Let it Dry (Important!): This is a step many people skip, but it’s crucial! Place the prepared pineapple crown in a cool, dry place for 2-3 days. This allows the cut end to callous over, which helps prevent rot. I usually just leave mine on a paper towel on the kitchen counter.
Rooting the Pineapple Crown
Now that we’ve prepped the crown, it’s time to encourage those roots to grow! There are two main methods you can use: water rooting and direct planting. I’ll explain both.
Water Rooting (My Preferred Method)
I find water rooting to be a bit more reliable because you can actually see the roots developing.
1. Prepare the Water: Fill a glass or jar with water. Make sure the water is clean and fresh.
2. Submerge the Base: Place the pineapple crown in the water, ensuring that only the base of the crown (where you peeled back the leaves) is submerged. The leaves should be above the water line.
3. Find a Sunny Spot: Place the glass or jar in a warm, sunny location. A windowsill is perfect.
4. Change the Water Regularly: Change the water every 2-3 days to prevent bacteria growth.
5. Be Patient: It can take several weeks (sometimes even a month or two) for roots to develop. Don’t get discouraged! Just keep changing the water and providing plenty of sunlight. You should start to see little white roots emerging from the base.
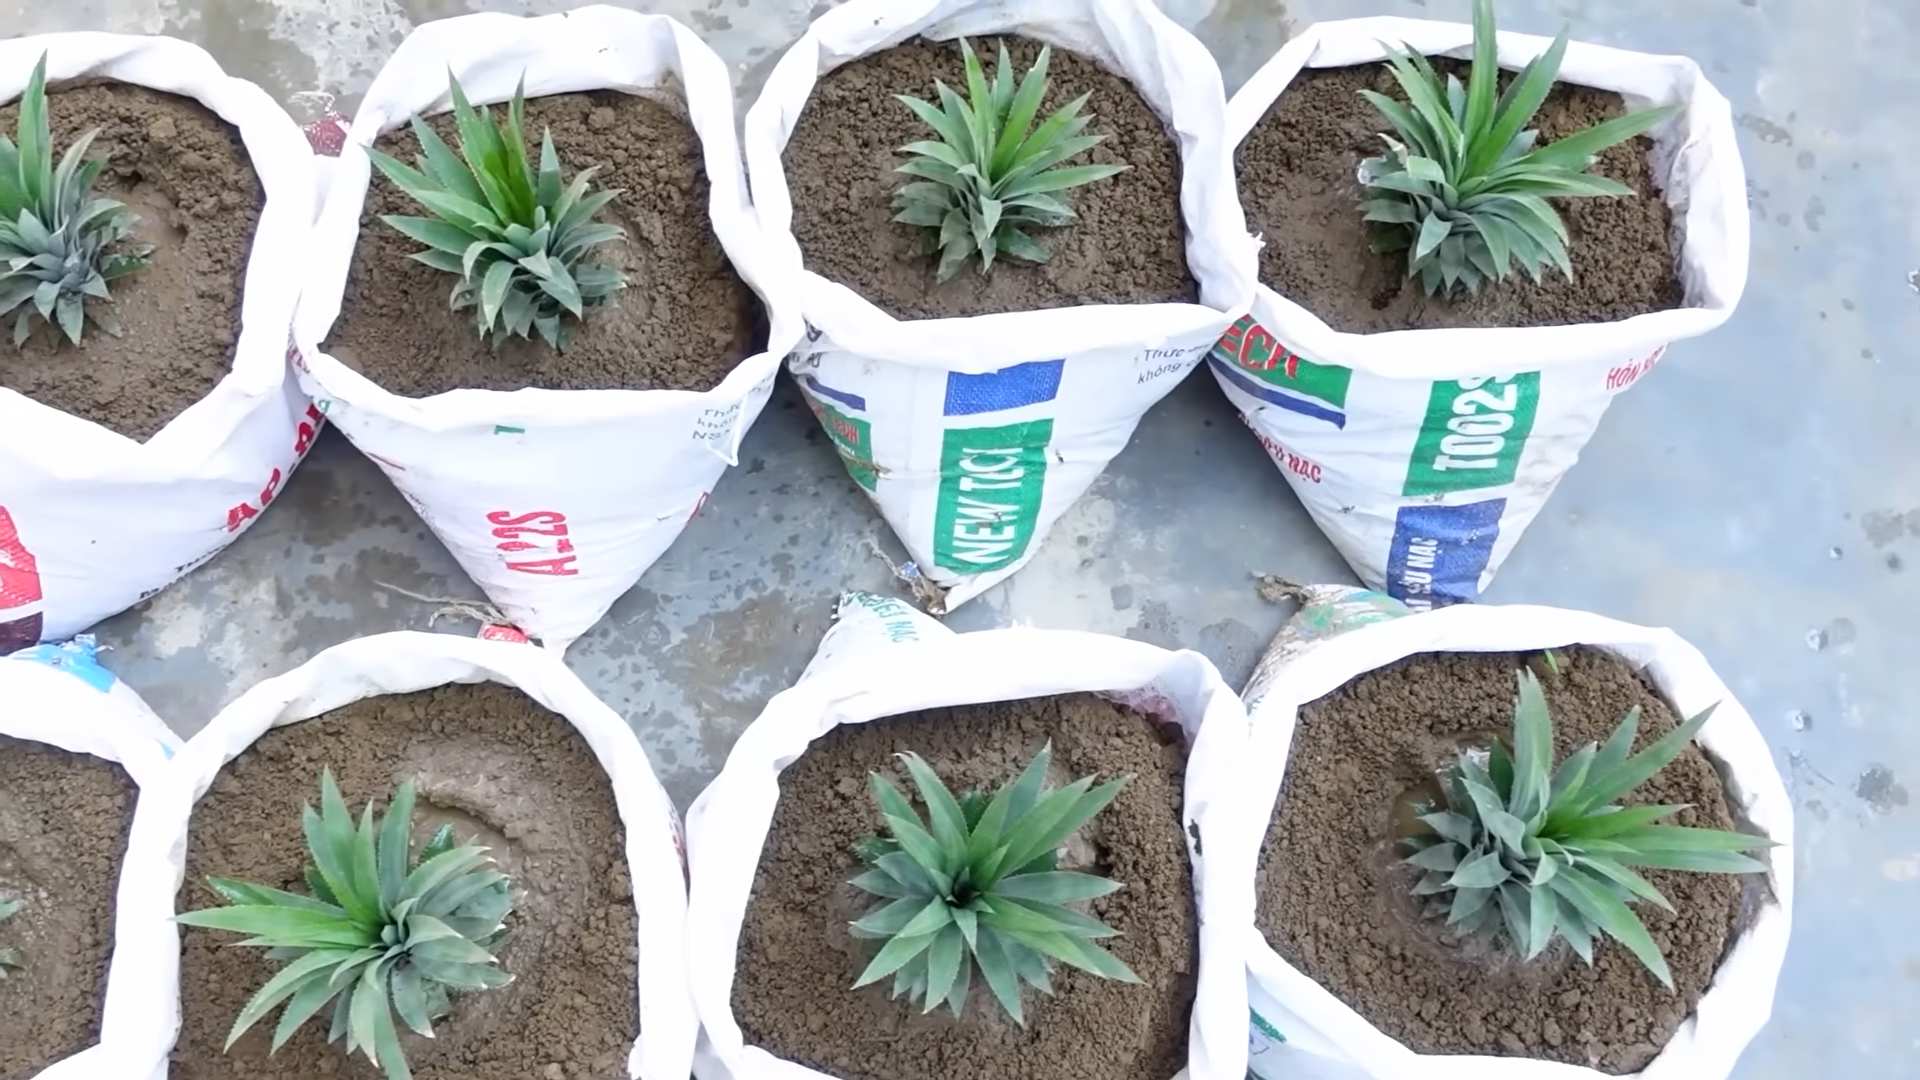
Direct Planting
This method involves planting the prepared pineapple crown directly into the soil.
1. Prepare the Pot: Fill your pot with well-draining potting mix.
2. Make a Hole: Create a hole in the center of the soil that’s large enough to accommodate the base of the pineapple crown.
3. Plant the Crown: Carefully place the pineapple crown in the hole, ensuring that the base is buried in the soil.
4. Water Thoroughly: Water the soil thoroughly until it’s evenly moist.
5. Find a Sunny Spot: Place the pot in a warm, sunny location.
6. Keep the Soil Moist: Keep the soil consistently moist, but not soggy. Overwatering can lead to rot.
Planting Your Rooted Pineapple Crown
Once your pineapple crown has developed a good set of roots (at least an inch or two long), it’s time to plant it in a pot. If you chose the direct planting method, you can skip this section.
1. Prepare the Pot: Choose a pot that’s at least 6-8 inches in diameter and has good drainage holes. Fill the pot with well-draining potting mix.
2. Make a Hole: Create a hole in the center of the soil that’s large enough to accommodate the root ball of the pineapple crown.
3. Carefully Remove the Crown: Gently remove the pineapple crown from the water. Be careful not to damage the roots.
4. Plant the Crown: Place the pineapple crown in the hole, ensuring that the roots are spread out.
5. Fill with Soil: Fill the hole with soil, gently patting it down around the base of the crown.
6. Water Thoroughly: Water the soil thoroughly until it’s evenly moist.
Caring for Your Pineapple Plant
Now that your pineapple plant is potted, it’s time to provide it with the care it needs to thrive.
1. Sunlight: Pineapples need plenty of sunlight, at least 6-8 hours per day. Place your plant in a sunny location, such as a south-facing window. If you don’t have enough natural light, you can supplement with a grow light.
2. Watering: Water your pineapple plant regularly, but don’t overwater it. Allow the soil to dry out slightly between waterings. During the warmer months, you may need to water more frequently.
3. Humidity: Pineapples thrive in humid environments. If you live in a dry climate, you can increase the humidity around your plant by misting the leaves regularly with a spray bottle or placing a tray of water near the plant.
4. Fertilizing: Fertilize your pineapple plant every 2-3 months with a balanced fertilizer. Follow the instructions on the fertilizer label.
5. Temperature: Pineapples prefer warm temperatures, between 65°F and 85°F (18°C and 29°C). Protect your plant from frost and cold temperatures.
6. Repotting: As your pineapple plant grows, it will eventually need to be repotted into a larger pot. Repot your plant every 1-2 years, or when it becomes root-bound.
Encouraging Fruiting
This is where the real patience comes in! It can take anywhere from 2 to 3 years for a pineapple plant grown from a crown to produce fruit. Here are a few tips to encourage fruiting:
1. Ethylene Gas: Pineapples are stimulated to fruit by ethylene gas. You can encourage fruiting by placing an apple core near the base of the plant and covering it with a plastic bag for a few days. Apples release ethylene gas as they ripen.
2. Magnesium Sulfate (Epsom Salts): Some growers recommend applying magnesium sulfate (Epsom salts) to the soil to encourage fruiting. Follow the instructions on the Epsom salts package.
3. Patience, Patience, Patience: The most important thing is to be patient! Just keep providing your pineapple plant with the care it needs, and eventually, it will reward you with a delicious, homegrown pineapple.
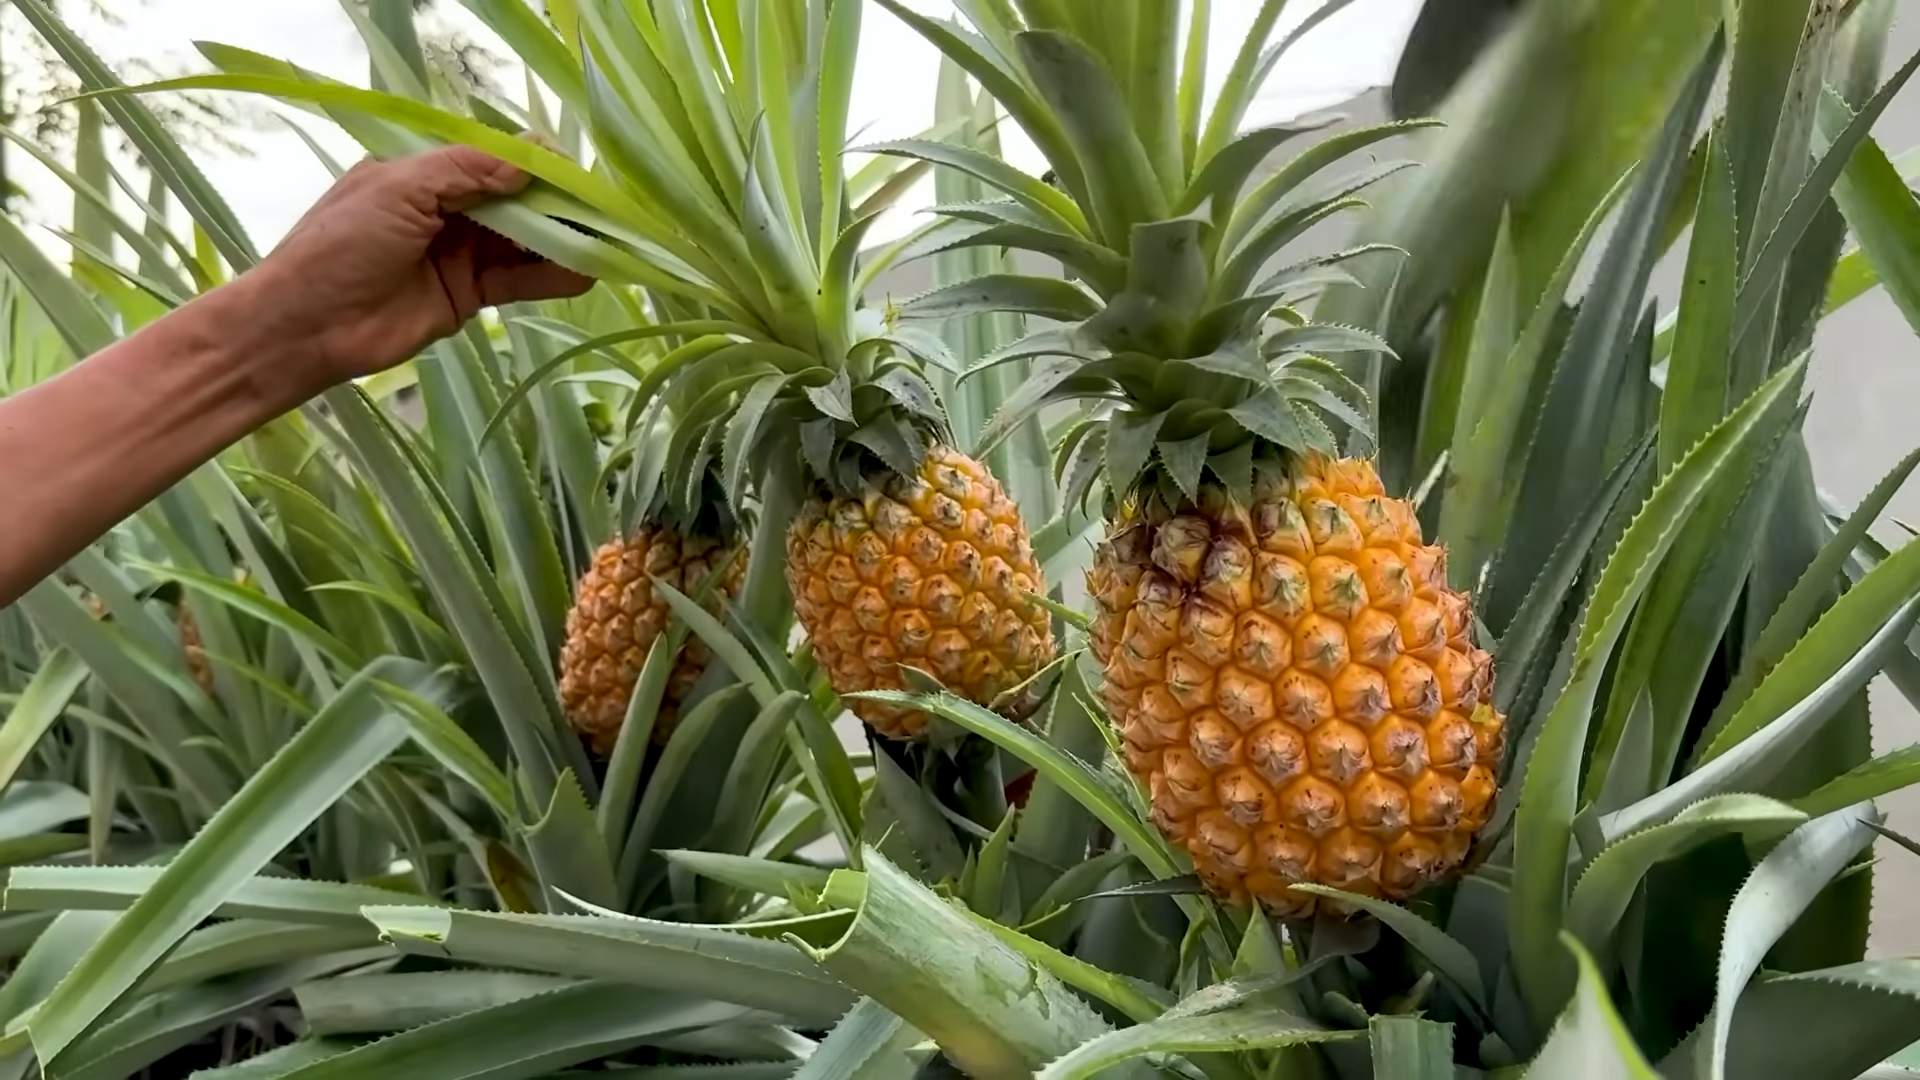
Harvesting Your Pineapple
Once your pineapple fruit has developed, it’s time to harvest it!
1. Check for Ripeness: A ripe pineapple will have a sweet, fragrant smell. The fruit should also be slightly soft to the touch.
2. Cut the Fruit: Use a sharp knife to cut the pineapple fruit from the plant.
3. Enjoy! Now you can enjoy your homegrown pineapple!
Troubleshooting
Even with the best care, you might encounter some problems along the way. Here are a few common issues and how to address them:
* Rotting Crown: If your pineapple crown starts to rot, it’s likely due to overwatering or poor drainage. Remove the rotting leaves and allow the crown to dry out completely
Conclusion
So, there you have it! Growing pineapples at home, while it might seem like a tropical dream reserved for expert gardeners, is surprisingly achievable with a little patience and the right approach. This DIY trick isn’t just about saving money on store-bought fruit; it’s about experiencing the unique satisfaction of nurturing a plant from its humble beginnings to a delicious, homegrown harvest. Imagine the bragging rights when you serve a pineapple you grew yourself!
But beyond the bragging rights, consider the environmental impact. By growing your own pineapple, you’re reducing your carbon footprint associated with transportation and commercial farming practices. You’re also connecting with nature in a tangible way, learning about the plant’s life cycle and appreciating the fruits (literally!) of your labor.
This method, focusing on rooting the pineapple top, is a fantastic starting point for anyone interested in home gardening, regardless of their experience level. It’s a relatively low-maintenance project that yields impressive results. The key is consistency – consistent watering, consistent sunlight, and consistent monitoring for any signs of pests or diseases.
Don’t be afraid to experiment with variations! Try different types of potting soil to see which works best in your climate. Some gardeners swear by adding a small amount of bone meal to the soil to encourage root growth. Others have had success using rainwater instead of tap water. You could even try growing your pineapple in a decorative pot to add a touch of tropical flair to your patio or balcony.
Consider these additional ideas for expanding your pineapple growing adventure:
* Hydroponic Pineapple Growing: For those interested in a more advanced approach, research hydroponic pineapple cultivation. This method involves growing the pineapple in a nutrient-rich water solution without soil, potentially leading to faster growth and larger fruit.
* Succession Planting: To ensure a continuous supply of homegrown pineapples, consider succession planting. Start new pineapple tops every few months so that you have a staggered harvest throughout the year.
* Gifting Pineapple Plants: Once you’ve mastered the art of growing pineapples from tops, consider gifting small pineapple plants to friends and family. It’s a unique and thoughtful present that will bring joy and a touch of the tropics to their lives.
Growing pineapples at home is more than just a gardening project; it’s an adventure. It’s a chance to connect with nature, learn new skills, and enjoy the unparalleled taste of homegrown fruit. So, what are you waiting for? Grab a pineapple, carefully remove the top, and embark on your own pineapple-growing journey today!
We encourage you to try this DIY trick and share your experiences with us! Post photos of your pineapple plants on social media using [Your Hashtag Here] and let us know what worked best for you. We’re eager to hear your tips, tricks, and triumphs as you cultivate your own little slice of paradise. Happy growing!
Frequently Asked Questions (FAQ)
How long does it take to grow a pineapple from a top?
Patience is key! Growing a pineapple from a top is a long-term project. It typically takes anywhere from 2 to 3 years for a pineapple plant to mature and produce fruit. The first few months are crucial for root development. After that, the plant will gradually grow larger, eventually flowering and producing a pineapple. Factors like climate, sunlight, and soil quality can influence the growth rate. Don’t be discouraged if it takes longer than expected; the reward of a homegrown pineapple is well worth the wait.
What kind of soil is best for growing pineapples?
Pineapples thrive in well-draining, slightly acidic soil. A mixture of potting soil, perlite, and peat moss is a good starting point. The perlite helps with drainage, preventing the roots from becoming waterlogged, while the peat moss provides acidity. You can also add some compost to enrich the soil with nutrients. Avoid heavy clay soils, as they retain too much water and can lead to root rot. A soil pH between 6.0 and 6.5 is ideal for pineapple growth.
How much sunlight do pineapples need?
Pineapples are sun-loving plants and require at least 6 hours of direct sunlight per day. If you’re growing your pineapple indoors, place it near a sunny window or supplement with a grow light. Insufficient sunlight can lead to stunted growth and reduced fruit production. During the hottest part of the day, especially in warmer climates, some afternoon shade may be beneficial to prevent the leaves from scorching.
How often should I water my pineapple plant?
Water your pineapple plant regularly, but avoid overwatering. Allow the soil to dry out slightly between waterings. During the growing season (spring and summer), you may need to water more frequently than in the dormant season (fall and winter). A good rule of thumb is to water deeply when the top inch of soil feels dry to the touch. Ensure that the pot has adequate drainage to prevent water from accumulating at the bottom.
What are some common pests and diseases that affect pineapple plants?
Pineapple plants can be susceptible to certain pests and diseases, including mealybugs, scale insects, and root rot. Mealybugs are small, white, cottony insects that suck sap from the plant. Scale insects are small, armored insects that attach themselves to the leaves and stems. Root rot is a fungal disease that occurs when the soil is too wet. To prevent pests and diseases, inspect your pineapple plant regularly and take action promptly if you notice any problems. You can treat mealybugs and scale insects with insecticidal soap or neem oil. To prevent root rot, ensure that the soil is well-draining and avoid overwatering.
Can I grow a pineapple indoors?
Yes, you can absolutely grow a pineapple indoors, especially if you live in a climate with cold winters. Choose a pot that is large enough to accommodate the plant’s root system and ensure that it has drainage holes. Place the pot near a sunny window or supplement with a grow light. Maintain a consistent temperature and humidity level. Indoor-grown pineapples may take longer to fruit than those grown outdoors, but with proper care, you can still enjoy a homegrown pineapple.
How do I know when my pineapple is ripe?
Determining when a pineapple is ripe can be tricky, but there are a few telltale signs to look for. A ripe pineapple will have a fragrant aroma, a slightly golden color, and a firm but not hard texture. The eyes (the individual segments of the pineapple) should be relatively flat. You can also try gently pulling on one of the leaves; if it comes out easily, the pineapple is likely ripe. Avoid pineapples that are bruised, soft, or have a sour smell.
What can I do with the pineapple leaves after harvesting the fruit?
Don’t throw away those pineapple leaves! They can be used for a variety of purposes. You can use them to make a natural fertilizer by composting them. You can also use them to create a decorative mulch for your garden. Some people even use pineapple leaves to make tea or to add flavor to soups and stews. Get creative and find new ways to utilize this often-overlooked resource.

Leave a Comment