
Growing peas indoors might sound like a whimsical dream, especially if you’re picturing sprawling vines taking over your living room! But trust me, it’s not only possible, it’s incredibly rewarding. Imagine fresh, sweet pea shoots brightening up your winter salads, all thanks to your own indoor garden. For centuries, humans have cultivated plants indoors, from the elaborate orangeries of the Renaissance to the humble windowsill herb gardens of today. This connection to nature, even in a limited space, is deeply ingrained in our history.
But why bother growing peas indoors? Well, maybe you live in an apartment with no outdoor space, or perhaps your growing season is too short to enjoy a full harvest. Or maybe, like me, you just crave that fresh, homegrown taste year-round! This DIY guide will walk you through everything you need to know, from choosing the right pea variety to providing the perfect light and support. We’ll explore simple, budget-friendly techniques that will have you harvesting delicious peas in no time. Get ready to transform your indoor space into a mini-farm and enjoy the satisfaction of growing your own food, no matter the season!
Growing Peas Indoors: A Complete DIY Guide
Hey there, fellow gardening enthusiasts! Dreaming of fresh, sweet peas even when the weather outside is frightful? Well, you’re in luck! Growing peas indoors is totally achievable, and I’m here to walk you through every step of the process. Get ready to enjoy homegrown goodness, no matter the season!
Choosing the Right Pea Variety
Not all pea varieties are created equal when it comes to indoor growing. You’ll want to opt for bush or dwarf varieties, as they stay more compact and manageable in containers. Here are a few of my personal favorites:
- ‘Little Marvel’: A classic dwarf variety that produces sweet, flavorful peas.
- ‘Tom Thumb’: Super compact, perfect for small spaces.
- ‘Sugar Ann’: A snap pea variety that’s ready to harvest early.
- ‘Oregon Sugar Pod II’: Another great snap pea option with high yields.
Gathering Your Supplies
Before we dive into planting, let’s make sure you have everything you need. Here’s your checklist:
- Pea Seeds: Choose your desired variety from the list above.
- Containers: Opt for pots that are at least 6 inches deep and wide. Remember, peas need room for their roots!
- Potting Mix: Use a high-quality, well-draining potting mix. Avoid garden soil, as it can compact and hinder drainage.
- Watering Can or Spray Bottle: For gentle watering.
- Grow Lights (Optional but Recommended): If you don’t have a sunny windowsill, grow lights will be your best friend.
- Trellis or Support System: Even bush varieties benefit from some support. Think small trellises, bamboo stakes, or even twigs.
- Seed Starting Tray (Optional): For pre-sprouting seeds.
Planting Your Pea Seeds
Now for the fun part! Let’s get those pea seeds in the soil.
- Soak the Seeds (Optional): Soaking your pea seeds in water for 24 hours before planting can help speed up germination. I usually do this, but it’s not strictly necessary.
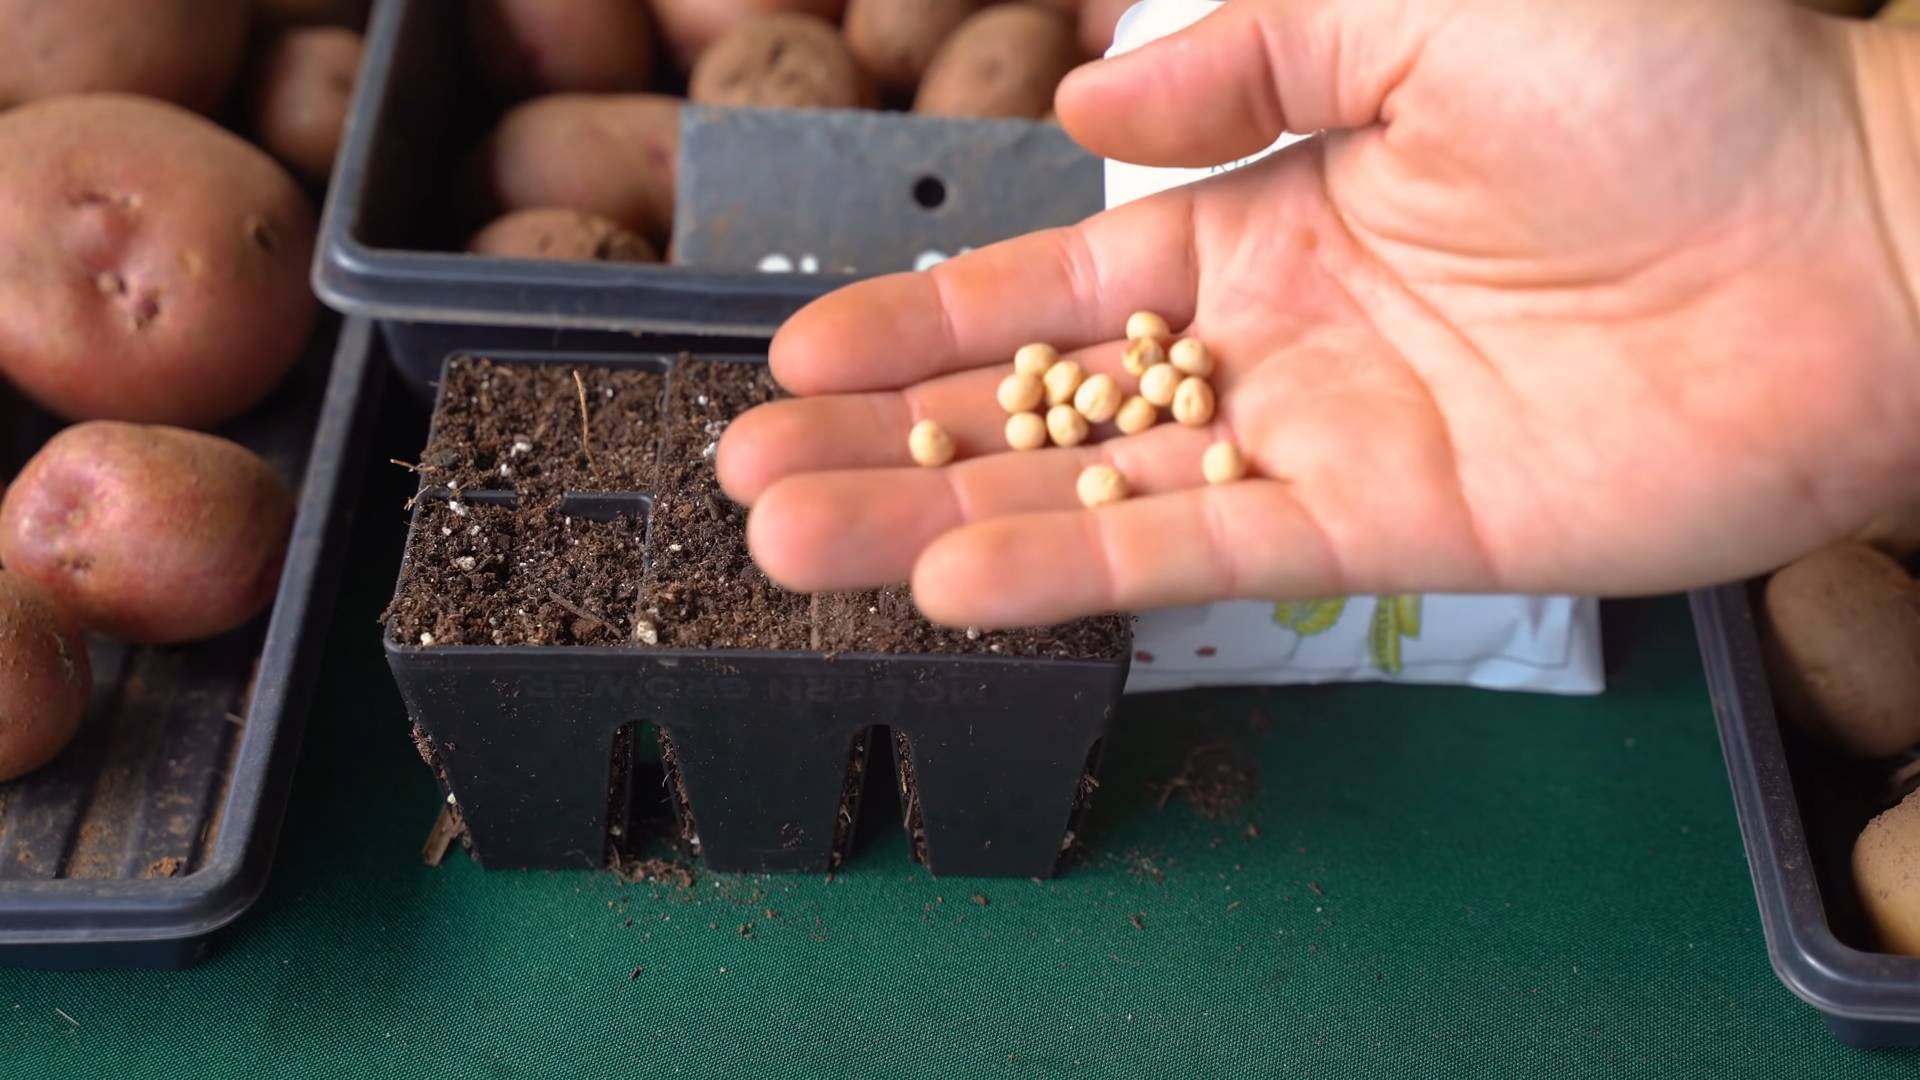
- Fill Your Containers: Fill your containers with potting mix, leaving about an inch of space at the top.
- Sow the Seeds: Plant the pea seeds about 1 inch deep and 1-2 inches apart.
- Water Gently: Water the soil thoroughly but gently, making sure not to dislodge the seeds.
- Provide Light: Place your containers in a sunny windowsill that receives at least 6 hours of direct sunlight per day. If you don’t have enough natural light, use grow lights. Position the lights a few inches above the soil surface.
Germination and Early Growth
This is where the magic happens! Keep a close eye on your seedlings as they emerge.
- Maintain Moisture: Keep the soil consistently moist, but not soggy. Water when the top inch of soil feels dry to the touch.
- Provide Support: Once the seedlings are a few inches tall, provide them with a trellis or support system. Gently guide the tendrils towards the support.
- Thin Seedlings (If Necessary): If you planted your seeds close together and they all sprouted, you might need to thin them out. Choose the strongest seedlings and remove the weaker ones to give the remaining plants more space to grow.
Caring for Your Indoor Pea Plants
Consistent care is key to a bountiful harvest.
- Watering: Water regularly, allowing the top inch of soil to dry out between waterings. Avoid overwatering, as this can lead to root rot.
- Fertilizing: Feed your pea plants with a balanced liquid fertilizer every 2-3 weeks. Follow the instructions on the fertilizer packaging.
- Light: Ensure your plants receive adequate light. If using grow lights, keep them on for 12-16 hours per day.
- Temperature: Peas prefer cooler temperatures, ideally between 60-70°F (15-21°C).
- Air Circulation: Good air circulation helps prevent fungal diseases. You can use a small fan to gently circulate the air around your plants.
- Pest Control: Keep an eye out for common pests like aphids and spider mites. If you spot any pests, treat them with insecticidal soap or neem oil.
Pollination (If Necessary)
Peas are self-pollinating, meaning they don’t need bees or other insects to produce pods. However, sometimes indoor plants can benefit from a little help.
- Hand Pollination: Gently shake the plants or use a small paintbrush to transfer pollen from one flower to another. Do this in the morning when the flowers are open.
Harvesting Your Peas
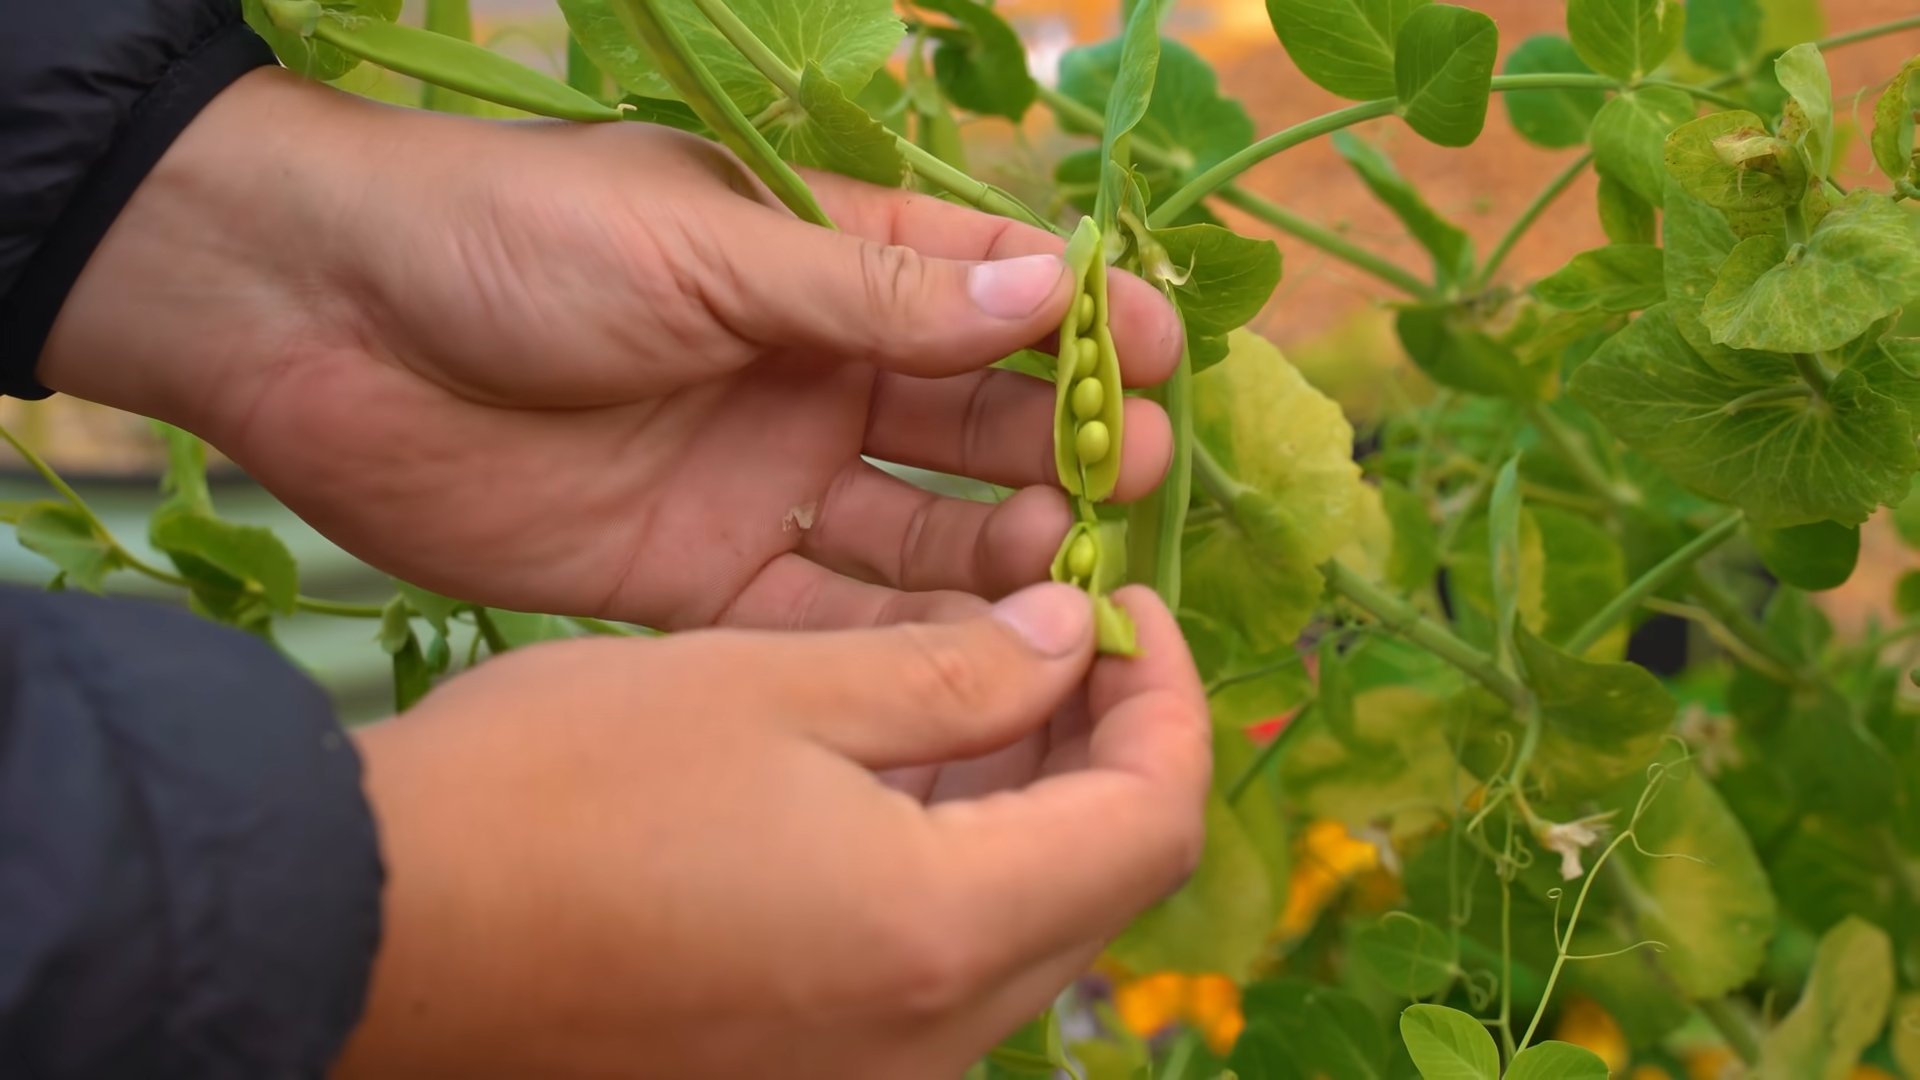
The moment you’ve been waiting for! Harvesting your peas at the right time is crucial for the best flavor.
- Timing: Harvest snap peas when the pods are plump and the peas inside are just beginning to develop. Harvest shelling peas when the pods are full and round.
- Technique: Gently pluck the pods from the plant, being careful not to damage the vines.
- Frequency: Harvest regularly to encourage continued production. The more you harvest, the more peas your plants will produce!
Troubleshooting Common Problems
Even with the best care, you might encounter a few challenges along the way. Here are some common problems and how to address them:
Yellowing Leaves
* Possible Cause: Overwatering, nutrient deficiency, or lack of light.
* Solution: Adjust your watering schedule, fertilize your plants, and ensure they are receiving adequate light.
Leggy Growth
* Possible Cause: Insufficient light.
* Solution: Provide more light, either through a sunnier location or with grow lights.
Lack of Pod Production
* Possible Cause: Insufficient pollination, nutrient deficiency, or temperature stress.
* Solution: Try hand-pollinating your plants, fertilize them with a balanced fertilizer, and ensure they are kept in a cool environment.
Pest Infestation
* Possible Cause: Pests can hitchhike on new plants or enter through open windows.
* Solution: Inspect your plants regularly for pests. Treat infestations with insecticidal soap or neem oil.
Extending Your Harvest
Want to keep the pea party going? Here are a few tips for extending your harvest:
- Succession Planting: Plant new seeds every 2-3 weeks to ensure a continuous supply of peas.
- Choose Heat-Tolerant Varieties: If you’re growing peas during warmer months, select varieties that are more tolerant of heat.
- Provide Shade: During the hottest part of the day, provide your plants with some shade to prevent them from overheating.
Enjoying Your Homegrown Peas
Congratulations! You’ve successfully grown peas indoors. Now it’s time to savor the fruits (or rather, vegetables) of your labor. Enjoy your fresh, sweet peas in salads, stir-fries, soups, or simply as a delicious snack straight from the pod.
Growing peas indoors is a rewarding experience that brings a touch of spring to your home, no matter the season. With a little care and attention, you can enjoy a bountiful harvest of homegrown goodness. Happy gardening!
Conclusion
So, there you have it! Growing peas indoors is not only achievable but also incredibly rewarding. Imagine fresh, crisp pea shoots brightening up your winter salads or adding a delightful crunch to your spring stir-fries, all thanks to your own green thumb. This DIY trick transforms a small space into a miniature edible garden, offering a sustainable and satisfying way to enjoy the taste of spring year-round.
Why is this a must-try? Because it’s more than just growing food; it’s about connecting with nature, even within the confines of your home. It’s about experiencing the miracle of growth firsthand, nurturing a tiny seed into a vibrant plant. It’s about adding a touch of freshness and vitality to your meals, knowing exactly where your food comes from and how it was grown. And let’s be honest, there’s a certain satisfaction in defying the seasons and enjoying homegrown produce when the grocery store shelves are looking a little bleak.
But the benefits don’t stop there. Growing peas indoors is also a fantastic way to introduce children to gardening, teaching them about responsibility, patience, and the wonders of the natural world. It’s a simple yet powerful way to foster a love for healthy eating and sustainable living.
Ready to take your indoor pea growing to the next level? Consider these variations:
* Microgreens Mania: Harvest your pea shoots when they’re just a few inches tall for a concentrated burst of flavor and nutrients. These microgreens are perfect for salads, sandwiches, and garnishes.
* Vertical Gardening: If you’re short on space, try growing your peas in a vertical planter or trellis. This not only maximizes your growing area but also adds a touch of greenery to your walls.
* Succession Planting: Plant new seeds every few weeks to ensure a continuous harvest of fresh pea shoots. This way, you’ll always have a supply on hand for your culinary creations.
* Experiment with Varieties: While most pea varieties will grow indoors, some are better suited than others. Try dwarf varieties like ‘Little Marvel’ or ‘Tom Thumb’ for compact growth.
Don’t be intimidated if you’re a beginner. Growing peas indoors is surprisingly easy, and the rewards are well worth the effort. So, grab a bag of pea seeds, gather your supplies, and get ready to embark on a green adventure. We are confident that you will enjoy the process of growing peas indoors.
We encourage you to try this DIY trick and share your experience with us! Post photos of your indoor pea gardens on social media using #IndoorPeaGarden and tag us so we can see your progress. We’d love to hear your tips, tricks, and any variations you’ve discovered along the way. Let’s create a community of indoor pea growers and inspire others to bring the taste of spring into their homes. Happy growing!
Frequently Asked Questions (FAQ)
What kind of peas are best for growing indoors?
While many pea varieties can be grown indoors, bush or dwarf varieties are generally preferred due to their compact size and shorter vines. These varieties are less likely to require extensive support and are better suited for container gardening. Some popular choices include ‘Little Marvel,’ ‘Tom Thumb,’ ‘Sugar Ann,’ and ‘Snowbird.’ Snow peas and snap peas also work well. Consider the space you have available and choose a variety that fits your needs. Also, make sure to use seeds specifically intended for planting, not dried peas from the grocery store.
How much light do indoor peas need?
Peas need a significant amount of light to thrive. Ideally, they require at least 6-8 hours of direct sunlight per day. If you don’t have a sunny windowsill, you can supplement with grow lights. Position the grow lights about 6-12 inches above the plants and keep them on for 12-16 hours a day. Insufficient light can lead to leggy growth and reduced yields. Rotate your pea plants regularly to ensure even light exposure on all sides.
What kind of soil should I use for growing peas indoors?
Use a well-draining potting mix that is rich in organic matter. Avoid using garden soil, as it can be too heavy and may contain pests or diseases. A good potting mix will provide the necessary nutrients and drainage for healthy pea growth. You can also amend your potting mix with compost or other organic materials to improve its fertility. Make sure the container you use has drainage holes to prevent waterlogging.
How often should I water my indoor pea plants?
Water your pea plants regularly, keeping the soil consistently moist but not waterlogged. Check the soil moisture by sticking your finger about an inch deep. If the soil feels dry, it’s time to water. Avoid overwatering, as this can lead to root rot. Water at the base of the plants to avoid wetting the foliage, which can increase the risk of fungal diseases. The frequency of watering will depend on factors such as temperature, humidity, and the size of your container.
Do I need to provide support for my indoor pea plants?
Yes, most pea varieties will need some form of support to climb. You can use a small trellis, stakes, or even chopsticks to provide support. As the plants grow, gently guide the vines onto the support structure. This will help to keep the plants upright and prevent them from sprawling. If you’re growing a dwarf variety, the support may not be as crucial, but it can still help to keep the plants tidy.
How long does it take for peas to germinate indoors?
Pea seeds typically germinate within 7-14 days, depending on the temperature and moisture levels. To speed up germination, you can soak the seeds in water for 24 hours before planting. Keep the soil consistently moist during the germination period. Once the seedlings emerge, provide them with plenty of light and continue to water regularly.
When can I harvest my indoor peas?
The harvest time will depend on the variety of peas you’re growing. Pea shoots can be harvested as soon as they are a few inches tall, usually within a few weeks of planting. For snow peas and snap peas, harvest when the pods are plump and tender. For shelling peas, wait until the pods are fully developed and the peas inside are plump and round. Regularly harvesting your peas will encourage the plants to produce more.
Are there any common pests or diseases that affect indoor pea plants?
While indoor pea plants are generally less susceptible to pests and diseases than outdoor plants, they can still be affected. Common pests include aphids, spider mites, and whiteflies. Check your plants regularly for signs of infestation and take action promptly. You can use insecticidal soap or neem oil to control pests. Fungal diseases such as powdery mildew can also be a problem. Ensure good air circulation and avoid overwatering to prevent fungal diseases.
Can I grow peas indoors year-round?
Yes, you can grow peas indoors year-round, provided you have adequate light and temperature control. Peas prefer cooler temperatures, so avoid placing them near heat sources. With proper care, you can enjoy fresh pea shoots and peas even in the dead of winter. Succession planting is key to ensuring a continuous harvest throughout the year.
What are the benefits of growing peas indoors?
Growing peas indoors offers several benefits, including:
* Fresh, homegrown produce: Enjoy the taste of fresh peas year-round, regardless of the season.
* Convenience: Have access to fresh peas right in your own home.
* Sustainability: Reduce your reliance on store-bought produce and minimize your carbon footprint.
* Educational opportunity: Teach children about gardening and healthy eating.
* Therapeutic benefits: Gardening can be a relaxing and rewarding hobby.
* Space-saving: Grow peas in small spaces, such as apartments or balconies.
* Pest and disease control: Indoor plants are generally less susceptible to pests and diseases.
* Nutritional value: Freshly grown peas are packed with vitamins, minerals, and antioxidants.
Leave a Comment