
Growing compact bush beans doesn’t have to be a sprawling, space-hogging affair! Are you dreaming of fresh, homegrown beans but think you don’t have the room? I’m here to tell you that even the tiniest balcony or patio can become a bean-growing paradise. Forget those sprawling vines; we’re diving into the world of compact bush beans and unlocking some seriously clever DIY tricks to maximize your harvest.
Beans, in general, have a rich history, dating back thousands of years and playing a vital role in diets across the globe. From ancient civilizations in the Americas to traditional European cuisines, beans have been a staple food source. But let’s be honest, not everyone has acres of farmland to dedicate to these nutritional powerhouses. That’s where the magic of compact bush beans comes in!
In this article, I’m going to share my favorite DIY hacks for growing compact bush beans successfully, even if you’re short on space. We’ll cover everything from choosing the right varieties and optimizing your soil to creating clever support systems and warding off pests naturally. Imagine stepping outside your door and picking fresh, crisp beans for dinner – it’s easier than you think! So, grab your gardening gloves, and let’s get started on this exciting journey to a bountiful bean harvest, no matter how small your garden may be.
Growing Bush Beans in Containers: A Beginner’s Guide
Hey there, fellow gardening enthusiasts! I’m so excited to share my experience with growing bush beans in containers. It’s a fantastic way to enjoy fresh, homegrown beans even if you have limited space, like an apartment balcony or a small patio. Trust me, the satisfaction of harvesting your own beans is totally worth it!
Why Bush Beans and Why Containers?
Bush beans are perfect for container gardening because, well, they’re *bushy*! Unlike pole beans, which need a trellis to climb, bush beans stay compact and manageable. This makes them ideal for pots and planters. Plus, container gardening gives you more control over the soil, watering, and sunlight, leading to healthier and more productive plants.
What You’ll Need: The Essential Supplies
Before we dive into the nitty-gritty, let’s gather our supplies. Here’s what you’ll need to get started:
* Bush Bean Seeds: Choose your favorite variety! I personally love ‘Blue Lake Bush’ for its classic flavor and high yield, but ‘Contender’ and ‘Provider’ are also excellent choices.
* Containers: Opt for pots that are at least 12 inches in diameter and 12 inches deep. This gives the roots enough room to spread out. Fabric pots are also a great option as they allow for better drainage and aeration.
* Potting Mix: Use a high-quality potting mix, not garden soil. Potting mix is lighter and drains better, which is crucial for container gardening.
* Fertilizer: A balanced, slow-release fertilizer is ideal. Alternatively, you can use a liquid fertilizer every few weeks.
* Watering Can or Hose: For regular watering.
* Trowel: For planting and transplanting.
* Optional: Mulch (straw, wood chips, or shredded leaves) to help retain moisture and suppress weeds.
Step-by-Step Planting Guide
Alright, let’s get our hands dirty! Here’s how to plant your bush bean seeds in containers:
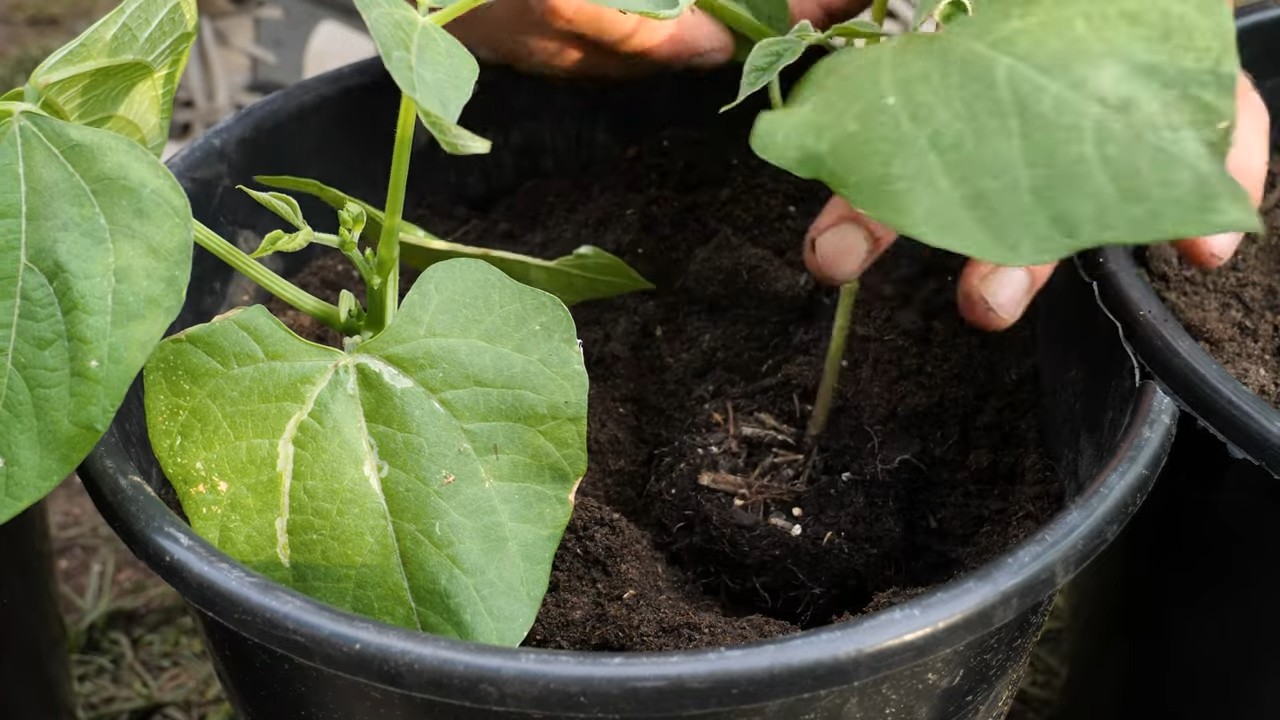
1. Prepare Your Containers:
* Make sure your containers have drainage holes. This is super important to prevent waterlogging, which can lead to root rot.
* Fill the containers with potting mix, leaving about an inch or two of space at the top.
* Gently pat down the soil to remove any air pockets.
2. Sow the Seeds:
* Plant the bean seeds about 1 inch deep and 2-3 inches apart.
* I usually plant 3-4 seeds per container, just to be on the safe side. If all the seeds germinate, you can thin them out later, keeping the strongest seedlings.
* Cover the seeds with potting mix and gently water the soil.
3. Watering and Sunlight:
* Keep the soil consistently moist, but not soggy. Water deeply whenever the top inch of soil feels dry to the touch.
* Bush beans need at least 6-8 hours of sunlight per day. Place your containers in a sunny spot where they’ll get plenty of light. If you don’t have enough natural sunlight, you can supplement with grow lights.
4. Germination and Thinning:
* Bean seeds usually germinate within 5-10 days, depending on the temperature and moisture levels.
* Once the seedlings have a few sets of true leaves, thin them out if necessary. Keep the strongest, healthiest seedlings and remove the weaker ones.
Caring for Your Bush Bean Plants
Now that your beans are growing, it’s time to provide them with the care they need to thrive.
1. Watering:
* Water regularly, especially during hot and dry weather. Check the soil moisture daily and water when the top inch feels dry.
* Avoid overwatering, as this can lead to root rot.
* Water in the morning to allow the foliage to dry before nightfall, which can help prevent fungal diseases.
2. Fertilizing:
* If you used a slow-release fertilizer at planting time, you may not need to fertilize again. However, if your plants start to look pale or stunted, you can give them a boost with a liquid fertilizer.
* Use a balanced fertilizer (e.g., 10-10-10) or a fertilizer specifically formulated for vegetables.
* Follow the instructions on the fertilizer label carefully.
3. Pest and Disease Control:
* Keep an eye out for common bean pests, such as aphids, bean beetles, and spider mites.
* You can usually control these pests with insecticidal soap or neem oil.
* To prevent fungal diseases, make sure your plants have good air circulation and avoid overhead watering.
* Remove any diseased leaves or plants promptly to prevent the spread of disease.
4. Support (Optional):
* While bush beans don’t need a trellis like pole beans, they can sometimes benefit from a little support, especially if they get top-heavy with beans.
* You can use small stakes or tomato cages to provide support.
Harvesting Your Bounty
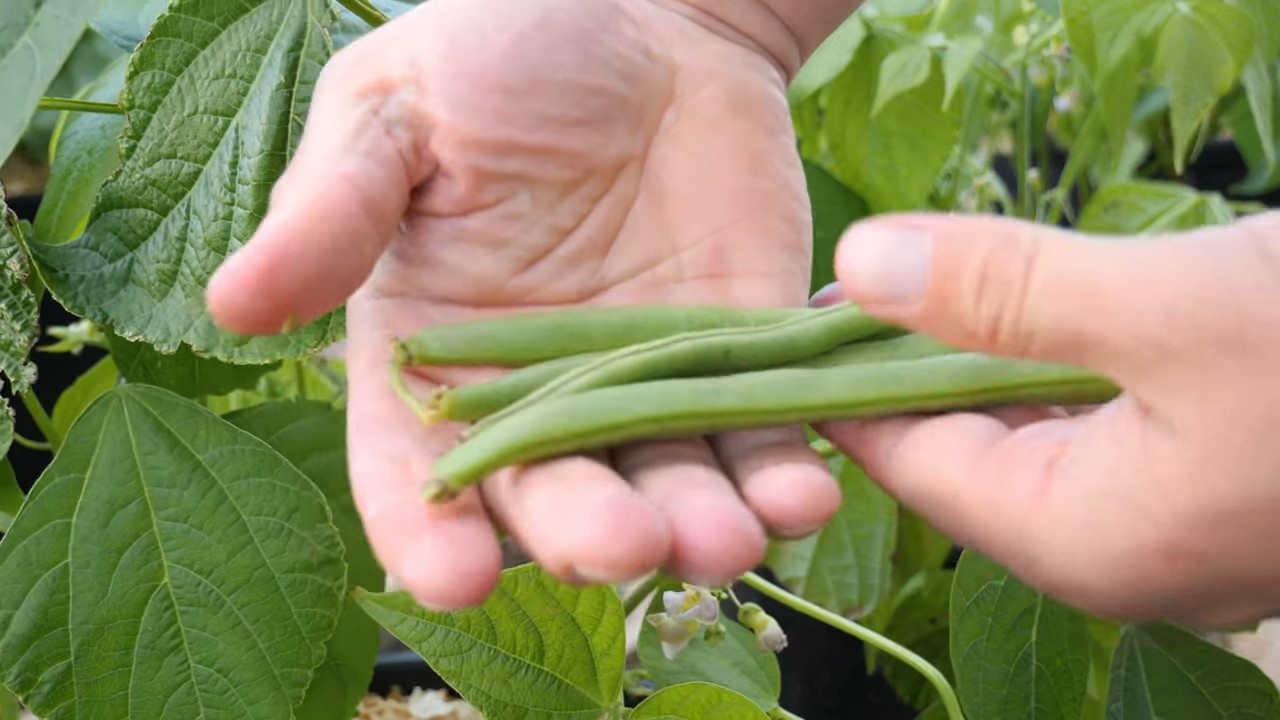
This is the most exciting part! You’ll know your bush beans are ready to harvest when the pods are firm, plump, and easily snap off the plant.
1. Timing:
* Harvest your beans regularly, about every 2-3 days. This will encourage the plants to produce more beans.
* The ideal time to harvest is in the morning, when the beans are cool and crisp.
2. Technique:
* Gently snap the bean pods off the plant, being careful not to damage the stems or leaves.
* Avoid pulling the pods, as this can uproot the entire plant.
3. Storage:
* Freshly harvested beans are best eaten right away.
* If you need to store them, you can keep them in the refrigerator for up to a week.
* For longer storage, you can blanch and freeze the beans.
Troubleshooting Common Problems
Even with the best care, you might encounter some challenges along the way. Here are some common problems and how to address them:
* Yellowing Leaves: This could be a sign of overwatering, nutrient deficiency, or pest infestation. Check the soil moisture, fertilize if necessary, and inspect the plants for pests.
* Lack of Flowers or Beans: This could be due to insufficient sunlight, poor soil, or extreme temperatures. Make sure your plants are getting enough sunlight, fertilize with a bloom-boosting fertilizer, and protect them from extreme heat or cold.
* Pest Infestations: Treat infestations promptly with insecticidal soap, neem oil, or other appropriate pesticides.
* Fungal Diseases: Improve air circulation, avoid overhead watering, and treat with a fungicide if necessary.
Choosing the Right Bush Bean Variety
There are tons of bush bean varieties out there, each with its own unique characteristics. Here are a few of my favorites:
* Blue Lake Bush: A classic variety with excellent flavor and high yields.
* Contender: An early-maturing variety that’s resistant to many common bean diseases.
* Provider: Another early-maturing variety that’s known for its consistent production.
* Roma II: A flat-podded Italian bean with a rich, nutty flavor.
* Royal Burgundy: A purple-podded bean that turns green when cooked. It adds a pop of color to your garden and your plate!
Tips for Maximizing Your Harvest
Want to get the most out of your bush bean plants? Here are a few extra tips:
* Succession Planting: Plant a new batch of seeds every 2-3 weeks to ensure a continuous harvest throughout the growing season.
* Companion Planting: Plant bush beans alongside other beneficial plants, such as carrots, cucumbers, and marigolds. These plants can help deter pests and improve soil health.
* Mulching: Apply a layer of mulch around your plants to help retain moisture, suppress weeds, and regulate soil temperature.
* Regular Harvesting: As mentioned earlier, harvest your beans regularly to encourage the plants to produce more.
Enjoying Your Homegrown Beans
Now that you’ve harvested your delicious bush beans, it’s time to enjoy them! Here are a few ideas:
* Steamed or Sautéed: Simply steam or sauté the beans with a little butter, garlic, and salt.
* Bean Salad: Add the beans to a salad with other vegetables, such as tomatoes, cucumbers, and onions.
* Casseroles: Use the beans in casseroles, soups, and stews.
* Pickled Beans: Pickle the beans for a tangy and flavorful treat.
Growing bush beans in containers is a rewarding and enjoyable experience. With a
Conclusion
So, there you have it! Growing compact bush beans doesn’t have to be a space-hogging endeavor. By embracing these simple yet effective DIY tricks, you can cultivate a thriving bean patch even in the most limited of gardens. We’ve explored how strategic container selection, proper soil preparation, and smart staking techniques can transform your small space into a bean-growing powerhouse.
But why is this a must-try? Because it unlocks the joy of fresh, homegrown produce for everyone, regardless of their living situation. Imagine stepping outside your apartment balcony or small backyard and harvesting a handful of crisp, flavorful bush beans for your dinner. That’s the power of this DIY approach. It’s about reclaiming control over your food source, reducing your carbon footprint, and experiencing the satisfaction of nurturing something from seed to table.
Beyond the basic techniques, there’s plenty of room for experimentation. Consider exploring different varieties of compact bush beans. Some, like ‘Blue Lake Bush’ or ‘Contender,’ are known for their high yields and disease resistance. Others, like ‘Provider,’ are particularly early producers, perfect for those eager to get their harvest started. You can also experiment with companion planting. Marigolds, for example, are known to deter bean beetles, while nasturtiums can attract aphids away from your precious bean plants.
Another variation to consider is vertical gardening. If you’re truly short on horizontal space, train your bush beans to climb a small trellis or netting. While bush beans aren’t natural climbers like pole beans, they can be encouraged to grow upwards with a little support, maximizing your yield per square foot. You can also try succession planting, sowing new seeds every few weeks to ensure a continuous harvest throughout the growing season.
Don’t be afraid to get your hands dirty and experiment! Gardening is a journey of learning and discovery. Each season brings new challenges and opportunities to refine your techniques. The key is to start small, observe your plants closely, and adapt your approach as needed.
We are confident that these DIY tricks will empower you to successfully grow compact bush beans, no matter your space constraints. Now, it’s your turn to put these tips into action. Plant those seeds, nurture those seedlings, and watch your bean patch flourish.
And most importantly, we want to hear about your experience! Share your successes, your challenges, and your creative solutions in the comments below. Let’s build a community of compact bush bean growers, sharing our knowledge and inspiring each other to cultivate thriving gardens, one bean at a time. Your insights could be invaluable to other aspiring gardeners, so don’t hesitate to share your story. Happy gardening!
Frequently Asked Questions (FAQ)
What exactly are compact bush beans, and how are they different from other types of beans?
Compact bush beans are specifically bred to have a shorter, bushier growth habit compared to pole beans, which require trellises or other support to climb. This compact nature makes them ideal for small gardens, containers, and raised beds where space is limited. They typically reach a height of 1-2 feet and produce beans in a concentrated period, making harvesting easier. Unlike pole beans that produce over a longer season, bush beans generally offer a single, abundant harvest.
How much sunlight do compact bush beans need?
Compact bush beans thrive in full sun, requiring at least 6-8 hours of direct sunlight per day. Insufficient sunlight can lead to leggy growth, reduced yields, and increased susceptibility to diseases. If you’re growing them indoors or in a partially shaded area, consider supplementing with grow lights to ensure they receive adequate light. Observe your plants closely; if they appear stretched or pale, it’s a sign they need more sunlight.
What kind of soil is best for growing compact bush beans?
Well-draining soil is crucial for growing healthy compact bush beans. They prefer a slightly acidic to neutral soil pH (around 6.0 to 7.0). Amend your soil with compost or other organic matter to improve drainage, fertility, and water retention. Avoid heavy clay soils that can become waterlogged, as this can lead to root rot. A good soil mix for container-grown bush beans consists of equal parts potting soil, compost, and perlite or vermiculite.
How often should I water my compact bush beans?
Water your compact bush beans regularly, especially during hot, dry weather. Aim to keep the soil consistently moist but not waterlogged. Water deeply at the base of the plants, avoiding wetting the foliage, which can encourage fungal diseases. Check the soil moisture regularly by sticking your finger about an inch deep into the soil. If it feels dry, it’s time to water. Mulching around the plants can help retain moisture and suppress weeds.
Do compact bush beans need fertilizer?
While compact bush beans are relatively low-maintenance, they benefit from occasional fertilization. Before planting, amend the soil with a slow-release fertilizer or compost. During the growing season, you can side-dress the plants with a balanced fertilizer (e.g., 10-10-10) every few weeks. Avoid over-fertilizing, as this can lead to excessive foliage growth at the expense of bean production.
How do I know when my compact bush beans are ready to harvest?
Compact bush beans are typically ready to harvest about 50-60 days after planting. The beans should be firm, plump, and easily snap when bent. Avoid letting the beans become too large or tough, as this can affect their flavor and texture. Harvest regularly to encourage continued production.
What are some common pests and diseases that affect compact bush beans, and how can I prevent them?
Common pests that affect compact bush beans include bean beetles, aphids, and spider mites. Diseases include powdery mildew, bean rust, and root rot. To prevent these problems, practice good garden hygiene, such as removing plant debris and weeds. Inspect your plants regularly for signs of pests or diseases and take action promptly. Use organic pest control methods, such as insecticidal soap or neem oil, to control pests. Ensure good air circulation to prevent fungal diseases.
Can I grow compact bush beans in containers? What size container is best?
Yes, compact bush beans are well-suited for container gardening. Choose a container that is at least 12 inches deep and 12 inches wide to provide adequate space for the roots to grow. Ensure the container has drainage holes to prevent waterlogging. Use a high-quality potting mix and water regularly.
How can I maximize my yield of compact bush beans in a small space?
To maximize your yield, consider these strategies:
* **Choose high-yielding varieties:** Select compact bush bean varieties known for their productivity.
* **Provide optimal growing conditions:** Ensure adequate sunlight, well-draining soil, and regular watering.
* **Succession planting:** Sow new seeds every few weeks to extend your harvest season.
* **Companion planting:** Plant beneficial herbs and flowers alongside your beans to deter pests and attract pollinators.
* **Vertical gardening:** Train your bush beans to climb a small trellis or netting to maximize space utilization.
Can I save seeds from my compact bush beans for next year?
Yes, you can save seeds from your compact bush beans, but only if they are open-pollinated varieties. Hybrid varieties will not produce true-to-type seeds. To save seeds, allow some of the bean pods to dry completely on the plant. Once the pods are dry and brittle, shell the beans and store them in an airtight container in a cool, dry place.
Leave a Comment