
Growing chili peppers tips are what you need to transform your garden into a vibrant, flavorful paradise! Imagine plucking fiery, sun-ripened chilies straight from your own backyard – ready to spice up your favorite dishes. Forget those bland, store-bought peppers; with a few simple tricks and a little DIY magic, you can cultivate a thriving chili pepper garden that will have your taste buds singing.
Chili peppers have a rich history, dating back thousands of years to South America, where they were not only a culinary staple but also held medicinal and even spiritual significance. From the ancient Aztecs to modern-day foodies, the allure of the chili pepper has endured. Today, growing your own chilies is more popular than ever, and for good reason!
Let’s face it, store-bought chilies can be expensive and often lack the intense flavor and heat you crave. Plus, there’s nothing quite like the satisfaction of nurturing a plant from seed to harvest. I’m here to share some easy-to-follow growing chili peppers tips and DIY hacks that will help you achieve a bountiful harvest, even if you’re a complete beginner. Whether you’re dreaming of fiery salsas, homemade hot sauces, or simply adding a touch of spice to your meals, these tips will empower you to grow the perfect chili peppers right at home. So, grab your gardening gloves, and let’s get started!
Growing Chili Peppers: From Seed to Sizzling Harvest!
Hey there, fellow spice enthusiasts! I’m so excited you’re here because we’re about to embark on a fiery journey: growing your own chili peppers! Trust me, there’s nothing quite like the satisfaction of harvesting peppers you nurtured from tiny seeds. This guide will walk you through every step, from choosing the right seeds to enjoying your spicy bounty. Let’s get started!
Choosing Your Chili Pepper Varieties
Okay, first things first: what kind of heat are you craving? The world of chili peppers is vast and varied, ranging from mild and sweet to face-meltingly hot. Here’s a quick rundown to get you thinking:
* Mild Peppers: If you’re just starting out or prefer a gentle kick, consider varieties like Anaheim, Poblano, or even Shishito peppers. These are great for stuffing, roasting, or adding a subtle flavor to your dishes.
* Medium-Hot Peppers: For a bit more zing, try Jalapeños, Serrano peppers, or Cayenne peppers. These are versatile and can be used in salsas, sauces, and stir-fries.
* Hot Peppers: Now we’re talking! Habaneros, Scotch Bonnets, and Thai chilies will definitely bring the heat. Use these sparingly and with caution!
* Super-Hot Peppers: Enter the realm of the Carolina Reaper, Ghost Pepper (Bhut Jolokia), and Trinidad Scorpion. These are not for the faint of heart! Handle with gloves and extreme care.
Pro Tip: Research the Scoville Heat Units (SHU) of different peppers to get a better understanding of their heat level.
Starting Your Chili Pepper Seeds
Starting your seeds indoors is crucial, especially if you live in a region with a shorter growing season. I usually start mine about 6-8 weeks before the last expected frost.
Materials You’ll Need:
* Chili pepper seeds (obviously!)
* Seed starting trays or small pots
* Seed starting mix (this is different from regular potting soil – it’s lighter and better for germination)
* A spray bottle
* A heat mat (optional, but highly recommended)
* A grow light (also optional, but helps prevent leggy seedlings)
* Labels and a permanent marker
Step-by-Step Instructions:
1. Prepare Your Seed Starting Trays: Fill your seed starting trays or pots with the seed starting mix. Gently tap the trays to settle the mix.
2. Sow the Seeds: Make a small indentation (about ¼ inch deep) in the center of each cell or pot. Place 1-2 seeds in each indentation.
3. Cover the Seeds: Gently cover the seeds with the seed starting mix.
4. Water the Seeds: Use a spray bottle to thoroughly moisten the soil. Avoid overwatering, as this can lead to damping off (a fungal disease that kills seedlings).
5. Provide Warmth: Place the seed starting trays on a heat mat. Chili pepper seeds germinate best in warm temperatures (around 80-85°F).
6. Provide Light: If you’re using a grow light, position it a few inches above the seed starting trays. If not, place the trays in a sunny window.
7. Maintain Moisture: Keep the soil consistently moist, but not soggy. Check the soil daily and mist with water as needed.
8. Be Patient: Germination can take anywhere from 7-21 days, depending on the variety of pepper and the temperature.
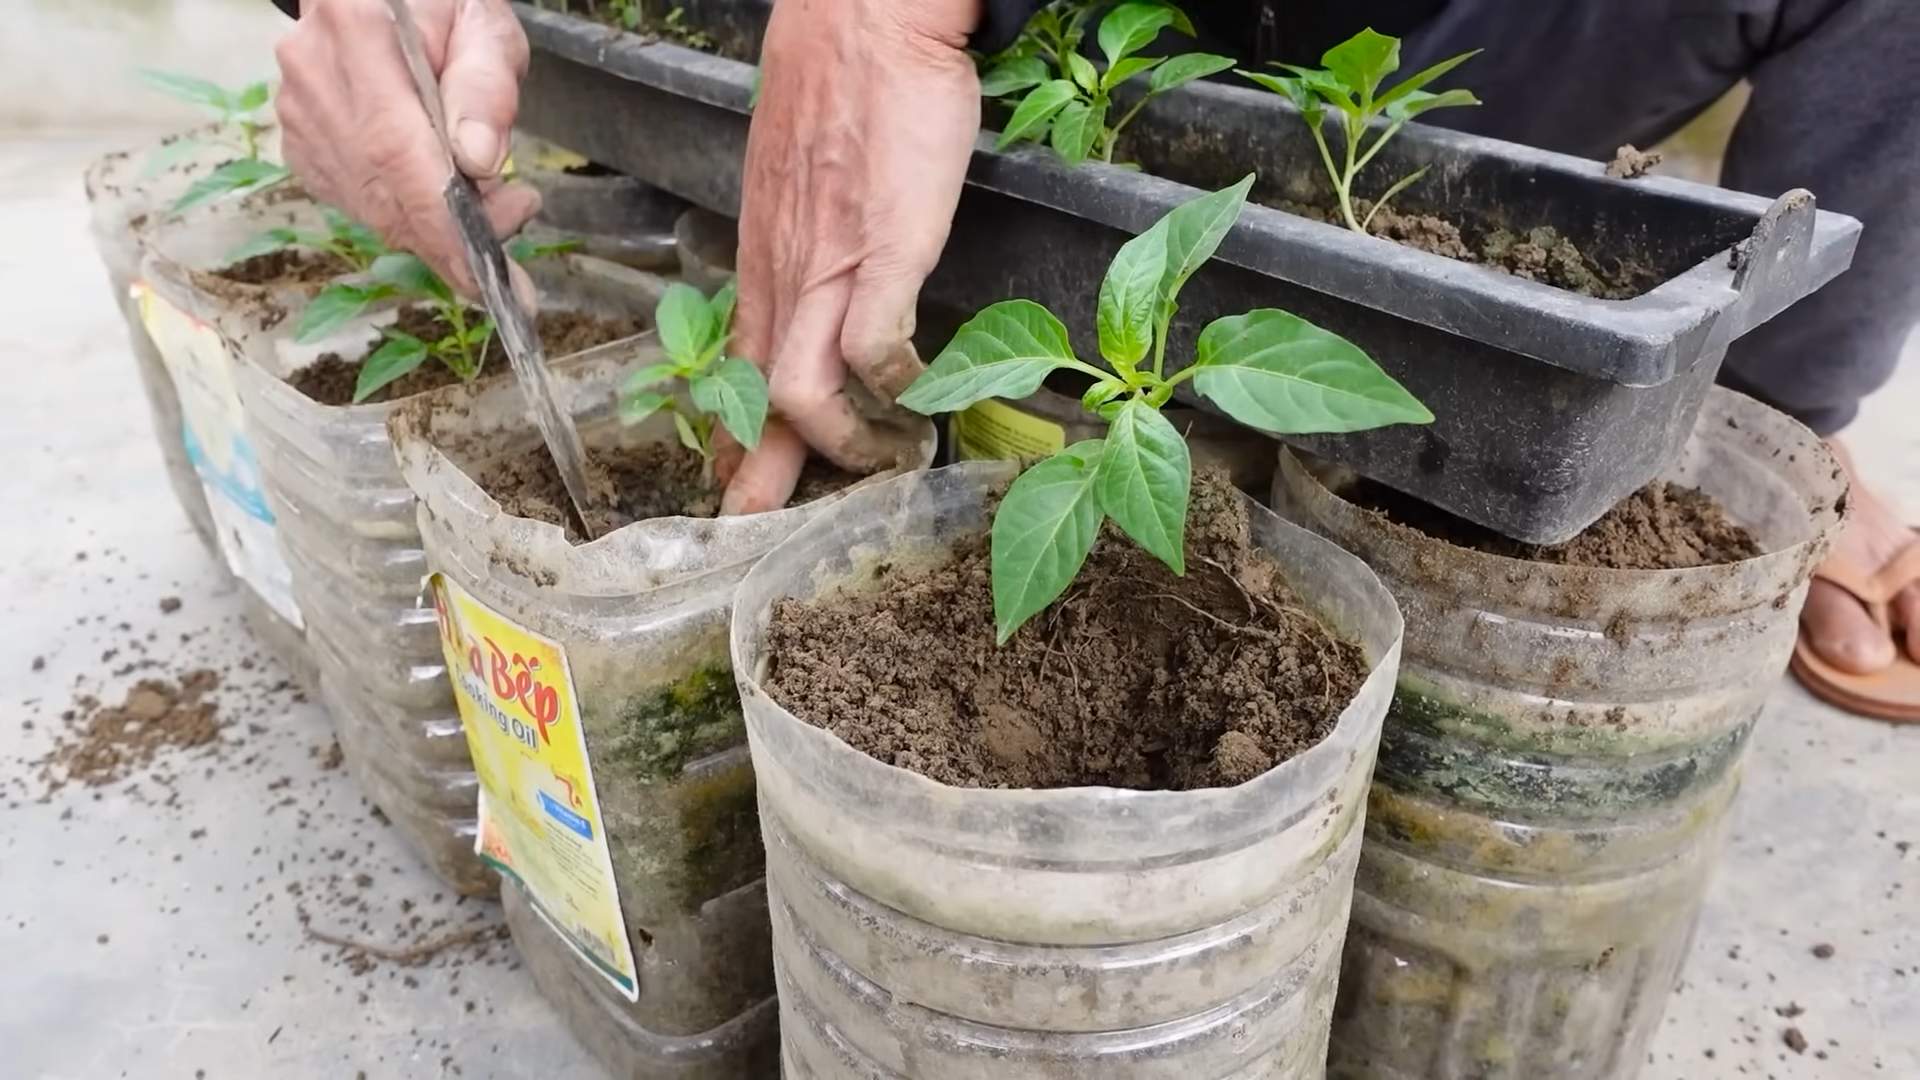
Transplanting Your Chili Pepper Seedlings
Once your seedlings have developed their first set of true leaves (the leaves that look like miniature versions of the adult leaves), it’s time to transplant them into larger pots.
Materials You’ll Need:
* Larger pots (at least 4 inches in diameter)
* Potting soil (a good quality potting mix is essential)
* A small trowel or spoon
* Water
Step-by-Step Instructions:
1. Prepare the Pots: Fill the larger pots with potting soil, leaving about an inch of space at the top.
2. Gently Remove the Seedlings: Carefully loosen the soil around the seedlings in the seed starting trays. Use a small trowel or spoon to gently lift the seedlings out of the trays, being careful not to damage the roots.
3. Transplant the Seedlings: Make a small hole in the center of the potting soil in the larger pots. Place the seedling in the hole, ensuring that the top of the root ball is level with the soil surface.
4. Fill in the Soil: Gently fill in the soil around the seedling, pressing lightly to secure it in place.
5. Water the Seedlings: Water the seedlings thoroughly after transplanting.
6. Provide Light and Warmth: Place the transplanted seedlings in a sunny window or under a grow light. Continue to provide warmth, especially at night.
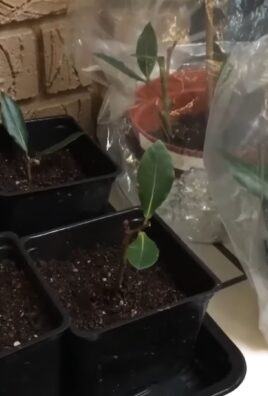
Hardening Off Your Chili Pepper Plants
Before you can plant your chili pepper plants outdoors, you need to “harden them off.” This process gradually acclimates the plants to the outdoor environment, preventing them from being shocked by the sun, wind, and temperature changes.
Step-by-Step Instructions:
1. Day 1-3: Place the plants outdoors in a sheltered location (e.g., a shaded patio) for 1-2 hours each day.
2. Day 4-6: Gradually increase the amount of time the plants spend outdoors, exposing them to more sunlight each day.
3. Day 7-10: Leave the plants outdoors for the entire day, but bring them inside at night if the temperature is expected to drop below 50°F.
4. Day 11-14: Leave the plants outdoors overnight, as long as the temperature remains above 50°F.
Planting Your Chili Pepper Plants Outdoors
Once your chili pepper plants are hardened off and the danger of frost has passed, it’s time to plant them in their final location.
Choosing the Right Location:
* Sunlight: Chili peppers need at least 6-8 hours of direct sunlight per day.
* Soil: The soil should be well-draining and rich in organic matter.
* Spacing: Space the plants 18-24 inches apart, depending on the variety.
Materials You’ll Need:
* Your hardened-off chili pepper plants
* A garden trowel or shovel
* Compost or other organic matter
* Water
* Mulch (optional)
* Stakes or cages (optional, but recommended for taller varieties)
Step-by-Step Instructions:
1. Prepare the Soil: Dig a hole that is slightly larger than the root ball of the plant. Mix compost or other organic matter into the soil.
2. Remove the Plant from the Pot: Gently remove the plant fro
Hey there, fellow spice enthusiasts! I’m so excited you’re here because we’re about to embark on a fiery journey: growing your own chili peppers! Trust me, there’s nothing quite like the satisfaction of harvesting peppers you nurtured from tiny seeds. This guide will walk you through every step, from choosing the right seeds to enjoying your spicy bounty. Let’s get started!
Choosing Your Chili Pepper Varieties
Okay, first things first: what kind of heat are you craving? The world of chili peppers is vast and varied, ranging from mild and sweet to face-meltingly hot. Here’s a quick rundown to get you thinking:
* Mild Peppers: If you’re just starting out or prefer a gentle kick, consider varieties like Anaheim, Poblano, or even Shishito peppers. These are great for stuffing, roasting, or adding a subtle flavor to your dishes.
* Medium-Hot Peppers: For a bit more zing, try Jalapeños, Serrano peppers, or Cayenne peppers. These are versatile and can be used in salsas, sauces, and stir-fries.
* Hot Peppers: Now we’re talking! Habaneros, Scotch Bonnets, and Thai chilies will definitely bring the heat. Use these sparingly and with caution!
* Super-Hot Peppers: Enter the realm of the Carolina Reaper, Ghost Pepper (Bhut Jolokia), and Trinidad Scorpion. These are not for the faint of heart! Handle with gloves and extreme care.
Pro Tip: Research the Scoville Heat Units (SHU) of different peppers to get a better understanding of their heat level.
Starting Your Chili Pepper Seeds
Starting your seeds indoors is crucial, especially if you live in a region with a shorter growing season. I usually start mine about 6-8 weeks before the last expected frost.
Materials You’ll Need:
* Chili pepper seeds (obviously!)
* Seed starting trays or small pots
* Seed starting mix (this is different from regular potting soil – it’s lighter and better for germination)
* A spray bottle
* A heat mat (optional, but highly recommended)
* A grow light (also optional, but helps prevent leggy seedlings)
* Labels and a permanent marker
Step-by-Step Instructions:
1. Prepare Your Seed Starting Trays: Fill your seed starting trays or pots with the seed starting mix. Gently tap the trays to settle the mix.
2. Sow the Seeds: Make a small indentation (about ¼ inch deep) in the center of each cell or pot. Place 1-2 seeds in each indentation.
3. Cover the Seeds: Gently cover the seeds with the seed starting mix.
4. Water the Seeds: Use a spray bottle to thoroughly moisten the soil. Avoid overwatering, as this can lead to damping off (a fungal disease that kills seedlings).
5. Provide Warmth: Place the seed starting trays on a heat mat. Chili pepper seeds germinate best in warm temperatures (around 80-85°F).
6. Provide Light: If you’re using a grow light, position it a few inches above the seed starting trays. If not, place the trays in a sunny window.
7. Maintain Moisture: Keep the soil consistently moist, but not soggy. Check the soil daily and mist with water as needed.
8. Be Patient: Germination can take anywhere from 7-21 days, depending on the variety of pepper and the temperature.
Transplanting Your Chili Pepper Seedlings
Once your seedlings have developed their first set of true leaves (the leaves that look like miniature versions of the adult leaves), it’s time to transplant them into larger pots.
Materials You’ll Need:
* Larger pots (at least 4 inches in diameter)
* Potting soil (a good quality potting mix is essential)
* A small trowel or spoon
* Water
Step-by-Step Instructions:
1. Prepare the Pots: Fill the larger pots with potting soil, leaving about an inch of space at the top.
2. Gently Remove the Seedlings: Carefully loosen the soil around the seedlings in the seed starting trays. Use a small trowel or spoon to gently lift the seedlings out of the trays, being careful not to damage the roots.
3. Transplant the Seedlings: Make a small hole in the center of the potting soil in the larger pots. Place the seedling in the hole, ensuring that the top of the root ball is level with the soil surface.
4. Fill in the Soil: Gently fill in the soil around the seedling, pressing lightly to secure it in place.
5. Water the Seedlings: Water the seedlings thoroughly after transplanting.
6. Provide Light and Warmth: Place the transplanted seedlings in a sunny window or under a grow light. Continue to provide warmth, especially at night.
Hardening Off Your Chili Pepper Plants
Before you can plant your chili pepper plants outdoors, you need to “harden them off.” This process gradually acclimates the plants to the outdoor environment, preventing them from being shocked by the sun, wind, and temperature changes.
Step-by-Step Instructions:
1. Day 1-3: Place the plants outdoors in a sheltered location (e.g., a shaded patio) for 1-2 hours each day.
2. Day 4-6: Gradually increase the amount of time the plants spend outdoors, exposing them to more sunlight each day.
3. Day 7-10: Leave the plants outdoors for the entire day, but bring them inside at night if the temperature is expected to drop below 50°F.
4. Day 11-14: Leave the plants outdoors overnight, as long as the temperature remains above 50°F.
Planting Your Chili Pepper Plants Outdoors
Once your chili pepper plants are hardened off and the danger of frost has passed, it’s time to plant them in their final location.
Choosing the Right Location:
* Sunlight: Chili peppers need at least 6-8 hours of direct sunlight per day.
* Soil: The soil should be well-draining and rich in organic matter.
* Spacing: Space the plants 18-24 inches apart, depending on the variety.
Materials You’ll Need:
* Your hardened-off chili pepper plants
* A garden trowel or shovel
* Compost or other organic matter
* Water
* Mulch (optional)
* Stakes or cages (optional, but recommended for taller varieties)
Step-by-Step Instructions:
1. Prepare the Soil: Dig a hole that is slightly larger than the root ball of the plant. Mix compost or other organic matter into the soil.
2. Remove the Plant from the Pot: Gently remove the plant from its pot, being careful not to damage the roots.
3. Plant the Pepper Plant: Place the plant in the hole, ensuring that the top of the root ball is level with the soil surface.
4. Fill in the Soil: Gently fill in the soil around the plant, pressing lightly to secure it in place.
5. Water the Plant: Water the plant thoroughly after planting.
6. Add Mulch (Optional): Apply a layer of mulch around the plant to help retain moisture and suppress weeds.
7. Stake or Cage the Plant (Optional): If you’re growing a taller variety of pepper, stake or cage the plant to provide support.
Caring for Your Chili Pepper Plants
Now that your chili pepper plants are in the ground, it’s important to provide them with the care they need to thrive.
Watering:
* Water deeply and regularly, especially during hot, dry weather.
* Avoid overwatering, as this can lead to root rot.
* Water at the base of the plant, avoiding wetting the leaves.
Fertilizing:
* Fertilize your chili pepper plants every 2-3 weeks with a balanced fertilizer.
* Avoid over-fertilizing, as this can lead to excessive foliage growth and fewer peppers.
Pest and Disease Control:
* Inspect your plants regularly for pests and diseases.
* Common pests include aphids, spider mites, and whiteflies.
* Common diseases include blossom end rot and fungal infections.
* Use organic pest and disease control methods whenever possible.
Pruning:
* Prune your chili pepper plants to encourage bushier growth and more peppers.
* Remove any dead or diseased leaves or branches.
* Pinch off the tips of the branches to encourage branching.
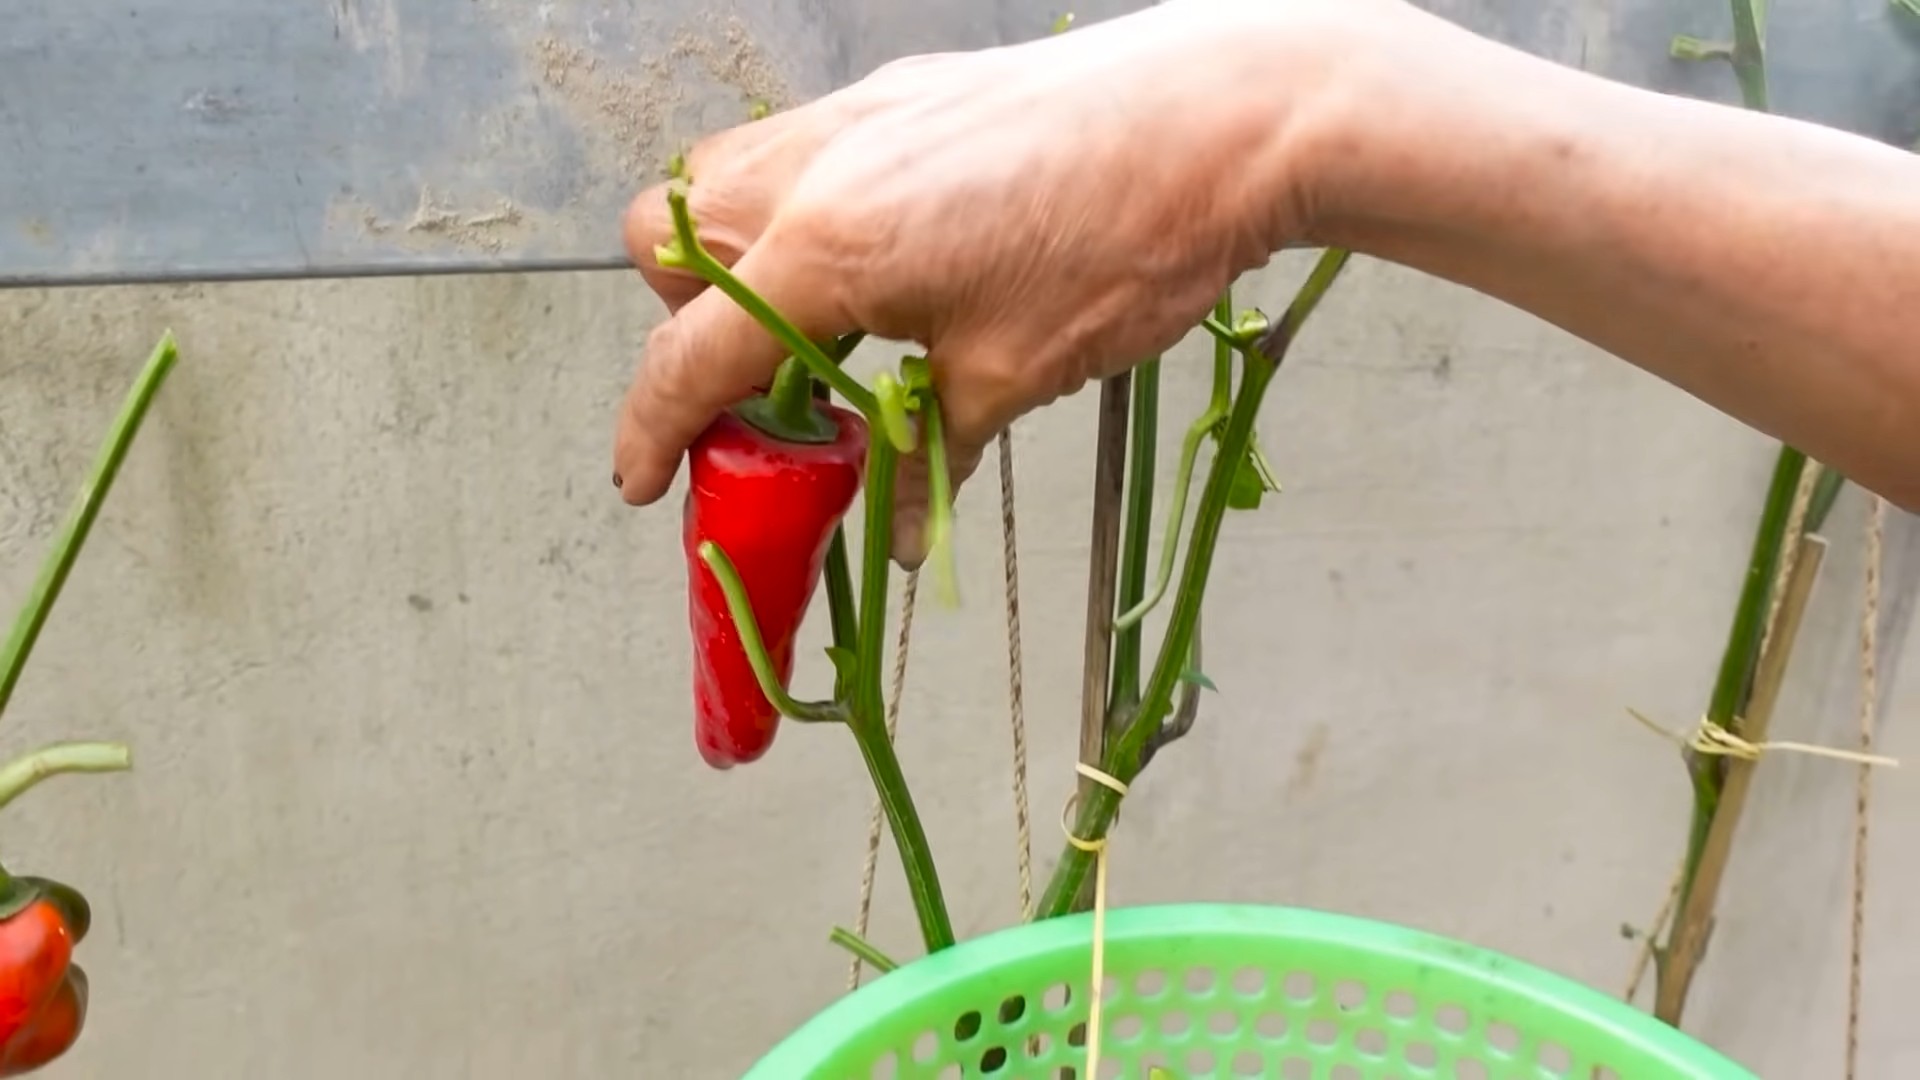
Harvesting Your Chili Peppers
The moment you’ve been waiting for! Harvesting your own chili peppers is incredibly rewarding.
When to Harvest
Conclusion
So, there you have it! Mastering the art of growing chili peppers doesn’t require a green thumb blessed by the gardening gods. With these simple yet effective DIY tricks, you can transform your backyard, balcony, or even a sunny windowsill into a thriving chili pepper paradise. We’ve covered everything from optimizing soil composition and providing the perfect amount of sunlight to warding off common pests and diseases. These techniques are not just about growing chili peppers; they’re about cultivating a deeper connection with nature and experiencing the immense satisfaction of nurturing something from seed to spicy fruition.
Why is this a must-try? Because store-bought chili peppers, while convenient, often lack the vibrant flavor and intense heat that homegrown varieties possess. Plus, you have complete control over the growing process, ensuring that your peppers are free from harmful chemicals and pesticides. Imagine the pride you’ll feel when you add your own freshly picked habaneros to your salsa or sprinkle your homemade cayenne pepper on your favorite dish. The possibilities are endless!
But don’t stop there! Experiment with different varieties of chili peppers to discover your personal favorites. Try growing jalapeños for a mild kick, serranos for a bit more heat, or even ghost peppers for the ultimate spicy challenge. You can also explore different growing methods, such as hydroponics or container gardening, to find what works best for your space and lifestyle. Consider companion planting with herbs like basil or rosemary, which can help deter pests and enhance the flavor of your chili peppers.
We’ve armed you with the knowledge and the tools; now it’s time to put them into action. Don’t be afraid to get your hands dirty, embrace the challenges, and celebrate the successes. Growing chili peppers is a journey, not a destination, and every step of the way is filled with learning and discovery.
We are confident that these DIY tricks will significantly improve your chili pepper growing experience. But the real magic happens when you share your own experiences and insights with others. We encourage you to try these techniques, document your progress, and share your results with us and the wider gardening community. Let us know what worked for you, what didn’t, and any other tips or tricks you’ve discovered along the way. Together, we can create a vibrant and supportive community of chili pepper enthusiasts.
So, grab your seeds, prepare your soil, and get ready to embark on a spicy adventure. Happy growing!
Frequently Asked Questions (FAQ)
What is the best time of year to start growing chili peppers?
The ideal time to start growing chili peppers depends on your climate. In general, chili peppers thrive in warm weather and require a long growing season. If you live in a region with mild winters, you can start your seeds indoors 6-8 weeks before the last expected frost. If you live in a colder climate, you may need to start your seeds even earlier. The key is to ensure that the seedlings are large enough to transplant outdoors after the danger of frost has passed. You can also purchase starter plants from a local nursery if you prefer not to start from seed.
What type of soil is best for growing chili peppers?
Chili peppers prefer well-draining soil that is rich in organic matter. A slightly acidic to neutral pH (around 6.0 to 7.0) is ideal. You can improve your soil by adding compost, aged manure, or other organic amendments. Avoid heavy clay soils, as they can retain too much water and lead to root rot. If you are growing chili peppers in containers, use a high-quality potting mix that is specifically formulated for vegetables.
How much sunlight do chili peppers need?
Chili peppers require at least 6-8 hours of direct sunlight per day to thrive. Choose a location in your garden that receives plenty of sunlight throughout the day. If you are growing chili peppers indoors, place them near a sunny window or use grow lights to supplement natural light. Insufficient sunlight can result in leggy plants with poor fruit production.
How often should I water my chili peppers?
Water your chili peppers regularly, especially during hot and dry weather. The soil should be consistently moist but not waterlogged. Overwatering can lead to root rot, while underwatering can stress the plants and reduce fruit production. Check the soil moisture level regularly by sticking your finger into the soil. If the top inch of soil feels dry, it’s time to water. When watering, water deeply and thoroughly, ensuring that the water reaches the roots.
What are some common pests and diseases that affect chili peppers?
Chili peppers are susceptible to a variety of pests and diseases, including aphids, spider mites, whiteflies, blossom-end rot, and fungal diseases. Regularly inspect your plants for signs of pests or diseases. You can control aphids, spider mites, and whiteflies with insecticidal soap or neem oil. Blossom-end rot is caused by a calcium deficiency and can be prevented by adding calcium to the soil or using a calcium-rich fertilizer. Fungal diseases can be prevented by providing good air circulation and avoiding overwatering.
How do I fertilize my chili peppers?
Fertilize your chili peppers regularly with a balanced fertilizer that is specifically formulated for vegetables. Follow the instructions on the fertilizer label for application rates and frequency. You can also use organic fertilizers, such as compost tea or fish emulsion. Avoid over-fertilizing, as this can lead to excessive foliage growth and reduced fruit production.
How do I harvest chili peppers?
Chili peppers are typically ready to harvest when they have reached their mature color and size. The color will vary depending on the variety of chili pepper. Gently twist or cut the peppers from the plant using pruning shears or scissors. Be careful not to damage the plant when harvesting. Wear gloves when harvesting hot chili peppers to avoid skin irritation.
How do I store chili peppers?
Fresh chili peppers can be stored in the refrigerator for up to a week. You can also dry, freeze, or pickle chili peppers for longer-term storage. To dry chili peppers, string them together and hang them in a well-ventilated area until they are completely dry. To freeze chili peppers, wash and dry them thoroughly, then place them in a freezer bag or container. To pickle chili peppers, follow a recipe for pickled vegetables.
Can I grow chili peppers in containers?
Yes, chili peppers can be successfully grown in containers. Choose a container that is at least 12 inches in diameter and has drainage holes. Use a high-quality potting mix that is specifically formulated for vegetables. Place the container in a sunny location and water regularly. Fertilize your chili peppers regularly with a balanced fertilizer.
What are some good companion plants for chili peppers?
Companion planting can help to deter pests, attract beneficial insects, and improve the flavor of your chili peppers. Some good companion plants for chili peppers include basil, rosemary, marigolds, and onions. Avoid planting chili peppers near fennel, as it can inhibit their growth.
Leave a Comment