
Peanut Bucket Growing Guide: Unleash your inner farmer, even without a sprawling garden! Have you ever dreamt of harvesting your own crunchy, delicious peanuts right from your backyard? I’m here to tell you, it’s easier than you think, and you don’t need acres of land to do it. This DIY guide will walk you through the surprisingly simple process of growing peanuts in buckets – a perfect solution for apartment dwellers, balcony gardeners, or anyone looking to add a fun and rewarding project to their gardening repertoire.
Peanuts, though often called nuts, are actually legumes, and their cultivation dates back thousands of years to South America. They’ve since become a beloved staple worldwide, enjoyed in countless forms. But beyond their culinary appeal, growing your own peanuts offers a unique connection to the earth and a satisfying sense of accomplishment.
Why should you try this Peanut Bucket Growing Guide? Well, for starters, it’s incredibly space-efficient. Forget tilling vast fields; a few strategically placed buckets can yield a surprisingly bountiful harvest. Plus, it’s a fantastic way to control the growing environment, ensuring your peanuts get the right amount of sunlight, water, and nutrients. In this guide, I’ll share my tried-and-true tips and tricks for success, from selecting the right peanut variety to troubleshooting common problems. Get ready to dig in (literally!) and experience the joy of homegrown peanuts!
Transforming a Peanut Butter Bucket into a Thriving Garden: A DIY Guide
Hey there, fellow gardening enthusiasts! I’m so excited to share this super simple and budget-friendly DIY project with you: turning a humble peanut butter bucket into a fantastic planter. Not only is this a great way to recycle, but it also provides a perfect home for herbs, flowers, vegetables, and more. Let’s get started!
Choosing Your Bucket and Plants
Before we dive into the nitty-gritty, let’s talk about the basics.
* Bucket Size Matters: Most peanut butter buckets are a good size, usually around 3-5 gallons. This is perfect for many plants, but consider the mature size of what you’re planting. Smaller herbs and flowers will thrive, while larger vegetables might need a bigger container.
* Bucket Material: Ensure your bucket is food-grade plastic. This means it’s safe for growing edibles. Look for a recycling symbol with a number 2 (HDPE) or 5 (PP) inside.
* Plant Selection: Think about what you want to grow! Herbs like basil, mint, and thyme are excellent choices. Flowers like petunias and marigolds add a splash of color. For veggies, consider compact varieties of tomatoes, peppers, or even strawberries.
* Sunlight Requirements: Match your plant choices to the amount of sunlight your growing area receives. Most vegetables and flowering plants need at least 6 hours of direct sunlight per day.
Materials You’ll Need
Here’s a list of everything you’ll need to transform your peanut butter bucket:
* Peanut butter bucket (cleaned thoroughly!)
* Drill with a 1/4-inch drill bit
* Potting mix (high-quality, well-draining)
* Landscape fabric or coffee filters (optional)
* Gravel or small stones (optional)
* Your chosen plants or seeds
* Watering can or hose
* Gloves (optional, but recommended)
* Measuring tape or ruler
* Marker or pen
Step-by-Step Instructions: Creating Your Bucket Planter
Okay, let’s get our hands dirty! Follow these steps to create your very own peanut butter bucket planter:
1. Clean the Bucket Thoroughly: This is crucial! You want to remove any lingering peanut butter residue. Wash the bucket inside and out with warm, soapy water. Rinse it thoroughly until all traces of soap are gone. I usually give it a final rinse with a diluted bleach solution (1 tablespoon of bleach per gallon of water) to sanitize it, but be sure to rinse it extremely well afterward.
2. Drill Drainage Holes: Drainage is essential to prevent root rot. Using your drill and 1/4-inch drill bit, drill several holes in the bottom of the bucket. I usually drill about 6-8 holes, spacing them evenly. Make sure the holes are large enough to allow water to drain freely.
3. Add a Drainage Layer (Optional): This step is optional, but I find it helps improve drainage, especially if you’re using a heavier potting mix. Place a layer of gravel or small stones at the bottom of the bucket, about 1-2 inches deep. This creates a space for excess water to collect without saturating the soil.
4. Line with Landscape Fabric or Coffee Filters (Optional): This step prevents soil from washing out through the drainage holes. Cut a piece of landscape fabric or several coffee filters to fit the bottom of the bucket, covering the drainage layer (if you used one). This will allow water to drain while keeping the soil in place.
5. Fill with Potting Mix: Now it’s time to add the potting mix! Use a high-quality, well-draining potting mix specifically designed for containers. Avoid using garden soil, as it can compact and doesn’t drain well in containers. Fill the bucket almost to the top, leaving about an inch or two of space at the rim.
6. Plant Your Plants or Seeds: This is the fun part! Gently remove your plants from their nursery pots and loosen the roots slightly. Dig a hole in the potting mix large enough to accommodate the root ball. Place the plant in the hole and backfill with potting mix, gently firming the soil around the base of the plant. If you’re planting seeds, follow the instructions on the seed packet for planting depth and spacing.
7. Water Thoroughly: After planting, water the bucket thoroughly until water drains out of the drainage holes. This helps settle the soil and ensures the roots are well-hydrated.
8. Choose a Sunny Location: Place your bucket planter in a location that receives the appropriate amount of sunlight for your chosen plants. Remember, most vegetables and flowering plants need at least 6 hours of direct sunlight per day.
9. Water Regularly: Check the soil moisture regularly and water when the top inch of soil feels dry to the touch. Avoid overwatering, as this can lead to root rot. The frequency of watering will depend on the weather, the type of plant, and the type of potting mix you’re using.
10. Fertilize as Needed: Container plants need regular fertilization to thrive. Use a balanced liquid fertilizer diluted to half strength every 2-4 weeks, or follow the instructions on the fertilizer label.
Tips for Success
Here are a few extra tips to help you get the most out of your peanut butter bucket garden:
* Consider Companion Planting: Companion planting involves growing different plants together that benefit each other. For example, basil repels pests that attack tomatoes, and marigolds deter nematodes.
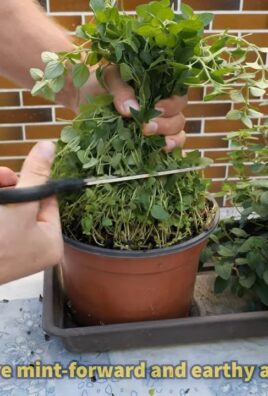
* Pinch Back Herbs: Pinching back herbs encourages bushier growth and prevents them from becoming leggy. Simply snip off the tips of the stems with your fingers or scissors.
* Deadhead Flowers: Deadheading flowers (removing spent blooms) encourages the plant to produce more flowers.
* Rotate Your Crops: If you’re growing vegetables, rotate your crops each year to prevent soilborne diseases and nutrient depletion.
* Protect from Frost: If you live in an area with frost, protect your bucket planters by moving them indoors or covering them with a frost blanket.
* Add a Trellis or Support: For vining plants like tomatoes or cucumbers, add a trellis or support to help them climb. You can easily make a simple trellis from bamboo stakes and twine.
* Monitor for Pests and Diseases: Regularly inspect your plants for pests and diseases. Treat any problems promptly with organic pest control methods or fungicides.
* Don’t Overcrowd: Avoid overcrowding your bucket planter. Give your plants enough space to grow and thrive.
* Repot if Necessary: If your plants become root-bound (the roots are circling the inside of the pot), you may need to repot them into a larger container.
* Get Creative with Decoration: Feel free to decorate your peanut butter bucket planter to add a personal touch. You can paint it, add stencils, or even cover it with mosaic tiles.
Troubleshooting Common Issues
Even with the best care, you might encounter some common gardening issues. Here’s how to troubleshoot them:
* Yellowing Leaves: This can be caused by overwatering, underwatering, nutrient deficiencies, or pests. Check the soil moisture and adjust your watering accordingly. Fertilize with a balanced fertilizer. Inspect the plants for pests.
* Wilting Leaves: This can be caused by underwatering, heat stress, or root rot. Water thoroughly and move the planter to a shadier location if necessary. Check for signs of root rot (soft, mushy roots).
* Stunted Growth: This can be caused by nutrient deficiencies, poor soil, or lack of sunlight. Fertilize with a balanced fertilizer. Repot into fresh potting mix. Move the planter to a sunnier location.
* Pests: Common pests include aphids, spider mites, and whiteflies. Treat with insecticidal soap or neem oil.
* Diseases: Common diseases include powdery mildew and fungal leaf spots. Treat with a fungicide. Improve air circulation around the plants.
Extending the Life of Your Bucket Planter
With proper care, your peanut butter bucket planter can last for several years. Here are some tips to extend its lifespan:
* Protect from UV Damage: Prolonged exposure to sunlight can cause the plastic to become brittle. Consider painting the bucket with a UV-resistant paint or placing it in a partially shaded location.
* Clean Regularly: Clean the bucket regularly to remove dirt and debris. This will help prevent the buildup of algae and other microorganisms.
* Store Properly in Winter: If you live in an area with harsh winters, store the bucket planter indoors to protect it from freezing temperatures.
* Replace When Necessary: Eventually, the plastic will degrade and the bucket will need to be replaced. When this happens, simply recycle the old bucket and start a new one!
I hope this guide has inspired you to create your own peanut butter bucket garden! It’s a fun, affordable, and rewarding way to grow your own food
Conclusion
So, there you have it! Transforming an ordinary peanut bucket into a thriving mini-garden is not only incredibly rewarding but also surprisingly simple. We’ve walked you through the entire process, from selecting the right bucket and preparing the soil to planting your seeds and nurturing your peanut plants. This DIY peanut bucket growing guide offers a fantastic way to cultivate your own fresh peanuts, even if you’re short on space or gardening experience.
Why is this a must-try? Because it’s accessible, affordable, and educational. It’s a fantastic project for families, teaching children about the life cycle of plants and the origins of their food. It’s also a great way for apartment dwellers or those with limited yard space to enjoy the satisfaction of growing their own produce. Plus, there’s nothing quite like the taste of freshly harvested, homegrown peanuts!
But don’t stop there! Feel free to experiment with different peanut varieties. Virginia peanuts, known for their large size, thrive in containers. Valencia peanuts, with their multiple small nuts per shell, are another excellent choice. You can also try adding companion plants to your peanut bucket. Marigolds, for example, can help deter pests, while basil can improve the flavor of your peanuts. Consider adding a small trellis or support structure as your peanut plants grow, especially if you’re growing a taller variety.
Remember to monitor your plants regularly for signs of pests or diseases. A simple solution of insecticidal soap can often take care of minor infestations. Proper watering and drainage are also crucial for healthy peanut growth. Avoid overwatering, as this can lead to root rot.
We are confident that with a little care and attention, you’ll be enjoying a bountiful harvest of homegrown peanuts in no time. The beauty of this DIY project lies in its adaptability. You can tailor it to your specific needs and preferences. Want to add a decorative touch to your peanut bucket? Paint it with vibrant colors or stencil on a fun design. The possibilities are endless!
Don’t be intimidated by the prospect of growing your own peanuts. This DIY peanut bucket growing guide is designed to be easy to follow, even for beginners. The most important thing is to get started and have fun!
We encourage you to try this DIY peanut bucket growing guide and share your experience with us. Post photos of your peanut plants on social media using #PeanutBucketGarden and let us know how your harvest turns out. We’d love to see your creative variations and hear your tips and tricks. Let’s build a community of peanut bucket gardeners!
Growing your own food is a deeply satisfying experience, and this peanut bucket project is a perfect way to connect with nature and enjoy the fruits (or rather, nuts!) of your labor. So, grab a bucket, some soil, and some peanut seeds, and get ready to embark on a rewarding gardening adventure. Happy growing!
Frequently Asked Questions (FAQ)
What kind of bucket should I use?
Ideally, you should use a food-grade bucket that is at least 5 gallons in size. A 5-gallon bucket provides enough space for the peanut plants to develop a healthy root system. Make sure the bucket is clean and has drainage holes drilled in the bottom to prevent waterlogging. You can often find used food-grade buckets at bakeries, restaurants, or grocery stores. Avoid using buckets that have previously contained chemicals, as these could contaminate your soil and peanuts.
What type of soil is best for growing peanuts in a bucket?
Peanuts prefer well-draining, sandy loam soil. You can purchase a pre-mixed potting mix specifically designed for vegetables, or you can create your own mix by combining equal parts of garden soil, compost, and sand. The compost will provide essential nutrients for the peanut plants, while the sand will improve drainage. Avoid using heavy clay soil, as it can become waterlogged and hinder root development.
How often should I water my peanut plants?
Water your peanut plants regularly, especially during hot, dry weather. The soil should be consistently moist but not waterlogged. Check the soil moisture by sticking your finger about an inch into the soil. If it feels dry, it’s time to water. Water deeply, allowing the water to drain out of the drainage holes in the bottom of the bucket. Reduce watering during cooler weather or when the plants are not actively growing.
How much sunlight do peanut plants need?
Peanut plants need at least 6-8 hours of direct sunlight per day to thrive. Choose a sunny location for your peanut bucket, such as a patio, balcony, or garden. If you live in a particularly hot climate, you may need to provide some afternoon shade to prevent the plants from scorching.
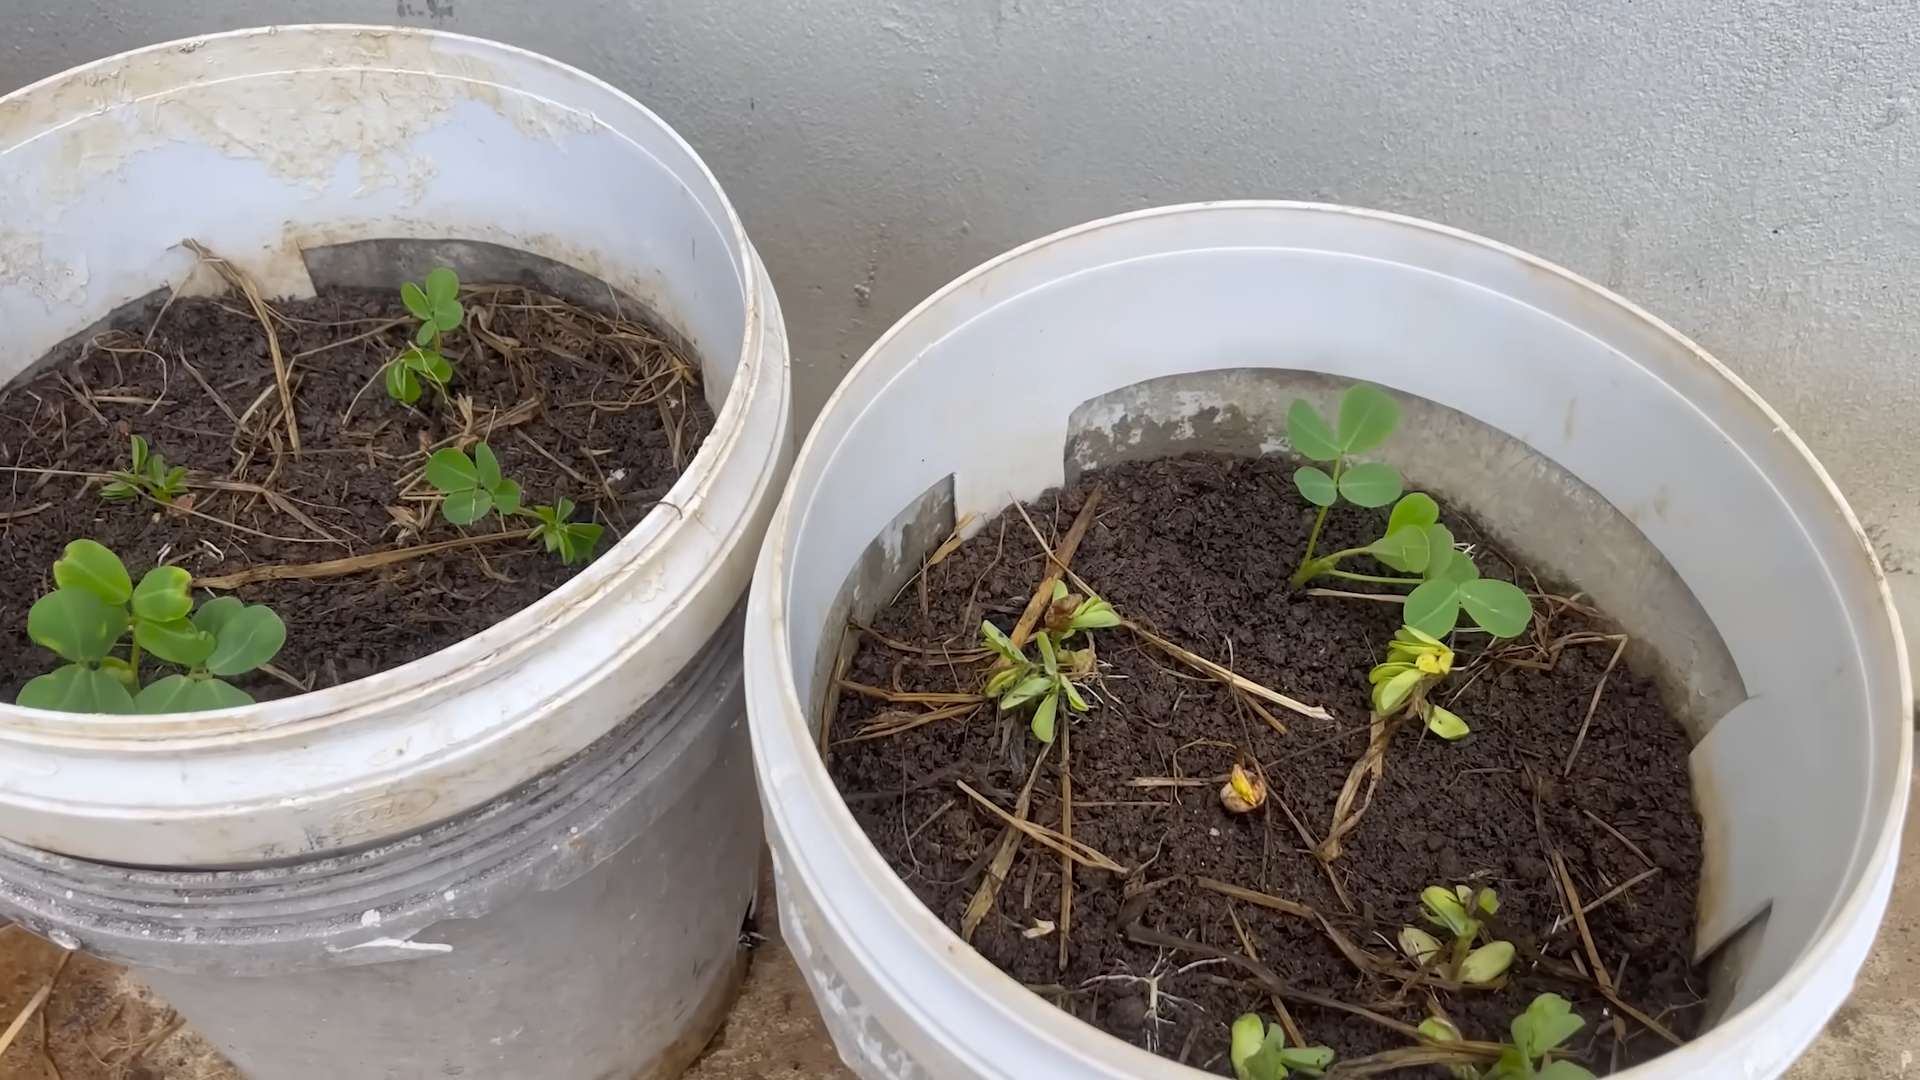
When is the best time to plant peanut seeds?
The best time to plant peanut seeds is after the last frost, when the soil has warmed up to at least 65 degrees Fahrenheit. In most regions, this is typically in late spring or early summer. You can start peanut seeds indoors 4-6 weeks before the last frost, but be sure to transplant them carefully to avoid disturbing the roots.
How long does it take for peanuts to mature?
Peanuts typically take 120-150 days to mature, depending on the variety and growing conditions. You’ll know your peanuts are ready to harvest when the foliage starts to turn yellow and the pods feel plump and full.
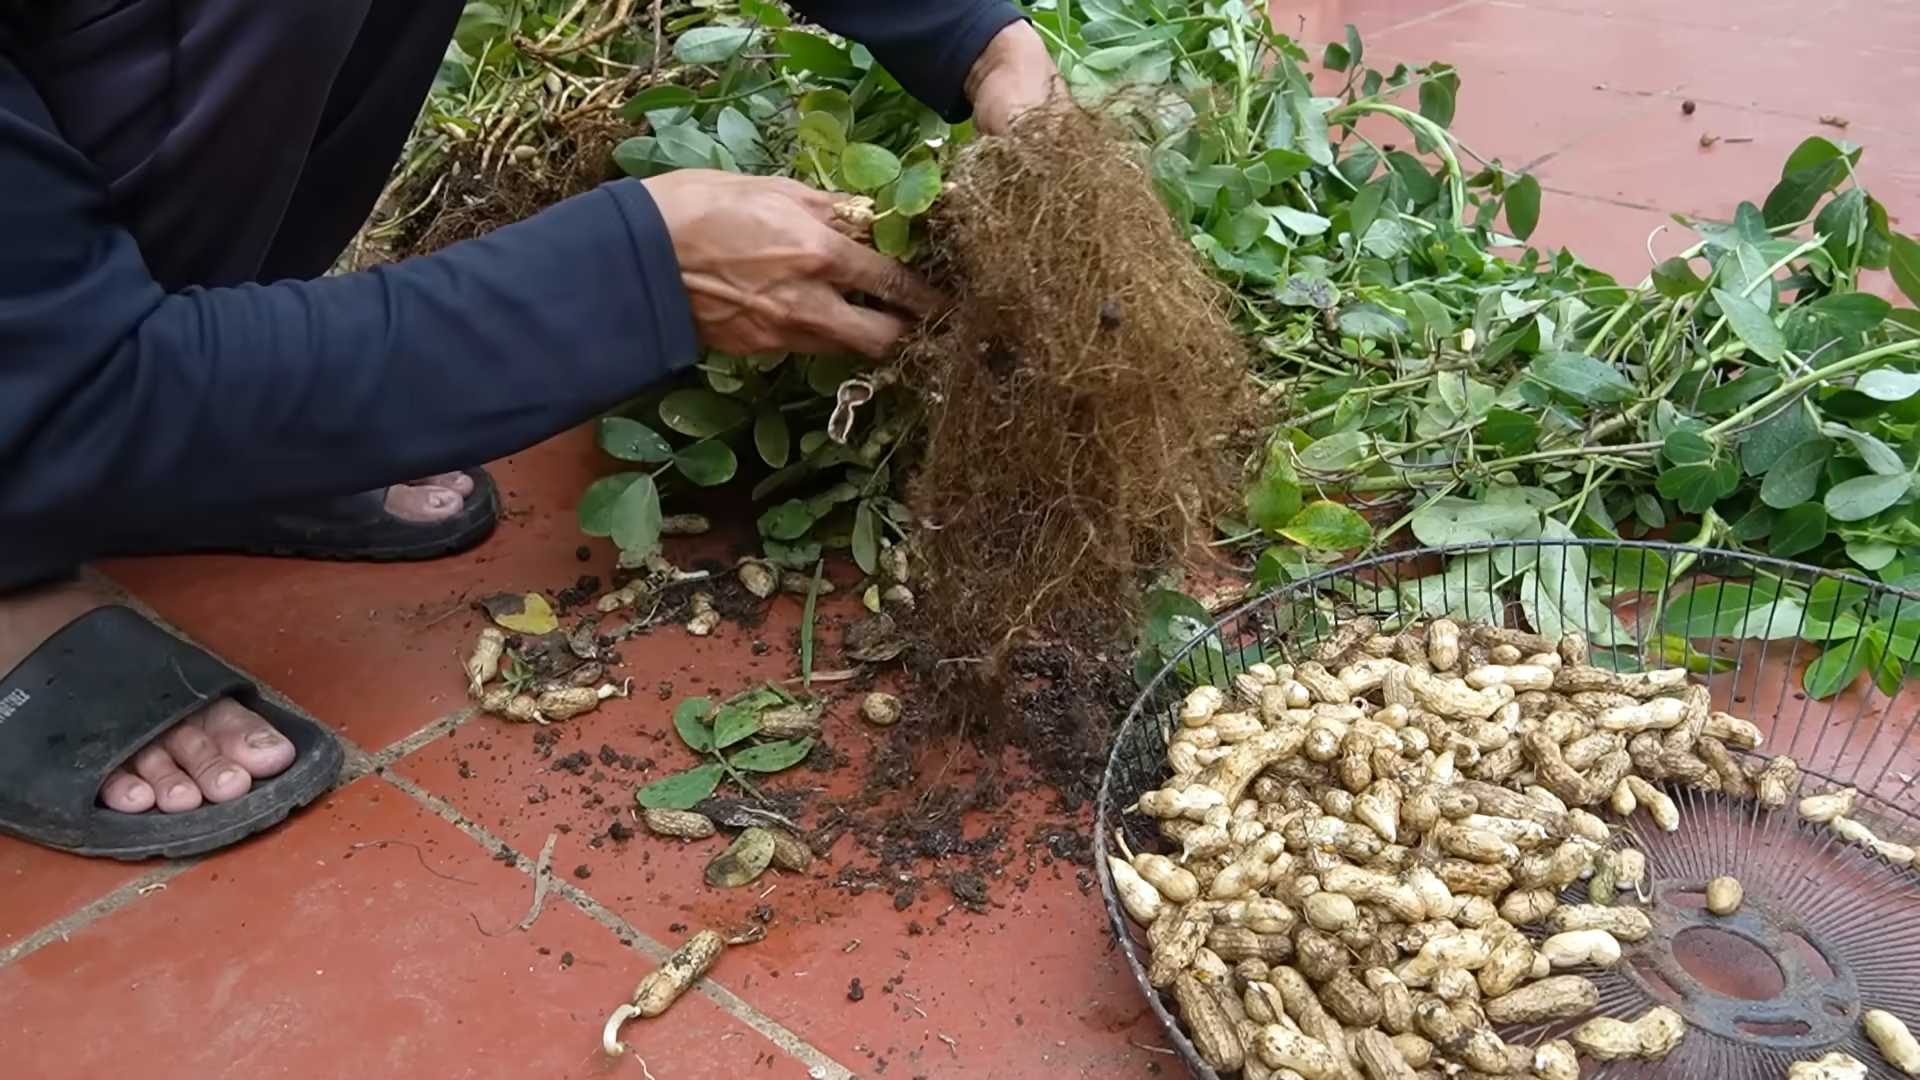
How do I harvest peanuts from a bucket?
To harvest your peanuts, gently pull the entire plant out of the bucket. Shake off any excess soil and then carefully remove the peanuts from the roots. You can then cure the peanuts by drying them in a well-ventilated area for several weeks.
Are there any common pests or diseases that affect peanut plants?
Yes, some common pests that can affect peanut plants include aphids, spider mites, and leafhoppers. Diseases such as leaf spot and root rot can also occur. Monitor your plants regularly for signs of pests or diseases and take appropriate action if necessary. Insecticidal soap can be used to control aphids and spider mites, while fungicides can be used to treat fungal diseases. Proper watering and drainage can help prevent root rot.
Can I grow other plants in the same bucket as my peanuts?
While it’s possible to grow companion plants with peanuts, it’s generally best to grow peanuts in their own bucket to ensure they have enough space and nutrients. If you do choose to grow companion plants, select varieties that are compatible with peanuts and won’t compete for resources. Marigolds and basil are good choices.
What are some different varieties of peanuts I can grow in a bucket?
There are several varieties of peanuts that are well-suited for container gardening. Virginia peanuts are known for their large size and are a popular choice. Valencia peanuts produce multiple small nuts per shell and are also a good option. Spanish peanuts are smaller and have a slightly sweeter flavor. Choose a variety that is adapted to your local climate and growing conditions.
How do I cure my peanuts after harvesting?
Curing peanuts is essential for developing their flavor and preventing spoilage. After harvesting, wash the peanuts and remove any excess soil. Spread them out in a single layer on a screen or tray in a well-ventilated area. Allow them to dry for several weeks, turning them occasionally to ensure even drying. The peanuts are cured when the shells are brittle and the kernels are loose inside.
Can I roast my homegrown peanuts?
Absolutely! Roasting your homegrown peanuts is a delicious way to enjoy your harvest. Preheat your oven to 350 degrees Fahrenheit. Spread the peanuts in a single layer on a baking sheet and roast for 20-25 minutes, or until they are golden brown and fragrant. Let them cool completely before shelling and enjoying. You can also boil your peanuts for a southern treat.
What if my peanut plants aren’t producing peanuts?
Several factors can contribute to a lack of peanut production. Ensure your plants are receiving enough sunlight, water, and nutrients. Check the soil pH, as peanuts prefer slightly acidic soil. Also, make sure your plants are properly pollinated. While peanuts are self-pollinating, wind or insect activity can help improve pollination rates. If you’ve ruled out these factors, it’s possible that the growing season is too short in your area, or that the soil is lacking essential nutrients like phosphorus and potassium. Consider adding a fertilizer specifically formulated for peanuts.
Leave a Comment