
Growing Big Melons at Home might seem like a challenge reserved for seasoned farmers, but trust me, with a few clever tricks and a dash of DIY spirit, you can be harvesting juicy, impressive melons right from your own backyard! I’m so excited to share some secrets that will transform your melon patch.
For centuries, melons have been symbols of abundance and sweetness, gracing tables from ancient Egypt to the royal courts of Europe. Their cultivation is steeped in tradition, with each culture developing unique techniques to coax the most flavorful fruit from the vine. But you don’t need generations of experience to get in on the action.
Let’s face it, store-bought melons can be a gamble. Sometimes they’re bland, sometimes they’re mealy, and sometimes they just don’t live up to the hype. That’s why learning how to grow your own is so rewarding! Imagine biting into a perfectly ripe, sun-warmed melon that you nurtured from seed to fruit. It’s an experience that simply can’t be beat. Plus, growing big melons at home is a fantastic way to connect with nature, reduce your carbon footprint, and impress your friends and family with your gardening prowess. So, are you ready to unlock the secrets to melon-growing success? Let’s dive in!
Growing Giant Melons: My Secret DIY Guide to Bumper Crops!
Okay, melon lovers, gather ’round! I’m about to spill my secrets for growing HUGE, juicy melons right in your own backyard. Forget those puny grocery store melons – we’re talking prize-winning, brag-worthy fruit! This isn’t just about planting seeds; it’s about creating the perfect environment and giving your melons the VIP treatment they deserve. Let’s get started!
Choosing the Right Melon Variety
First things first, you need to pick the right melon. Not all melons are created equal when it comes to size. Some are naturally smaller, while others are bred for gigantism. Here are a few of my favorites for growing big:
* Watermelon: ‘Carolina Cross’ (known for record-breaking sizes!), ‘Charleston Gray’ (classic and reliable), ‘Black Diamond’ (dark, sweet, and impressive).
* Cantaloupe: ‘Hale’s Best Jumbo’ (as the name suggests!), ‘Athena’ (disease-resistant and productive).
* Honeydew: ‘Honey Dew Green Flesh’ (sweet and refreshing).
Pro Tip: Always buy seeds from a reputable source to ensure you’re getting the variety you expect. Read the seed packet carefully for specific growing instructions and days to maturity.
Preparing the Soil: The Foundation for Success
Melons are heavy feeders, meaning they need a lot of nutrients to grow big and strong. So, soil preparation is absolutely crucial. I can’t stress this enough!
* Sunlight: Melons need at least 6-8 hours of direct sunlight per day. Choose a location in your yard that gets plenty of sunshine.
* Soil Type: Melons prefer well-drained, sandy loam soil with a pH between 6.0 and 6.8.
* Soil Testing: I highly recommend getting your soil tested. You can usually get this done through your local agricultural extension office. This will tell you exactly what nutrients your soil is lacking.
* Amending the Soil: Based on your soil test results, amend your soil accordingly. Here’s what I usually do:
* Compost: Add a generous amount of compost to improve soil structure, drainage, and fertility. I usually aim for about 4-6 inches of compost worked into the top 12 inches of soil.
* Aged Manure: Aged manure is another excellent soil amendment. It provides essential nutrients and helps retain moisture.
* Fertilizer: Use a balanced fertilizer (e.g., 10-10-10) according to the package directions. You can also use a fertilizer specifically formulated for melons.
* Raised Beds (Optional): If your soil is heavy clay or poorly drained, consider growing your melons in raised beds. This will improve drainage and warm the soil faster in the spring.
Important Note: Don’t over-fertilize! Too much nitrogen can lead to excessive vine growth at the expense of fruit production.
Starting Seeds Indoors (Optional but Recommended)
While you can direct sow melon seeds, I’ve found that starting them indoors gives them a head start and protects them from pests and diseases.
1. Timing: Start your seeds about 4-6 weeks before the last expected frost in your area.
2. Seed Starting Mix: Use a high-quality seed starting mix.
3. Containers: Plant each seed in its own individual pot (about 3-4 inches in diameter). This will minimize root disturbance when you transplant them later. Peat pots or biodegradable pots are great options.
4. Planting Depth: Plant the seeds about ½ inch deep.
5. Watering: Water gently to moisten the soil. Don’t overwater!
6. Warmth: Keep the soil warm (around 75-85°F) until the seeds germinate. You can use a heat mat to help with this.
7. Light: Once the seeds germinate, provide plenty of light. A sunny windowsill or grow lights will work.
8. Hardening Off: Before transplanting your seedlings outdoors, you need to “harden them off.” This means gradually exposing them to outdoor conditions over a period of about a week. Start by placing them outside for a few hours each day in a sheltered location, gradually increasing the amount of time they spend outdoors.
Transplanting Seedlings or Direct Sowing
Once the danger of frost has passed and the soil has warmed up, it’s time to transplant your seedlings or direct sow your seeds.
1. Spacing: Melons need plenty of space to grow. Watermelons typically need 3-4 feet between plants and 6-8 feet between rows. Cantaloupes and honeydews need 2-3 feet between plants and 4-6 feet between rows.
2. Planting Depth: Plant your seedlings at the same depth they were growing in their pots. If direct sowing, follow the instructions on the seed packet.
3. Watering: Water thoroughly after planting.
4. Mulching: Apply a layer of mulch around your plants to help retain moisture, suppress weeds, and regulate soil temperature. Straw, hay, or black plastic mulch are all good options.
Watering and Feeding: Keeping Your Melons Hydrated and Nourished
Consistent watering and feeding are essential for growing big melons.
1. Watering: Melons need about 1-2 inches of water per week, especially during fruit development. Water deeply and regularly, especially during hot, dry weather. Avoid overhead watering, as this can promote fungal diseases. Drip irrigation is the best option.
2. Fertilizing: Side-dress your plants with a balanced fertilizer every 2-3 weeks. You can also use a liquid fertilizer diluted according to the package directions. I like to use a fertilizer that’s higher in phosphorus and potassium during fruit development to promote larger, sweeter melons. Bone meal is a great source of phosphorus.
3. Foliar Feeding (Optional): You can also foliar feed your plants with a seaweed extract or fish emulsion. This can help boost their growth and improve their overall health.
Pruning and Training: Directing Energy to Fruit Production
Pruning and training your melon vines can help improve air circulation, reduce disease, and direct energy to fruit production.
1. Pruning: Remove any suckers (small shoots that grow from the base of the plant) to encourage the main vine to grow stronger. You can also prune off some of the lateral vines to reduce overcrowding.
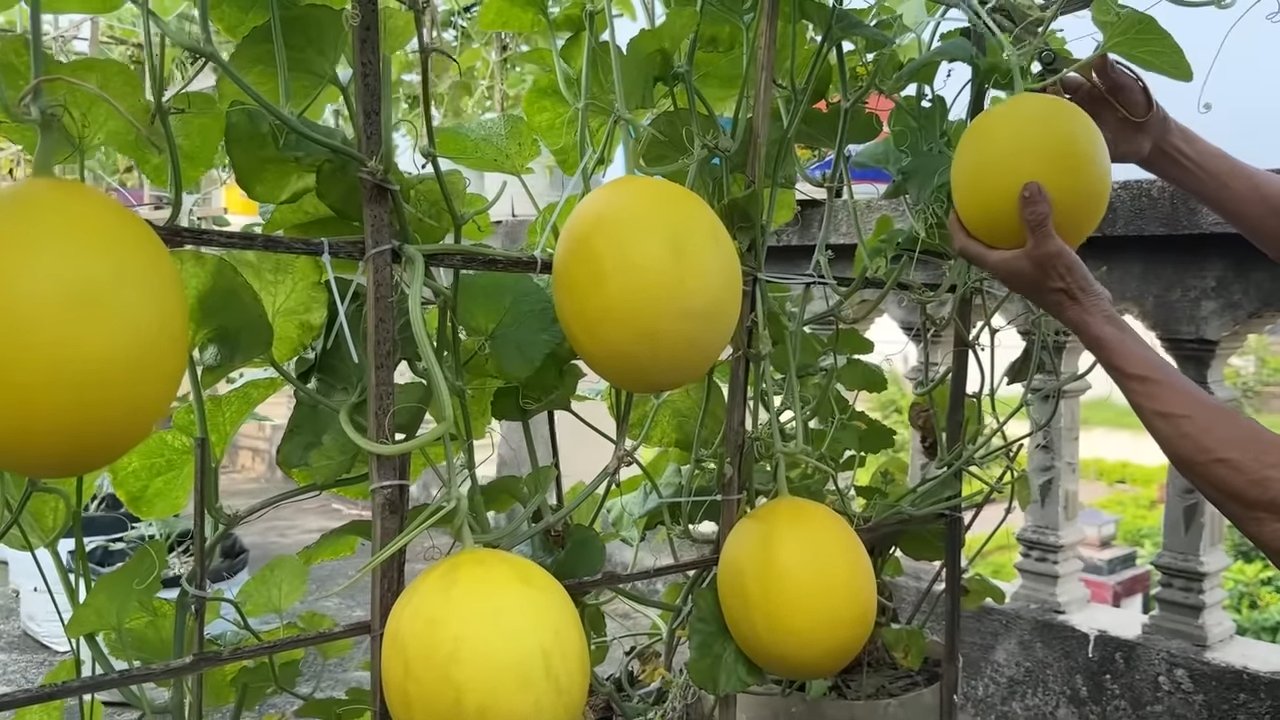
2. Training: Train your vines to grow in a specific direction. This can help keep them off the ground and prevent the fruit from rotting. You can use stakes, trellises, or even just arrange the vines carefully.
Supporting the Fruit: Protecting Your Precious Cargo
As your melons grow larger, they may need some support to prevent them from breaking off the vine or rotting on the ground.
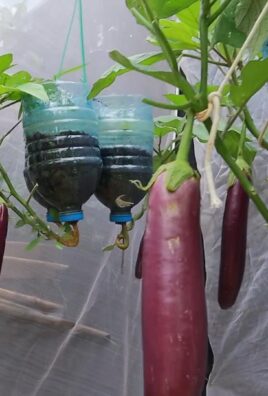
1. Slings: For larger melons, you can use slings made from old t-shirts, pantyhose, or netting to support the fruit. Tie the slings to a trellis or stake.
2. Boards or Bricks: Place boards or bricks under the melons to keep them off the ground and prevent them from rotting.
Pest and Disease Control: Keeping Your Melons Healthy
Melons are susceptible to a variety of pests and diseases. Here are a few common problems and how to deal with them:
* Squash Bugs: Handpick them off your plants or use insecticidal soap.
* Cucumber Beetles: Cover your plants with row covers or use insecticidal soap.
* Aphids: Spray them with a strong stream of water or use insecticidal soap.
* Powdery Mildew: Improve air circulation and use a fungicide if necessary.
* Fusarium Wilt: Choose disease-resistant varieties and practice crop rotation.
Prevention is Key: The best way to deal with pests and diseases is to prevent them from occurring in the first place. Keep your garden clean, water properly, and provide good air circulation.
Pollination: Ensuring Fruit Set
Melons need to be pollinated in order to produce fruit. Bees are the primary pollinators, so it’s important to attract them to your garden.
1. Attract Pollinators: Plant flowers that attract bees, such as sunflowers, zinnias, and lavender.
2. Hand Pollination (If Necessary): If you’re not seeing enough bees in your garden, you can hand pollinate your melons. Use a small paintbrush to transfer pollen from the male flowers to the female flowers. Female flowers have a small fruit behind the flower, while male flowers do not.
Harvesting: The Moment of Truth!
Knowing when to harvest your melons is crucial for getting the best flavor and texture.
1. Watermelons: Look for a dry tendril closest to the melon, a dull sound when you
Conclusion
So, there you have it! Growing big, juicy melons at home isn’t just a pipe dream; it’s an achievable reality with a little know-how and dedication. This DIY trick, focusing on strategic pruning and targeted feeding, is a game-changer for anyone serious about maximizing their melon harvest. We’ve walked you through the process, highlighting the importance of sunlight, water management, and nutrient balance, all crucial elements in nurturing those sweet, sun-kissed fruits.
Why is this DIY trick a must-try? Because it empowers you to take control of your melon’s growth, steering it towards producing fewer, but significantly larger and more flavorful fruits. Instead of a vine laden with small, underwhelming melons, you’ll be rewarded with a handful of truly impressive specimens that will be the envy of your neighbors. Think of the bragging rights! Think of the delicious summer salads, refreshing smoothies, and delectable desserts you can create with your homegrown bounty!
But the beauty of this method lies in its adaptability. Feel free to experiment with different melon varieties. Watermelons, cantaloupes, honeydews – each will respond uniquely to this technique. Consider using different types of organic fertilizers to tailor the nutrient profile to your specific soil conditions. You could even try companion planting with herbs like basil or marigolds to deter pests naturally. The possibilities are endless!
Don’t be afraid to tweak the process to suit your garden’s unique environment. If you live in a particularly hot climate, you might need to provide extra shade during the peak afternoon hours. If your soil is naturally poor, amend it generously with compost and other organic matter before planting. The key is to observe your plants closely and respond to their needs.
We are confident that by implementing this DIY trick, you’ll be amazed by the results. Imagine sinking your teeth into a slice of perfectly ripe, incredibly sweet melon that you grew yourself. It’s a truly rewarding experience.
Now, it’s your turn! We urge you to give this method a try. Plant those melon seeds, follow our guidelines, and prepare to be amazed. And most importantly, share your experiences with us! We’d love to hear about your successes, your challenges, and any variations you discover along the way. Post pictures of your giant melons on social media using #HomegrownMelons or leave a comment below. Let’s build a community of melon-growing enthusiasts and learn from each other. Happy gardening!
Frequently Asked Questions (FAQ)
What kind of melons does this DIY trick work best for?
This DIY trick is effective for a wide variety of melons, including watermelons, cantaloupes, honeydews, and even smaller varieties like Galia melons. However, the size potential will vary depending on the specific variety. Watermelons, known for their large size, will naturally produce the most impressive results. Cantaloupes and honeydews will also benefit significantly from this method, yielding larger and sweeter fruits. Experiment with different varieties to find your favorites!
How often should I water my melon plants?
Watering frequency depends on several factors, including your climate, soil type, and the stage of growth. Generally, melon plants need consistent moisture, especially during flowering and fruit development. Aim to water deeply and less frequently, rather than shallowly and often. Check the soil moisture by sticking your finger about an inch deep. If it feels dry, it’s time to water. Avoid overhead watering, as this can promote fungal diseases. Drip irrigation or soaker hoses are ideal for delivering water directly to the roots. During hot, dry periods, you may need to water daily. As the melons ripen, you can reduce watering slightly to concentrate the sugars and enhance flavor.
What kind of fertilizer should I use?
Melon plants are heavy feeders and require a balanced fertilizer to thrive. Start with a fertilizer that is high in phosphorus to promote strong root development. Once the plants begin to flower, switch to a fertilizer that is higher in potassium to support fruit production and sweetness. Look for fertilizers specifically formulated for fruits and vegetables. Organic options like compost tea, bone meal, and kelp meal are excellent choices. Avoid over-fertilizing, as this can lead to excessive foliage growth at the expense of fruit production. Follow the instructions on the fertilizer packaging carefully. Soil testing can also help you determine the specific nutrient needs of your soil.
How do I know when my melons are ripe?
Determining ripeness varies slightly depending on the melon variety. For watermelons, look for a dull rind, a yellowish spot on the underside where the melon rests on the ground (the “ground spot”), and a hollow sound when you thump it. The tendril closest to the melon should also be brown and dry. For cantaloupes, the stem should slip easily from the fruit with a gentle tug. The melon should also have a fragrant aroma. Honeydews are ripe when the rind turns a creamy yellow color and feels slightly waxy. Don’t rely solely on color; use a combination of these indicators to ensure optimal ripeness.
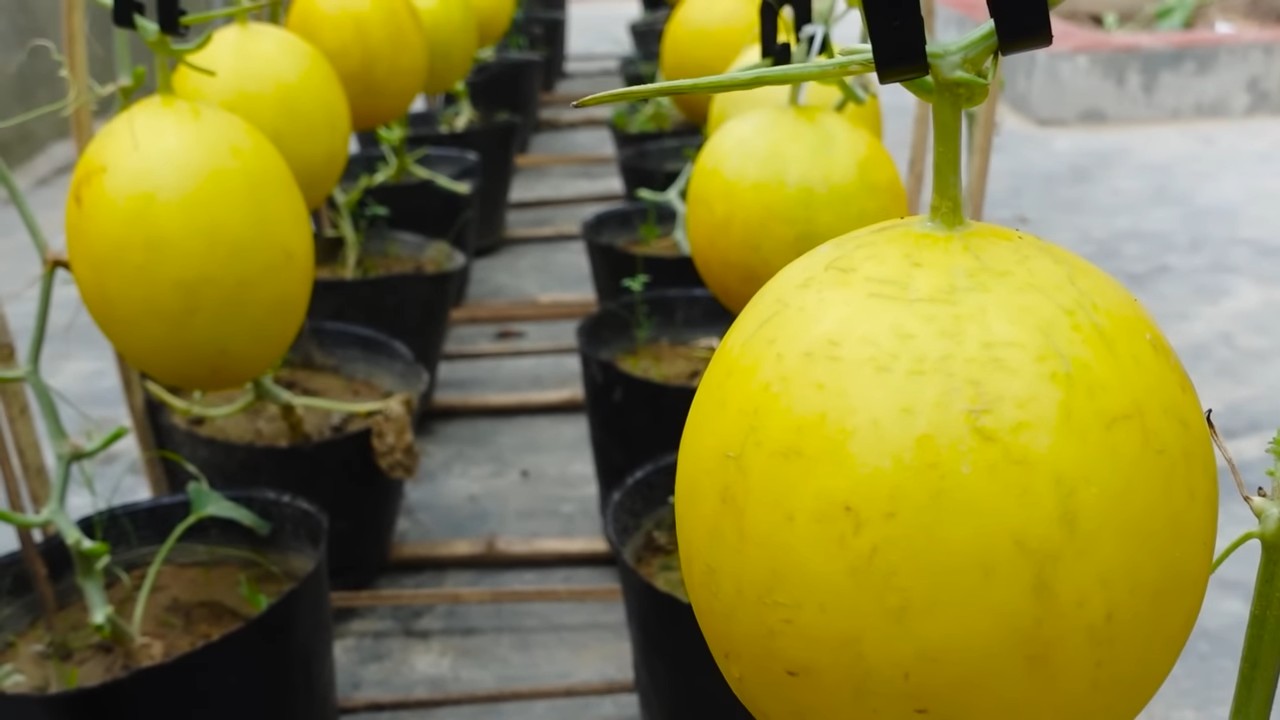
What if I don’t have a lot of space? Can I still grow big melons?
Even if you have limited space, you can still grow melons using this DIY trick. Consider growing them vertically on a trellis or fence. This will save space and improve air circulation, reducing the risk of disease. Choose smaller melon varieties that are well-suited for container gardening. Ensure that your container is large enough to accommodate the plant’s root system. Provide adequate support for the growing melons, as they can become quite heavy. With a little creativity and planning, you can enjoy homegrown melons even in a small garden or on a balcony.
How do I protect my melons from pests and diseases?
Prevention is key when it comes to pests and diseases. Start by choosing disease-resistant melon varieties. Practice good garden hygiene by removing any dead or diseased foliage. Use row covers to protect young plants from pests like squash bugs and cucumber beetles. Encourage beneficial insects like ladybugs and lacewings to control aphids and other pests. If you notice signs of disease, such as powdery mildew or fungal spots, treat them promptly with an appropriate fungicide. Organic options like neem oil and copper fungicide can be effective. Rotate your crops each year to prevent soilborne diseases from building up.
What is the best time of year to plant melons?
Melons are warm-season crops and require plenty of sunshine and warm temperatures to thrive. The best time to plant melons is after the last frost, when the soil has warmed to at least 60°F (15°C). In cooler climates, you may need to start seeds indoors several weeks before the last frost and transplant them outdoors once the weather is suitable. Check your local planting calendar for specific recommendations for your region.
Can I use this trick for other fruits and vegetables?
While this specific DIY trick is tailored for melons, the underlying principles of pruning and targeted feeding can be applied to other fruits and vegetables as well. For example, pruning tomato plants can improve fruit size and quality. Similarly, providing adequate nutrients to pepper plants can increase yields. Research the specific needs of each plant and adapt the techniques accordingly.


Leave a Comment