
Harvesting Turnips Home Garden can feel like a treasure hunt in your own backyard! Imagine the satisfaction of pulling plump, vibrant turnips from the soil, knowing you nurtured them from tiny seeds to delicious, homegrown goodness. For centuries, turnips have been a staple crop, feeding families and livestock alike. Their resilience and adaptability have made them a vital part of agricultural history across many cultures. From ancient Rome to medieval Europe, turnips were a reliable source of sustenance, especially during the colder months.
But let’s be honest, knowing *when* and *how* to harvest them can be a little tricky. That’s where this DIY guide comes in! I’m here to share my tried-and-true tips and tricks for successfully harvesting turnips home garden, ensuring you get the most flavorful and nutritious yield possible. We’ll cover everything from recognizing the signs of ripeness to the best techniques for pulling them from the ground without damaging them.
Why is this important? Because nobody wants to end up with woody, bitter turnips! With a little know-how, you can avoid common mistakes and enjoy the sweet, slightly peppery flavor of freshly harvested turnips in your favorite recipes. So, grab your gardening gloves, and let’s get started on this rewarding journey of harvesting your own homegrown turnips!
Growing Artichokes: A DIY Guide to Bountiful Blooms (and Delicious Hearts!)
Okay, artichoke lovers, listen up! I know, I know, they seem intimidating. Those spiky leaves, that mysterious heart… But trust me, growing your own artichokes is totally doable, and incredibly rewarding. Imagine plucking those beauties straight from your garden and enjoying them fresh! This guide will walk you through everything you need to know, from choosing the right variety to harvesting your delicious bounty. Let’s get started!
Choosing Your Artichoke Variety
Before we dive into the nitty-gritty, let’s talk artichoke varieties. Not all artichokes are created equal, and some are better suited for certain climates and growing conditions than others. Here are a few popular choices:
* Green Globe: This is probably the most common variety you’ll find. It’s known for its large, round, green heads and excellent flavor. It’s a good all-around choice for many climates.
* Violetta: If you’re looking for something a little different, Violetta artichokes have beautiful purple-tinged heads. They’re also known for their tender hearts.
* Imperial Star: This variety is a good choice for warmer climates, as it’s more heat-tolerant than some others. It produces medium-sized, green heads.
* Big Heart: As the name suggests, this variety is prized for its large, meaty hearts. It’s a good choice if you’re primarily interested in the edible portion of the artichoke.
Consider your local climate and growing conditions when making your choice. Your local nursery can also offer valuable advice on which varieties thrive in your area.
Starting from Seed vs. Transplants
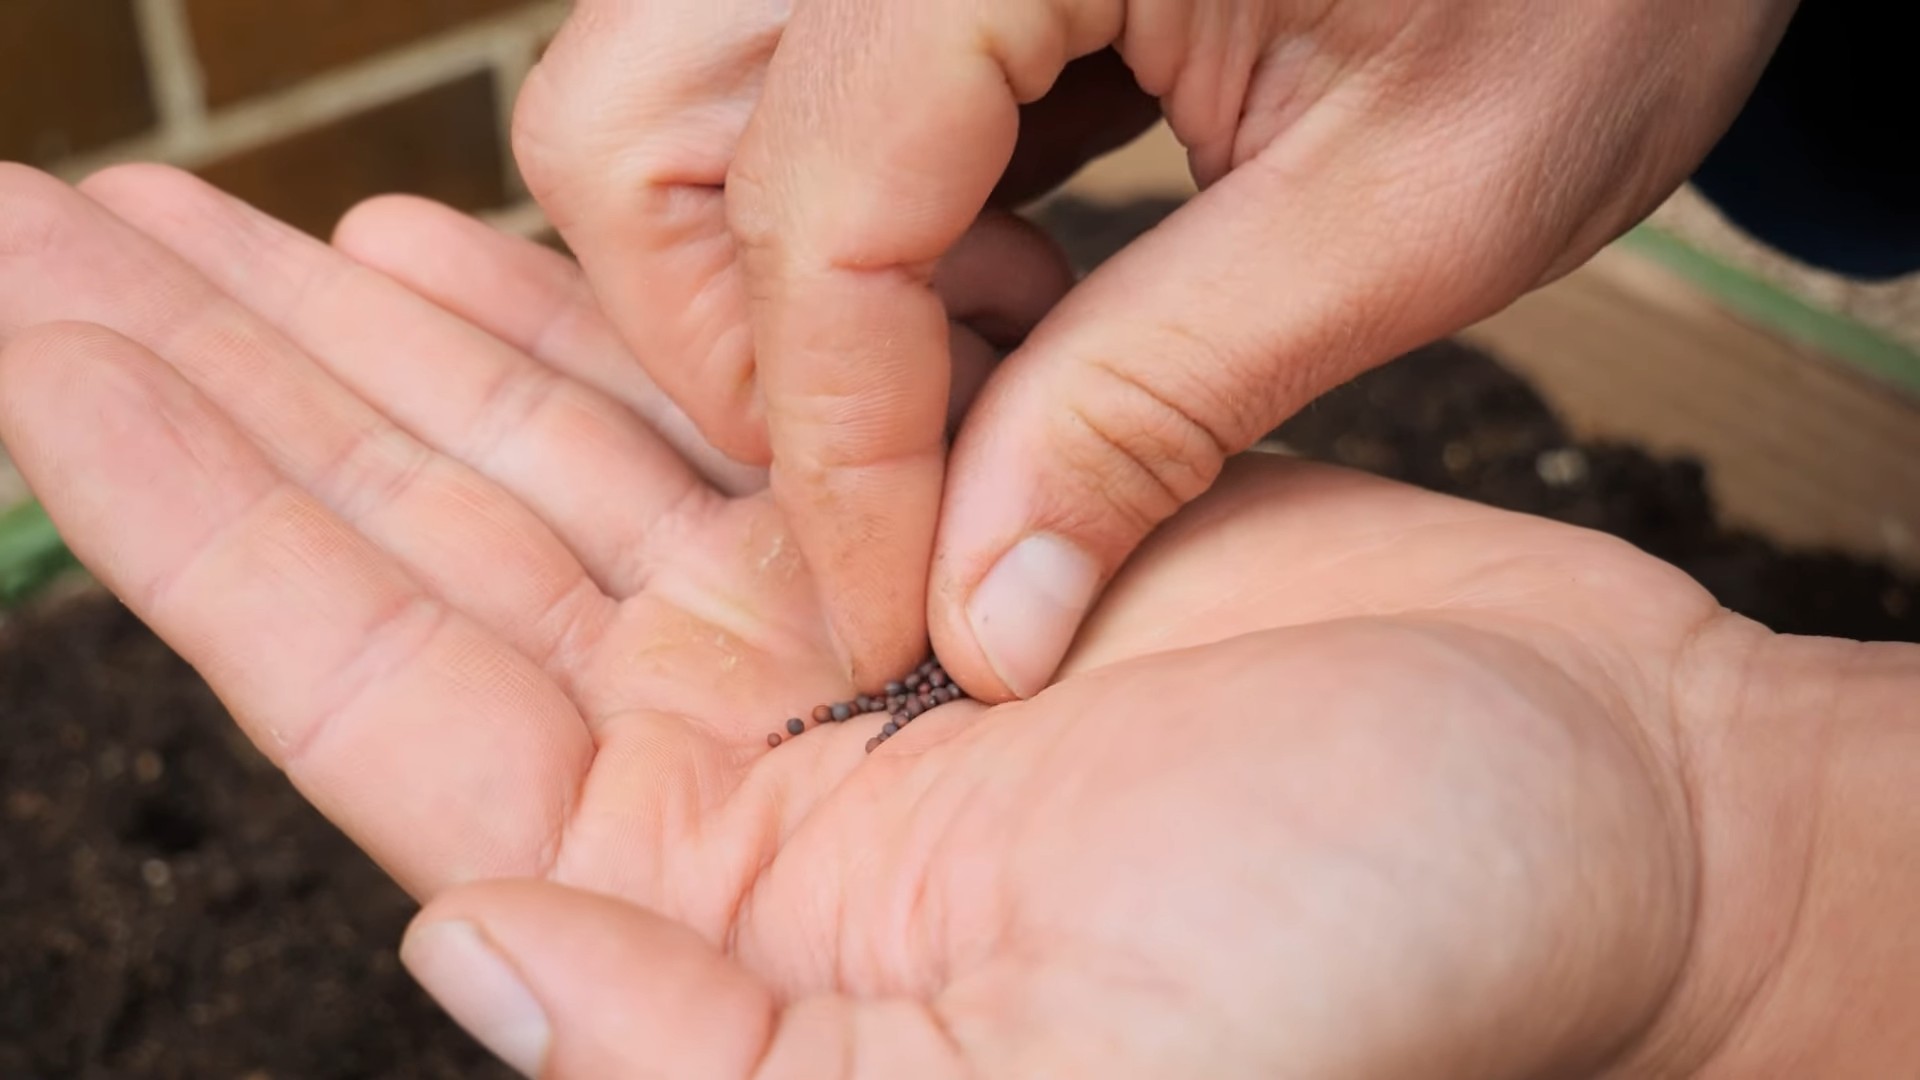
You have two main options for starting your artichoke journey: seeds or transplants.
* Seeds: Starting from seed requires more patience, as artichokes can take a while to mature. However, it’s a more economical option, and you’ll have a wider selection of varieties to choose from.
* Transplants: Transplants are young artichoke plants that have already been started for you. They’re more expensive than seeds, but they’ll give you a head start and are generally easier to grow, especially for beginners.
For this guide, I’ll focus on growing from transplants, as it’s the most straightforward method for most home gardeners.
Preparing Your Garden Bed
Artichokes are hungry plants, so preparing your garden bed properly is crucial for success. They need well-drained soil that’s rich in organic matter.
1. Choose a Sunny Location: Artichokes need at least 6-8 hours of sunlight per day. Pick a spot in your garden that gets plenty of sunshine.
2. Amend the Soil: Dig a hole that is twice as wide as the transplant’s root ball. Mix in plenty of compost or well-rotted manure into the soil. This will improve drainage, add nutrients, and help retain moisture. I usually aim for a 50/50 mix of native soil and compost.
3. Check the Drainage: Artichokes hate soggy roots. Make sure your soil drains well. If you have heavy clay soil, consider adding some sand or perlite to improve drainage.
4. Consider Raised Beds: If your soil is particularly poor or drains poorly, growing artichokes in raised beds can be a great solution.
Planting Your Artichoke Transplants
Now for the fun part – planting your artichoke transplants!
1. Dig a Hole: Dig a hole that’s slightly larger than the root ball of your transplant.
2. Gently Remove the Transplant: Carefully remove the transplant from its container, being careful not to damage the roots. Gently loosen any roots that are circling the root ball.
3. Place the Transplant in the Hole: Place the transplant in the hole, making sure the top of the root ball is level with the surrounding soil.
4. Backfill with Soil: Fill the hole with the amended soil, gently firming it around the base of the plant.
5. Water Thoroughly: Water the transplant thoroughly after planting. This will help settle the soil and encourage root growth.
6. Space Them Out: Artichokes get big! Give them plenty of space to grow. I recommend spacing them at least 3-4 feet apart.
Caring for Your Artichokes
Once your artichokes are planted, it’s time to provide them with the care they need to thrive.
1. Watering: Artichokes need consistent moisture, especially during hot, dry weather. Water deeply whenever the top inch of soil feels dry to the touch. Avoid overwatering, as this can lead to root rot.
2. Fertilizing: Artichokes are heavy feeders, so regular fertilization is important. Use a balanced fertilizer, such as a 10-10-10, every few weeks during the growing season. You can also side-dress with compost or well-rotted manure.
3. Mulching: Apply a layer of mulch around your artichoke plants. This will help retain moisture, suppress weeds, and regulate soil temperature. I like to use straw or wood chips.
4. Pest Control: Keep an eye out for pests, such as aphids, snails, and slugs. Hand-picking pests is often the easiest solution. You can also use organic pest control methods, such as insecticidal soap or diatomaceous earth.
5. Weed Control: Keep your garden bed free of weeds, as they can compete with your artichokes for nutrients and water. Hand-weeding is the best option.
6. Overwintering (in colder climates): Artichokes are perennials in warmer climates (zones 7-10), meaning they’ll come back year after year. However, in colder climates, they need to be protected from frost. After the first frost, cut the plant back to about 12 inches. Cover the plant with a thick layer of mulch, such as straw or leaves. You can also dig up the plant and store it in a cool, dark place over the winter. Replant it in the spring after the last frost.
Harvesting Your Artichokes
The moment you’ve been waiting for! Harvesting your own artichokes is incredibly satisfying.
1. Timing is Key: Artichokes are ready to harvest when the buds are still tight and firm, but the scales have begun to open slightly. The size of the artichoke will vary depending on the variety, but generally, they should be about 3-4 inches in diameter.
2. Cut the Stem: Use a sharp knife to cut the artichoke stem about 2-3 inches below the base of the bud.
3. Harvest the Side Shoots: After harvesting the main bud, you can also harvest the smaller side shoots that develop along the stem. These are often more tender than the main bud.
4. Enjoy Your Harvest: Artichokes are best enjoyed fresh. They can be steamed, boiled, grilled, or baked. Don’t forget to remove the choke (the fuzzy part in the center) before eating.
Troubleshooting Common Problems
Even with the best care, you might encounter some problems along the way. Here are a few common issues and how to address them:
* Yellowing Leaves: This can be a sign of overwatering, underwatering, or nutrient deficiency. Check the soil moisture and adjust your watering accordingly. Fertilize with a balanced fertilizer.
* Aphids: These tiny pests can suck the sap from your artichoke plants. Spray them with insecticidal soap or blast them off with a strong stream of water.
* Snails and Slugs: These pests can munch on the leaves of your artichoke plants. Hand-pick them or use snail bait.
* Bud Rot: This is a fungal disease that can cause the buds to rot. Improve air circulation by spacing your plants properly. Remove any infected buds.
Propagating Artichokes
If you want to expand your artichoke patch, you can propagate them from offshoots, also known as “suckers.”
1. Identify Offshoots: Look for small shoots growing from the base of the plant.
2. Dig Up the Offshoot: Carefully dig up the offshoot, making sure to get some roots with it.
3. Plant the Offshoot: Plant the offshoot in a pot or directly in the garden.
4. Water Thoroughly: Water the offshoot thoroughly after planting.
Artichoke Recipes to Try
Now that you’ve harvested your own artichokes, it’s time to get cooking! Here are a few of my favorite artichoke recipes:
* Steamed Artichokes with Garlic Aioli: A classic and simple way to enjoy artichokes.
* Grilled Artichokes with Lemon Butter: Grilling gives artichokes a smoky flavor that’s delicious.
* Artichoke and Spinach Dip:
Conclusion
So, there you have it! Mastering the art of harvesting turnips from your home garden is not only achievable but also incredibly rewarding. We’ve walked through the simple steps, highlighted the key indicators of ripeness, and armed you with the knowledge to ensure a bountiful harvest. But why is this DIY trick a must-try? Because it puts you in complete control of the flavor and freshness of your turnips. Store-bought turnips simply can’t compare to the crisp, sweet taste of those you’ve nurtured yourself. Plus, knowing exactly when and how to harvest them means you’ll minimize waste and maximize the yield from your precious garden space.
Think about it: no more guessing games at the grocery store, no more wilted greens or woody roots. Just perfectly ripe turnips, ready to be transformed into delicious meals. From creamy mashed turnips to roasted root vegetable medleys, the possibilities are endless.
But the fun doesn’t stop there!
Consider these variations to elevate your turnip harvesting experience:
* **Succession Planting:** Plant turnip seeds every few weeks for a continuous harvest throughout the growing season. This ensures a steady supply of fresh turnips for your table.
* **Companion Planting:** Plant turnips alongside other vegetables like beans, peas, or radishes to improve soil health and deter pests.
* **Turnip Greens Galore:** Don’t discard the turnip greens! They are packed with nutrients and can be cooked like spinach or added to salads. Experiment with different ways to prepare them – sautéed with garlic, steamed, or even blended into a pesto.
* **Winter Storage:** If you have a root cellar or cool, dark storage space, you can store your harvested turnips for several months. Simply trim the greens, leaving about an inch of stem, and pack the turnips in damp sand or sawdust.
Ready to get your hands dirty?
We wholeheartedly encourage you to try this DIY turnip harvesting trick in your own home garden. It’s a simple, satisfying, and sustainable way to enjoy fresh, flavorful produce. And remember, gardening is a journey of learning and experimentation. Don’t be afraid to make mistakes and adapt your approach as needed.
Once you’ve harvested your first batch of homegrown turnips, we’d love to hear about your experience! Share your tips, tricks, and favorite turnip recipes in the comments below. Let’s build a community of passionate gardeners and celebrate the joys of homegrown food. Happy harvesting!
Frequently Asked Questions (FAQ)
Q: How do I know when my turnips are ready to harvest?
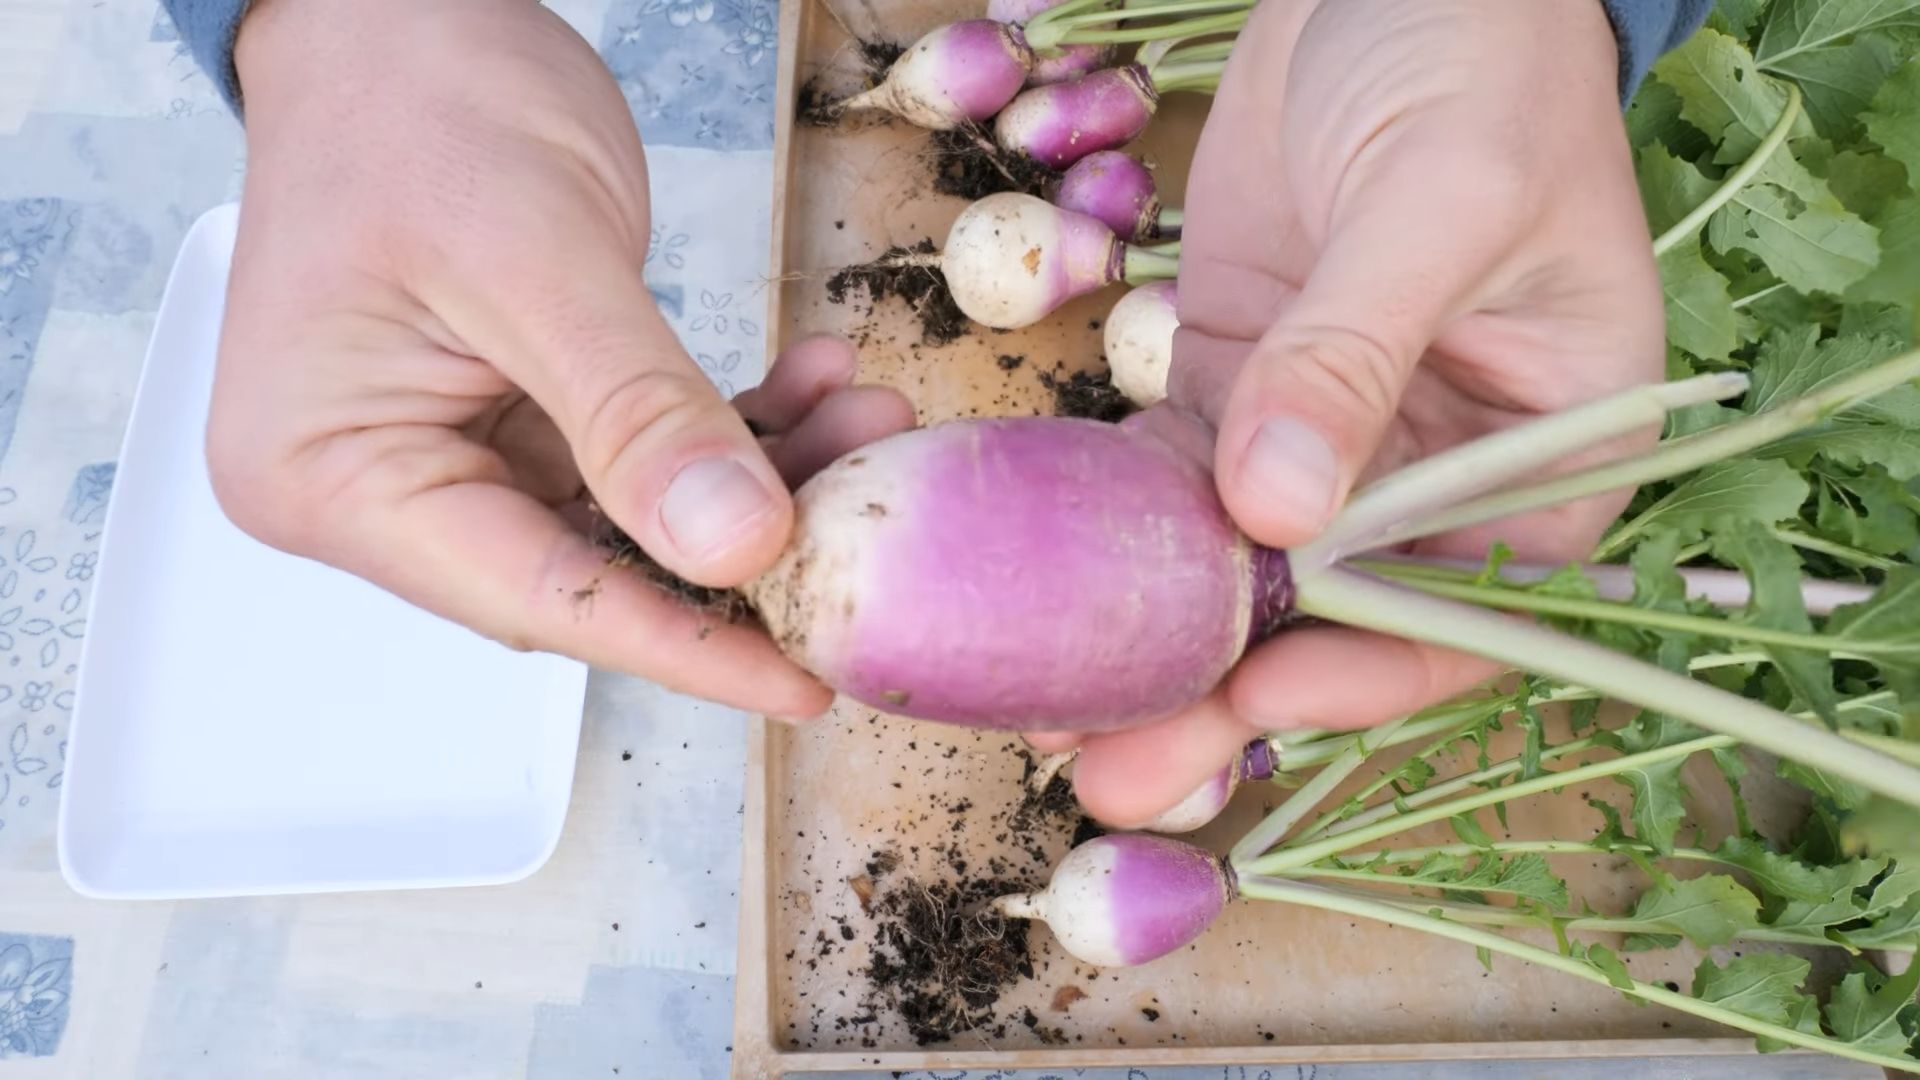
A: The size of the turnip root is the primary indicator of ripeness. Most varieties are ready to harvest when the root is between 2 and 3 inches in diameter. You can gently brush away some soil around the base of the plant to check the size. Also, look for the top of the turnip to be peeking out of the soil. The greens should be vibrant and healthy-looking, not wilted or yellowed. If you leave them in the ground too long, they can become woody and less flavorful.
Q: What’s the best time of day to harvest turnips?
A: Harvesting in the morning, after the dew has dried, is generally recommended. This is when the turnips are at their peak crispness and flavor. Avoid harvesting during the hottest part of the day, as the heat can stress the plants and affect the quality of the roots.
Q: How do I properly harvest turnips without damaging them?
A: Gently loosen the soil around the turnip with a garden fork or trowel. Be careful not to puncture the root. Once the soil is loosened, grasp the turnip greens near the base of the root and gently pull upwards with a twisting motion. If the turnip is difficult to pull, loosen the soil further. Avoid yanking on the greens, as this can break them off and leave the root in the ground.
Q: Can I eat the turnip greens?
A: Absolutely! Turnip greens are highly nutritious and delicious. They can be cooked like spinach or other leafy greens. Wash them thoroughly before cooking to remove any dirt or debris. You can sauté them with garlic and olive oil, steam them, or add them to soups and stews. Some people even enjoy them raw in salads, although they can have a slightly peppery taste.
Q: How should I store harvested turnips?
A: To store turnips for a short period (up to a week), trim the greens, leaving about an inch of stem, and store them in a plastic bag in the refrigerator. For longer storage (several months), you can store them in a root cellar or cool, dark place. Trim the greens as before and pack the turnips in damp sand or sawdust in a container with good ventilation. The ideal storage temperature is between 32 and 40 degrees Fahrenheit.
Q: What if my turnips are small and underdeveloped?
A: Several factors can contribute to small or underdeveloped turnips, including poor soil quality, insufficient sunlight, overcrowding, and lack of water. Ensure your turnips are planted in well-drained soil that is rich in organic matter. Provide them with at least 6 hours of sunlight per day. Thin out the seedlings to allow adequate spacing between plants. Water regularly, especially during dry periods. You can also fertilize them with a balanced fertilizer to promote growth.
Q: My turnips are bitter. What could be the reason?
A: Bitterness in turnips can be caused by several factors, including hot weather, drought stress, and over-maturity. Turnips prefer cool weather and consistent moisture. If they are exposed to prolonged periods of heat or drought, they can develop a bitter taste. Harvesting them when they are young and tender can help to prevent bitterness. Also, certain varieties of turnips are naturally more prone to bitterness than others.
Q: Can I grow turnips in containers?
A: Yes, turnips can be successfully grown in containers, especially smaller varieties. Choose a container that is at least 12 inches deep and wide to allow adequate room for root development. Use a well-draining potting mix and provide regular watering and fertilization. Place the container in a sunny location that receives at least 6 hours of sunlight per day.
Q: Are there any common pests or diseases that affect turnips?
A: Yes, some common pests that can affect turnips include aphids, flea beetles, and root maggots. Diseases that can affect turnips include clubroot and powdery mildew. Monitor your plants regularly for signs of pests or diseases. Use organic pest control methods, such as insecticidal soap or neem oil, to control pests. Ensure good air circulation to prevent fungal diseases. If necessary, use appropriate fungicides to treat diseases. Crop rotation can also help to prevent soilborne diseases.
Q: What are some creative ways to use my harvested turnips?
A: Beyond the traditional mashed turnips and roasted root vegetables, there are many creative ways to use your harvested turnips. Try adding them to soups, stews, and stir-fries. You can also grate them and use them in salads or slaws. Turnip greens can be used in smoothies or juiced for a nutrient boost. Consider pickling turnips for a tangy and flavorful condiment. Experiment with different spices and herbs to create unique flavor combinations. Don’t be afraid to get creative and explore the versatility of this humble root vegetable!
Leave a Comment