
Grow peanuts at home? Absolutely! Imagine the satisfaction of harvesting your own homegrown peanuts, ready to be roasted, turned into creamy peanut butter, or simply enjoyed as a healthy snack. It’s easier than you might think, and this DIY guide will walk you through every step of the process.
Peanuts, also known as groundnuts, have a rich history, dating back thousands of years in South America. They’ve since spread across the globe, becoming a staple food in many cultures. In some traditions, peanuts symbolize prosperity and good fortune. Now, you can bring a little of that good fortune to your own backyard!
Why should you try this DIY project? Well, for starters, growing your own peanuts allows you to control exactly what goes into them – no pesticides or harmful chemicals needed! Plus, it’s a fantastic way to connect with nature, learn about the growing process, and impress your friends and family with your green thumb. Many people are intimidated by the idea of growing their own food, but grow peanuts at home is surprisingly simple, even for beginners. I’m excited to share these easy-to-follow tricks and hacks that will have you harvesting a bountiful crop in no time. Let’s get started!
Growing Peanuts at Home: A Beginner’s Guide
Hey there, fellow gardening enthusiasts! Ever thought about growing your own peanuts? It’s surprisingly easy and incredibly rewarding. Imagine the satisfaction of harvesting your own homegrown peanuts, perfect for snacking, making peanut butter, or adding to your favorite recipes. I’m going to walk you through the entire process, from choosing the right peanuts to enjoying your delicious harvest. Let’s get started!
Choosing Your Peanuts and Preparing for Planting
Before we get our hands dirty, we need to select the right peanuts and get our planting area ready. This is a crucial step, so let’s take our time and do it right.
* Selecting the Right Peanuts: You can’t just grab any roasted peanuts from the grocery store. You need raw, unsalted peanuts. Look for them at your local garden center, health food store, or online seed supplier. Make sure they are specifically labeled for planting. Valencia peanuts are a great choice for beginners because they mature relatively quickly.
* Testing for Viability: To ensure your peanuts will sprout, do a simple viability test. Soak a handful of peanuts in water for a few hours. Then, place them between damp paper towels in a plastic bag. Seal the bag and keep it in a warm place. Check them every day for sprouting. If most of them sprout within a week, you’re good to go!
* Choosing the Right Location: Peanuts need plenty of sunshine – at least 6-8 hours a day. They also prefer well-drained, sandy loam soil. Avoid heavy clay soil, as it can hinder the development of the peanut pods.
* Preparing the Soil: Loosen the soil to a depth of at least 12 inches. Amend it with compost or well-rotted manure to improve drainage and fertility. Peanuts prefer slightly acidic soil, with a pH between 6.0 and 6.5. You can test your soil pH with a simple soil testing kit from your local garden center.
* Timing is Key: Peanuts need a long growing season, typically 120-150 days. Plant them after the last frost when the soil temperature has warmed to at least 65°F (18°C). I usually wait until a couple of weeks after my last expected frost date just to be safe.
Planting Your Peanuts
Now for the fun part – getting those peanuts in the ground! Follow these steps carefully for the best results.
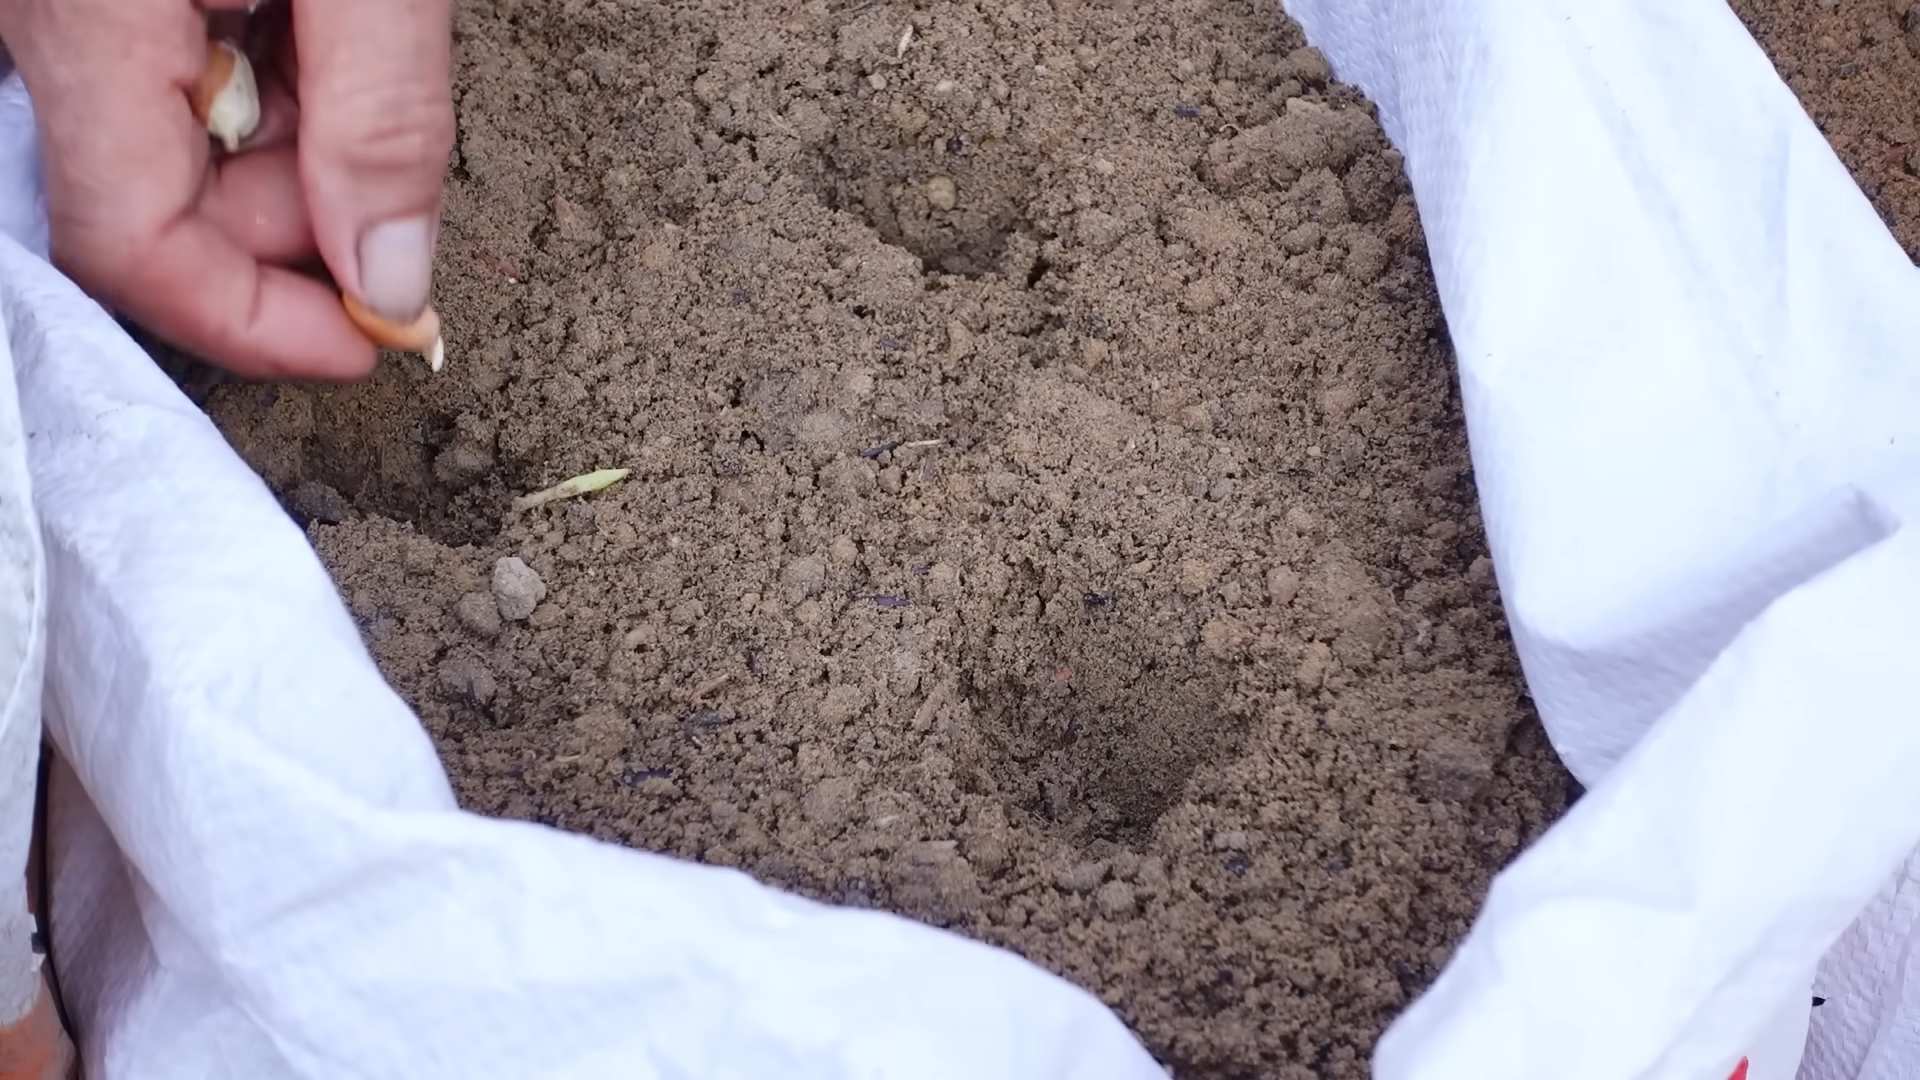
1. Soaking the Peanuts (Optional): While not strictly necessary, soaking the peanuts in water for a few hours before planting can help speed up germination. I usually soak mine overnight.
2. Creating the Rows: Create rows that are about 2-3 feet apart. This will give the peanut plants plenty of room to spread out.
3. Planting the Peanuts: Plant the peanuts about 1-2 inches deep and 6-8 inches apart within the rows.
4. Covering the Peanuts: Gently cover the peanuts with soil and pat it down lightly.
5. Watering: Water the newly planted peanuts thoroughly. Keep the soil consistently moist, but not waterlogged, until the seedlings emerge.
Caring for Your Peanut Plants
Once your peanut plants have sprouted, it’s important to provide them with the right care to ensure a bountiful harvest.
* Watering: Water regularly, especially during dry spells. Peanuts need about 1 inch of water per week. Avoid overhead watering, as it can promote fungal diseases. Drip irrigation is ideal.
* Weeding: Keep the area around your peanut plants free of weeds. Weeds compete with the peanuts for nutrients and water. Hand-pulling weeds is the best option, as herbicides can damage the peanut plants.
* Fertilizing: Peanuts don’t need a lot of fertilizer, but a light feeding of a balanced fertilizer (e.g., 10-10-10) a few weeks after planting can be beneficial. Avoid over-fertilizing, as this can lead to excessive foliage growth at the expense of peanut production.
* Hilling: This is a crucial step! As the peanut plants grow, they will produce “pegs” that grow downwards from the base of the plant into the soil. These pegs are where the peanuts will develop. To encourage peanut production, gently hill the soil around the base of the plants, covering the pegs with soil. Do this several times throughout the growing season. I usually do it every few weeks.
* Pest and Disease Control: Peanuts are generally resistant to pests and diseases, but keep an eye out for common problems like aphids, spider mites, and fungal diseases. If you notice any problems, treat them promptly with appropriate organic pesticides or fungicides. Neem oil is a good option for controlling many common pests.
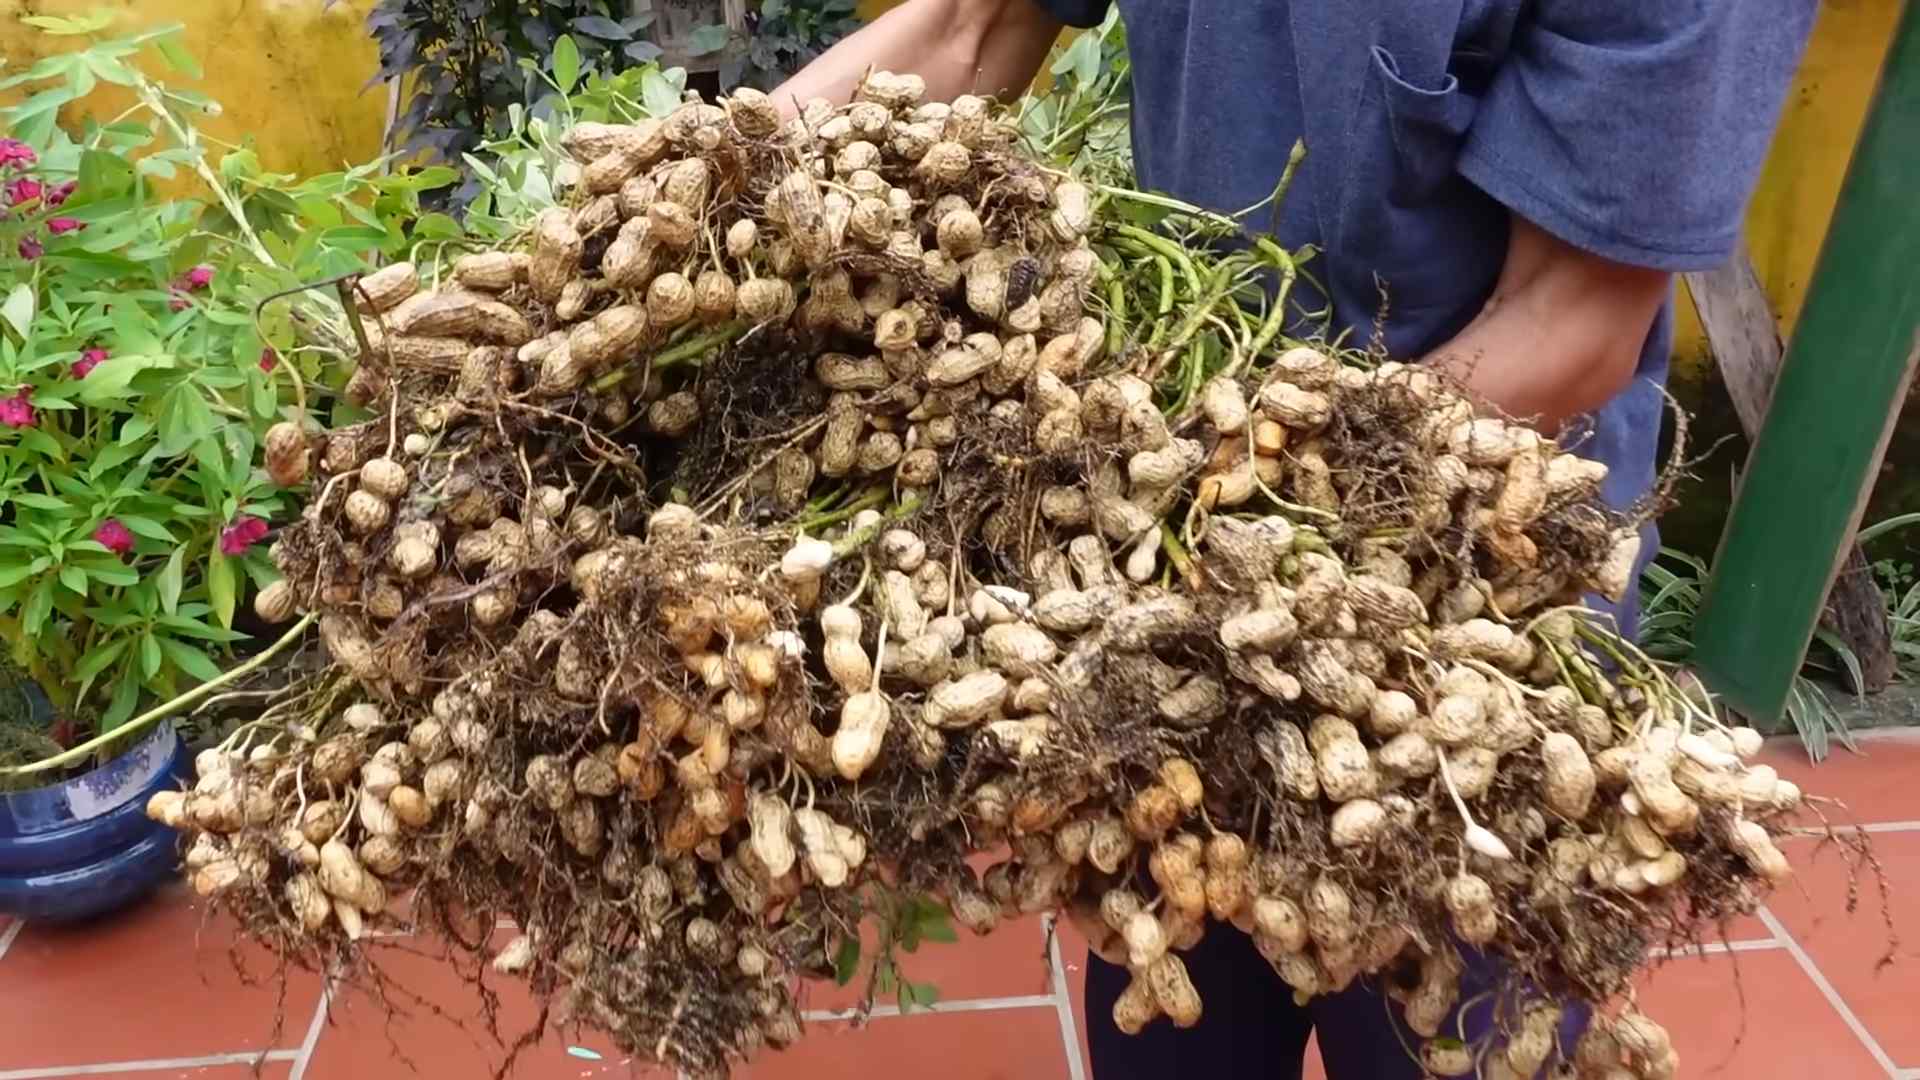
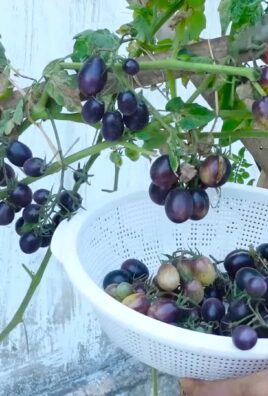
Harvesting Your Peanuts
The moment we’ve all been waiting for! Harvesting your own peanuts is a truly rewarding experience.
1. Knowing When to Harvest: This is the trickiest part. Peanuts are ready to harvest when the foliage starts to turn yellow and the inside of the peanut shells are dark brown. You can also dig up a few plants to check the peanuts. If the peanuts are plump and the shells are well-formed, it’s time to harvest.
2. Digging Up the Plants: Use a garden fork or shovel to carefully dig up the entire peanut plant. Be gentle to avoid damaging the peanuts.
3. Shaking Off the Soil: Shake off as much soil as possible from the plants.
4. Drying the Peanuts: Hang the peanut plants upside down in a well-ventilated area for several weeks to dry. This allows the peanuts to cure and develop their flavor. I usually hang them in my garage.
5. Removing the Peanuts: Once the plants are dry, remove the peanuts from the vines.
6. Final Drying (Optional): For longer storage, you can dry the peanuts further in a dehydrator or oven at a low temperature (around 130°F or 55°C) for several hours.
7. Storing Your Peanuts: Store your dried peanuts in an airtight container in a cool, dry place. They should keep for several months.
Troubleshooting Common Problems
Even with the best care, you might encounter some challenges along the way. Here are some common problems and how to address them:
* Poor Germination: If your peanuts aren’t sprouting, make sure the soil temperature is warm enough and that the peanuts are viable. You can also try scarifying the peanuts by gently rubbing them with sandpaper before planting.
* Yellowing Leaves: Yellowing leaves can be a sign of nutrient deficiency. Try fertilizing with a balanced fertilizer. It can also be a sign of overwatering or poor drainage.
* Small Peanuts: Small peanuts can be caused by poor soil fertility, insufficient watering, or a short growing season. Make sure to amend your soil with compost, water regularly, and plant your peanuts early enough in the season.
* Pest Infestations: Keep an eye out for common pests like aphids and spider mites. Treat them promptly with appropriate organic pesticides.
Enjoying Your Homegrown Peanuts
Congratulations! You’ve successfully grown your own peanuts. Now it’s time to enjoy the fruits (or rather, nuts) of your labor.
* Roasting: Roasting peanuts is easy and brings out their delicious flavor. Simply spread the peanuts on a baking sheet and roast them in a preheated oven at 350°F (175°C) for 15-20 minutes, or until they are golden brown.
* Snacking: Enjoy your roasted peanuts as a healthy and satisfying snack.
* Making Peanut Butter: Homemade peanut butter is incredibly easy to make and tastes so much better than store-bought. Simply grind roasted peanuts in a food processor until smooth. You can add a pinch of salt or a touch of honey for extra flavor.
* Adding to Recipes: Use your homegrown peanuts in your favorite recipes, such as stir-fries, salads, and desserts.
Growing peanuts at home is a fun and rewarding experience. With a little bit of care and attention, you can enjoy a bountiful harvest of delicious, homegrown peanuts. Happy gardening!
Conclusion
So, there you have it! Growing peanuts at home is not only achievable, but it’s also a deeply rewarding experience that connects you to the source of your food in a tangible way. Forget the store-bought varieties that often lack the freshness and vibrant flavor of homegrown produce. With a little patience and the right approach, you can cultivate your own supply of delicious, crunchy peanuts right in your backyard or even in containers on your patio.
Why is this DIY trick a must-try? Because it offers a unique opportunity to witness the fascinating life cycle of a plant, from seed to harvest. It’s a fantastic educational experience for children and adults alike, teaching valuable lessons about botany, agriculture, and the importance of sustainable food practices. Plus, the taste of freshly harvested peanuts is simply unparalleled. They’re sweeter, nuttier, and bursting with flavor in a way that store-bought peanuts can only dream of.
But the benefits don’t stop there. Growing your own peanuts allows you to control the entire process, from the type of soil you use to the fertilizers you apply (or don’t apply!). This means you can ensure that your peanuts are grown organically and free from harmful chemicals, giving you peace of mind knowing exactly what you’re putting into your body.
Looking for variations to spice things up? Consider experimenting with different peanut varieties. Virginia peanuts are known for their large size and are perfect for roasting. Spanish peanuts are smaller and have a reddish skin, making them ideal for candies and snacks. Runner peanuts are commonly used for peanut butter due to their uniform size and flavor. Or, if you’re feeling adventurous, try growing Valencia peanuts, which typically have three or four kernels per shell.
Another fun variation is to experiment with different growing methods. While growing peanuts in the ground is the most common approach, you can also successfully grow them in containers. This is a great option if you have limited space or if you want to protect your plants from pests and diseases. Just be sure to choose a large container with good drainage and use a well-draining potting mix.
Ultimately, the key to successful peanut cultivation lies in providing your plants with the right conditions: plenty of sunlight, well-drained soil, and consistent moisture. Don’t be afraid to get your hands dirty and experiment with different techniques to find what works best for you.
We wholeheartedly encourage you to give this DIY trick a try. It’s a fun, educational, and rewarding experience that will provide you with a delicious and healthy snack. And once you’ve harvested your first crop of homegrown peanuts, be sure to share your experience with us! We’d love to hear about your successes, your challenges, and any tips or tricks you’ve learned along the way. Share your photos and stories on social media using #HomegrownPeanuts and let’s inspire others to discover the joy of growing their own food. So, get out there, get planting, and get ready to enjoy the taste of fresh, homegrown **peanuts**!
Frequently Asked Questions (FAQ)
What is the best time of year to plant peanuts?
The ideal time to plant peanuts is in the spring, after the last frost has passed and the soil has warmed to at least 65 degrees Fahrenheit (around 18 degrees Celsius). Peanuts require a long growing season of at least 120-150 days, so it’s important to plant them early enough to allow them to mature fully before the first frost of autumn. In warmer climates, you may be able to plant peanuts earlier in the spring or even in the late winter. Check your local weather conditions and consult with your local agricultural extension office for specific recommendations for your area.
What type of soil is best for growing peanuts?
Peanuts thrive in well-drained, sandy loam soil that is rich in organic matter. The soil should be loose and friable to allow the developing peanut pods to penetrate easily. Avoid heavy clay soils, as they can become compacted and restrict root growth. The ideal soil pH for peanuts is between 6.0 and 6.5. Before planting, it’s a good idea to amend your soil with compost or other organic matter to improve its drainage and fertility. You can also add a small amount of gypsum to provide calcium, which is essential for peanut pod development.
How much sunlight do peanuts need?
Peanuts require at least 6-8 hours of direct sunlight per day to thrive. Choose a planting location that receives full sun throughout the day. If you’re growing peanuts in containers, be sure to place them in a sunny spot on your patio or balcony. Insufficient sunlight can lead to stunted growth, reduced yields, and poor-quality peanuts.
How often should I water my peanut plants?
Peanuts need consistent moisture, especially during the flowering and pod development stages. Water your plants deeply whenever the top inch of soil feels dry to the touch. Avoid overwatering, as this can lead to root rot and other fungal diseases. A good rule of thumb is to water your peanut plants about once or twice a week, depending on the weather conditions and the type of soil you have. During periods of drought, you may need to water more frequently.
Do I need to fertilize my peanut plants?
Peanuts are legumes, which means they have the ability to fix nitrogen from the air into the soil. However, they still benefit from supplemental fertilization, especially during the early stages of growth. A balanced fertilizer with a ratio of 10-10-10 or 5-10-10 can be applied at planting time and again about 4-6 weeks later. Avoid using fertilizers that are high in nitrogen, as this can promote excessive vegetative growth at the expense of pod development. You can also amend your soil with compost or other organic matter to provide a slow-release source of nutrients.
How do I know when my peanuts are ready to harvest?
The best way to determine when your peanuts are ready to harvest is to check the maturity of the pods. About 120-150 days after planting, dig up a few plants and examine the pods. The pods should be plump and full, with a distinct veining pattern on the shell. The inside of the shell should be dark brown or black. If the pods are still white or light-colored, they are not yet mature. Another sign of maturity is yellowing of the foliage. Once the majority of the pods are mature, you can harvest the entire crop.
How do I harvest peanuts?
To harvest peanuts, carefully dig up the entire plant, being careful not to damage the pods. Shake off any excess soil and allow the plants to dry in the sun for several days. This will help to cure the peanuts and improve their flavor. Once the plants are dry, you can remove the peanuts from the vines by hand or with a peanut picker.
How do I store peanuts?
After harvesting and drying your peanuts, you can store them in a cool, dry place for several months. The ideal storage temperature is between 32 and 40 degrees Fahrenheit (0 and 4 degrees Celsius). You can store the peanuts in their shells or shelled, depending on your preference. If you’re storing them in their shells, be sure to keep them in a well-ventilated container to prevent mold growth. Shelled peanuts can be stored in an airtight container in the refrigerator or freezer.
Can I grow peanuts in containers?
Yes, you can successfully grow peanuts in containers. Choose a large container that is at least 18 inches in diameter and 12 inches deep. Make sure the container has good drainage holes. Use a well-draining potting mix that is rich in organic matter. Place the container in a sunny location that receives at least 6-8 hours of direct sunlight per day. Water regularly and fertilize as needed.
What are some common pests and diseases that affect peanuts?
Some common pests that affect peanuts include aphids, spider mites, and leafhoppers. These pests can be controlled with insecticidal soap or neem oil. Common diseases that affect peanuts include leaf spot, rust, and white mold. These diseases can be prevented by practicing good sanitation, providing adequate air circulation, and using disease-resistant varieties. If you notice any signs of pests or diseases, treat them promptly to prevent them from spreading.
Leave a Comment