
Grow Mustard Greens Small Space? Absolutely! Imagine stepping outside your door and harvesting fresh, peppery mustard greens, even if all you have is a tiny balcony or a sunny windowsill. For centuries, mustard greens have been a staple in cuisines around the world, from Asian stir-fries to Southern comfort food. Their vibrant flavor and nutritional punch have made them a beloved ingredient, and now, you can easily cultivate them yourself, no matter how limited your space may be.
But why bother with growing your own mustard greens? Well, store-bought greens often lack the freshness and flavor of homegrown varieties. Plus, knowing exactly where your food comes from and how it’s grown is incredibly rewarding. In this article, I’m going to share some simple yet effective DIY tricks and hacks that will empower you to grow mustard greens small space, even if you’ve never gardened before. We’ll cover everything from choosing the right containers and soil to providing the perfect amount of sunlight and water. Get ready to transform your small space into a thriving edible garden!
Growing Mustard Greens in a Small Space: A DIY Guide
Hey there, fellow gardening enthusiasts! So, you’re itching to grow some peppery, delicious mustard greens but are short on space? No problem! I’m here to show you how to cultivate these leafy wonders even if you only have a tiny balcony, a sunny windowsill, or a small patio. Mustard greens are surprisingly easy to grow, quick to mature, and packed with nutrients. Let’s get started!
Choosing the Right Mustard Green Variety
First things first, let’s talk varieties. Not all mustard greens are created equal, and some are better suited for small spaces than others. Here are a few of my favorites:
- ‘Red Giant’: This variety has beautiful, deep purple leaves and a slightly milder flavor than some others. It adds a pop of color to your garden!
- ‘Green Wave’: This is a classic, frilly-edged variety with a robust, spicy flavor. It’s a reliable grower and a great choice for beginners.
- ‘Osaka Purple’: Similar to ‘Red Giant’ but with even more intense purple coloration. It’s also quite compact, making it ideal for containers.
- ‘Southern Giant Curled’: This variety is known for its large, heavily curled leaves and strong mustard flavor. It can get quite big, so make sure your container is large enough.
- ‘Mizuna’: While technically a Japanese mustard green, Mizuna is incredibly versatile and easy to grow. It has a mild, slightly peppery flavor and a delicate texture.
Gathering Your Supplies
Before we dive into planting, let’s make sure we have everything we need. Here’s a checklist:
- Mustard Green Seeds: Choose your favorite variety from the list above!
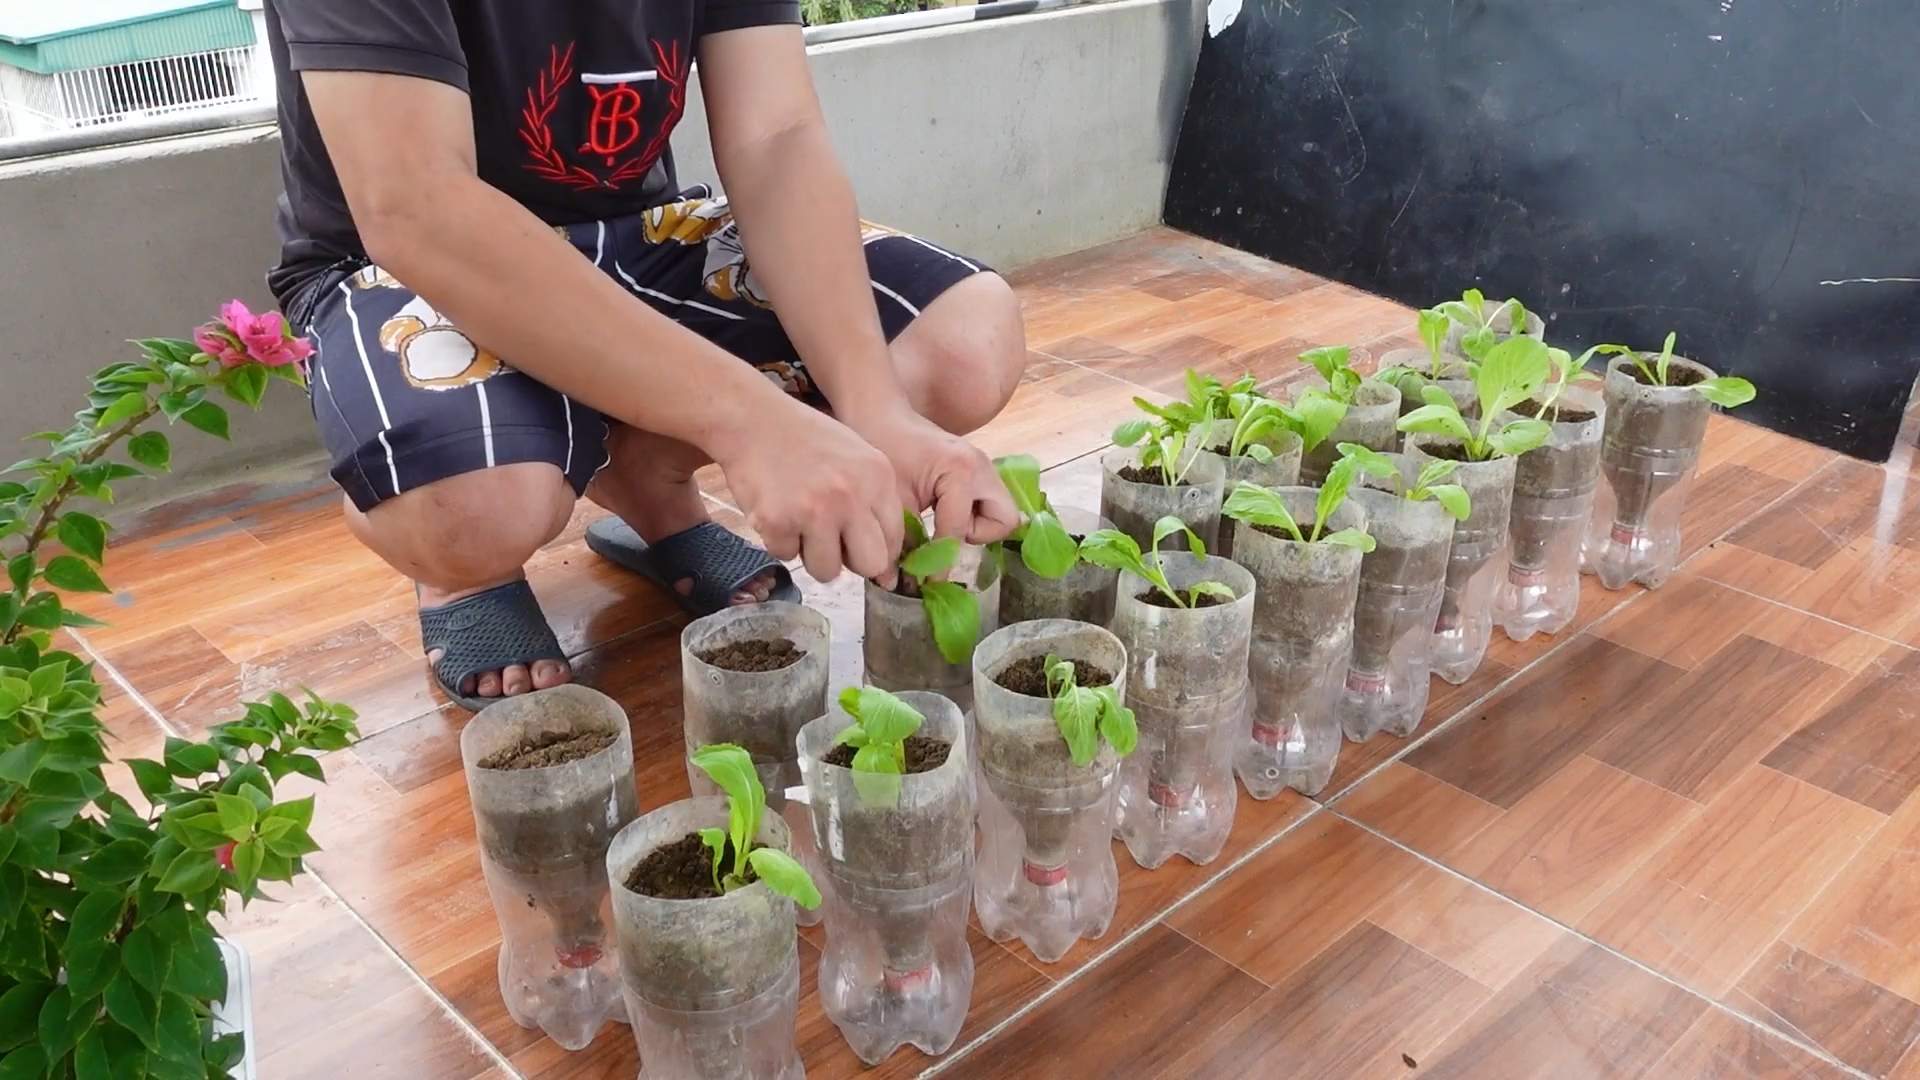
- Containers: You’ll need containers with drainage holes. I recommend pots that are at least 6 inches deep and wide. You can use terracotta pots, plastic containers, or even repurposed items like buckets or tubs.
- Potting Mix: Use a high-quality potting mix that drains well. Avoid using garden soil, as it can become compacted in containers.
- Watering Can or Hose: For watering your plants.
- Fertilizer (Optional): A balanced liquid fertilizer can help boost growth.
- Trowel or Small Shovel: For filling your containers with potting mix.
- Spray Bottle (Optional): For misting seedlings.
- Labels and Marker (Optional): To label your containers with the variety and planting date.
Planting Your Mustard Greens
Now for the fun part! Here’s how to plant your mustard green seeds:
- Prepare Your Containers: Fill your containers with potting mix, leaving about an inch of space at the top. Gently pat down the soil to remove any air pockets.
- Sow the Seeds: Sprinkle the mustard green seeds evenly over the surface of the soil. You can sow them quite densely, as you can always thin them out later.
- Cover the Seeds: Lightly cover the seeds with a thin layer of potting mix (about 1/4 inch).
- Water Gently: Water the soil gently using a watering can or hose with a gentle spray nozzle. Be careful not to wash away the seeds.
- Label Your Containers (Optional): If you’re planting multiple varieties, label your containers so you know which is which.
Caring for Your Mustard Greens
Once your seeds are planted, it’s time to provide them with the care they need to thrive.
- Provide Adequate Sunlight: Mustard greens need at least 4-6 hours of sunlight per day. Place your containers in a sunny location, such as a balcony, patio, or windowsill. If you don’t have enough natural light, you can supplement with grow lights.
- Water Regularly: Keep the soil consistently moist, but not soggy. Water when the top inch of soil feels dry to the touch. Avoid overwatering, as this can lead to root rot.
- Thin Seedlings (If Necessary): Once your seedlings have emerged and have a few true leaves, thin them out so that they are spaced about 2-3 inches apart. This will give them enough room to grow and prevent overcrowding. You can eat the thinned seedlings as microgreens!
- Fertilize (Optional): If you want to give your mustard greens a boost, you can fertilize them every 2-3 weeks with a balanced liquid fertilizer. Follow the instructions on the fertilizer label.
- Monitor for Pests and Diseases: Keep an eye out for pests such as aphids, flea beetles, and cabbage worms. You can control these pests with insecticidal soap or neem oil. Mustard greens are also susceptible to fungal diseases such as downy mildew. To prevent these diseases, make sure your plants have good air circulation and avoid overwatering.
Harvesting Your Mustard Greens
The best part of growing your own mustard greens is, of course, harvesting them! Mustard greens are ready to harvest when the leaves are about 4-6 inches long.
- Harvesting Individual Leaves: You can harvest individual leaves as needed, starting with the outer leaves. This will allow the inner leaves to continue to grow.
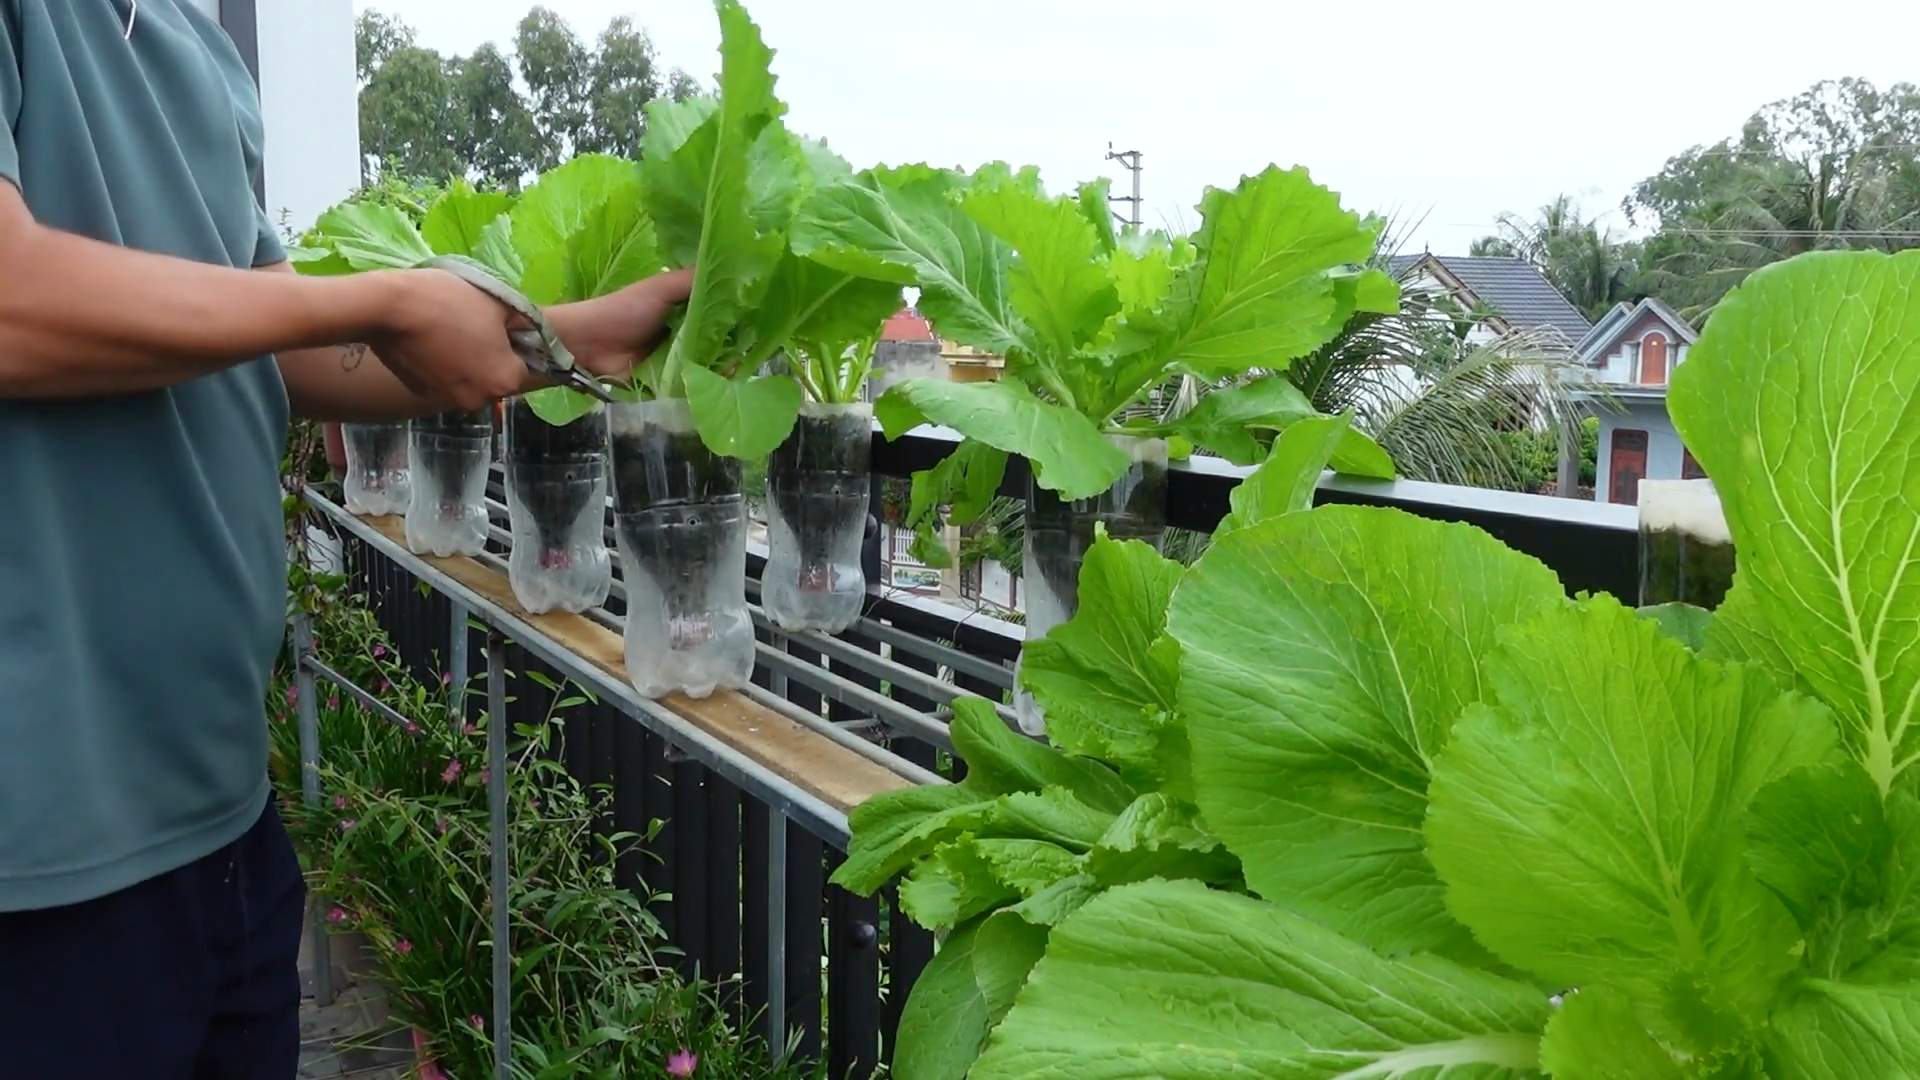
- Harvesting the Entire Plant: If you want to harvest the entire plant, simply cut it off at the base.
- Succession Planting: To ensure a continuous supply of mustard greens, sow new seeds every 2-3 weeks. This is called succession planting.
Troubleshooting Common Problems
Even with the best care, you might encounter some problems while growing mustard greens. Here are a few common issues and how to address them:
- Yellowing Leaves: This could be a sign of overwatering, underwatering, or nutrient deficiency. Check the soil moisture and adjust your watering accordingly. If the soil is dry, water more frequently. If the soil is soggy, water less frequently. You can also try fertilizing your plants with a balanced liquid fertilizer.
- Leggy Seedlings: This means your seedlings are not getting enough light. Move them to a sunnier location or supplement with grow lights.
- Pest Infestations: As mentioned earlier, mustard greens can be susceptible to pests such as aphids, flea beetles, and cabbage worms. Control these pests with insecticidal soap or neem oil.
- Fungal Diseases: To prevent fungal diseases, make sure your plants have good air circulation and avoid overwatering. If you notice any signs of fungal disease, such as white powdery spots on the leaves, remove the affected leaves and treat the plants with a fungicide.
Enjoying Your Harvest
Now that you’ve harvested your mustard greens, it’s time to enjoy them! Mustard greens can be eaten raw or cooked. They have a peppery, slightly bitter flavor that adds a kick to salads, stir-fries, soups, and stews.
Here are a few ideas for using your homegrown mustard greens:
- Salads: Add mustard greens to your favorite salad for a peppery bite.
- Stir-fries: Stir-fry mustard greens with garlic, ginger, and soy sauce for a quick and easy side dish.
- Soups: Add mustard greens to soups and stews for added flavor and nutrients.
- Sautéed: Sauté mustard greens with olive oil, garlic, and a pinch of red pepper flakes for a simple and delicious side dish.
- Smoothies: Add a handful of mustard greens to your smoothies for a healthy boost.
Extra Tips for Small Space Gardening
Here are a few extra tips to help you maximize
Hey there, fellow gardening enthusiasts! So, you’re itching to grow some peppery, delicious mustard greens but are short on space? No problem! I’m here to show you how to cultivate these leafy wonders even if you only have a tiny balcony, a sunny windowsill, or a small patio. Mustard greens are surprisingly easy to grow, quick to mature, and packed with nutrients. Let’s get started!
Choosing the Right Mustard Green Variety
First things first, let’s talk varieties. Not all mustard greens are created equal, and some are better suited for small spaces than others. Here are a few of my favorites:
- ‘Red Giant’: This variety has beautiful, deep purple leaves and a slightly milder flavor than some others. It adds a pop of color to your garden!
- ‘Green Wave’: This is a classic, frilly-edged variety with a robust, spicy flavor. It’s a reliable grower and a great choice for beginners.
- ‘Osaka Purple’: Similar to ‘Red Giant’ but with even more intense purple coloration. It’s also quite compact, making it ideal for containers.
- ‘Southern Giant Curled’: This variety is known for its large, heavily curled leaves and strong mustard flavor. It can get quite big, so make sure your container is large enough.
- ‘Mizuna’: While technically a Japanese mustard green, Mizuna is incredibly versatile and easy to grow. It has a mild, slightly peppery flavor and a delicate texture.
Gathering Your Supplies
Before we dive into planting, let’s make sure we have everything we need. Here’s a checklist:
- Mustard Green Seeds: Choose your favorite variety from the list above!
- Containers: You’ll need containers with drainage holes. I recommend pots that are at least 6 inches deep and wide. You can use terracotta pots, plastic containers, or even repurposed items like buckets or tubs.
- Potting Mix: Use a high-quality potting mix that drains well. Avoid using garden soil, as it can become compacted in containers.
- Watering Can or Hose: For watering your plants.
- Fertilizer (Optional): A balanced liquid fertilizer can help boost growth.
- Trowel or Small Shovel: For filling your containers with potting mix.
- Spray Bottle (Optional): For misting seedlings.
- Labels and Marker (Optional): To label your containers with the variety and planting date.
Planting Your Mustard Greens
Now for the fun part! Here’s how to plant your mustard green seeds:
- Prepare Your Containers: Fill your containers with potting mix, leaving about an inch of space at the top. Gently pat down the soil to remove any air pockets.
- Sow the Seeds: Sprinkle the mustard green seeds evenly over the surface of the soil. You can sow them quite densely, as you can always thin them out later.
- Cover the Seeds: Lightly cover the seeds with a thin layer of potting mix (about 1/4 inch).
- Water Gently: Water the soil gently using a watering can or hose with a gentle spray nozzle. Be careful not to wash away the seeds.
- Label Your Containers (Optional): If you’re planting multiple varieties, label your containers so you know which is which.
Caring for Your Mustard Greens
Once your seeds are planted, it’s time to provide them with the care they need to thrive.
- Provide Adequate Sunlight: Mustard greens need at least 4-6 hours of sunlight per day. Place your containers in a sunny location, such as a balcony, patio, or windowsill. If you don’t have enough natural light, you can supplement with grow lights.
- Water Regularly: Keep the soil consistently moist, but not soggy. Water when the top inch of soil feels dry to the touch. Avoid overwatering, as this can lead to root rot.
- Thin Seedlings (If Necessary): Once your seedlings have emerged and have a few true leaves, thin them out so that they are spaced about 2-3 inches apart. This will give them enough room to grow and prevent overcrowding. You can eat the thinned seedlings as microgreens!
- Fertilize (Optional): If you want to give your mustard greens a boost, you can fertilize them every 2-3 weeks with a balanced liquid fertilizer. Follow the instructions on the fertilizer label.
- Monitor for Pests and Diseases: Keep an eye out for pests such as aphids, flea beetles, and cabbage worms. You can control these pests with insecticidal soap or neem oil. Mustard greens are also susceptible to fungal diseases such as downy mildew. To prevent these diseases, make sure your plants have good air circulation and avoid overwatering.
Harvesting Your Mustard Greens
The best part of growing your own mustard greens is, of course, harvesting them! Mustard greens are ready to harvest when the leaves are about 4-6 inches long.
- Harvesting Individual Leaves: You can harvest individual leaves as needed, starting with the outer leaves. This will allow the inner leaves to continue to grow.
- Harvesting the Entire Plant: If you want to harvest the entire plant, simply cut it off at the base.
- Succession Planting: To ensure a continuous supply of mustard greens, sow new seeds every 2-3 weeks. This is called succession planting.
Troubleshooting Common Problems
Even with the best care, you might encounter some problems while growing mustard greens. Here are a few common issues and how to address them:
- Yellowing Leaves: This could be a sign of overwatering, underwatering, or nutrient deficiency. Check the soil moisture and adjust your watering accordingly. If the soil is dry, water more frequently. If the soil is soggy, water less frequently. You can also try fertilizing your plants with a balanced liquid fertilizer.
- Leggy Seedlings: This means your seedlings are not getting enough light. Move them to a sunnier location or supplement with grow lights.
- Pest Infestations: As mentioned earlier, mustard greens can be susceptible to pests such as aphids, flea beetles, and cabbage worms. Control these pests with insecticidal soap or neem oil.
- Fungal Diseases: To prevent fungal diseases, make sure your plants have good air circulation and avoid overwatering. If you notice any signs of fungal disease, such as white powdery spots on the leaves, remove the affected leaves and treat the plants with a fungicide.
Enjoying Your Harvest
Now that you’ve harvested your mustard greens, it’s time to enjoy them! Mustard greens can be eaten raw or cooked. They have a peppery, slightly bitter flavor that adds a kick to salads, stir-fries, soups, and stews.
Here are a few ideas for using your homegrown mustard greens:
- Salads: Add mustard greens to your favorite salad for a peppery bite.
- Stir-fries: Stir-fry mustard greens with garlic, ginger, and soy sauce for a quick and easy side dish.
- Soups: Add mustard greens to soups and stews for added flavor and nutrients.
- Sautéed: Sauté mustard greens with olive oil, garlic, and a pinch of red pepper flakes for a simple and delicious side dish.
- Smoothies: Add a handful of mustard greens to your smoothies for a healthy boost.
Extra Tips for Small Space Gardening
Here are a few extra tips to help you maximize your small space garden:
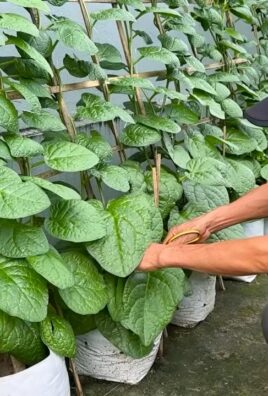
- Vertical Gardening: Use vertical gardening techniques, such as hanging baskets or wall planters, to grow more plants in a small space.
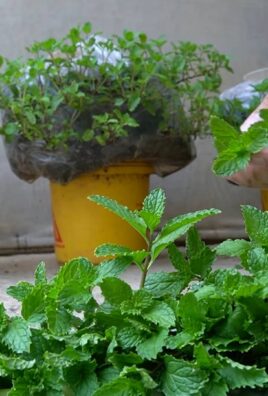
- Companion Planting: Plant mustard greens with companion plants that can help deter pests or improve growth. Good companion plants for mustard greens include dill, chamomile, and rosemary.
- Succession Planting: As mentioned earlier, succession planting is a great way to ensure a continuous supply of mustard greens.
- Choose the Right Container Size: Make sure your containers are large enough for the plants you are growing. Mustard greens need at least 6 inches of soil depth.
- Use High-Quality Potting Mix: Use a high-quality potting mix that drains well. Avoid using garden soil, as it can become compacted in containers.
Growing mustard greens in a small space is a rewarding and delicious experience. With a little bit of planning and care, you can enjoy fresh, homegrown mustard greens all season long. Happy gardening!
Conclusion
So, there you have it! Growing mustard greens in a small space is not only achievable, but it’s also incredibly rewarding. Forget those wilted, overpriced greens at the grocery store. Imagine stepping onto your balcony, patio, or even just reaching for a windowsill, and harvesting fresh, peppery mustard greens whenever you need them. This DIY trick is a must-try for anyone looking to add a burst of flavor and nutrition to their meals, regardless of their living situation.
Why is this method so compelling? Firstly, it’s incredibly space-efficient. We’ve shown you how to utilize vertical space, repurposed containers, and even indoor environments to cultivate your own mini-mustard green farm. Secondly, it’s cost-effective. Starting from seed is significantly cheaper than buying pre-packaged greens, and you can even save seeds from your harvest for future plantings, creating a sustainable cycle. Thirdly, it’s empowering. There’s a unique satisfaction in nurturing something from seed to table, knowing exactly where your food comes from and how it was grown.
But the benefits don’t stop there. Growing your own mustard greens allows you to control the growing conditions, ensuring they are free from harmful pesticides and herbicides. You can also tailor the flavor profile by experimenting with different varieties. Want a milder flavor? Try ‘Florida Broadleaf.’ Craving some serious heat? ‘Southern Giant Curled’ might be your new favorite.
Don’t be afraid to experiment! Consider companion planting your mustard greens with other herbs like dill or cilantro to deter pests and enhance flavor. You can also try succession planting, sowing new seeds every few weeks to ensure a continuous harvest throughout the growing season. If you’re growing indoors, experiment with different grow lights to find the optimal spectrum for your plants.
And speaking of variations, think beyond the traditional container. Old gutters, hanging baskets, even repurposed plastic bottles can all be transformed into thriving mustard green habitats. Get creative and let your imagination run wild! The possibilities are endless.
Ultimately, this DIY trick is about more than just growing mustard greens; it’s about connecting with nature, embracing sustainability, and enjoying the freshest, most flavorful ingredients possible. It’s about proving that you don’t need acres of land to enjoy the bounty of the earth.
We wholeheartedly encourage you to give this a try. Start small, learn as you go, and don’t be discouraged by initial setbacks. Gardening is a journey, and every mistake is a learning opportunity. Once you taste the difference between homegrown mustard greens and store-bought ones, you’ll be hooked!
We’d love to hear about your experiences! Share your photos, tips, and challenges in the comments below. Let’s create a community of small-space mustard green growers and inspire others to embrace the joys of homegrown food. What are you waiting for? Get planting!
Frequently Asked Questions (FAQ)
What kind of soil should I use for growing mustard greens in a small space?
The best soil for growing mustard greens is a well-draining, nutrient-rich potting mix. Avoid using garden soil directly in containers, as it can become compacted and hinder drainage. Look for a potting mix that contains ingredients like peat moss, perlite, and vermiculite to provide good aeration and water retention. You can also amend your potting mix with compost or aged manure to boost its nutrient content. A slightly acidic to neutral pH (around 6.0 to 7.0) is ideal for mustard greens.
How much sunlight do mustard greens need when grown in a small space, especially indoors?
Mustard greens thrive in full sun, which means at least 6 hours of direct sunlight per day. If you’re growing them outdoors in a small space like a balcony or patio, position your containers in a location that receives ample sunlight. If you’re growing them indoors, a south-facing window is usually the best option. However, even with a sunny window, you may need to supplement with artificial light, especially during the winter months. LED grow lights are a great option, as they are energy-efficient and provide the full spectrum of light that plants need to grow. Aim for 12-14 hours of light per day when growing indoors.
How often should I water my mustard greens in containers?
Watering frequency depends on several factors, including the size of your container, the type of soil you’re using, the temperature, and the humidity. As a general rule, water your mustard greens when the top inch of soil feels dry to the touch. Avoid overwatering, as this can lead to root rot. When you water, water thoroughly until water drains out of the bottom of the container. This ensures that the entire root system is moistened. During hot, dry weather, you may need to water more frequently. Check your plants daily and adjust your watering schedule accordingly.
What are some common pests and diseases that affect mustard greens, and how can I prevent them in a small space?
Common pests that can affect mustard greens include aphids, flea beetles, and cabbage worms. Diseases include downy mildew and white rust. To prevent these problems, start with healthy seeds and use a well-draining potting mix. Inspect your plants regularly for signs of pests or diseases. If you spot any pests, you can try washing them off with a strong stream of water or using insecticidal soap. For diseases, remove any affected leaves and ensure good air circulation around your plants. Companion planting with herbs like dill or cilantro can also help deter pests. Consider using organic pest control methods to avoid harming beneficial insects.
How long does it take for mustard greens to mature and be ready for harvest?
Mustard greens are relatively fast-growing and can be ready for harvest in as little as 30-45 days from planting. You can start harvesting the outer leaves when they are about 4-6 inches long. This allows the inner leaves to continue to grow. Alternatively, you can harvest the entire plant at once. The flavor of mustard greens becomes more intense as they mature, so harvest them when they are at your desired level of spiciness.
Can I grow different varieties of mustard greens in the same container?
While it’s possible to grow different varieties of mustard greens in the same container, it’s generally best to stick to one variety per container, especially if you’re a beginner. Different varieties may have different growth rates and nutrient requirements, which can make it challenging to manage them in the same space. If you do decide to grow multiple varieties in the same container, make sure they have similar growth habits and provide them with adequate space to prevent overcrowding.
How do I harvest mustard greens without damaging the plant?
The best way to harvest mustard greens is to use a sharp knife or scissors to cut the outer leaves near the base of the plant. Avoid pulling the leaves off, as this can damage the plant. By harvesting the outer leaves, you allow the inner leaves to continue to grow, providing you with a continuous harvest. You can also harvest the entire plant at once by cutting it off at the base.
Can I save seeds from my mustard greens to plant next year?
Yes, you can save seeds from your mustard greens to plant next year. However, keep in mind that mustard greens are cross-pollinating, so if you’re growing multiple varieties, the seeds may not be true to type. To save seeds, allow a few plants to bolt (flower) and produce seed pods. Once the seed pods are dry and brown, harvest them and allow them to dry completely. Then, crack open the pods and collect the seeds. Store the seeds in a cool, dry place until you’re ready to plant them.
What are some creative ways to use my homegrown mustard greens in recipes?
Mustard greens are incredibly versatile and can be used in a variety of dishes. They can be eaten raw in salads, added to stir-fries, sautéed as a side dish, or used in soups and stews. They can also be pickled or fermented. Try adding them to your favorite green smoothie for a nutritional boost. The peppery flavor of mustard greens pairs well with a variety of ingredients, including garlic, ginger, soy sauce, vinegar, and chili peppers. Experiment with different recipes and find your favorite ways to enjoy your homegrown mustard greens!
Leave a Comment