
Grow Mushrooms Indoors? Absolutely! Imagine harvesting fresh, delicious mushrooms right from your own home, any time of year. Forget those expensive grocery store prices and questionable freshness. This isn’t some far-fetched fantasy; it’s a surprisingly achievable DIY project that can bring a touch of culinary magic to your life.
Cultivating mushrooms has a rich history, dating back centuries. Ancient civilizations prized them not only for their unique flavors but also for their medicinal properties. From the meticulously crafted mushroom gardens of the East to the foraging traditions of Europe, mushrooms have always held a special place in human culture. Now, you can participate in this time-honored tradition, but with a modern, indoor twist!
Why should you learn to grow mushrooms indoors? Well, for starters, it’s incredibly rewarding to nurture something from spore to plate. Plus, you gain complete control over the growing environment, ensuring your mushrooms are free from pesticides and other harmful chemicals. In today’s world, where we’re all looking for ways to be more self-sufficient and eat healthier, this DIY project is a game-changer. I’m excited to share some simple, effective tricks and hacks that will have you harvesting your own gourmet mushrooms in no time. Let’s get started!

Growing Mushrooms Indoors: A Beginner’s Guide
Okay, so you want to grow mushrooms indoors? Awesome! It’s a surprisingly rewarding hobby, and you get delicious, fresh mushrooms out of it. Don’t be intimidated; it’s totally doable, even for beginners. I’m going to walk you through a simple method using a monotub, which is a popular and effective way to cultivate mushrooms at home.
What You’ll Need
Before we dive in, let’s gather our supplies. This is crucial for a smooth and successful grow.
* **Monotub:** A clear plastic storage container with a lid. Size depends on how many mushrooms you want to grow, but a 50-60 quart tub is a good starting point. Make sure it’s opaque or you will need to paint the bottom to prevent light from hitting the substrate.
* **Substrate:** This is the food source for your mushrooms. Coco coir (coconut fiber) is a popular and easy-to-use option. You can also use a mix of coco coir, vermiculite, and gypsum.
* **Spawn:** This is the mushroom culture that will colonize the substrate. You can buy pre-colonized grain spawn (rye berries, millet, etc.) online or from a local mushroom supplier. Oyster mushrooms are a great choice for beginners.
* **Spray Bottle:** For misting the tub to maintain humidity.
* **Rubbing Alcohol (70%):** For sanitizing everything. Seriously, everything.
* **Latex Gloves:** To keep your hands clean and prevent contamination.
* **Micropore Tape:** For covering the holes you’ll drill in the monotub.
* **Drill with Drill Bits:** For creating ventilation holes in the monotub.
* **Large Pot or Bucket:** For pasteurizing the substrate.
* **Thermometer:** To monitor the temperature of the substrate during pasteurization.
* **Filter Patches or Polyfill:** To cover the ventilation holes and allow for air exchange while preventing contaminants from entering.
* **Optional: LED Grow Light:** If your grow area doesn’t have enough natural light.
Preparing the Monotub
The monotub is your mushroom’s home, so we need to make it a safe and comfortable place.
1. **Sanitize the Tub:** This is the most important step! Wipe down the entire inside and outside of the monotub and lid with rubbing alcohol. Let it air dry completely. Don’t skip this step; contamination is the biggest enemy of mushroom growing.
2. **Drill Ventilation Holes:** You’ll need to drill holes for air exchange. I usually drill four holes, two on each of the long sides of the tub, about 2-3 inches from the top. The size of the holes depends on what you’re using to cover them. If you’re using filter patches, drill holes that are slightly smaller than the diameter of the patches. If you’re using polyfill, drill larger holes (around 1/2 inch).
3. **Apply Filter Patches or Polyfill:** If you’re using filter patches, peel off the backing and stick them over the holes. If you’re using polyfill, stuff the holes with enough polyfill to allow for air exchange but prevent contaminants from entering. You want it to be snug but not completely airtight.
Pasteurizing the Substrate
Pasteurization kills off any unwanted microorganisms in the substrate, giving your mushroom spawn a head start.
1. **Hydrate the Coco Coir:** Place the coco coir brick in a large pot or bucket. Add boiling water until the coco coir is fully saturated. The general rule of thumb is to use about 5 times the weight of the dry coco coir in water.
2. **Pasteurize the Substrate:** Once the coco coir has cooled down enough to handle (but is still warm), squeeze out any excess water. You want the substrate to be at “field capacity,” which means it should be moist enough that you can squeeze it and only a few drops of water come out.
3. **Check the Temperature:** Use a thermometer to ensure the substrate has cooled down to below 80°F (27°C) before moving on to the next step. This is important because high temperatures can kill the mushroom spawn.
Spawning and Mixing
This is where the magic happens! We’re going to combine the spawn and substrate to create a happy home for our mushrooms.
1. **Sanitize Your Hands:** Put on your latex gloves and wipe them down with rubbing alcohol.
2. **Layer the Substrate and Spawn:** In the sanitized monotub, create a layer of substrate about 2-3 inches thick. Then, sprinkle a layer of spawn over the substrate. Repeat this process, layering substrate and spawn, until you’ve used all of the spawn and substrate. The top layer should be a layer of substrate.
3. **Gently Mix:** Gently mix the top layer of substrate and spawn together. This will help the spawn colonize the substrate more evenly.
4. **Level the Surface:** Gently level the surface of the substrate with your gloved hands.
5. **Close the Lid:** Close the lid of the monotub. You don’t need to latch it completely shut; you want some air exchange.
Colonization
During this phase, the mushroom spawn will spread throughout the substrate, forming a network of mycelium.
1. **Maintain Temperature:** Keep the monotub in a dark, warm place (around 70-75°F or 21-24°C). A closet or cupboard works well.
2. **Patience is Key:** Don’t open the tub unless absolutely necessary. Opening the tub increases the risk of contamination.
3. **Observe Colonization:** After a few days, you should start to see white, fuzzy mycelium spreading across the surface of the substrate. This is a good sign!
4. **Full Colonization:** It will take about 2-3 weeks for the substrate to be fully colonized. The entire surface should be covered in white mycelium.
Fruiting
Once the substrate is fully colonized, it’s time to introduce fruiting conditions, which will trigger the mushrooms to start growing.
1. **Introduce Light:** Move the monotub to a location with indirect light. If you don’t have enough natural light, you can use an LED grow light.
2. **Increase Air Exchange:** Increase the air exchange by fanning the tub 2-3 times a day. You can do this by simply removing the lid and waving it around for a minute or two.
3. **Maintain Humidity:** Mist the inside of the tub with a spray bottle to maintain humidity. The walls of the tub should have a thin layer of condensation. Be careful not to over-mist, as this can lead to contamination.
4. **Observe Pinning:** After a few days, you should start to see small mushroom “pins” forming on the surface of the substrate. These are baby mushrooms!
5. **Watch Them Grow:** The mushrooms will grow rapidly over the next few days.
Harvesting
Harvesting at the right time is important for maximizing yield and flavor.
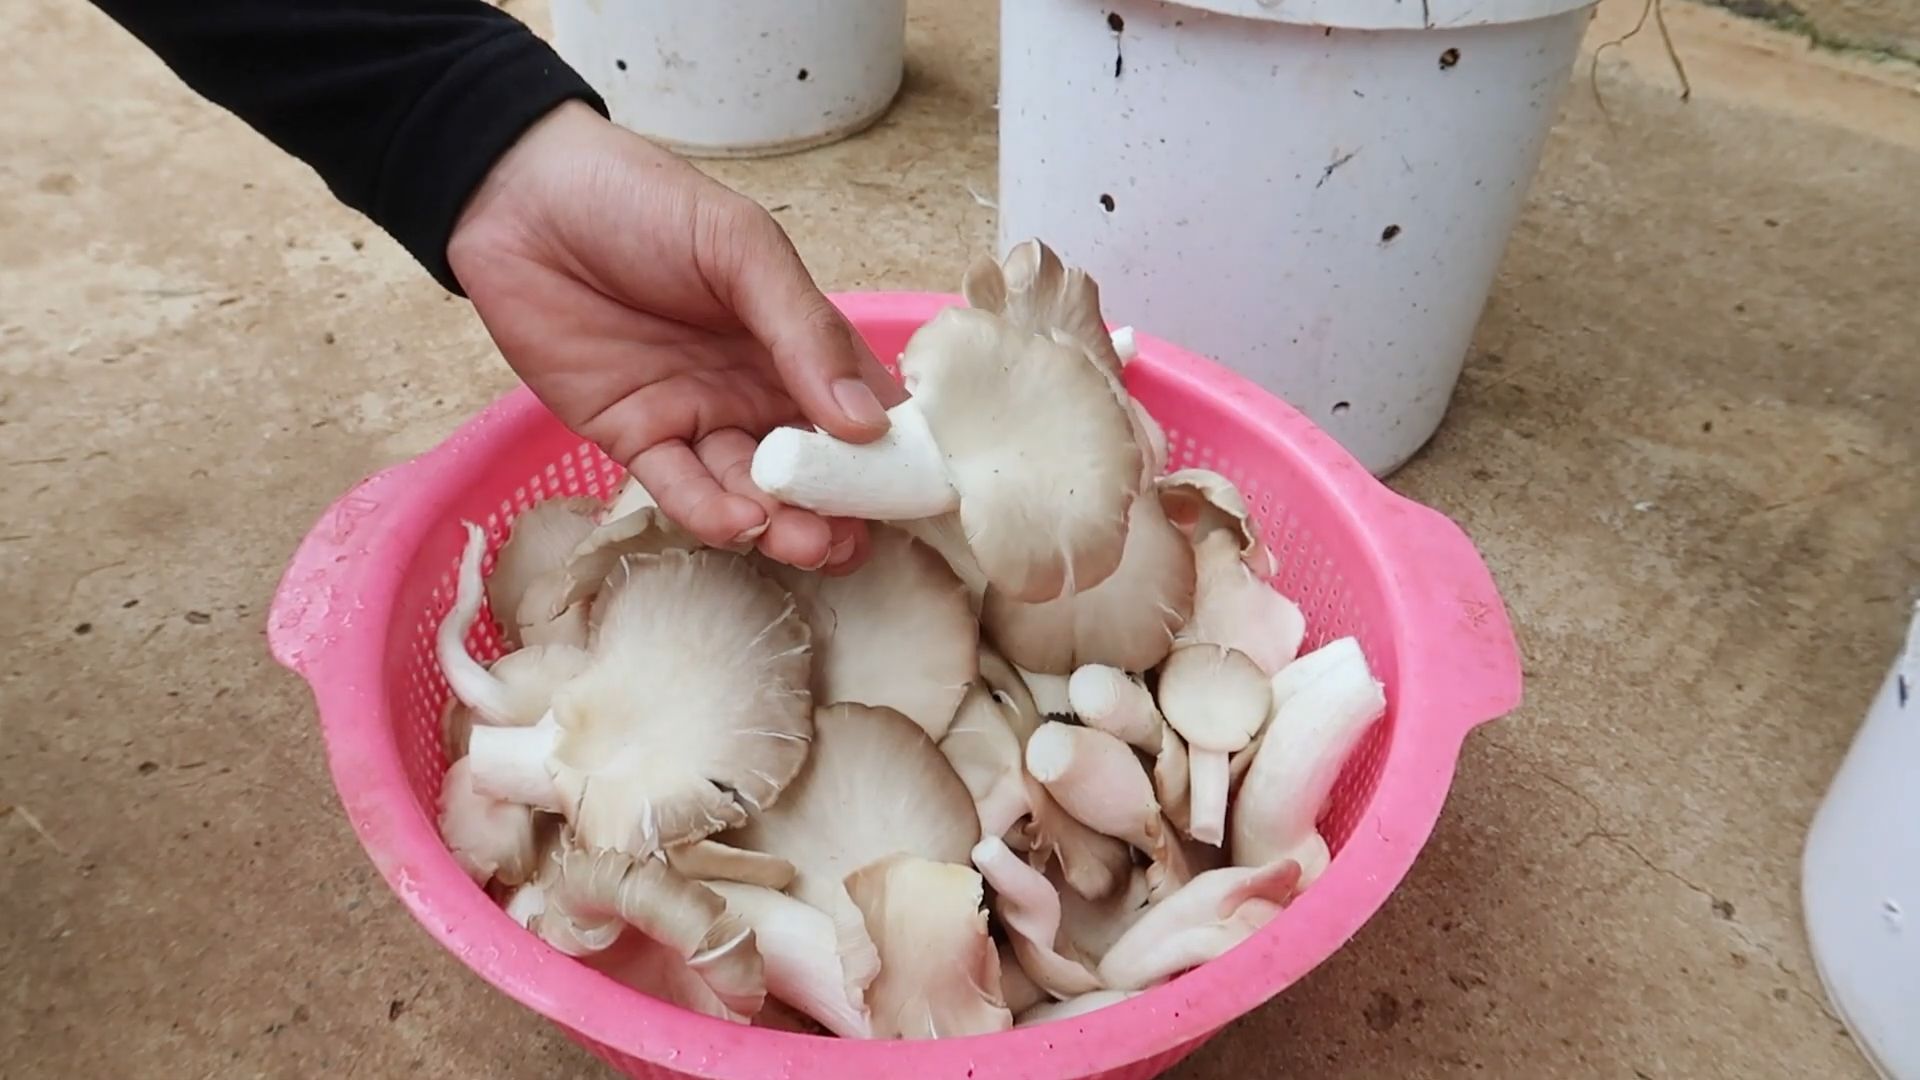
1. **Harvest Before Spore Drop:** Harvest the mushrooms just before they start to drop their spores. You’ll know they’re about to drop spores when the caps start to flatten out and the gills underneath turn dark.
2. **Twist and Pull:** To harvest, gently twist the mushroom at the base and pull it away from the substrate.
3. **Clean the Area:** After harvesting, clean up any leftover substrate from the base of the mushrooms.
Subsequent Flushes
After the first harvest, you can get multiple “flushes” of mushrooms from the same substrate.
1. **Soak the Substrate:** After harvesting the first flush, soak the substrate in water for 4-6 hours. This will rehydrate the substrate and encourage another flush of mushrooms. You can do this by filling the tub with water and weighing it down with a heavy object.
2. **Drain the Water:** After soaking, drain the water from the tub.
3. **Return to Fruiting Conditions:** Return the tub to fruiting conditions (light, air exchange, humidity).
4. **Repeat:** You can repeat this process for several flushes until the substrate is exhausted.
Troubleshooting
Sometimes things don’t go as planned. Here are some common problems and how to fix them.
* **Contamination:** If you see green, black, or other colored mold growing in the tub, it’s contaminated. Unfortunately, you’ll need to discard the entire tub to prevent the contamination from spreading.
* **Dry Substrate:** If the substrate is dry, mist it more frequently.
* **Too Much Humidity:** If there’s too much condensation in the tub, increase the air exchange.
* **Slow Colonization:** If the colonization is slow, make sure the temperature is warm enough.
Tips for Success
* Sanitation is key! Always sanitize everything before starting.
* Be patient. Mushroom growing takes time
Conclusion
So, there you have it! Growing mushrooms indoors might seem like a daunting task at first, but with a little patience, the right setup, and this straightforward guide, you’ll be harvesting your own delicious, homegrown fungi in no time. This DIY approach to mushroom cultivation isn’t just about saving money; it’s about connecting with nature, understanding the fascinating life cycle of these organisms, and enjoying the unparalleled freshness and flavor of truly local produce.
Why is this a must-try? Because it empowers you to take control of your food source, reduces your reliance on commercially grown mushrooms (often shipped long distances), and offers a sustainable and rewarding hobby. Imagine the satisfaction of adding freshly picked oyster mushrooms to your stir-fry, or the delight of sharing a creamy mushroom soup made with your own homegrown shiitakes. The possibilities are endless!
Beyond the basic method outlined, there’s plenty of room for experimentation. Try different substrates like coffee grounds, straw, or even cardboard. Explore various mushroom varieties, each with its unique flavor profile and growing requirements. Lion’s mane, for example, is a popular choice for its meaty texture and brain-boosting properties. Consider building a dedicated mushroom fruiting chamber for optimal humidity and temperature control. You can even integrate your mushroom growing into a larger aquaponics or hydroponics system for a truly sustainable and integrated food production setup.
Don’t be afraid to experiment with different lighting conditions. While mushrooms don’t require a lot of light, some indirect light can help with fruiting. Observe your mushrooms closely and adjust your setup as needed. Remember, every grow is a learning experience.
We strongly encourage you to embark on this exciting journey of indoor mushroom cultivation. It’s a rewarding experience that will not only provide you with delicious food but also deepen your understanding of the natural world. And most importantly, we want to hear about your successes (and even your challenges!). Share your experiences, tips, and photos in the comments below. Let’s build a community of indoor mushroom growers and learn from each other. Your insights could help others overcome obstacles and achieve their own mushroom-growing dreams.
Ready to dive in and grow mushrooms indoors? We’re confident that with a little effort, you’ll be amazed at what you can achieve. Happy growing!
Frequently Asked Questions (FAQ)
What are the easiest types of mushrooms to grow indoors for beginners?
Oyster mushrooms are generally considered the easiest to grow for beginners. They are fast-growing, relatively forgiving of environmental fluctuations, and can thrive on a variety of substrates like straw, coffee grounds, and even cardboard. Shiitake mushrooms are another good option, although they require a bit more patience as they take longer to fruit. Button mushrooms, the kind you typically find in grocery stores, are more challenging to grow at home and require a more specialized setup.
What kind of substrate should I use for growing mushrooms indoors?
The best substrate depends on the type of mushroom you’re growing. Oyster mushrooms do well on pasteurized straw, coffee grounds, or even shredded cardboard. Shiitake mushrooms typically require hardwood logs or sawdust supplemented with bran. Make sure your substrate is properly pasteurized or sterilized to eliminate competing molds and bacteria. Pasteurization involves heating the substrate to a temperature that kills harmful organisms but leaves beneficial ones intact, while sterilization involves heating to a higher temperature to kill all organisms.
How do I maintain the proper humidity for growing mushrooms indoors?
Maintaining high humidity is crucial for successful mushroom cultivation. You can achieve this by using a humidifier, misting the mushrooms regularly with water, or creating a humidity tent using a plastic bag or container. A humidity tent traps moisture around the mushrooms, creating a humid microclimate. Make sure to provide adequate ventilation to prevent the buildup of stagnant air, which can lead to mold growth. A hygrometer can help you monitor the humidity levels in your growing environment. Aim for a humidity level of 80-90% for most mushroom varieties.
How much light do mushrooms need to grow indoors?
Mushrooms don’t require a lot of light. In fact, direct sunlight can be harmful. Indirect or ambient light is sufficient for most mushroom varieties. Some growers use LED grow lights to supplement natural light, but this is not always necessary. The primary function of light is to trigger pinning (the formation of baby mushrooms), rather than to provide energy for growth.
How long does it take to grow mushrooms indoors?
The time it takes to grow mushrooms indoors varies depending on the variety and growing conditions. Oyster mushrooms can typically be harvested within a few weeks of inoculation, while shiitake mushrooms may take several months. The entire process, from inoculation to harvest, involves several stages: colonization (when the mycelium spreads throughout the substrate), pinning (when baby mushrooms form), and fruiting (when the mushrooms mature).
What are some common problems when growing mushrooms indoors and how can I fix them?
Some common problems include contamination (mold growth), insufficient humidity, and lack of ventilation. Contamination can be prevented by using sterile techniques and pasteurizing or sterilizing your substrate. Insufficient humidity can be addressed by using a humidifier or misting the mushrooms regularly. Lack of ventilation can be improved by opening the growing container or tent periodically. If you notice any signs of mold growth, remove the affected area immediately to prevent it from spreading.
Can I reuse the substrate after harvesting mushrooms?
Yes, you can often get multiple flushes (harvests) from the same substrate. After harvesting, soak the substrate in water for a few hours to rehydrate it. This will encourage another flush of mushrooms to grow. However, the yield of each subsequent flush may be lower than the first. Eventually, the substrate will become depleted of nutrients and will need to be replaced. You can compost the spent substrate and use it to enrich your garden soil.
Are there any safety precautions I should take when growing mushrooms indoors?
Always wash your hands thoroughly before and after handling mushrooms or substrate. Use sterile techniques to prevent contamination. Avoid breathing in mushroom spores, as they can cause allergic reactions in some people. If you are unsure about the identification of a mushroom, do not eat it. Only consume mushrooms that you have positively identified as edible.
What are the benefits of growing my own mushrooms indoors?
Growing your own mushrooms indoors offers numerous benefits, including:
* Fresh, flavorful mushrooms: Homegrown mushrooms are often fresher and more flavorful than store-bought ones.
* Cost savings: Growing your own mushrooms can save you money on groceries.
* Sustainability: Indoor mushroom cultivation is a sustainable way to produce food.
* Educational experience: Growing mushrooms is a fascinating and educational hobby.
* Control over your food source: You have complete control over the growing process, ensuring that your mushrooms are free from pesticides and other harmful chemicals.
* Unique varieties: You can grow varieties of mushrooms that are not typically available in stores.
Where can I find mushroom spawn or cultures to start growing?
Mushroom spawn and cultures can be purchased from a variety of online retailers and local suppliers. Look for reputable sources that offer high-quality spawn and cultures. Some popular online retailers include Mushroom Mountain, Field and Forest Products, and North Spore. You can also check with local gardening centers or agricultural supply stores. When purchasing spawn or cultures, make sure to choose a variety that is well-suited to your growing environment and experience level.
Leave a Comment