
Grow Mushrooms at Home: Imagine stepping into your kitchen, not to grab ingredients from the fridge, but to harvest fresh, flavorful mushrooms you cultivated yourself! Sounds like something out of a fairytale, right? Well, it’s more attainable than you think! This isn’t just about saving money at the grocery store; it’s about connecting with nature, learning a new skill, and enjoying the unparalleled taste of homegrown fungi.
For centuries, mushroom cultivation has been practiced across various cultures, from ancient China where they were revered for their medicinal properties to European monasteries where monks perfected growing techniques. Today, you don’t need to be a seasoned mycologist or a cloistered monk to enjoy the fruits (or rather, fungi!) of your labor.
In this DIY guide, I’m going to share some simple, effective tricks and hacks that will empower you to grow mushrooms at home, even if you have limited space or experience. Forget expensive kits and complicated setups. We’ll explore affordable and accessible methods that will have you harvesting delicious mushrooms in no time. Whether you’re a seasoned gardener or a complete beginner, this guide will provide you with the knowledge and confidence to embark on your own mushroom-growing adventure. So, let’s get started and unlock the secrets to cultivating these fascinating and flavorful organisms right in your own home!

Grow Your Own Gourmet Mushrooms: A Beginner’s Guide
Hey there, fellow fungi fanatics! Ever dreamt of harvesting your own delicious mushrooms right in your kitchen? Well, dream no more! Growing mushrooms at home is surprisingly achievable, even for beginners. I’m going to walk you through a simple, effective method that will have you enjoying fresh, homegrown mushrooms in no time.
Choosing Your Mushroom Variety
Before we dive into the nitty-gritty, let’s talk about which mushrooms are easiest to grow at home. While some varieties are notoriously tricky, others are quite forgiving and perfect for beginners. Here are a few of my top recommendations:
* Oyster Mushrooms (Pleurotus spp.): These are arguably the easiest to grow. They’re fast-growing, versatile in the kitchen, and can thrive on a variety of substrates. You can find different colors like pearl, blue, pink, and golden oyster mushrooms.
* Shiitake Mushrooms (Lentinula edodes): A bit more patience is required, but shiitakes are incredibly rewarding. They have a rich, savory flavor and are a staple in Asian cuisine.
* Wine Cap Mushrooms (Stropharia rugosoannulata): These are great for outdoor cultivation in wood chips or straw. They’re relatively easy to grow and produce large, meaty mushrooms.
For this guide, I’ll focus on growing oyster mushrooms, as they’re the most beginner-friendly.
Gathering Your Supplies
Okay, let’s get organized! Here’s what you’ll need to embark on your mushroom-growing adventure:
* Oyster Mushroom Spawn: This is essentially the “seed” for your mushrooms. You can purchase it online from reputable mushroom suppliers. Look for grain spawn or sawdust spawn.
* Substrate: This is the material your mushrooms will grow on. Straw is an excellent choice for oyster mushrooms. You can also use coffee grounds, cardboard, or hardwood sawdust. For this guide, we’ll use straw.
* Large Plastic Bag or Bucket: This will be your growing container. Make sure it’s clean and has a few small holes for ventilation. A 5-gallon bucket works great.
* Hydrogen Peroxide (3%): This will help sterilize the straw.
* Spray Bottle: For misting the mushrooms.
* Gloves: To keep everything clean and prevent contamination.
* Optional: A thermometer to monitor the temperature.
Preparing the Substrate
The key to successful mushroom growing is a clean and properly prepared substrate. This step is crucial to prevent contamination from unwanted molds and bacteria.
1. Pasteurize the Straw: This process kills off competing organisms without completely sterilizing the straw (which would also kill beneficial microbes). There are a few ways to pasteurize straw, but I find the hot water method the easiest for home growers.
* Chop the Straw: Cut the straw into smaller pieces, about 2-3 inches long. This will make it easier to pack into the bag and for the mycelium (mushroom roots) to colonize.
* Soak the Straw: Fill a large container (like a bathtub or a large plastic tub) with hot water. The water should be around 160-180°F (71-82°C). You can use a thermometer to check the temperature.
* Add Hydrogen Peroxide: Add about 1 cup of 3% hydrogen peroxide to the hot water. This will help further sterilize the straw.
* Submerge the Straw: Completely submerge the chopped straw in the hot water. Weigh it down with a brick or a heavy object to ensure it stays submerged.
* Soak for 1-2 Hours: Let the straw soak in the hot water for 1-2 hours. This will pasteurize it effectively.
* Drain the Straw: After soaking, carefully drain the hot water from the straw. You can use a colander or a large strainer.
* Cool the Straw: Allow the straw to cool down to room temperature. This is important because the hot straw can kill the mushroom spawn. You want the straw to be damp, but not dripping wet. Squeeze out any excess water.
Inoculating the Substrate
Now comes the fun part – introducing the mushroom spawn to the prepared straw!
1. Clean Your Work Area: Before you start, clean your work surface with a disinfectant to minimize the risk of contamination.
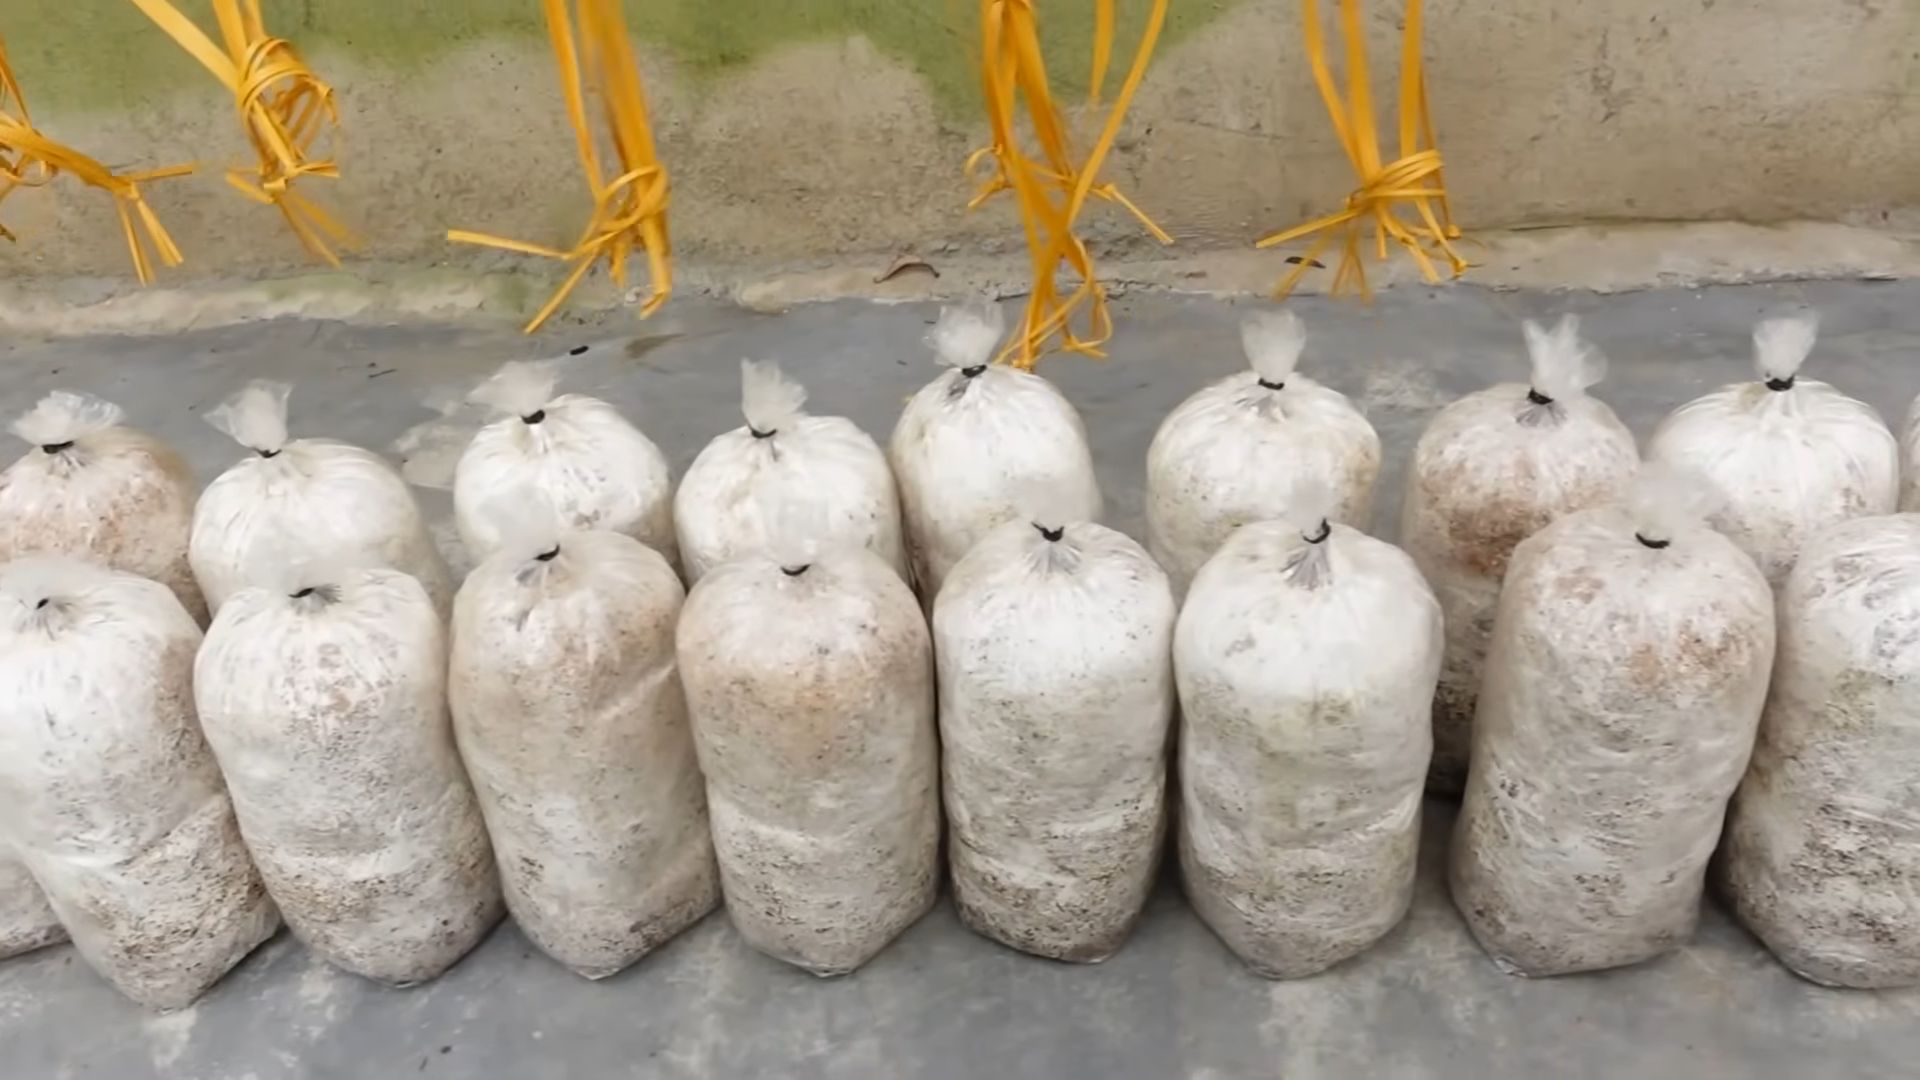
2. Layer the Straw and Spawn: In your clean plastic bag or bucket, create alternating layers of straw and mushroom spawn.
* Start with a layer of straw at the bottom of the bag.
* Sprinkle a generous layer of mushroom spawn over the straw.
* Add another layer of straw, followed by another layer of spawn.
* Continue layering until you’ve used up all the straw and spawn. Make sure the final layer is straw.
3. Mix Thoroughly: Gently mix the straw and spawn together to ensure good contact. This will help the mycelium colonize the straw more quickly.
4. Pack the Bag: Pack the straw and spawn mixture firmly into the bag or bucket. This will help retain moisture and create a more stable environment for the mushrooms.
5. Seal the Bag (Loosely): If you’re using a plastic bag, fold over the top and secure it loosely with a rubber band or clip. You want to allow for some air exchange. If you’re using a bucket, you can simply place a lid on top, leaving it slightly ajar.
6. Ventilation Holes: If your bag or bucket doesn’t already have them, create a few small ventilation holes (about ¼ inch in diameter) around the sides. This will allow for air exchange and prevent the buildup of carbon dioxide.
Incubation
This is the waiting game! During incubation, the mushroom mycelium will spread throughout the straw, colonizing it and preparing it for fruiting.
1. Find a Suitable Location: Place the inoculated bag or bucket in a dark, humid, and well-ventilated location. The ideal temperature for oyster mushroom incubation is around 65-75°F (18-24°C). A basement, closet, or spare room works well.
2. Monitor the Temperature: Use a thermometer to monitor the temperature in the incubation area. Avoid temperatures above 80°F (27°C), as this can inhibit mycelial growth.
3. Patience is Key: The incubation process typically takes 2-3 weeks. During this time, you’ll notice the straw gradually turning white as the mycelium spreads.
4. Check for Contamination: Keep an eye out for any signs of contamination, such as green, black, or orange mold. If you see any contamination, remove the affected area immediately to prevent it from spreading. If the contamination is widespread, you may need to discard the entire bag.
Fruiting
Once the straw is fully colonized (it will be almost entirely white), it’s time to initiate fruiting! This is when the mushrooms will start to form.
1. Increase Humidity: Oyster mushrooms need high humidity to fruit properly. You can increase the humidity by misting the bag or bucket with water several times a day. You can also place a humidifier near the growing area.
2. Increase Light: While mushrooms don’t need direct sunlight, they do need some light to fruit properly. Place the bag or bucket in a location that receives indirect light.
3. Initiate Pinning: To encourage pinning (the formation of baby mushrooms), you can “shock” the mycelium by lowering the temperature slightly. You can do this by placing the bag or bucket in a cooler location for a few hours.
4. Cut Slits in the Bag: Once you see small mushroom pins forming, cut slits in the plastic bag around the areas where the pins are emerging. This will give the mushrooms room to grow. If you’re using a bucket, you can simply remove the lid.
5. Maintain Humidity and Ventilation: Continue to mist the mushrooms regularly to maintain high humidity. Make sure the growing area is well-ventilated to prevent the buildup of carbon dioxide.
Harvesting
Congratulations! You’ve successfully grown your own oyster mushrooms!
1. Harvest When Mature: Harvest the mushrooms when the caps are fully formed and the edges are still slightly curled downwards.
2. Twist and Pull: To harvest, gently twist and pull the mushrooms from the substrate.
3. Enjoy Your Harvest: Your freshly harvested oyster mushrooms are now ready to be enjoyed! They can be stored in the refrigerator for up to a week.
Second Flush and Beyond
After harvesting your first flush of mushrooms, you can often get a second (and sometimes even a third) flush.
1. Soak the Substrate: After harvesting, soak the substrate in water for 12-24 hours. This will rehydrate the mycelium and encourage it to produce
Conclusion
So, there you have it! Cultivating your own mushrooms at home is not only achievable but also incredibly rewarding. We’ve walked you through a simple, effective method that demystifies the process, making fresh, flavorful fungi accessible to everyone, regardless of their gardening experience. Forget those expensive, often lackluster, supermarket mushrooms. Imagine the satisfaction of harvesting your own bounty, knowing exactly where it came from and how it was grown.
This DIY approach to mushroom cultivation offers a multitude of benefits. Beyond the obvious cost savings, you gain control over the entire growing process, ensuring that your mushrooms are free from harmful pesticides and chemicals. You also reduce your carbon footprint by eliminating the transportation and packaging associated with commercially grown mushrooms. Plus, let’s be honest, there’s something undeniably cool about nurturing life from spores to delicious, edible mushrooms.
But the real magic lies in the flavor. Homegrown mushrooms, harvested at their peak ripeness, boast a depth and complexity of flavor that store-bought varieties simply can’t match. Whether you’re adding them to a creamy pasta sauce, sautéing them with garlic and herbs, or grilling them as a hearty vegetarian main course, your homegrown mushrooms will elevate your culinary creations to a whole new level.
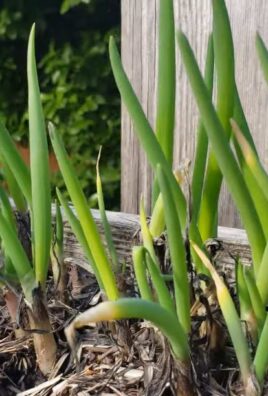
Don’t be afraid to experiment! Once you’ve mastered the basic technique, you can explore different mushroom varieties. Oyster mushrooms are a great starting point, known for their rapid growth and versatility. Shiitake mushrooms offer a more robust, earthy flavor, while lion’s mane mushrooms provide a unique, seafood-like texture. Consider adjusting the substrate to suit the specific needs of each variety. For example, some mushrooms thrive on hardwood sawdust, while others prefer straw or coffee grounds.
Ready to embark on your mushroom-growing adventure?
We encourage you to give this DIY trick a try. It’s a fun, educational, and ultimately delicious experience. Remember to start small, be patient, and don’t be discouraged by initial setbacks. Mushroom cultivation is a learning process, and every attempt will bring you closer to success.
And most importantly, we want to hear about your experiences! Share your photos, tips, and questions in the comments below. Let’s build a community of home mushroom growers and learn from each other. Together, we can unlock the secrets of the fungal kingdom and enjoy the incredible benefits of growing our own food. So, grab your supplies, get your hands dirty, and prepare to be amazed by the wonders of grow mushrooms at home. Happy growing!
Frequently Asked Questions (FAQ)
What are the easiest types of mushrooms to grow at home for beginners?
Oyster mushrooms are generally considered the easiest for beginners due to their rapid growth, tolerance of various substrates (like straw, coffee grounds, and cardboard), and relatively simple cultivation requirements. They are also quite forgiving, making them a great choice for those new to mushroom growing. Other relatively easy options include shiitake mushrooms (though they require a longer incubation period) and wine cap mushrooms, which can be grown outdoors in wood chips.
What kind of environment do mushrooms need to grow successfully?
Mushrooms thrive in environments that are dark, humid, and cool. The ideal temperature range varies depending on the species, but generally, a temperature between 60-75°F (15-24°C) is suitable for many common edible mushrooms. High humidity is crucial, typically around 80-90%, to prevent the substrate from drying out and to encourage fruiting. Adequate ventilation is also important to prevent the buildup of carbon dioxide, which can inhibit growth. A dark or dimly lit space is preferred, as direct sunlight can be harmful.
How long does it take to grow mushrooms at home?
The time it takes to grow mushrooms varies depending on the species, the substrate used, and the environmental conditions. Oyster mushrooms can often be harvested within a few weeks of inoculation, while shiitake mushrooms may take several months. The incubation period, during which the mycelium colonizes the substrate, is typically the longest phase. Once fruiting conditions are introduced (e.g., increased humidity and ventilation), mushrooms usually appear within a week or two.
What is the best substrate to use for growing mushrooms?
The best substrate depends on the type of mushroom you are growing. Oyster mushrooms are versatile and can be grown on a variety of substrates, including straw, coffee grounds, cardboard, and wood chips. Shiitake mushrooms typically require hardwood sawdust or logs. Wine cap mushrooms thrive in wood chips. It’s important to choose a substrate that is free from contaminants and properly pasteurized or sterilized to prevent the growth of unwanted molds and bacteria.
How do I prevent contamination in my mushroom grow?
Contamination is a common challenge in mushroom cultivation, but it can be minimized by following proper hygiene practices. Sterilize or pasteurize your substrate thoroughly before inoculation. Use sterile tools and gloves when handling the substrate and spawn. Maintain a clean growing environment and avoid introducing contaminants such as dust, mold spores, and bacteria. Ensure adequate ventilation to prevent the buildup of moisture, which can promote the growth of unwanted organisms. Regularly inspect your grow for signs of contamination, such as unusual colors or odors, and remove any contaminated areas immediately.
How often should I water my mushrooms?
So, there you have it! Cultivating your own mushrooms at home is not only achievable but also incredibly rewarding. We’ve walked you through a simple, effective method that demystifies the process, making fresh, flavorful fungi accessible to everyone, regardless of their gardening experience. Forget those expensive, often lackluster, supermarket mushrooms. Imagine the satisfaction of harvesting your own bounty, knowing exactly where it came from and how it was grown.
This DIY approach to mushroom cultivation offers a multitude of benefits. Beyond the obvious cost savings, you gain control over the entire growing process, ensuring that your mushrooms are free from harmful pesticides and chemicals. You also reduce your carbon footprint by eliminating the transportation and packaging associated with commercially grown mushrooms. Plus, let’s be honest, there’s something undeniably cool about nurturing life from spores to delicious, edible mushrooms.
But the real magic lies in the flavor. Homegrown mushrooms, harvested at their peak ripeness, boast a depth and complexity of flavor that store-bought varieties simply can’t match. Whether you’re adding them to a creamy pasta sauce, sautéing them with garlic and herbs, or grilling them as a hearty vegetarian main course, your homegrown mushrooms will elevate your culinary creations to a whole new level.
Don’t be afraid to experiment! Once you’ve mastered the basic technique, you can explore different mushroom varieties. Oyster mushrooms are a great starting point, known for their rapid growth and versatility. Shiitake mushrooms offer a more robust, earthy flavor, while lion’s mane mushrooms provide a unique, seafood-like texture. Consider adjusting the substrate to suit the specific needs of each variety. For example, some mushrooms thrive on hardwood sawdust, while others prefer straw or coffee grounds.
Ready to embark on your mushroom-growing adventure?
We encourage you to give this DIY trick a try. It’s a fun, educational, and ultimately delicious experience. Remember to start small, be patient, and don’t be discouraged by initial setbacks. Mushroom cultivation is a learning process, and every attempt will bring you closer to success.
And most importantly, we want to hear about your experiences! Share your photos, tips, and questions in the comments below. Let’s build a community of home mushroom growers and learn from each other. Together, we can unlock the secrets of the fungal kingdom and enjoy the incredible benefits of growing our own food. So, grab your supplies, get your hands dirty, and prepare to be amazed by the wonders of grow mushrooms at home. Happy growing!
Frequently Asked Questions (FAQ)
What are the easiest types of mushrooms to grow at home for beginners?
Oyster mushrooms are generally considered the easiest for beginners due to their rapid growth, tolerance of various substrates (like straw, coffee grounds, and cardboard), and relatively simple cultivation requirements. They are also quite forgiving, making them a great choice for those new to mushroom growing. Other relatively easy options include shiitake mushrooms (though they require a longer incubation period) and wine cap mushrooms, which can be grown outdoors in wood chips.
What kind of environment do mushrooms need to grow successfully?
Mushrooms thrive in environments that are dark, humid, and cool. The ideal temperature range varies depending on the species, but generally, a temperature between 60-75°F (15-24°C) is suitable for many common edible mushrooms. High humidity is crucial, typically around 80-90%, to prevent the substrate from drying out and to encourage fruiting. Adequate ventilation is also important to prevent the buildup of carbon dioxide, which can inhibit growth. A dark or dimly lit space is preferred, as direct sunlight can be harmful.
How long does it take to grow mushrooms at home?
The time it takes to grow mushrooms varies depending on the species, the substrate used, and the environmental conditions. Oyster mushrooms can often be harvested within a few weeks of inoculation, while shiitake mushrooms may take several months. The incubation period, during which the mycelium colonizes the substrate, is typically the longest phase. Once fruiting conditions are introduced (e.g., increased humidity and ventilation), mushrooms usually appear within a week or two.
What is the best substrate to use for growing mushrooms?
The best substrate depends on the type of mushroom you are growing. Oyster mushrooms are versatile and can be grown on a variety of substrates, including straw, coffee grounds, cardboard, and wood chips. Shiitake mushrooms typically require hardwood sawdust or logs. Wine cap mushrooms thrive in wood chips. It’s important to choose a substrate that is free from contaminants and properly pasteurized or sterilized to prevent the growth of unwanted molds and bacteria.
How do I prevent contamination in my mushroom grow?
Contamination is a common challenge in mushroom cultivation, but it can be minimized by following proper hygiene practices. Sterilize or pasteurize your substrate thoroughly before inoculation. Use sterile tools and gloves when handling the substrate and spawn. Maintain a clean growing environment and avoid introducing contaminants such as dust, mold spores, and bacteria. Ensure adequate ventilation to prevent the buildup of moisture, which can promote the growth of unwanted organisms. Regularly inspect your grow for signs of contamination, such as unusual colors or odors, and remove any contaminated areas immediately.
How often should I water my mushrooms?
Mushrooms need consistent moisture to thrive, but overwatering can lead to problems such as mold growth. The frequency of watering depends on the humidity of your growing environment and the type of substrate you are using. Generally, you should mist your mushrooms daily or every other day to maintain a high level of humidity. The substrate should feel moist but not waterlogged. Avoid spraying the mushrooms directly, as this can damage them. Instead, mist the surrounding air and the walls of your growing container.
What are the signs that my mushrooms are ready to harvest?
The signs of maturity vary depending on the type of mushroom. Oyster mushrooms are typically ready to harvest when the caps have fully expanded and the edges are still slightly curled downward. Shiitake mushrooms are ready when the caps have flattened out and the gills are visible. It’s important to harvest your mushrooms at the right time to ensure the best flavor and texture. Overripe mushrooms may become tough and less flavorful.
Can I grow mushrooms indoors without a special setup?
Yes, you can grow mushrooms indoors without a complex setup. A simple plastic tub or container with a lid can be used as a growing chamber. You can also use a humidity tent or a greenhouse to maintain the necessary humidity levels. A spray bottle can be used to mist the mushrooms regularly. A dark or dimly lit room is ideal, but you can also use a closet or a basement. With a little creativity and resourcefulness, you can create a suitable growing environment for mushrooms in your home.
What can I do with spent mushroom substrate?
Spent mushroom substrate is a valuable resource that can be used in a variety of ways. It is an excellent soil amendment for gardens and compost piles, as it is rich in nutrients and organic matter. It can also be used as mulch to suppress weeds and retain moisture in the soil. Some people even use spent mushroom substrate as animal feed. Before using spent substrate, it’s important to ensure that it is free from contaminants.
Is it safe to eat mushrooms that I grow at home?
Yes, it is generally safe to eat mushrooms that you grow at home, provided that you have correctly identified the species and followed proper cultivation practices. It’s crucial to only grow edible mushroom varieties and to avoid consuming any mushrooms that you are unsure about. If you are new to mushroom growing, it’s a good idea to start with a well-known and easily identifiable species, such as oyster mushrooms. Always cook your homegrown mushrooms thoroughly before eating them. If you experience any adverse reactions after eating your homegrown mushrooms, seek medical attention immediately.
Leave a Comment