
Grow Kale Kitchen Corner: Imagine stepping into your kitchen, not just to cook, but to harvest fresh, vibrant kale right from your own little indoor garden! Sounds like a dream, right? Well, it doesn’t have to be! For centuries, humans have cultivated gardens, from the hanging gardens of Babylon to the humble kitchen gardens of our grandmothers. There’s something deeply satisfying about nurturing life and reaping the rewards of your labor, especially when it comes to fresh, healthy food.
In today’s fast-paced world, access to truly fresh produce can be a challenge. Supermarket kale, while convenient, often lacks the robust flavor and nutritional punch of homegrown varieties. That’s where this DIY guide comes in! I’m going to show you simple, effective tricks to grow kale kitchen corner, even if you have limited space or gardening experience. We’ll cover everything from choosing the right container and soil to providing optimal light and nutrients.
Why kale? Because it’s a nutritional powerhouse packed with vitamins, minerals, and antioxidants. Plus, it’s incredibly versatile in the kitchen, perfect for salads, smoothies, soups, and more. But more importantly, because you can grow it in your kitchen! So, ditch the wilted supermarket greens and get ready to embark on a rewarding journey of growing your own delicious and nutritious kale, right in the heart of your home!
Grow Your Own Kale Oasis: A Kitchen Corner DIY Guide
Hey there, fellow plant enthusiasts! Ever dreamt of having fresh, vibrant kale right at your fingertips? Well, ditch the grocery store runs because I’m going to show you how to transform a simple corner of your kitchen into a thriving kale garden. This DIY project is surprisingly easy, even if you don’t have a green thumb (yet!). Get ready to enjoy delicious, homegrown kale in your smoothies, salads, and stir-fries. Let’s get started!
What You’ll Need: The Kale Gardener’s Toolkit
Before we dive in, let’s gather our supplies. This will make the whole process smoother and more enjoyable.
* **Kale Seeds or Seedlings:** You can start from seeds for a more budget-friendly approach or opt for seedlings if you want a head start. I personally love starting from seeds – it’s so rewarding to watch them sprout! Choose your favorite kale variety. Curly kale, Lacinato (dinosaur) kale, and Red Russian kale are all great options.
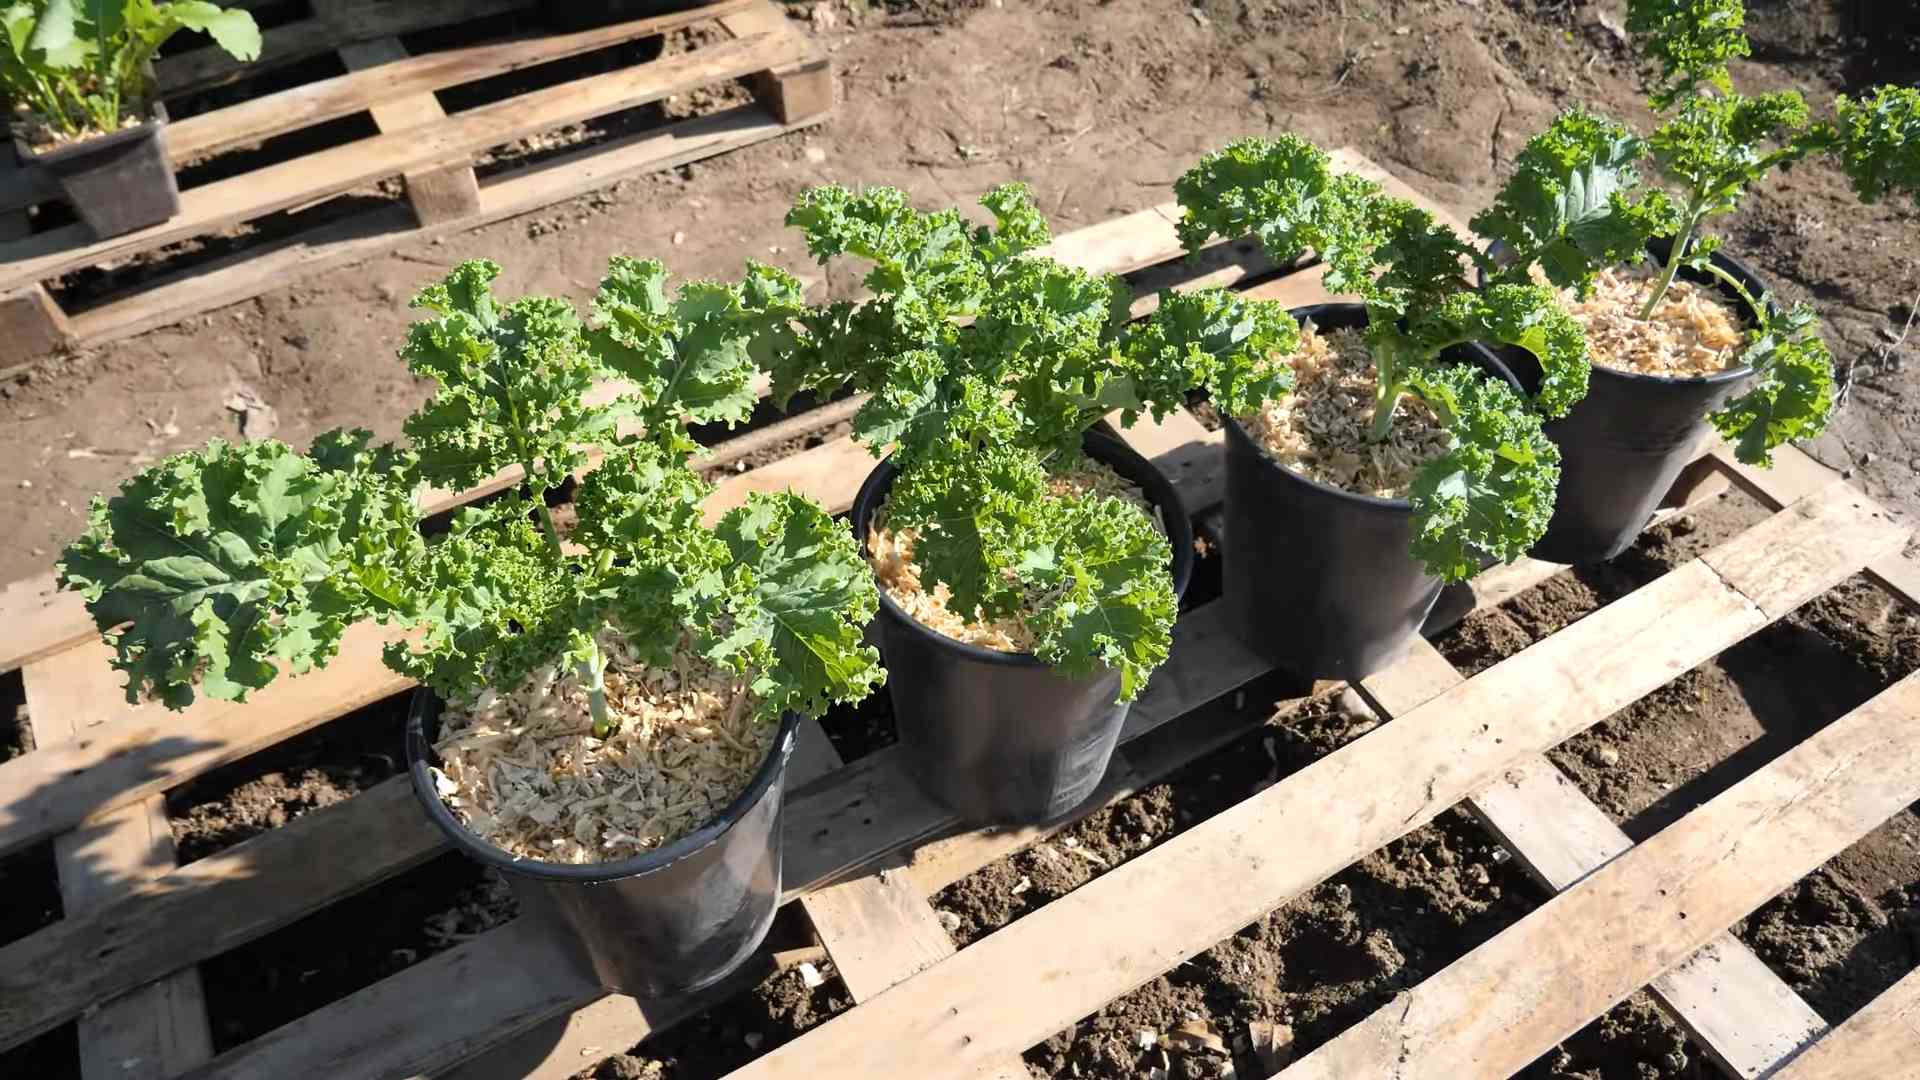
* **Pots or Containers:** The size will depend on how much kale you want to grow. I recommend pots that are at least 12 inches in diameter and 12 inches deep. Make sure they have drainage holes!
* **Potting Mix:** Don’t use garden soil! It’s too heavy and doesn’t drain well in containers. Opt for a high-quality potting mix specifically formulated for container gardening.
* **Grow Lights (Optional but Recommended):** If your kitchen corner doesn’t get at least 6 hours of direct sunlight per day, you’ll need grow lights. LED grow lights are energy-efficient and work wonders.
* **Watering Can or Spray Bottle:** For gentle watering.
* **Fertilizer:** A balanced, water-soluble fertilizer will keep your kale happy and healthy.
* **Spray Bottle (for Pest Control):** Fill with water and a few drops of dish soap (optional, for dealing with aphids).
* **Small Trowel or Hand Shovel:** For planting and transplanting.
* **Measuring Cup or Spoon:** For fertilizer.
* **Labels and a Marker:** To keep track of your kale varieties.
* **Pebbles or Gravel (Optional):** To improve drainage in the bottom of your pots.
Phase 1: Planting Your Kale Seeds or Seedlings
This is where the magic begins! Whether you’re starting from seeds or seedlings, the planting process is pretty straightforward.
1. **Prepare Your Pots:** If you’re using new pots, give them a quick rinse. If you’re reusing pots, make sure they’re clean and free of any debris. Add a layer of pebbles or gravel to the bottom of each pot to improve drainage (optional).
2. **Fill with Potting Mix:** Fill your pots with potting mix, leaving about an inch or two of space at the top. Gently pat down the soil to remove any air pockets.
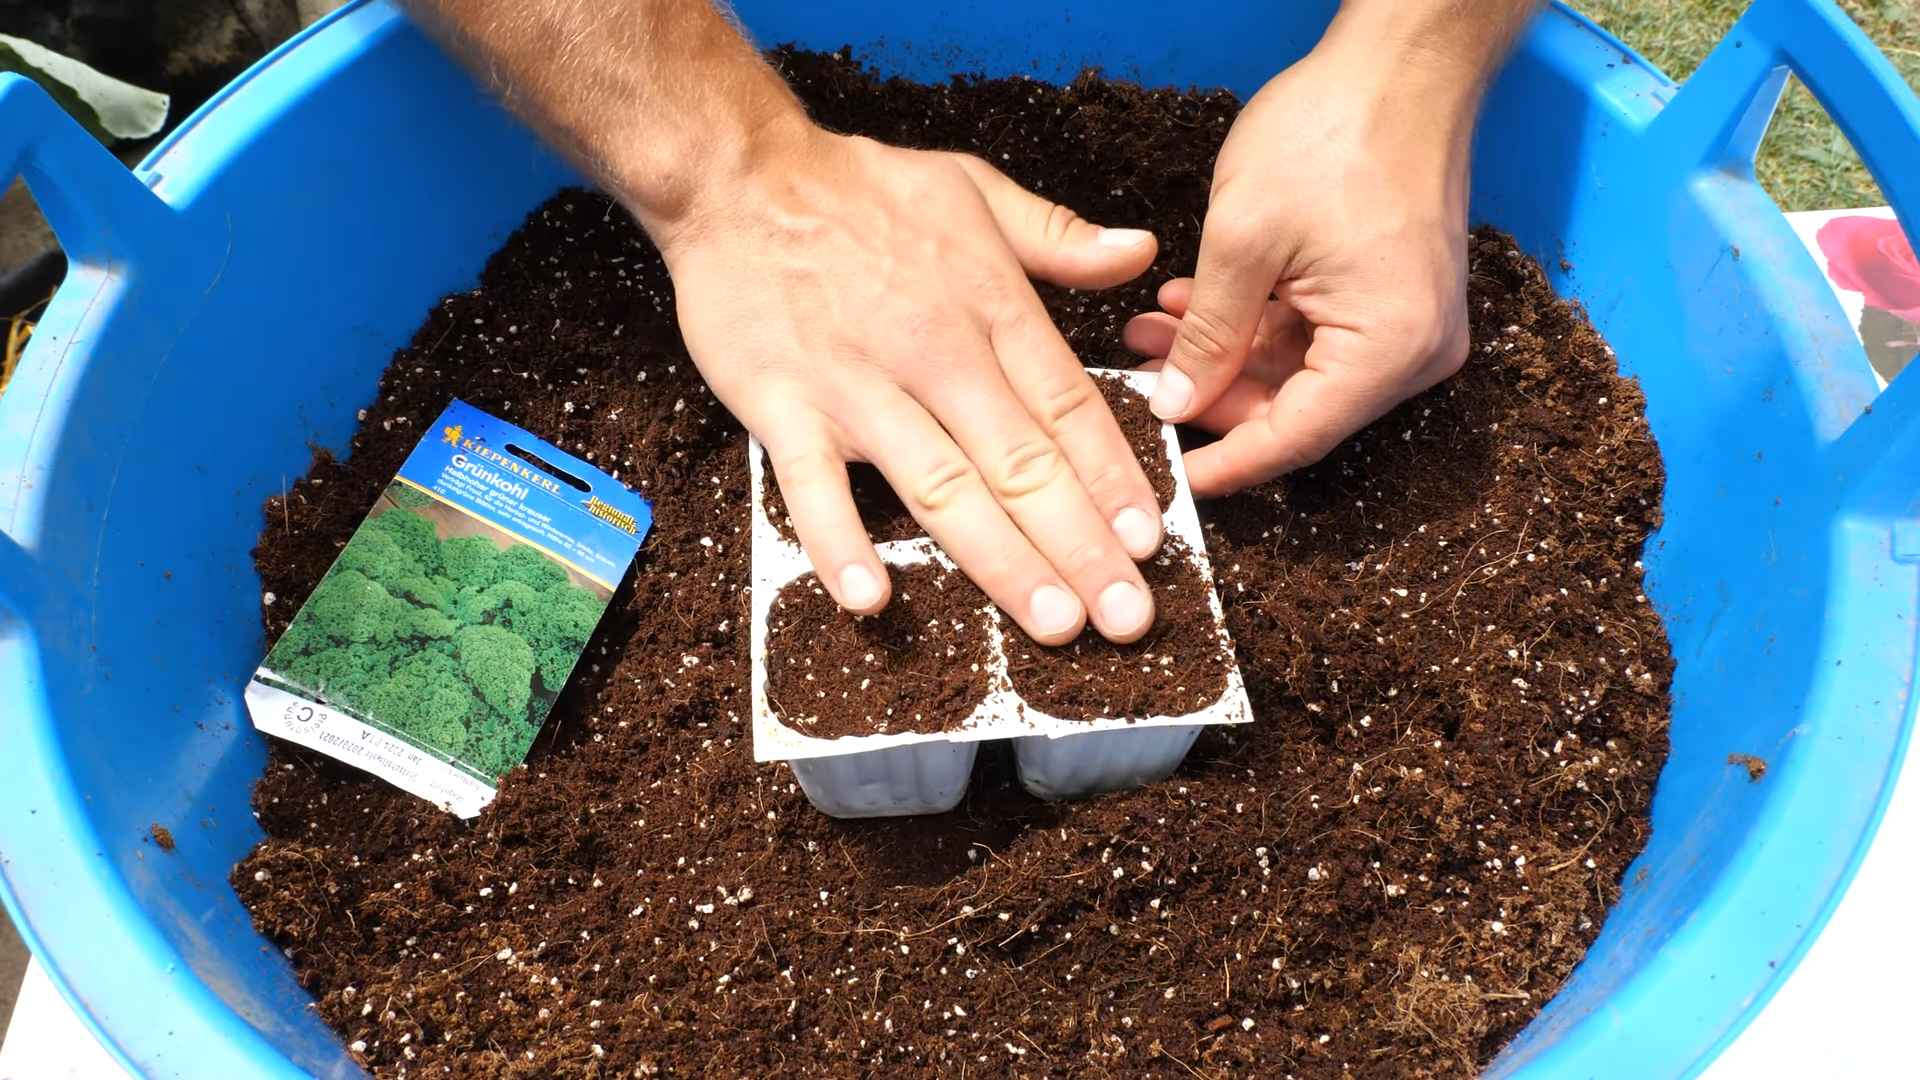
3. **Planting Seeds (if starting from seeds):**
* Read the seed packet for specific instructions on planting depth and spacing. Generally, you’ll want to sow kale seeds about ½ inch deep and 1-2 inches apart.
* Make small indentations in the soil with your finger or a pencil.
* Place 2-3 seeds in each indentation. This increases your chances of germination.
* Cover the seeds with a thin layer of potting mix.
* Gently water the soil using a spray bottle or watering can. Keep the soil consistently moist but not soggy.
4. **Planting Seedlings (if starting from seedlings):**
* Gently remove the seedlings from their nursery containers. If the roots are tightly bound, gently loosen them with your fingers.
* Dig a hole in the potting mix that’s large enough to accommodate the root ball of the seedling.
* Place the seedling in the hole, making sure the top of the root ball is level with the surrounding soil.
* Fill in the hole with potting mix and gently pat down the soil.
* Water thoroughly.
5. **Label Your Pots:** Use labels and a marker to identify each pot with the kale variety you planted. This will help you keep track of your plants as they grow.
Phase 2: Nurturing Your Kale Garden
Now that your kale is planted, it’s time to provide it with the care it needs to thrive.
1. **Watering:** Kale needs consistent moisture, but it doesn’t like to be waterlogged. Water your kale plants when the top inch of soil feels dry to the touch. Water deeply, until water drains out of the drainage holes. Avoid getting water on the leaves, as this can promote fungal diseases. I usually check the soil moisture every day or two.
2. **Light:** Kale needs at least 6 hours of direct sunlight per day. If your kitchen corner doesn’t get enough natural light, supplement with grow lights. Position the grow lights about 6-12 inches above the plants. I use a timer to ensure my grow lights are on for 12-14 hours per day.
3. **Fertilizing:** Kale is a heavy feeder, so it needs regular fertilization. Start fertilizing your kale plants about 2-3 weeks after planting. Use a balanced, water-soluble fertilizer according to the package instructions. I usually fertilize my kale every 2-3 weeks.
4. **Thinning (if starting from seeds):** Once your seedlings have sprouted and have a few sets of true leaves, you’ll need to thin them out. This means removing some of the seedlings so that the remaining plants have enough space to grow. Choose the strongest-looking seedling in each spot and snip off the others at the soil line. Don’t pull them out, as this can disturb the roots of the remaining seedling.
5. **Pest Control:** Keep an eye out for pests, such as aphids, cabbage worms, and flea beetles. If you spot any pests, you can try spraying them with a mixture of water and a few drops of dish soap. You can also handpick pests off the plants. I check my kale plants for pests every few days.
6. **Air Circulation:** Good air circulation is important for preventing fungal diseases. Make sure your kale plants have enough space between them and that the air can circulate freely around them. You can also use a small fan to improve air circulation.
Phase 3: Harvesting Your Bounty
The most rewarding part! Harvesting your own kale is incredibly satisfying.
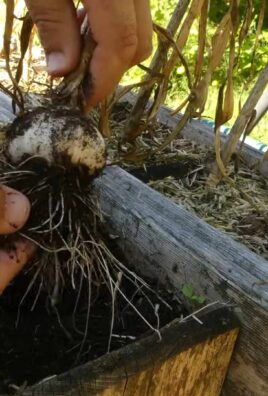
1. **When to Harvest:** You can start harvesting kale leaves when they are about 4-6 inches long. The outer, older leaves are usually the first to be harvested.
2. **How to Harvest:** Use a sharp knife or scissors to cut the leaves off the plant, near the base of the stem. Leave the central bud intact, so the plant can continue to produce new leaves.
3. **Harvesting Technique:** Harvest from the bottom up, taking the oldest leaves first. This encourages the plant to produce new growth from the top.
4. **Storage:** Freshly harvested kale can be stored in the refrigerator for up to a week. Wrap the leaves in a damp paper towel and place them in a plastic bag.
5. **Continuous Harvest:** Kale is a cut-and-come-again crop, which means you can harvest leaves from the same plant multiple times. As long as you leave the central bud intact, the plant will continue to produce new leaves for several months. I’ve been harvesting kale from my kitchen garden for almost a year now!
Troubleshooting Tips for a Happy Kale Garden
Even with the best care, you might encounter some challenges along the way. Here are a few common problems and how to fix them:
* **Yellowing Leaves:** This could be a sign of overwatering, underwatering, or nutrient deficiency. Check the soil moisture and adjust your watering schedule accordingly. If the soil is dry, water deeply. If the soil is soggy, let it dry out before watering again. You may also need to fertilize your kale plants.
* **Leggy Growth:** This means your kale plants aren’t getting enough light. Move them to a sunnier location or supplement with grow lights.
* **Pests:** As mentioned earlier, keep an eye out for pests and take action as soon as you spot them.
* **Fungal Diseases:** These can be caused by excessive moisture and poor air circulation. Avoid getting water on the leaves and make sure your kale plants have enough space between them. You can also use a fungicide if necessary.
Enjoying Your Homegrown Kale
Now that you’re harvesting your own kale, it’s time to get creative in the kitchen! Kale is incredibly versatile and can be used in a variety of dishes. Here are a few of my favorite ways to enjoy homegrown kale:
* **Smoothies:** Add a handful of kale to your favorite smoothie recipe for a boost of nutrients.
* **Salads:** Massage kale leaves with olive oil and lemon juice to soften them and make them more palatable for salads.
* **Stir-fries:** Add kale to stir-fries for a healthy and flavorful addition.
Conclusion
So, there you have it! Transforming a neglected corner of your kitchen into a thriving kale garden is not only achievable, but surprisingly rewarding. We’ve walked you through the simple steps, highlighting the ease and accessibility of this DIY project. Forget expensive grocery store kale – imagine stepping into your kitchen and harvesting fresh, vibrant leaves whenever you need them. This isn’t just about saving money; it’s about connecting with your food source, reducing your carbon footprint, and adding a touch of green serenity to your daily life.
The beauty of this project lies in its adaptability. Feel free to experiment with different varieties of kale. Curly kale, Lacinato (dinosaur) kale, or even Red Russian kale can all thrive in your indoor garden. Consider using different types of containers, from repurposed plastic tubs to aesthetically pleasing ceramic pots, to match your kitchen decor. You can also adjust the lighting based on the natural light available in your kitchen. If you have a particularly dark corner, a small grow light can make all the difference.
This DIY kale growing trick is a game-changer for anyone who loves fresh, healthy greens. It’s a sustainable, cost-effective, and incredibly satisfying way to enjoy kale year-round. Plus, it’s a fantastic conversation starter! Imagine the look on your guests’ faces when you tell them you grew the kale in their salad right in your kitchen.
Don’t be intimidated by the idea of indoor gardening. Kale is a resilient and forgiving plant, making it perfect for beginners. The initial setup is minimal, and the ongoing maintenance is surprisingly low. With just a little bit of attention and care, you’ll be rewarded with a continuous supply of fresh, nutritious kale.
We encourage you to take the plunge and try this DIY kale growing trick. It’s a small investment of time and effort that yields significant returns in terms of fresh produce, environmental benefits, and personal satisfaction. Once you experience the joy of harvesting your own kale, you’ll wonder why you didn’t start sooner.
And most importantly, we want to hear about your experience! Share your photos, tips, and challenges in the comments below. Let’s create a community of indoor kale growers and inspire others to embrace this simple and sustainable way of life. What varieties of kale are you growing? What challenges have you faced, and how did you overcome them? Your insights can help others succeed and make this DIY project even more accessible to everyone. So, get growing and share your kale-tastic journey with us!
FAQ
What kind of kale is best for indoor growing?
While most kale varieties can be grown indoors, some are better suited than others. Curly kale is a popular choice due to its compact size and resilience. Lacinato (dinosaur) kale is another excellent option, known for its distinctive texture and flavor. Red Russian kale is also a good choice, offering a beautiful color contrast and a slightly sweeter taste. Ultimately, the best kale variety for you will depend on your personal preferences and the space you have available. Experiment with different varieties to see which ones thrive best in your kitchen environment.
How much light does my indoor kale garden need?
Kale requires at least 6 hours of sunlight per day to thrive. If your kitchen corner doesn’t receive enough natural light, you’ll need to supplement it with artificial lighting. A simple fluorescent grow light or an LED grow light can provide the necessary illumination. Position the light about 6-12 inches above the kale plants and adjust the height as they grow. You can also use a timer to ensure that the plants receive consistent light exposure each day. Remember that insufficient light can lead to leggy growth and reduced yields.
What type of soil should I use for growing kale indoors?
Use a well-draining potting mix that is rich in organic matter. Avoid using garden soil, as it can be too heavy and may contain pests or diseases. A good potting mix will provide the necessary nutrients and drainage for healthy kale growth. You can also amend the potting mix with compost or other organic materials to further improve its fertility. Make sure the container you choose has drainage holes to prevent waterlogging.
How often should I water my indoor kale plants?
Water your kale plants when the top inch of soil feels dry to the touch. Avoid overwatering, as this can lead to root rot. Water thoroughly, allowing the excess water to drain out of the bottom of the container. The frequency of watering will depend on the temperature, humidity, and the size of the container. Check the soil moisture regularly and adjust your watering schedule accordingly.
How do I fertilize my indoor kale plants?
Kale is a heavy feeder and requires regular fertilization to maintain healthy growth. Use a balanced liquid fertilizer diluted to half strength every 2-3 weeks. You can also use a slow-release fertilizer at the time of planting. Avoid over-fertilizing, as this can burn the roots. Look for fertilizers that are specifically formulated for leafy greens.
How do I harvest my indoor kale?
You can start harvesting kale leaves when they are about 4-6 inches long. Harvest the outer leaves first, leaving the inner leaves to continue growing. This will encourage the plant to produce more leaves. Use a sharp knife or scissors to cut the leaves close to the stem. Avoid tearing the leaves, as this can damage the plant.
How do I deal with pests and diseases in my indoor kale garden?
Indoor kale gardens are generally less susceptible to pests and diseases than outdoor gardens. However, it’s still important to monitor your plants regularly for any signs of problems. Common pests that may affect kale include aphids, spider mites, and whiteflies. You can control these pests by spraying the plants with insecticidal soap or neem oil. Diseases such as powdery mildew and downy mildew can also affect kale. To prevent these diseases, ensure good air circulation and avoid overwatering. If you notice any signs of disease, remove the affected leaves immediately.
Can I grow kale indoors year-round?
Yes, you can grow kale indoors year-round, provided you provide the necessary light, water, and nutrients. Indoor growing allows you to control the environment and protect your plants from extreme weather conditions. With proper care, you can enjoy a continuous supply of fresh kale throughout the year.
What are some creative ways to use my homegrown kale?
The possibilities are endless! Of course, you can use it in salads, smoothies, and soups. But don’t stop there! Try adding it to stir-fries, omelets, or even homemade pesto. You can also bake kale chips for a healthy and delicious snack. Get creative and experiment with different recipes to discover your favorite ways to enjoy your homegrown kale.
Is growing kale indoors really worth the effort?
Absolutely! While it requires some initial setup and ongoing maintenance, the benefits of growing kale indoors far outweigh the effort. You’ll have access to fresh, nutritious greens year-round, save money on groceries, reduce your carbon footprint, and enjoy the satisfaction of growing your own food. Plus, it’s a fun and rewarding hobby that can bring a touch of green to your kitchen. So, what are you waiting for? Give it a try and see for yourself!
Leave a Comment