
Harvest Iceberg Lettuce: Your Guide to a Bountiful Home Garden
Harvesting iceberg lettuce might seem straightforward, but there’s more to it than simply pulling a head from the ground! This article is your complete guide to successfully harvesting your homegrown iceberg lettuce, ensuring you get the crispest, most delicious heads possible. I’ve always loved the satisfying crunch of a perfectly ripe iceberg lettuce, and after years of gardening, I’ve learned a few tricks to maximize your yield and quality. It’s a rewarding experience, and I’m excited to share my knowledge with you.
Growing your own food has a rich history, connecting us to our agricultural roots and providing a sense of accomplishment. From ancient civilizations cultivating crops to the modern-day resurgence of home gardening, the practice offers a tangible link to nature and a healthier lifestyle. And while iceberg lettuce might not be the most glamorous of greens, its reliable growth and refreshing taste make it a perfect choice for beginner gardeners.
Why Harvest Your Own Iceberg Lettuce?
There are many reasons to try your hand at harvesting your own iceberg lettuce. Firstly, nothing beats the flavor of freshly picked produce. Store-bought lettuce often travels long distances, losing its crispness and vibrancy along the way. Secondly, growing your own gives you complete control over the growing process, allowing you to avoid pesticides and other chemicals. And finally, the satisfaction of nurturing a plant from seed to harvest is incredibly rewarding – a true testament to your green thumb!
This article will cover everything from the ideal time to harvest iceberg lettuce to proper storage techniques, ensuring you get the most out of your homegrown bounty. So, let’s dive in and unlock the secrets to a successful Harvest Iceberg Lettuce experience!
Grow Potatoes Easily: A Beginner’s Guide
I’ve always loved potatoes, and nothing beats the taste of homegrown spuds. This guide will walk you through growing your own, even if you’ve never gardened before. It’s easier than you think!
Phase 1: Preparation – Getting Ready to Grow
- Choose your potatoes: Select seed potatoes – these are specifically grown for planting, not the ones from your grocery store. Look for firm, disease-free potatoes with several “eyes” (buds). Certified seed potatoes are best to avoid introducing diseases to your garden.
- Timing is key: The best time to plant potatoes depends on your climate. Generally, aim for planting 2-3 weeks before the last expected frost. Check your local frost dates to determine the optimal planting time. You want the soil to be warm enough (at least 45°F or 7°C).
- Prepare your soil: Potatoes need well-drained, loose soil rich in organic matter. Amend heavy clay soils with compost or other organic materials to improve drainage. Sandy soils might benefit from the addition of peat moss to retain moisture. Work the soil to a depth of at least 12 inches.
- Choose your location: Potatoes need at least 6-8 hours of sunlight per day. Select a sunny spot in your garden. Also, ensure good air circulation to prevent fungal diseases.
- Gather your supplies: You’ll need seed potatoes, gardening gloves, a shovel or spade, a garden fork (optional, but helpful for loosening the soil), and possibly some compost or other soil amendments.
Phase 2: Planting Your Seed Potatoes
- Cut your seed potatoes (optional): Larger seed potatoes can be cut into chunks, each containing at least two eyes. Let the cut pieces sit for a day or two to allow the cut surfaces to callous over, preventing rot. This isn’t strictly necessary for smaller seed potatoes.
- Dig planting holes: Dig holes or trenches about 4-6 inches deep. The spacing between holes or trenches should be 12-18 inches apart, depending on the variety of potato you are growing. Check the seed potato packaging for specific recommendations.
- Plant the seed potatoes: Place the seed potatoes (or cut pieces) in the holes, eyes facing upwards. Cover them with soil.
- Water gently: After planting, water the area thoroughly but gently to settle the soil around the potatoes. Avoid overwatering, which can lead to rot.
Phase 3: Caring for Your Potato Plants
- Regular watering: Keep the soil consistently moist, but not waterlogged. Water deeply and less frequently rather than shallowly and often. The frequency of watering will depend on your climate and soil type.
- Weed control: Regularly remove weeds, as they compete with your potato plants for nutrients and water. Mulching around the plants can help suppress weeds.
- Hilling (earthing up): As the potato plants grow, gradually add more soil around the base of the plants, covering the stems up to about 6 inches below the top leaves. This encourages the formation of more potatoes along the stems. You can do this several times throughout the growing season.
- Pest and disease control: Regularly inspect your plants for signs of pests or diseases. Common potato pests include aphids and Colorado potato beetles. Treat any infestations promptly using appropriate organic or chemical controls. Always follow the instructions on any pesticide labels carefully.
- Fertilizing (optional): While potatoes don’t require heavy fertilization, a balanced fertilizer can boost yields. Apply a slow-release fertilizer at planting time or use a liquid fertilizer according to package instructions.
Phase 4: Harvesting Your Potatoes
- Know when to harvest: The harvesting time depends on the variety of potato and the growing season. Early potatoes are ready to harvest around 70-80 days after planting, while later varieties may take 90-120 days. The plants will usually start to flower and then the foliage will begin to die back, indicating that the potatoes are nearing maturity. You can gently dig up a few potatoes to check their size and maturity.
- Harvesting techniques: Carefully dig around the plants with a garden fork or shovel, being careful not to damage the potatoes. Lift the plants gently from the ground and collect the potatoes. If you are harvesting early potatoes, you can gently lift the potatoes from the soil without disturbing the entire plant.
- Curing your potatoes: After harvesting, allow the potatoes to cure in a cool, dark, and well-ventilated area for 7-10 days. This allows the skins to toughen and prevents spoilage. Spread the potatoes in a single layer to ensure good air circulation.
- Storing your potatoes: Once cured, store your potatoes in a cool, dark, and dry place. Temperatures between 40-50°F (4-10°C) are ideal. Avoid storing potatoes in direct sunlight or in areas with high humidity.
Tips for Success:
- Choose the right potato variety: Different varieties have different growing seasons and yields. Select a variety suitable for your climate and growing conditions.
- Don’t overcrowd your plants: Adequate spacing allows for proper air circulation and prevents disease.
- Pay attention to the weather: Adjust your watering schedule based on rainfall and temperature.
- Practice crop rotation: Avoid planting potatoes in the same spot year after year to prevent soilborne diseases.
Troubleshooting:
- Potato blight: This fungal disease can quickly destroy potato plants. Look for brown or black spots on leaves and stems. Remove affected plants immediately and practice good sanitation to prevent its spread.
- Potato scab: This is a common disease that causes rough, scabby patches on the potatoes. It’s often worse in alkaline soils. Amend the soil with organic matter to improve its drainage and pH.
- Potato beetles: These insects can decimate potato plants. Handpick them off the plants or use an appropriate insecticide if necessary.
Conclusion
So there you have it – a simple, effective, and surprisingly rewarding method for harvesting your own iceberg lettuce. This DIY trick isn’t just about saving money; it’s about connecting with your food in a more meaningful way. By understanding the growth cycle and employing this straightforward harvesting technique, you gain a deeper appreciation for the effort and care that goes into producing fresh, crisp lettuce. The satisfaction of biting into a head of lettuce you’ve nurtured from seed to harvest is unparalleled. This Harvest Iceberg Lettuce guide empowers you to take control of your food source, ensuring quality and freshness while minimizing waste. It’s a truly rewarding experience for both seasoned gardeners and enthusiastic beginners alike.
Beyond the basic method outlined, there are several exciting variations you can explore. Experiment with different planting times to extend your harvest season. Consider companion planting – incorporating herbs like basil or dill nearby can deter pests and enhance the overall flavor profile of your lettuce. For those with limited space, vertical gardening techniques can be surprisingly effective for growing iceberg lettuce. And don’t be afraid to get creative with your harvest! Use your freshly picked lettuce in salads, sandwiches, wraps, or even as a refreshing addition to your favorite summer cocktails. The possibilities are endless!
We strongly encourage you to try this Harvest Iceberg Lettuce method and share your experience with us! Whether you’re a seasoned gardener or a complete novice, we’d love to hear about your successes, challenges, and any innovative twists you’ve added to the process. Share your photos and stories on social media using #HarvestIcebergLettuce – let’s build a community of home gardeners who are passionate about growing their own food. Remember, the journey of growing your own food is as rewarding as the delicious results. So grab your seeds, get your hands dirty, and embark on this fulfilling adventure. You might be surprised at how much you enjoy the process and the incredible taste of homegrown iceberg lettuce.
This DIY approach to harvesting iceberg lettuce is not only sustainable and cost-effective but also incredibly satisfying. It allows you to control the quality and freshness of your produce, ensuring you always have access to crisp, delicious lettuce. Give it a try and experience the joy of harvesting your own homegrown vegetables!
Frequently Asked Questions
How often should I harvest iceberg lettuce?
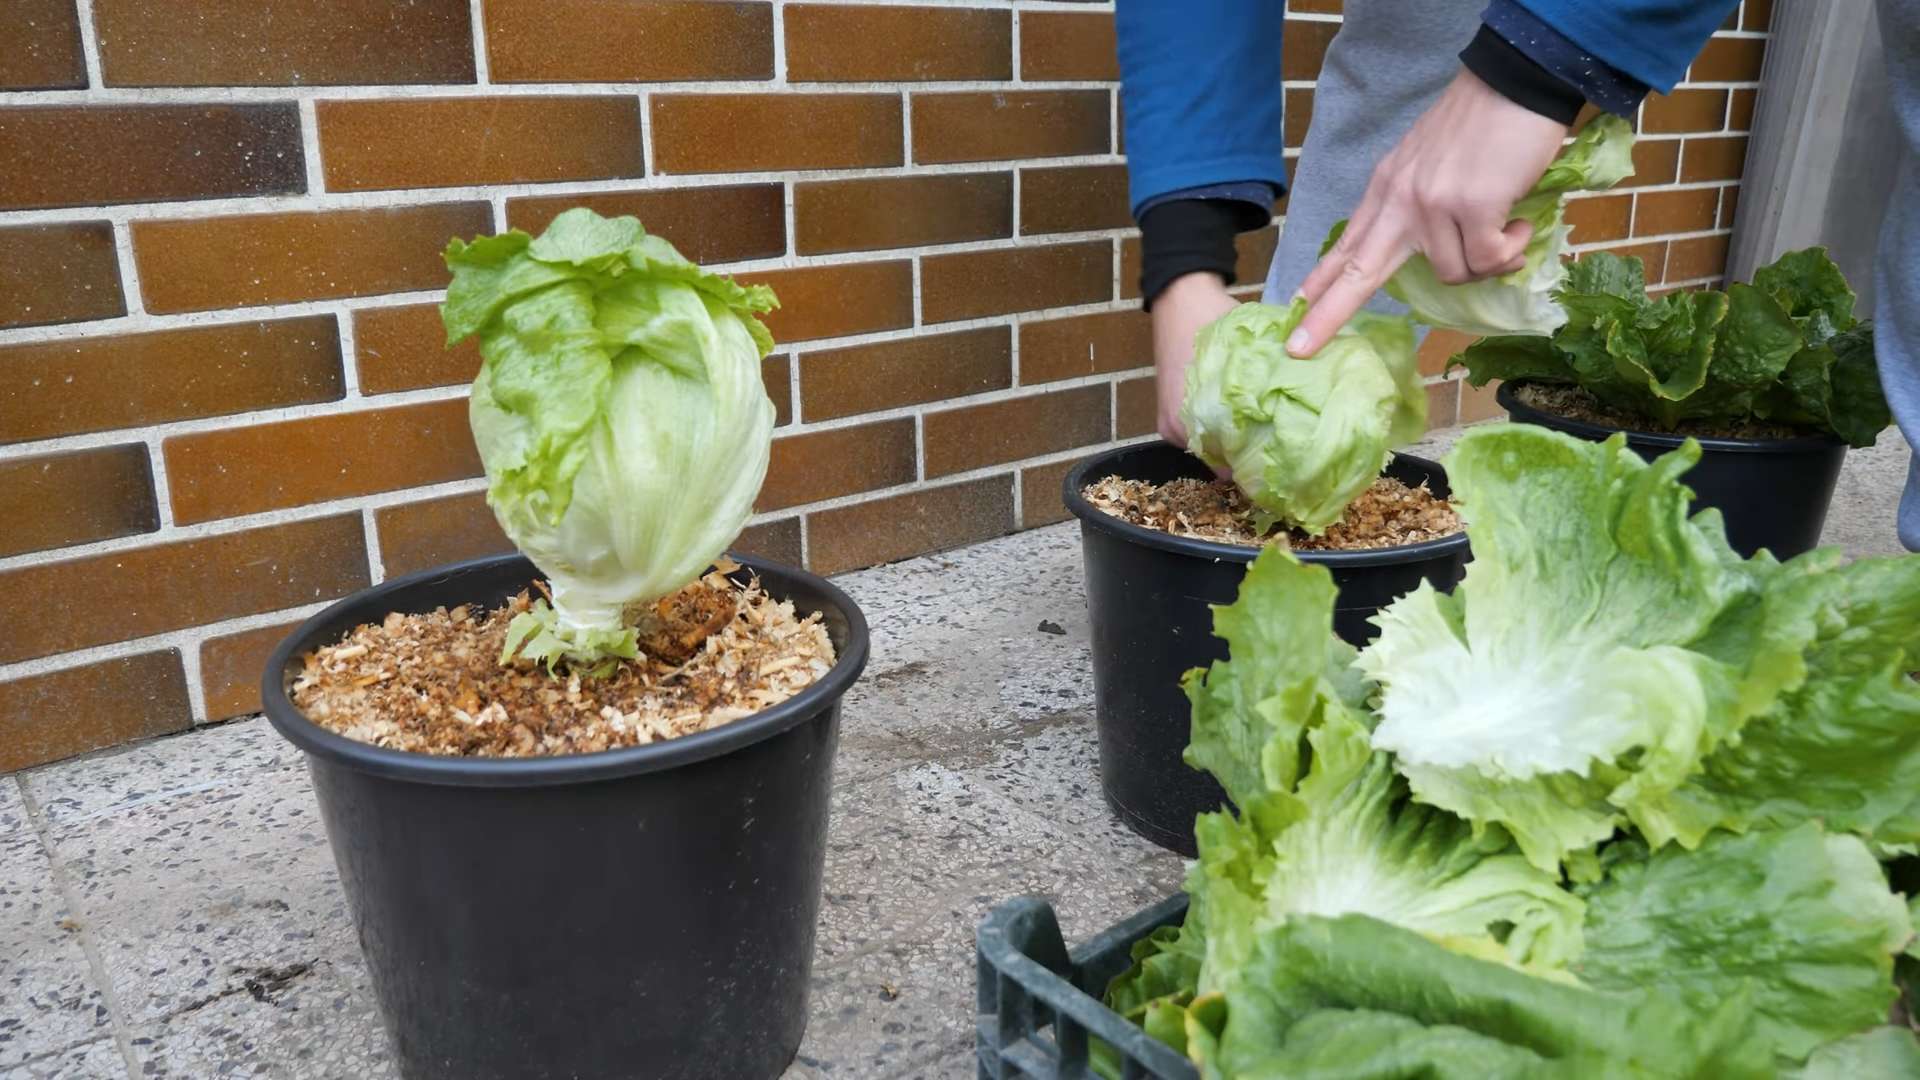
The frequency of harvesting depends on the size and maturity of your lettuce heads. Generally, you can harvest iceberg lettuce when the heads are firm and approximately 6-8 inches in diameter. You can harvest individual heads as they mature, or you can harvest the entire crop at once if you prefer. Regularly checking your plants and harvesting when they reach the desired size will ensure optimal flavor and prevent the lettuce from becoming overly mature and bitter.
What are the signs that my iceberg lettuce is ready for harvest?
Your iceberg lettuce is ready for harvest when the heads are firm, tightly packed, and have reached a diameter of about 6-8 inches. The leaves should be a vibrant green color, and the outer leaves should be crisp and free from blemishes or signs of disease. Avoid harvesting lettuce that shows signs of wilting, yellowing, or pest damage.
Can I store harvested iceberg lettuce for a long time?
While iceberg lettuce is relatively hardy, it’s best enjoyed fresh. For optimal freshness, store harvested lettuce in a plastic bag in the refrigerator. It should remain crisp and delicious for about a week. To extend its shelf life, consider wrapping the lettuce in a damp paper towel before placing it in the bag. Avoid washing the lettuce before storing it, as excess moisture can promote spoilage.
What should I do if my iceberg lettuce develops pests or diseases?
Regularly inspect your lettuce plants for signs of pests or diseases. If you notice any problems, take immediate action. Common pests include aphids and slugs. You can control these pests using organic methods such as insecticidal soap or diatomaceous earth. For diseases, ensure good air circulation around your plants and avoid overwatering. If the problem persists, consider consulting a local gardening expert for advice.
What are some alternative uses for iceberg lettuce beyond salads?
Iceberg lettuce is surprisingly versatile! Beyond salads, you can use it in sandwiches, wraps, tacos, and burgers. It can also be used as a refreshing addition to smoothies or as a crunchy element in stir-fries. You can even grill iceberg lettuce for a unique smoky flavor. Experiment and discover your favorite ways to enjoy your homegrown harvest!
Can I grow iceberg lettuce in containers?
Absolutely! Iceberg lettuce can be successfully grown in containers, making it a great option for those with limited garden space. Choose a container that is at least 12 inches deep and wide to allow for adequate root development. Ensure the container has drainage holes to prevent waterlogging. Use a well-draining potting mix and provide consistent watering.
What type of soil is best for growing iceberg lettuce?
Iceberg lettuce thrives in loose, well-draining soil that is rich in organic matter. Amend heavy clay soils with compost or other organic materials to improve drainage and aeration. The ideal soil pH for iceberg lettuce is slightly acidic, between 6.0 and 6.8.


Leave a Comment