
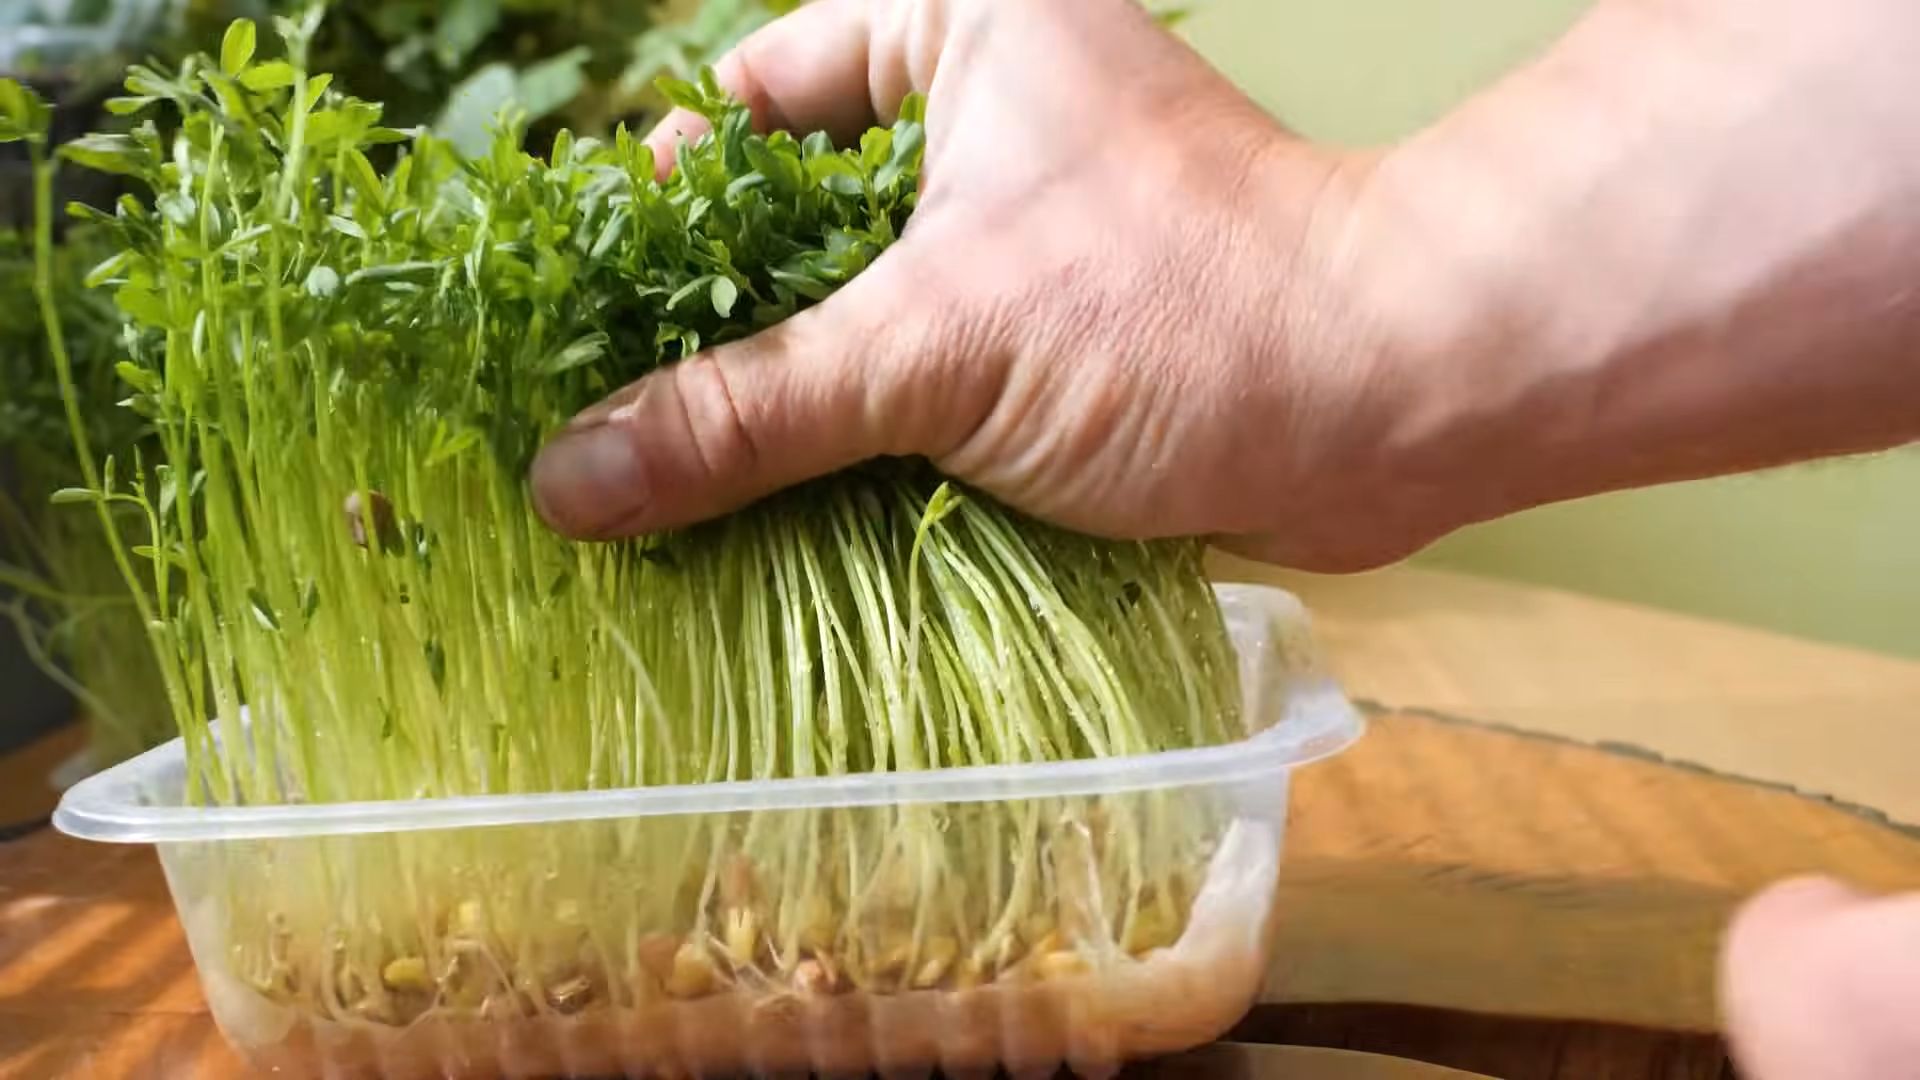
Grow Microgreens at Home – ever dreamt of having a tiny, vibrant garden bursting with flavor right on your kitchen counter? Imagine snipping fresh, nutrient-packed greens to sprinkle on your salad, sandwich, or even your morning smoothie, all grown by your own two hands! This isn’t some futuristic fantasy; it’s the reality of growing microgreens, and I’m here to show you how incredibly easy (and rewarding!) it can be.
While the modern microgreen trend has exploded in recent years, the concept of eating young, sprouted plants isn’t new. Cultures around the world have long valued the concentrated nutrition and delicate flavors of these tiny powerhouses. Think of the sprouts used in Asian cuisine for centuries – a testament to the enduring appeal of these miniature greens.
But why should you learn to grow microgreens at home? In today’s world, we’re all looking for ways to eat healthier, save money, and connect with our food. Microgreens offer all of that and more! They’re packed with vitamins and minerals, often exceeding the nutritional value of their mature counterparts. Plus, growing them yourself is significantly cheaper than buying them at the store, and you’ll have the satisfaction of knowing exactly where your food comes from. Ready to ditch the expensive grocery store greens and embark on a fun, flavorful adventure? Let’s get started!
Growing Butternut Squash: A Beginner’s Guide to a Bountiful Harvest
Okay, so you want to grow butternut squash? Awesome! It’s totally doable, even if you’re a newbie gardener like I was. Butternut squash is delicious, versatile, and surprisingly rewarding to grow yourself. This guide will walk you through everything you need to know, from seed to table. Let’s get started!
Choosing Your Butternut Squash Variety
First things first, let’s talk varieties. While “butternut squash” is the general term, there are actually a few different cultivars you can choose from. Here are a couple of popular options:
* Waltham Butternut: This is a classic choice, known for its consistent size and excellent flavor. It’s a reliable producer and stores well.
* Butterscotch PMR: If you’re short on space, this semi-bush variety is a great option. It’s also resistant to powdery mildew, which is a common squash problem.
* Early Butternut: As the name suggests, this variety matures earlier than others, making it a good choice for shorter growing seasons.
I personally love Waltham Butternut because of its classic flavor and reliable yield. But feel free to experiment and find the variety that works best for you!
Getting Started: Planting Your Butternut Squash
Butternut squash needs a long growing season (around 90-100 days), so starting seeds indoors is often the best way to go, especially if you live in a cooler climate.
Starting Seeds Indoors (Optional, but Recommended)
1. Gather Your Supplies: You’ll need seed starting trays or small pots (I like using peat pots because they’re biodegradable), seed starting mix, butternut squash seeds, and a spray bottle.
2. Prepare Your Pots: Fill your pots with seed starting mix, leaving about half an inch of space at the top. Gently tap the pots to settle the soil.
3. Plant the Seeds: Make a small hole (about 1 inch deep) in the center of each pot. Drop in 2-3 seeds per pot. This increases your chances of germination. Cover the seeds with soil and gently water with a spray bottle.
4. Provide Warmth and Light: Butternut squash seeds need warmth to germinate. Place your seed starting trays in a warm location (around 70-80°F). A heat mat can be really helpful. You’ll also need to provide plenty of light. A sunny windowsill might work, but grow lights are even better.
5. Keep the Soil Moist: Water regularly with a spray bottle to keep the soil moist, but not soggy. Overwatering can lead to rot.
6. Thin the Seedlings: Once the seedlings emerge (usually in about a week), thin them to one strong seedling per pot. Snip off the weaker seedlings at the soil line with scissors. Don’t pull them out, as this can disturb the roots of the remaining seedling.
Direct Sowing (If You Have a Long Growing Season)
If you live in a warm climate with a long growing season, you can direct sow your butternut squash seeds directly into the garden.
1. Wait for Warm Weather: Butternut squash needs warm soil to germinate. Wait until the soil temperature is consistently above 60°F before planting.
2. Prepare the Soil: Choose a sunny spot with well-drained soil. Amend the soil with compost or aged manure to improve fertility and drainage. Butternut squash are heavy feeders!
3. Create Mounds: Butternut squash plants are vining and need plenty of space. Create mounds of soil about 2-3 feet apart. This will help with drainage and provide a good base for the plants.
4. Plant the Seeds: Sow 2-3 seeds per mound, about 1 inch deep. Cover the seeds with soil and gently water.
5. Thin the Seedlings: Once the seedlings emerge, thin them to one strong seedling per mound.
Transplanting Your Seedlings
Whether you started your seeds indoors or bought seedlings from a nursery, you’ll need to transplant them into the garden.
1. Harden Off the Seedlings: If you started your seeds indoors, you’ll need to harden them off before transplanting. This means gradually exposing them to outdoor conditions over a period of about a week. Start by placing them outside in a sheltered location for a few hours each day, gradually increasing the amount of time they spend outdoors.
2. Prepare the Planting Site: Choose a sunny spot with well-drained soil. Amend the soil with compost or aged manure.
3. Dig Holes: Dig holes that are slightly larger than the root balls of your seedlings. Space the holes about 2-3 feet apart.
4. Gently Remove the Seedlings: Carefully remove the seedlings from their pots, being careful not to damage the roots. If you used peat pots, you can plant the entire pot directly into the ground.
5. Plant the Seedlings: Place the seedlings in the holes and backfill with soil. Gently firm the soil around the base of the plants.
6. Water Thoroughly: Water the seedlings thoroughly after planting.
Caring for Your Butternut Squash Plants
Once your butternut squash plants are in the ground, they’ll need regular care to thrive.
* Watering: Butternut squash plants need consistent moisture, especially during hot, dry weather. Water deeply at the base of the plants, avoiding getting the leaves wet. Soaker hoses or drip irrigation are ideal.
* Fertilizing: Butternut squash are heavy feeders and benefit from regular fertilization. Use a balanced fertilizer (like 10-10-10) every few weeks. You can also side-dress the plants with compost or aged manure.
* Weeding: Keep the area around your butternut squash plants free of weeds. Weeds compete with the plants for water and nutrients.
* Mulching: Mulch around the plants with straw, wood chips, or other organic material. This will help to retain moisture, suppress weeds, and regulate soil temperature.
* Pest Control: Butternut squash plants can be susceptible to pests like squash bugs, squash vine borers, and aphids. Inspect your plants regularly for signs of pests and take action as needed. Handpicking pests is often effective. You can also use insecticidal soap or neem oil.
* Pollination: Butternut squash plants have separate male and female flowers. The female flowers need to be pollinated in order to produce fruit. Bees are the primary pollinators, but you can also hand-pollinate the flowers if necessary. To hand-pollinate, use a small paintbrush to transfer pollen from the male flower to the female flower. The female flowers have a small immature squash at the base of the flower.
* Pruning (Optional): Some gardeners prune their butternut squash plants to encourage fruit production. You can prune off some of the side vines to direct the plant’s energy towards developing the main fruits.
Dealing with Common Problems
Even with the best care, you might encounter some problems while growing butternut squash. Here are a few common issues and how to deal with them:
* Powdery Mildew: This fungal disease causes a white, powdery coating on the leaves. To prevent powdery mildew, choose resistant varieties, provide good air circulation, and avoid overhead watering. If powdery mildew does occur, you can treat it with a fungicide.
* Squash Bugs: These pests suck the sap from the leaves, causing them to wilt and die. Handpicking squash bugs is often effective. You can also use insecticidal soap or neem oil.
* Squash Vine Borers: These pests bore into the stems of the plants, causing them to wilt and die. To prevent squash vine borers, wrap the base of the stems with aluminum foil or netting. You can also inject Bacillus thuringiensis (Bt) into the stems to kill the borers.
* Blossom End Rot: This condition causes the blossom end of the squash to rot. It’s usually caused by calcium deficiency or inconsistent watering. To prevent blossom end rot, amend the soil with calcium and water regularly.
Harvesting Your Butternut Squash
The moment you’ve been waiting for! Harvesting your butternut squash is the most rewarding part of the process.
1. Know When to Harvest: Butternut squash is ready to harvest when the skin is hard and tough, and the stem is dry and brown. The squash should also have a deep tan color. A good test is to try to pierce the skin with your fingernail. If you can’t, it’s ready to harvest.
2. Cut the Squash from the Vine: Use a sharp knife or pruning shears to cut the squash from the vine, leaving about 2-3 inches of stem attached. This will help to prevent rot.
3. Handle with Care: Butternut squash can bruise easily, so handle them with care.
4. Cure the Squash: Curing the squash will help to improve its flavor and storage life.
Conclusion
So, there you have it! Growing microgreens at home is not only surprisingly simple, but also incredibly rewarding. Forget those expensive, pre-packaged containers from the grocery store. With just a few basic supplies and a little bit of patience, you can cultivate a vibrant, nutrient-packed garden right on your windowsill.
Why is this DIY trick a must-try? Because it puts you in control. You know exactly what you’re eating, where it came from, and how it was grown. No pesticides, no questionable additives, just pure, unadulterated goodness. Plus, the flavor explosion you get from freshly harvested microgreens is unlike anything you’ve experienced before. They add a burst of freshness and complexity to salads, sandwiches, soups, and just about anything else you can imagine.
But the benefits extend beyond just taste and nutrition. Growing microgreens is also a fantastic way to connect with nature, even in the middle of a bustling city. It’s a calming, meditative activity that can help reduce stress and boost your mood. Watching those tiny seeds sprout and transform into vibrant greens is truly a magical experience.
Ready to take your microgreen game to the next level? Consider experimenting with different seed varieties. Radish microgreens offer a spicy kick, while broccoli microgreens are mild and slightly sweet. Sunflower microgreens have a nutty flavor and a satisfying crunch. You can even create your own custom blends to suit your personal preferences.
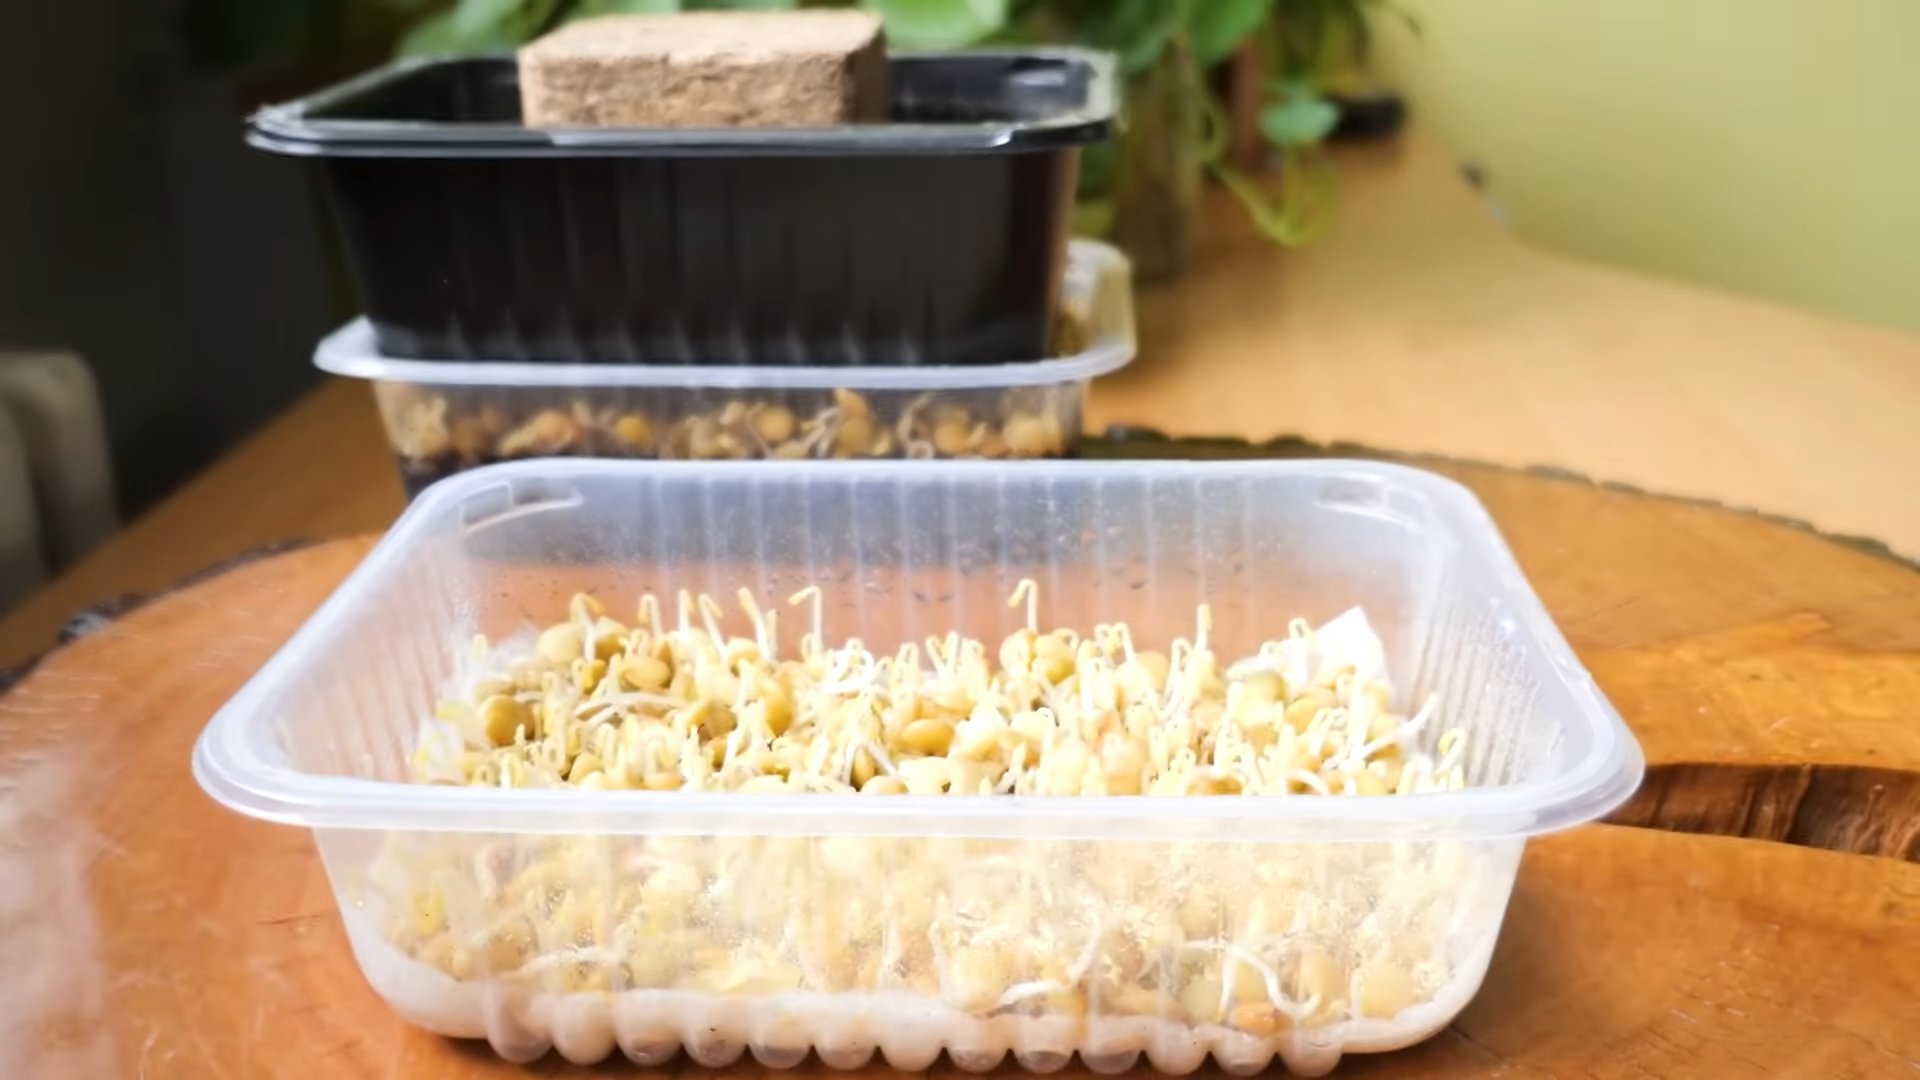
Another fun variation is to try growing your microgreens in different containers. While the shallow trays we discussed are ideal for beginners, you can also use repurposed plastic containers, glass jars, or even terracotta pots. Just make sure your chosen container has adequate drainage to prevent waterlogging.
Don’t be afraid to get creative with your growing medium, too. While soil is the most common choice, you can also use coconut coir, hemp mats, or even paper towels. Each medium offers its own unique advantages and disadvantages, so experiment to see what works best for you.
Ultimately, the best way to learn is by doing. So, gather your supplies, choose your seeds, and get ready to embark on your microgreen adventure. We’re confident that you’ll be amazed by how easy and rewarding it is to grow your own fresh, healthy microgreens at home.
We encourage you to try this DIY trick and share your experience with us! Let us know what varieties you’re growing, what challenges you’ve encountered, and what delicious dishes you’re creating with your homegrown microgreens. Share your photos and tips on social media using #HomegrownMicrogreens. We can’t wait to see what you create!
Frequently Asked Questions (FAQ)
What exactly are microgreens?
Microgreens are young vegetable greens that are harvested just after the cotyledon leaves (the first leaves that emerge from the seed) have developed, and often after the first true leaves have appeared. They are typically 1-3 inches tall and are packed with nutrients and flavor. Think of them as baby versions of your favorite vegetables and herbs.
What types of seeds can I use to grow microgreens?
The possibilities are almost endless! Some popular choices include:
* **Brassicas:** Broccoli, cauliflower, kale, cabbage, radish, mustard
* **Legumes:** Peas, lentils, chickpeas
* **Leafy Greens:** Arugula, spinach, lettuce, chard
* **Herbs:** Basil, cilantro, dill, parsley
* **Other:** Sunflower, buckwheat, amaranth
Just make sure you’re using seeds that are specifically intended for sprouting or growing food. Avoid seeds that have been treated with fungicides or other chemicals.
How long does it take to grow microgreens?
The growing time varies depending on the seed variety, but most microgreens are ready to harvest in 7-14 days. Radish microgreens, for example, tend to grow quickly, while sunflower microgreens may take a bit longer.
Do I need special equipment to grow microgreens?
Not at all! One of the great things about growing microgreens is that it requires minimal equipment. You’ll need:
* A shallow tray or container with drainage holes
* A growing medium (soil, coconut coir, hemp mat, etc.)
* Seeds
* A spray bottle
* A source of light (natural sunlight or a grow light)
How much light do microgreens need?
Microgreens need plenty of light to thrive. If you’re growing them indoors, a sunny windowsill that receives at least 4-6 hours of direct sunlight per day is ideal. If you don’t have access to enough natural light, you can supplement with a grow light. Position the light a few inches above the microgreens and keep it on for 12-16 hours per day.
How often should I water my microgreens?
Microgreens need to be kept consistently moist, but not waterlogged. Water them gently with a spray bottle once or twice a day, or as needed, to keep the growing medium damp. Avoid overwatering, as this can lead to mold growth.
How do I harvest microgreens?
Once your microgreens have reached the desired height (usually 1-3 inches), they’re ready to harvest. Use a pair of scissors or a sharp knife to cut the stems just above the growing medium. Rinse the microgreens gently with water and pat them dry before using.
How long do harvested microgreens last?
Harvested microgreens are best used immediately, but they can be stored in the refrigerator for up to a week. To store them, wrap them loosely in a paper towel and place them in a plastic bag or container.
What if my microgreens get moldy?
Mold growth is a common problem when growing microgreens, especially in humid environments. To prevent mold, make sure your growing medium is well-drained, avoid overwatering, and provide adequate ventilation. If you do notice mold, remove the affected area immediately. If the mold is widespread, it’s best to discard the entire batch.
Can I reuse the growing medium?
It’s generally not recommended to reuse the growing medium after harvesting microgreens, as it may contain pathogens or mold spores. It’s best to start with fresh growing medium each time.
Are there any seeds I shouldn’t use for microgreens?
Yes, some seeds are not suitable for growing microgreens because they contain toxins or are otherwise unsafe to eat. Avoid using seeds from the nightshade family (tomatoes, peppers, eggplants), as well as rhubarb leaves and certain types of beans. Always do your research before growing a new type of microgreen.
Can I grow microgreens outdoors?
Yes, you can grow microgreens outdoors, but you’ll need to protect them from extreme weather conditions, such as direct sunlight, heavy rain, and frost. A shaded patio or balcony is a good option.
What are the nutritional benefits of microgreens?
Microgreens are packed with vitamins, minerals, and antioxidants. Studies have shown that they can contain significantly higher levels of nutrients than their mature counterparts. They are a great way to boost your intake of vitamins A, C, E, and K, as well as folate, iron, and magnesium.
How can I use microgreens in my cooking?
Microgreens are incredibly versatile and can be used in a wide variety of dishes. Add them to salads, sandwiches, soups, smoothies, omelets, and stir-fries. Use them as a garnish for grilled meats, fish, or vegetables. Or simply sprinkle them on top of your favorite dishes for a burst of flavor and nutrition. The possibilities are endless!


Leave a Comment