
Grow Calendula From Seed and unlock a world of vibrant color and potent healing right in your own backyard! Have you ever dreamed of a garden bursting with sunshine-yellow and fiery-orange blooms, a garden that not only delights the eyes but also offers a treasure trove of natural remedies? Well, dream no more! This DIY guide will empower you to cultivate these cheerful flowers from the tiniest of seeds, transforming your garden into a haven of beauty and wellness.
Calendula, also known as pot marigold, boasts a rich history dating back centuries. Ancient Egyptians revered it for its rejuvenating properties, while Romans and Greeks used it to heal wounds and treat various ailments. Its vibrant petals have even been used as a natural dye and a culinary ingredient, adding a touch of sunshine to dishes.
In today’s fast-paced world, many of us are seeking natural and sustainable ways to care for ourselves and our families. Growing your own calendula allows you to harness the plant’s incredible healing power, creating homemade salves, teas, and tinctures free from harsh chemicals and artificial additives. Plus, it’s incredibly rewarding to nurture a plant from seed to bloom, knowing you’re contributing to a healthier and more beautiful world. So, let’s dive in and learn how easy it is to grow calendula from seed and reap the many benefits this amazing flower has to offer!
Grow Your Own Sunshine: A Guide to Growing Calendula From Seed
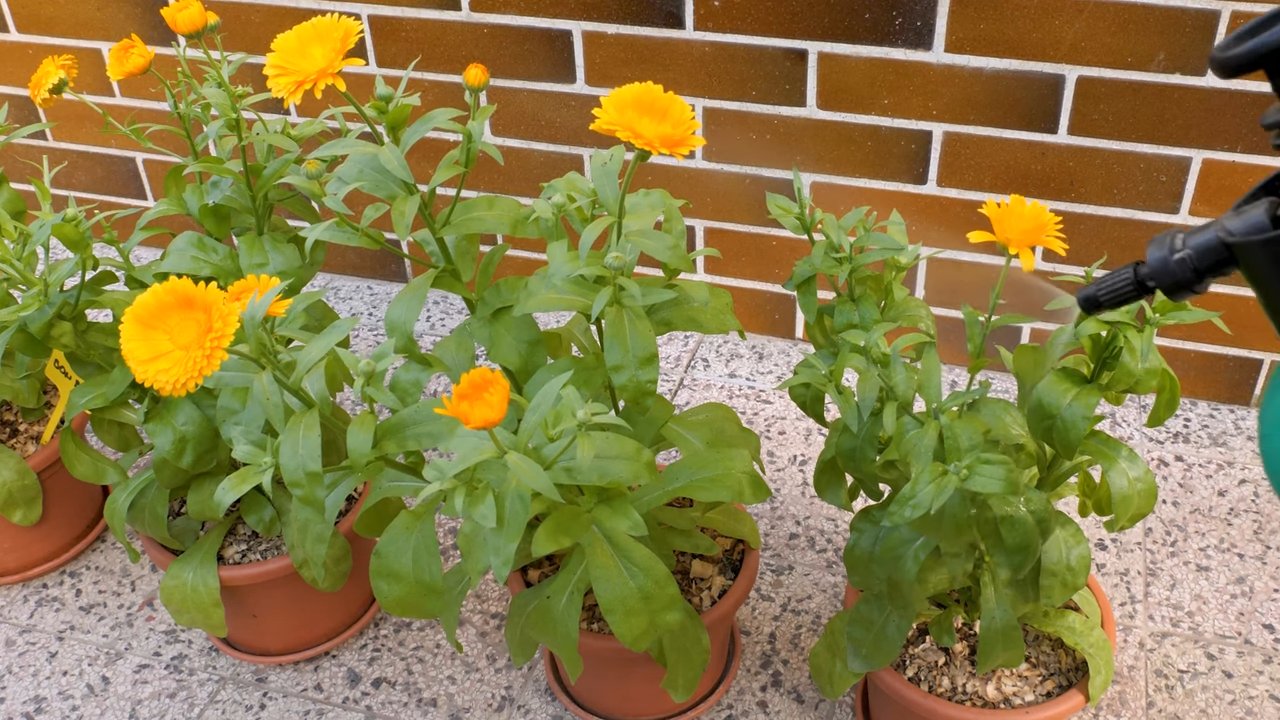
Calendula, also known as pot marigold, is one of my absolute favorite flowers to grow. Not only are they incredibly cheerful with their bright orange and yellow blooms, but they’re also super easy to cultivate and have tons of uses, from adding color to salads to making soothing skin salves. I’m going to walk you through everything you need to know to successfully grow calendula from seed, so you can enjoy these sunny beauties in your garden too!
What You’ll Need
Before we dive in, let’s gather our supplies. Here’s a list of what you’ll need to get started:
* Calendula seeds (obviously!)
* Seed starting trays or small pots
* Seed starting mix (or a well-draining potting mix)
* Watering can or spray bottle
* A sunny windowsill or grow lights
* Optional: Plant labels and a marker
* Gardening gloves
* Trowel or small shovel
* Well-draining garden soil or a large container
Starting Calendula Seeds Indoors (Optional)
While calendula can be directly sown into the garden, starting them indoors gives you a head start, especially if you live in a region with a shorter growing season. I usually start mine indoors about 4-6 weeks before the last expected frost.
Why Start Indoors?
* Extends the growing season.
* Protects seedlings from harsh weather.
* Gives you more control over the growing environment.
Here’s how to do it:
1. Prepare Your Seed Starting Trays: Fill your seed starting trays or small pots with seed starting mix. Gently press down the soil to eliminate air pockets, but don’t pack it too tightly.
2. Sow the Seeds: Make a small indentation (about ¼ inch deep) in the center of each cell or pot. Place 2-3 calendula seeds in each indentation. This increases the chances of at least one seed germinating.
3. Cover the Seeds: Gently cover the seeds with a thin layer of seed starting mix.
4. Water Thoroughly: Use a watering can or spray bottle to thoroughly moisten the soil. Be careful not to overwater, as this can lead to damping off (a fungal disease that affects seedlings).
5. Provide Light and Warmth: Place the trays or pots in a warm location (around 65-75°F or 18-24°C) with plenty of sunlight. A sunny windowsill facing south or west is ideal. If you don’t have enough natural light, use grow lights. Keep the lights on for about 14-16 hours per day.
6. Keep the Soil Moist: Check the soil moisture daily and water as needed to keep the soil consistently moist, but not soggy.
7. Thin Seedlings (If Necessary): Once the seedlings emerge and have their first true leaves (the second set of leaves), thin them out by snipping off the weaker seedlings at the soil line with scissors. Leave only the strongest seedling in each cell or pot.
8. Harden Off Seedlings: About a week before you plan to transplant the seedlings outdoors, you’ll need to “harden them off.” This process gradually acclimates the seedlings to outdoor conditions. Start by placing the trays or pots outdoors in a sheltered location for a few hours each day, gradually increasing the amount of time they spend outside. Protect them from direct sunlight and strong winds during this process.
Direct Sowing Calendula Seeds Outdoors
If you live in a region with a mild climate and a long growing season, you can directly sow calendula seeds into the garden. I often do this for a second round of blooms later in the season.
When to Direct Sow:
* After the last expected frost.
* When the soil temperature is at least 60°F (15°C).
Here’s how to do it:
1. Prepare the Soil: Choose a location in your garden that receives at least 6 hours of sunlight per day. Calendula can tolerate partial shade, but they’ll bloom best in full sun. Amend the soil with compost or other organic matter to improve drainage and fertility.
2. Sow the Seeds: Sow the seeds directly into the soil, about ¼ inch deep and 6-8 inches apart.
3. Water Gently: Water the soil gently to avoid disturbing the seeds.
4. Keep the Soil Moist: Keep the soil consistently moist until the seedlings emerge.
5. Thin Seedlings (If Necessary): Once the seedlings emerge and have their first true leaves, thin them out to 6-8 inches apart.
Transplanting Calendula Seedlings Outdoors
If you started your calendula seeds indoors, it’s time to transplant them into the garden!
When to Transplant:
* After the last expected frost.
* After the seedlings have been hardened off.
Here’s how to do it:
1. Prepare the Planting Site: Choose a location in your garden that receives at least 6 hours of sunlight per day. Amend the soil with compost or other organic matter to improve drainage and fertility.
2. Dig Holes: Dig holes that are slightly larger than the root balls of the seedlings, spacing them 6-8 inches apart.
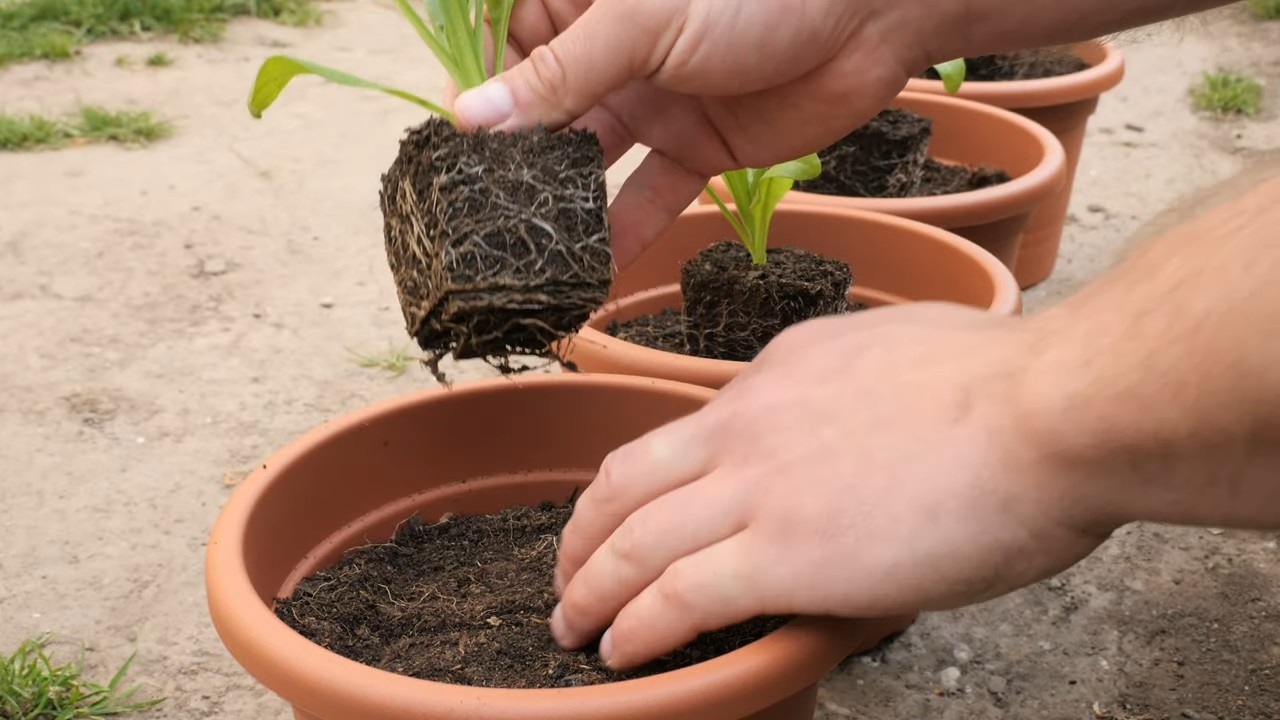
3. Remove Seedlings from Trays or Pots: Gently remove the seedlings from their trays or pots. Be careful not to damage the roots.
4. Place Seedlings in Holes: Place the seedlings in the holes, making sure the top of the root ball is level with the surrounding soil.
5. Fill Holes with Soil: Fill the holes with soil, gently firming it around the seedlings.
6. Water Thoroughly: Water the seedlings thoroughly.
7. Mulch (Optional): Apply a layer of mulch around the seedlings to help retain moisture and suppress weeds.
Caring for Your Calendula Plants
Once your calendula plants are established, they’re relatively low-maintenance. Here are a few tips to keep them thriving:
* Watering: Water regularly, especially during dry periods. Calendula prefers consistently moist soil, but avoid overwatering, as this can lead to root rot.
* Fertilizing: Calendula doesn’t require a lot of fertilizer. However, you can give them a boost by applying a balanced fertilizer (such as 10-10-10) every few weeks.
* Deadheading: Deadhead spent flowers regularly to encourage more blooms. Simply pinch or cut off the faded flowers just below the flower head.
* Pest Control: Calendula is generally pest-resistant, but aphids and spider mites can sometimes be a problem. If you notice any pests, spray the plants with insecticidal soap or neem oil.
* Disease Control: Powdery mildew can sometimes affect calendula, especially in humid conditions. To prevent powdery mildew, provide good air circulation around the plants and avoid overhead watering. If you notice powdery mildew, spray the plants with a fungicide.
* Harvesting: You can harvest calendula flowers as soon as they’re fully open. Simply cut the flower heads off the stem. The more you harvest, the more they will bloom!
Using Your Calendula Flowers
Now for the fun part! Once you’ve harvested your calendula flowers, there are tons of ways to use them.
* Culinary Uses: Calendula petals are edible and can be used to add color and flavor to salads, soups, and other dishes. They have a slightly peppery taste.
* Medicinal Uses: Calendula has been used for centuries for its medicinal properties. It’s known for its anti-inflammatory, antiseptic, and wound-healing properties. You can use calendula flowers to make salves, creams, and teas.
* Crafting: Calendula petals can be used to make natural dyes for fabrics and yarns. They can also be used in potpourri and other crafts.
* Attracting Pollinators: Calendula flowers attract beneficial insects, such as bees and butterflies, to your garden.
Troubleshooting
Even with the best care, you might encounter a few problems while growing calendula. Here are some common issues and how to address them:
* Poor Germination: If your seeds aren’t germinating, make sure the soil is consistently moist and the temperature is warm enough. You can also try scarifying the seeds (gently scratching the surface) before planting to improve germination rates.
* Leggy Seedlings: If your seedlings are tall and spindly, they’re not getting enough light. Move them to a sunnier location or use grow lights.
* Yellowing Leaves: Yellowing leaves can be a sign of overwatering, underwatering, or nutrient deficiency. Check the soil moisture and adjust your watering schedule accordingly. You can also fertilize the plants with a balanced fertilizer.
* Powdery Mildew: Powdery mildew
Conclusion
So, there you have it! Growing calendula from seed isn’t just a gardening project; it’s an investment in a vibrant, useful, and beautiful addition to your life. From the cheerful burst of color in your garden to the potent healing properties you can harness, calendula offers a wealth of benefits that make the small effort of starting it from seed incredibly worthwhile.
Why is this DIY trick a must-try? Because it empowers you to take control of your garden’s bounty and your well-being. You’re not relying on commercially grown plants that may have been treated with chemicals or transported long distances. You’re nurturing life from the very beginning, creating a connection with nature that’s deeply satisfying. Plus, starting from seed is significantly more cost-effective than buying established plants, allowing you to cultivate a larger, more diverse calendula patch without breaking the bank.
But the advantages don’t stop there. Growing your own calendula allows you to select the specific varieties that appeal to you most. Do you prefer the deep orange hues of ‘Pacific Beauty’ or the double blooms of ‘Bronzed Beauty’? Perhaps you’re interested in the shorter, more compact ‘Radio’ variety for container gardening. Starting from seed gives you the freedom to explore the diverse world of calendula and tailor your garden to your exact preferences.
And speaking of variations, don’t be afraid to experiment! Try direct sowing seeds in different locations in your garden to see which areas provide the optimal growing conditions. Consider companion planting calendula with other herbs and vegetables to attract beneficial insects and deter pests. You can even try saving seeds from your most successful plants to perpetuate your own unique calendula strain.
Beyond the garden, the possibilities are endless. Use your homegrown calendula petals to create soothing skin salves, infused oils, and teas. Add them to your culinary creations for a touch of color and flavor. Dry the petals and store them for use throughout the year. The only limit is your imagination!
We wholeheartedly encourage you to embark on this rewarding journey of growing calendula from seed. It’s a simple, accessible, and deeply fulfilling project that will bring joy and abundance to your life. Don’t be intimidated if you’re a beginner gardener; calendula is remarkably forgiving and easy to grow.
So, grab a packet of seeds, prepare your soil, and get ready to witness the magic of calendula unfold before your eyes.
And most importantly, we want to hear about your experiences! Share your photos, tips, and stories with us. Let us know which varieties you’re growing, what you’re using your calendula for, and any challenges you’ve overcome along the way. Together, we can create a vibrant community of calendula enthusiasts, sharing our knowledge and inspiring others to discover the wonders of this remarkable plant. Let’s cultivate a world filled with the golden glow of homegrown calendula!
Frequently Asked Questions (FAQ)
What is the best time to plant calendula seeds?
The ideal time to plant calendula seeds depends on your climate. In cooler regions, start seeds indoors 6-8 weeks before the last expected frost. This allows you to get a head start on the growing season. In warmer climates, you can direct sow seeds outdoors in early spring or fall. Calendula prefers cooler temperatures, so avoid planting during the hottest months of summer. A soil temperature of around 60-70°F (15-21°C) is optimal for germination. If you are direct sowing, ensure the danger of frost has passed. You can also do succession planting every few weeks to ensure a continuous supply of blooms throughout the growing season.
How deep should I plant calendula seeds?
Calendula seeds are relatively small and should be planted shallowly. Sow them about ¼ to ½ inch deep in well-draining soil. Gently cover the seeds with soil and water thoroughly. Avoid burying the seeds too deep, as this can inhibit germination.
How long does it take for calendula seeds to germinate?
Calendula seeds typically germinate within 5-14 days, depending on soil temperature and moisture levels. Keep the soil consistently moist but not waterlogged during this period. Using a seed starting tray with a humidity dome can help maintain optimal moisture levels. Once the seedlings emerge, provide them with plenty of sunlight or grow lights.
What kind of soil does calendula need?
Calendula is not particularly fussy about soil type, but it thrives in well-draining soil that is rich in organic matter. Amend heavy clay soils with compost or other organic materials to improve drainage. A slightly acidic to neutral soil pH (around 6.0-7.0) is ideal. Before planting, consider adding a slow-release fertilizer to the soil to provide the seedlings with essential nutrients.
How much sunlight does calendula need?
Calendula prefers full sun, which means at least 6 hours of direct sunlight per day. However, it can also tolerate partial shade, especially in hotter climates. In areas with intense summer heat, providing some afternoon shade can help prevent the plants from wilting. Insufficient sunlight can result in leggy growth and fewer blooms.
How often should I water calendula?
Water calendula regularly, especially during dry periods. Keep the soil consistently moist but not waterlogged. Overwatering can lead to root rot, so ensure the soil has good drainage. Water deeply and less frequently, rather than shallowly and more often. Mulching around the plants can help retain moisture in the soil.
Does calendula need fertilizer?
Calendula is not a heavy feeder, but it benefits from occasional fertilization. Apply a balanced fertilizer or compost tea every few weeks during the growing season. Avoid over-fertilizing, as this can lead to excessive foliage growth at the expense of blooms. A fertilizer with a higher phosphorus content can encourage more abundant flowering.
How do I harvest calendula flowers?
Harvest calendula flowers in the morning, after the dew has dried. Choose flowers that are fully open and brightly colored. Gently pluck the flowers from the stem, leaving the stem intact. Regular harvesting encourages the plant to produce more blooms.
How do I dry calendula flowers?
There are several ways to dry calendula flowers. One method is to spread the petals on a screen or tray in a well-ventilated area. Another method is to hang the flowers upside down in small bunches. Avoid drying the flowers in direct sunlight, as this can fade their color and reduce their potency. The flowers are dry when they are brittle to the touch. Store the dried flowers in an airtight container in a cool, dark place.
What are the uses of calendula?
Calendula has a wide range of uses, both medicinal and culinary. It is known for its anti-inflammatory, antiseptic, and wound-healing properties. Calendula-infused oils and salves can be used to treat skin irritations, burns, and eczema. The petals can also be added to salads, soups, and teas for a touch of color and flavor. Some people also use calendula as a natural dye.
Are there any pests or diseases that affect calendula?
Calendula is generally resistant to pests and diseases, but it can be susceptible to aphids, spider mites, and powdery mildew. Inspect your plants regularly for signs of infestation or disease. Treat aphids and spider mites with insecticidal soap or neem oil. Prevent powdery mildew by ensuring good air circulation and avoiding overhead watering.
Can I save seeds from my calendula plants?
Yes, you can easily save seeds from your calendula plants. Allow the flower heads to dry completely on the plant. Once the flower heads are dry and brown, collect the seeds. Store the seeds in an airtight container in a cool, dry place. Label the container with the variety and date.
Is calendula safe for pets?
Calendula is generally considered safe for pets, but it is always best to consult with your veterinarian before giving it to your animals. Some pets may be allergic to calendula.
What are some good companion plants for calendula?
Calendula is a great companion plant for many vegetables and herbs. It attracts beneficial insects, such as ladybugs and hoverflies, which prey on aphids and other pests. It also deters nematodes in the soil. Good companion plants for calendula include tomatoes, peppers, cucumbers, basil, and rosemary.
Can I grow calendula in containers?
Yes, calendula grows well in containers. Choose a pot that is at least 12 inches in diameter and has good drainage. Use a well-draining potting mix. Water regularly and fertilize every few weeks. Place the container in a sunny location.
Leave a Comment