
Kohlrabi Planting Guide: Your Guide to a Bountiful Harvest
Kohlrabi Planting Guide – I’ve always loved the unique look and taste of kohlrabi, that fascinating bulbous vegetable that looks like something out of a fantasy novel. But for years, I struggled to grow it successfully. It seemed like a fussy plant, prone to pests and unpredictable yields. That’s why I’m so excited to share my hard-earned knowledge and simple, effective Kohlrabi Planting Guide with you today! This isn’t just another gardening article; it’s a collection of DIY tricks and hacks that will transform your kohlrabi growing experience, leading to a bountiful harvest you can be truly proud of.
While kohlrabi might seem like a newcomer to many modern gardens, its history stretches back centuries. Cultivated for its nutritious bulb and tender leaves, it has been a staple in various cultures across Europe and Asia for hundreds of years. But even with its long history, many gardeners still find it challenging to grow. This is where my Kohlrabi Planting Guide comes in handy.
Why You Need This Guide
This guide isn’t just for experienced gardeners; it’s perfect for beginners too! Whether you’re struggling with pests, poor yields, or simply want to learn the secrets to growing perfect kohlrabi, this Kohlrabi Planting Guide will provide you with the knowledge and confidence to succeed. You’ll learn everything from seed starting techniques to harvesting tips, all presented in a clear, easy-to-follow format. Imagine the satisfaction of biting into a crisp, sweet kohlrabi you grew yourself – that’s the reward waiting for you!
So, let’s get started on your journey to becoming a kohlrabi-growing expert! This Kohlrabi Planting Guide is your key to unlocking the secrets of this fascinating and delicious vegetable.
Harvesting Your Okra: A Guide to a Bountiful Crop
Okra, with its unique texture and flavor, is a rewarding vegetable to grow. But knowing when and how to harvest it is key to getting the most delicious pods. Follow these steps for a successful okra harvest!
Preparing for the Harvest
- Check your okra plants regularly. Aim for daily checks, especially once the plants start producing. The more frequently you harvest, the more okra your plants will produce.
- Know what to look for. Okra pods are ready for harvest when they are young and tender, typically 2-3 inches long, but this can vary depending on the variety. Larger pods will be tough and stringy.
- Gather your tools. You’ll need a sharp knife or garden shears. A small basket or bucket is also helpful for collecting your harvest.
- Choose the right time of day. Early morning is ideal, as the pods are less likely to be wilted by the sun’s heat.
Step-by-Step Harvesting Process
- Locate ripe okra pods. Look for pods that are the desired size and shape for your variety. Remember, smaller is better for tenderness.
- Gently grasp the pod. Hold the pod firmly near its base, where it connects to the plant stem.
- Use your knife or shears. Make a clean cut just below the pod, removing it from the plant stem. Avoid pulling or snapping the pod off, as this can damage the plant and reduce future yields. A clean cut minimizes the risk of disease.
- Inspect the cut. Ensure the cut is clean and smooth. If you notice any signs of disease or damage, remove the affected pod immediately and dispose of it properly.
- Place the harvested okra in your basket or bucket. Handle the pods gently to avoid bruising. Bruised okra is more susceptible to spoilage.
- Continue harvesting. Repeat steps 1-5 until you’ve harvested all the ripe pods from the plant. Don’t be afraid to harvest frequently; this encourages the plant to produce more pods.
- Store your okra properly. Okra is best used fresh, but if you can’t use it immediately, store it in a plastic bag in the refrigerator. It’s best used within a few days of harvesting for optimal flavor and texture.
Troubleshooting Common Issues
Dealing with Pests and Diseases
Regularly inspect your okra plants for signs of pests or diseases. Common pests include aphids, spider mites, and flea beetles. Diseases such as fusarium wilt and verticillium wilt can also affect okra. If you notice any problems, take appropriate action, such as using insecticidal soap or neem oil for pests, or removing and destroying affected plants to prevent the spread of disease. Prevention is key; ensure proper spacing between plants for good air circulation and avoid overhead watering to minimize disease risk.
Understanding Okra Pod Development
Okra pod development is influenced by several factors, including temperature, sunlight, and soil conditions. Consistent watering is crucial, especially during dry periods. Ensure your plants receive at least six hours of sunlight daily. Well-drained soil is also essential to prevent root rot. If your okra plants are not producing many pods, consider adjusting your watering schedule, fertilizing, or checking for pests and diseases.
Harvesting Different Okra Varieties
Different okra varieties may have slightly different harvesting times and pod sizes. Always refer to the seed packet or plant tag for specific information on your variety. Some varieties produce smaller pods, while others produce larger ones. Harvesting at the appropriate size is crucial for optimal flavor and texture. Overripe pods will be tough and stringy.
Advanced Harvesting Techniques
Successive Harvesting
For a continuous harvest, aim to pick okra every 2-3 days. This encourages the plant to produce more pods. Regular harvesting prevents the pods from becoming overripe and tough. This consistent approach maximizes your yield throughout the growing season.
Preserving Your Harvest
If you have a large harvest, consider preserving your okra. Freezing is a popular method. Simply blanch the pods in boiling water for a few minutes, then plunge them into ice water to stop the cooking process. After drying, you can freeze the okra in freezer bags for later use. Proper freezing preserves the quality and flavor of your okra for several months.
Identifying Overripe Okra
Overripe okra pods will be large, tough, and stringy. They may also have a dull color and a less appealing flavor. Avoid harvesting overripe pods, as they are not suitable for eating. Instead, focus on harvesting young, tender pods for the best quality.
Conclusion
So there you have it – your comprehensive guide to successfully planting kohlrabi! This DIY approach to growing your own kohlrabi offers a rewarding experience that goes beyond simply harvesting delicious vegetables. It connects you directly to the growing process, allowing you to understand the nuances of plant care and appreciate the freshness and flavor of homegrown produce like never before. The satisfaction of biting into a crisp, sweet kohlrabi that you nurtured from seed to harvest is unparalleled. This method, focusing on proper soil preparation, timely planting, and consistent care, ensures a bountiful harvest, making it a must-try for both seasoned gardeners and enthusiastic beginners alike. The relatively low maintenance required, coupled with the high reward of delicious, healthy kohlrabi, makes this a truly worthwhile endeavor. Beyond the simple satisfaction, growing your own kohlrabi contributes to a more sustainable lifestyle, reducing your carbon footprint and fostering a deeper connection with nature.
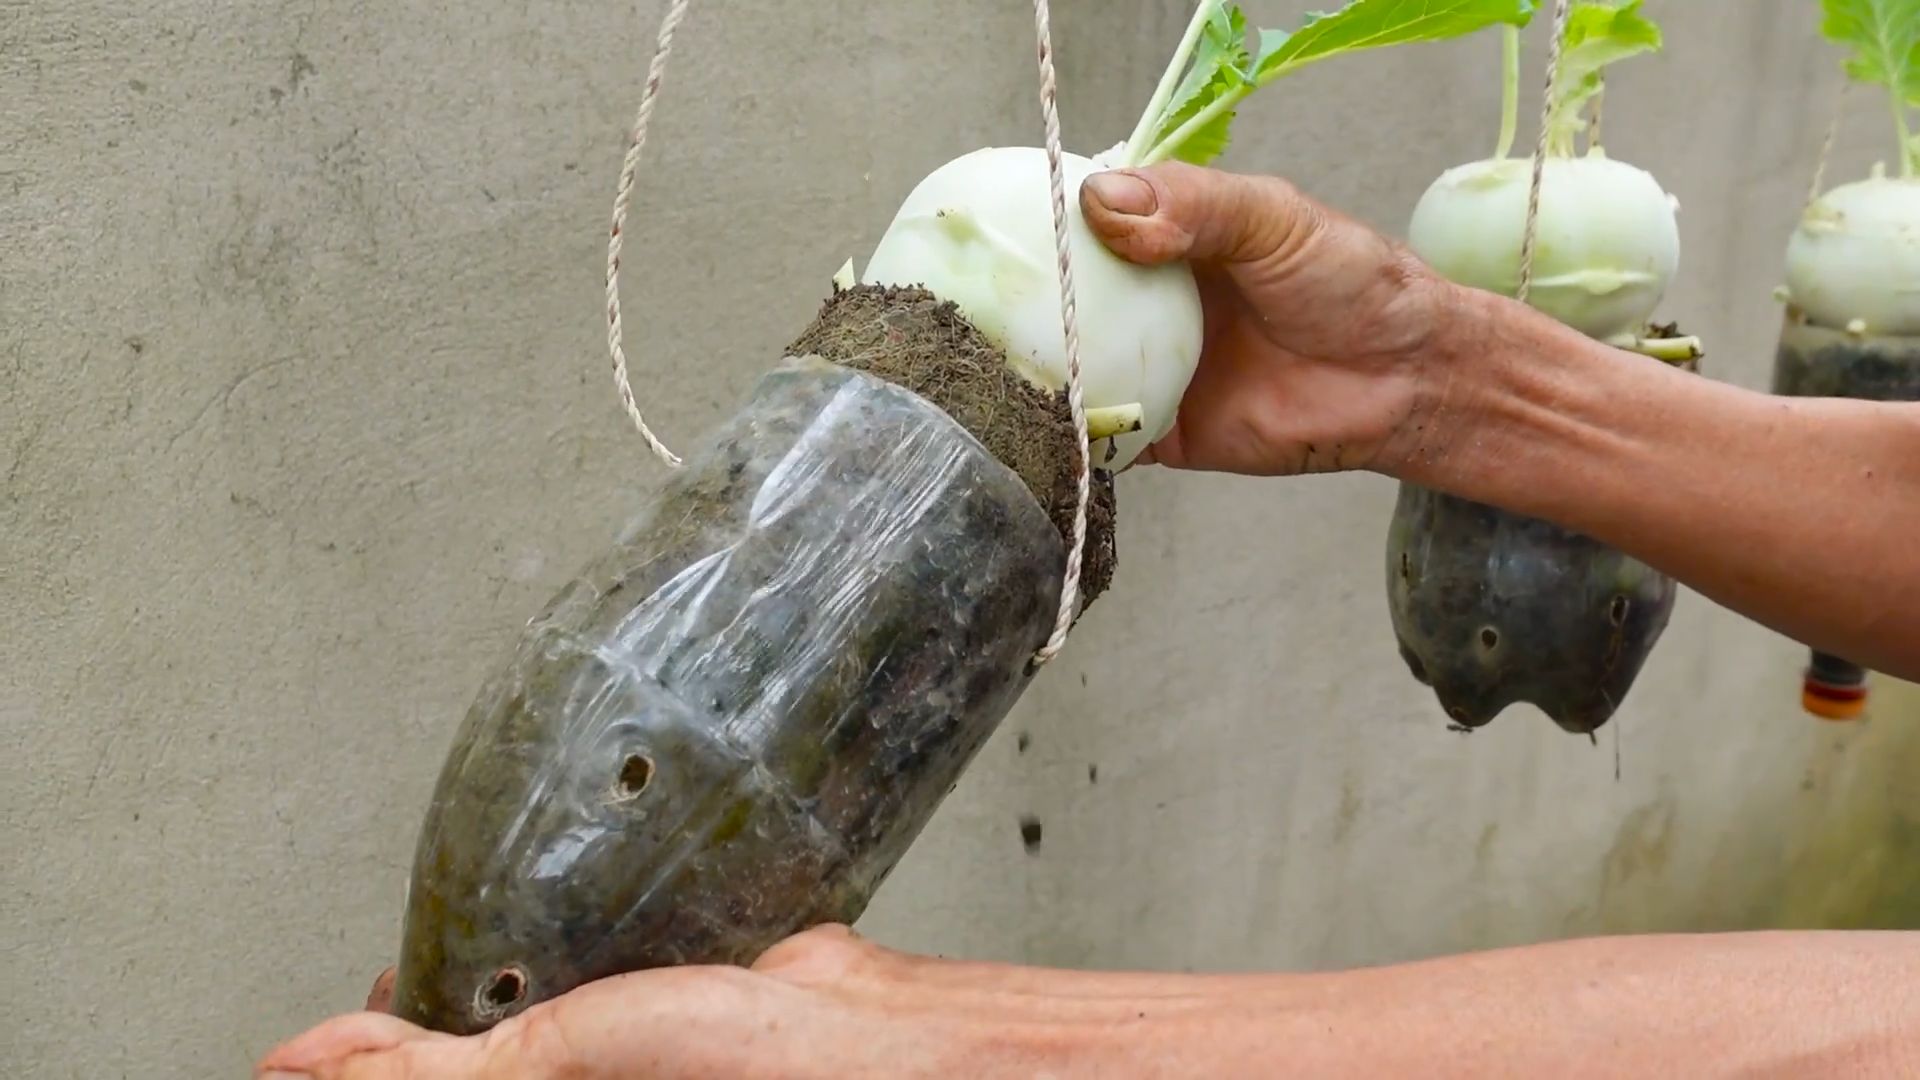
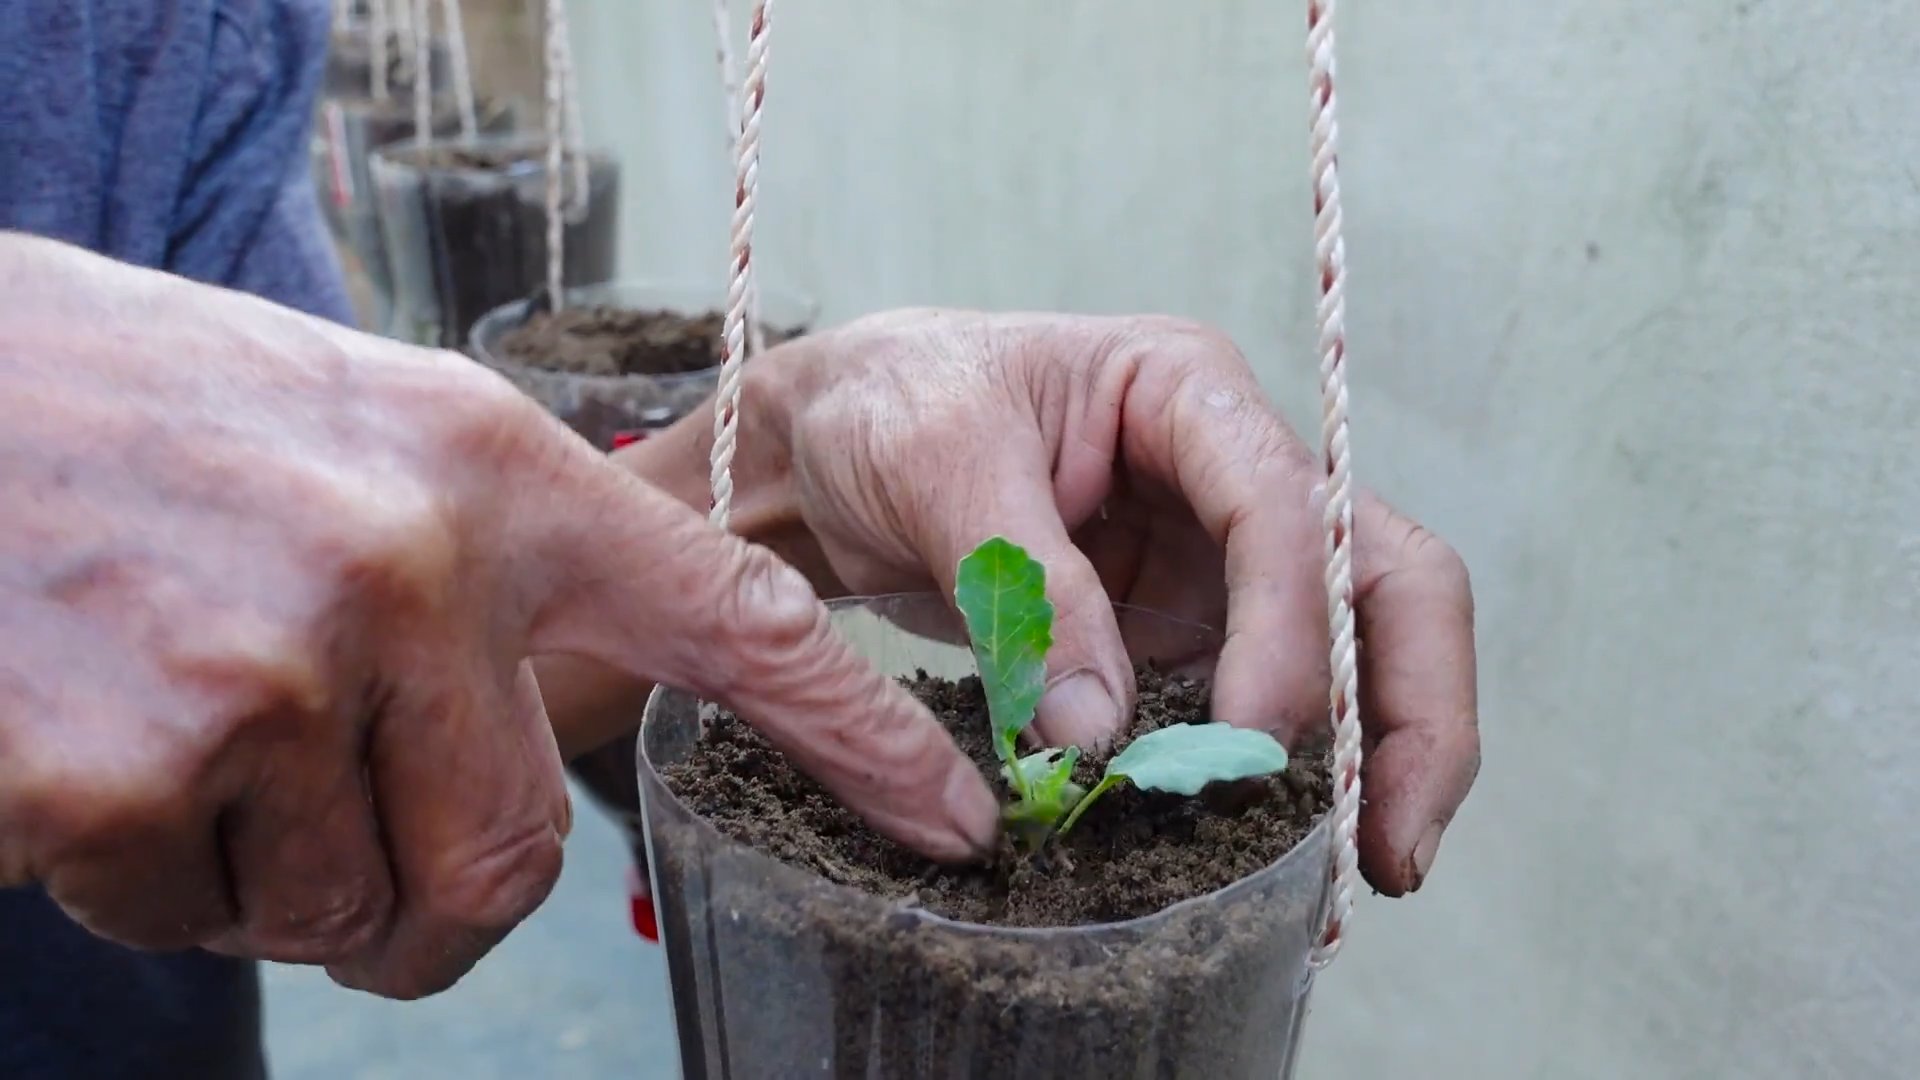
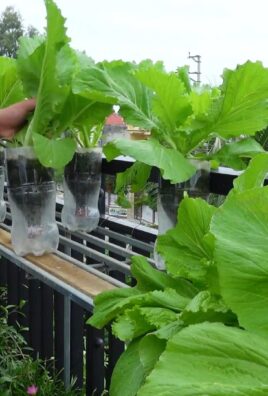
Beyond the basic planting guide, there are numerous exciting variations you can explore. Experiment with different kohlrabi varieties – some boast vibrant purple hues, while others offer a milder, sweeter taste. Consider companion planting, incorporating herbs like rosemary or thyme near your kohlrabi to deter pests and enhance the overall health of your plants. If space is limited, try vertical gardening techniques, using trellises or hanging planters to maximize your yield. For those with less sunlight, explore the possibility of growing kohlrabi in containers, ensuring they receive adequate light and water. Don’t be afraid to get creative and adapt the techniques to your specific environment and preferences. The possibilities are endless!
We strongly encourage you to embark on this rewarding journey of growing your own kohlrabi. Share your experiences with us! Post pictures of your thriving kohlrabi plants and your delicious harvest on social media using #DIYKohlrabi or #HomegrownKohlrabi. We’d love to see your success stories and learn from your experiences. Remember, even minor adjustments to the techniques outlined here can lead to significant improvements in your yield and overall satisfaction. Don’t be discouraged by minor setbacks – gardening is a learning process, and every season brings new opportunities for growth and improvement. So, grab your seeds, prepare your soil, and get ready to enjoy the fruits (or rather, the bulbs!) of your labor. Happy gardening!
Frequently Asked Questions
What type of soil is best for growing kohlrabi?
Kohlrabi thrives in loose, well-drained soil rich in organic matter. Amend heavy clay soils with compost or other organic materials to improve drainage and aeration. Sandy soils may benefit from the addition of peat moss or other organic matter to retain moisture. A slightly acidic to neutral pH (6.0-7.0) is ideal. Testing your soil’s pH before planting is highly recommended to ensure optimal conditions. You can purchase soil testing kits at most garden centers.
How much sunlight does kohlrabi need?
Kohlrabi requires at least six hours of direct sunlight per day for optimal growth. Choose a location in your garden that receives ample sunlight, preferably in a sunny spot that is not shaded by taller plants or structures. Insufficient sunlight can lead to poor growth and reduced yields. If you have limited sunlight, consider growing kohlrabi in containers that can be moved to sunnier locations throughout the day.
When is the best time to plant kohlrabi?
The best time to plant kohlrabi is in the spring or fall, depending on your climate. In cooler climates, spring planting is generally preferred, allowing the plants to mature before the onset of hot summer weather. In warmer climates, fall planting may be more suitable, as it avoids the intense summer heat. Check your local frost dates to determine the optimal planting time for your region. You can also start seeds indoors several weeks before the last expected frost for an earlier harvest.
How often should I water my kohlrabi?
Consistent watering is crucial for healthy kohlrabi growth. Aim to keep the soil consistently moist but not waterlogged. Water deeply and regularly, especially during dry periods. The frequency of watering will depend on your climate, soil type, and weather conditions. Monitor the soil moisture regularly and adjust your watering schedule accordingly. Mulching around the plants can help retain soil moisture and reduce the frequency of watering.
What are some common pests and diseases that affect kohlrabi?
Kohlrabi can be susceptible to various pests and diseases, including aphids, flea beetles, cabbage worms, and fungal diseases like black rot and clubroot. Regularly inspect your plants for signs of pests or diseases. Implement preventative measures such as crop rotation, companion planting, and the use of organic pest control methods to minimize the risk of infestations. Early detection and prompt treatment are crucial for managing pest and disease problems effectively. Consider using insecticidal soap or neem oil for pest control, and ensure good air circulation to prevent fungal diseases.
How long does it take for kohlrabi to mature?
The time it takes for kohlrabi to mature depends on the variety and growing conditions. Early-maturing varieties may be ready for harvest in as little as 50-60 days, while later-maturing varieties may take up to 70-80 days. Harvest kohlrabi when the bulbs are firm and approximately 2-3 inches in diameter. Overgrown bulbs can become tough and woody. Regular harvesting encourages continued production. Pay close attention to the specific maturity time indicated on your seed packet or plant tag.
Leave a Comment