
Dust-free furniture maintenance – sounds like a dream, right? I know I’ve certainly wished for a magic wand to banish dust bunnies from my home! But what if I told you that achieving a consistently clean and dust-free home is more attainable than you think, and doesn’t require endless hours of scrubbing?
For centuries, keeping homes clean has been a fundamental part of human culture. From ancient civilizations using natural oils to polish wooden surfaces to our modern-day obsession with spotless interiors, the desire for a clean and comfortable living space is deeply ingrained. But let’s face it, in today’s busy world, who has the time for constant dusting? That’s where these clever DIY tricks come in!
This article is your ultimate guide to simple, effective, and often overlooked methods for keeping your furniture sparkling clean. We’ll explore easy-to-implement strategies that not only minimize dust accumulation but also protect and prolong the life of your beloved furniture pieces. Imagine spending less time dusting and more time enjoying your beautifully maintained home. Ready to say goodbye to those pesky dust particles? Let’s dive into these game-changing dust-free furniture maintenance hacks!

DIY Dust-Free Furniture Maintenance: A Comprehensive Guide
Hey there, fellow DIY enthusiasts! I’m so excited to share my tried-and-true method for keeping furniture dust-free for longer. We all know the struggle – you dust meticulously, and within days, that annoying layer of grime is back. But fear not! This guide will walk you through a simple yet effective routine that will significantly reduce dust accumulation and keep your furniture looking its best.
Understanding the Enemy: Dust Composition
Before we dive into the how-to, let’s understand what we’re fighting. Dust isn’t just dirt; it’s a complex mixture of:
* Dead skin cells (yuck, I know!)
* Pet dander
* Pollen
* Dust mites and their droppings (double yuck!)
* Fabric fibers
* Dirt and soil particles
* Air pollution particles
Knowing this helps us understand why simply wiping with a dry cloth isn’t enough. We need to trap and remove these particles effectively.
The Arsenal: What You’ll Need
To wage war on dust, you’ll need the following supplies:
* Microfiber cloths: These are your best friends! They trap dust instead of just pushing it around. I recommend having several on hand.
* A vacuum cleaner with a soft brush attachment: Essential for upholstery and hard-to-reach areas.
* A spray bottle: For your homemade dusting solution.
* White vinegar: A natural cleaner and disinfectant.
* Olive oil: Adds shine and helps repel dust.
* Lemon essential oil (optional): For a fresh scent and added cleaning power.
* Distilled water: To dilute the vinegar and oil.
* Furniture polish (optional, but choose wisely): If you prefer a commercial polish, opt for one that’s silicone-free. Silicone can attract dust over time.
* A bowl or bucket: For mixing your cleaning solution.
* A soft-bristled brush: For intricate carvings and details.
* A damp cloth or sponge: For cleaning surfaces after dusting.
Phase 1: Preparing Your Furniture
This initial step is crucial for maximizing the effectiveness of our dust-busting efforts.
1. Clear the area: Remove any items from the furniture surface, such as lamps, books, or decorative objects. This allows you to clean the entire surface thoroughly.
2. Vacuum upholstery: Use the soft brush attachment on your vacuum cleaner to gently vacuum upholstered furniture. Pay close attention to crevices, seams, and areas where dust tends to accumulate. I like to go over each area twice to ensure I’ve picked up as much dust as possible.
3. Brush intricate details: For furniture with carvings or intricate details, use a soft-bristled brush to loosen dust from hard-to-reach areas. Gently brush the dust towards an area where you can easily vacuum it up.
4. Pre-treat stains (if necessary): If you notice any stains on your furniture, address them before dusting. Use a stain remover appropriate for the fabric or material. Always test the stain remover in an inconspicuous area first to ensure it doesn’t damage the finish.
Phase 2: Crafting Your Dust-Repelling Solution
Now, let’s create our secret weapon against dust! I swear by this homemade solution; it’s natural, effective, and smells amazing.
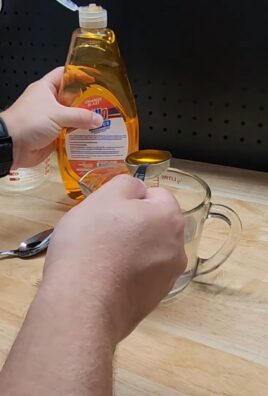
1. Gather your ingredients: You’ll need white vinegar, olive oil, lemon essential oil (optional), and distilled water.
2. Mix the solution: In your bowl or bucket, combine the following:
* 1/4 cup white vinegar
* 1/2 cup olive oil
* 1 cup distilled water
* 10-15 drops of lemon essential oil (optional)
3. Combine thoroughly: Whisk the ingredients together until they are well combined. The olive oil and water may separate slightly, but that’s okay.
4. Transfer to spray bottle: Pour the mixture into your spray bottle. Shake well before each use to ensure the ingredients are properly mixed.
Phase 3: The Dusting Process
This is where the magic happens! We’ll use our homemade solution and microfiber cloths to effectively remove dust and leave a protective layer.
1. Spray lightly: Lightly spray your microfiber cloth with the dusting solution. Avoid spraying the furniture directly, as this can lead to over-saturation and potential damage.
2. Wipe in sections: Wipe the furniture surface in small, overlapping sections. Use a gentle, circular motion to lift dust and grime.
3. Flip and repeat: As your microfiber cloth becomes saturated with dust, flip it over to a clean side. Continue wiping until the entire surface is clean.
4. Buff to a shine: Once you’ve wiped the entire surface, use a clean, dry microfiber cloth to buff the furniture to a shine. This will remove any excess solution and leave a protective layer of olive oil.
5. Address intricate details: For furniture with carvings or intricate details, use a soft-bristled brush to apply the dusting solution to hard-to-reach areas. Then, use a clean microfiber cloth to wipe away any excess solution.
6. Clean glass surfaces: If your furniture has glass surfaces, use a separate glass cleaner to remove any streaks or smudges. I like to use a mixture of equal parts white vinegar and water.
7. Allow to dry: Allow the furniture to air dry completely before replacing any items on the surface. This will prevent water spots and ensure the protective layer of olive oil is properly absorbed.
Phase 4: Maintaining Your Dust-Free Furniture
Consistency is key! Follow these tips to keep your furniture dust-free for longer.
1. Dust regularly: Aim to dust your furniture at least once a week, or more often if you live in a dusty environment.
2. Change your air filters: Regularly changing your air filters can significantly reduce the amount of dust in your home. I try to change mine every three months.
3. Vacuum frequently: Vacuum your floors and carpets regularly to remove dust and pet dander.
4. Control humidity: High humidity can attract dust mites. Use a dehumidifier to keep the humidity level in your home below 50%.
5. Wash bedding regularly: Wash your bedding at least once a week to remove dust mites and allergens.
6. Declutter: The less clutter you have, the less dust will accumulate.
7. Consider an air purifier: An air purifier can help remove dust, pollen, and other allergens from the air.
8. Use dust covers: For furniture that’s not used frequently, consider using dust covers to protect it from dust accumulation.
9. Avoid using dusting sprays with silicone: As mentioned earlier, silicone can attract dust over time.
10. Embrace natural fibers: Opt for furniture and upholstery made from natural fibers, such as cotton or linen, which tend to attract less dust than synthetic materials.
Troubleshooting: Common Issues and Solutions
Even with the best techniques, you might encounter a few hiccups. Here’s how to handle them:
* Streaky finish: If you notice streaks after dusting, you may be using too much solution. Try using a drier microfiber cloth to buff the surface.
* Sticky residue: If your furniture feels sticky after dusting, you may need to dilute your solution further. Try adding more distilled water.
* Dull finish: If your furniture looks dull after dusting, you may need to add more olive oil to your solution.
* Allergic reaction: If you experience an allergic reaction to the dusting solution, discontinue use immediately. Try using a different solution or consult with a doctor.
A Note on Different Furniture Types
This method is generally safe for most types of furniture, but here are a few things to keep in mind:
* Wood furniture: Always test your dusting solution in an inconspicuous area first to ensure it doesn’t damage the finish.
* Leather furniture: Use a leather conditioner after dusting to keep the leather supple and prevent cracking.
* Upholstered furniture: Be careful not to over-saturate the fabric with the dusting solution.
* Antique furniture: Consult with a professional before cleaning antique furniture, as it may require special care.
Final Thoughts
Keeping your furniture dust-free doesn’t have to be a daunting task. By following these simple steps and maintaining a regular cleaning routine, you can enjoy a cleaner, healthier home and furniture that looks its best. Happy dusting!

Conclusion
So, there you have it! This simple, yet incredibly effective DIY trick for dust-free furniture maintenance is a game-changer for anyone tired of constantly battling dust bunnies. We’ve all been there, spending precious weekend hours dusting only to find a fresh layer settled back down within days. This method offers a proactive approach, creating a barrier that repels dust and keeps your furniture looking cleaner for longer.
Why is this a must-try? Because it’s economical, using ingredients you likely already have in your home. It’s also gentle on your furniture, avoiding harsh chemicals that can damage finishes over time. And most importantly, it saves you time and effort in the long run. Imagine reclaiming those hours spent dusting and using them for activities you actually enjoy!
But the beauty of this DIY trick lies in its adaptability. Feel free to experiment with different essential oils to find a scent that you love and that complements your home’s décor. Lavender, lemon, and cedarwood are all excellent choices known for their pleasant aromas and potential dust-repelling properties. You could also adjust the ratio of ingredients slightly to suit your specific furniture types. For instance, if you have delicate antique furniture, you might want to use a slightly more diluted solution.
Consider adding a small amount of beeswax to the mixture for an extra layer of protection and shine, especially for wooden furniture. Just be sure to melt the beeswax properly and incorporate it thoroughly into the solution. Another variation involves using a microfiber cloth specifically designed for dusting. These cloths are excellent at trapping dust particles and preventing them from simply being redistributed into the air.
We are confident that once you try this DIY dust-free furniture maintenance trick, you’ll wonder how you ever lived without it. It’s a simple, sustainable, and effective way to keep your home looking its best.
Now, we want to hear from you! Give this DIY trick a try and share your experiences in the comments below. Did it work as well for you as it did for us? Did you experiment with any variations? What scents did you use? Your feedback is invaluable and helps us refine and improve our recommendations. Let’s create a community of dust-free homes together! Don’t forget to share this article with your friends and family who are also tired of the endless dusting cycle. Let’s spread the word and help everyone enjoy cleaner, more beautiful homes with less effort.
Frequently Asked Questions (FAQs)
Q: What type of furniture is this DIY dust-free maintenance trick suitable for?
A: This trick is generally safe for most types of furniture, including wood, leather, and upholstered pieces. However, it’s always a good idea to test a small, inconspicuous area first, especially if you’re dealing with antique or delicate furniture. This will help you ensure that the solution doesn’t damage the finish or fabric. Avoid using it on unfinished wood, as the moisture could cause warping or staining. For leather furniture, use a very light hand and ensure the solution is well-diluted to prevent drying.
Q: How often should I apply this DIY dust-free maintenance solution?
A: The frequency of application will depend on several factors, including the amount of dust in your home, the type of furniture, and your personal preferences. As a general guideline, we recommend applying the solution every 2-4 weeks. If you live in a particularly dusty environment or have pets that shed a lot, you may need to apply it more frequently. Conversely, if your home is relatively clean, you may be able to extend the time between applications. Observe your furniture and reapply when you notice dust starting to accumulate.
Q: Can I use any type of essential oil in this DIY dust-free maintenance solution?
A: While you can technically use any essential oil, some are better suited for this purpose than others. Essential oils with natural dust-repelling properties, such as lavender, lemon, cedarwood, eucalyptus, and tea tree oil, are excellent choices. These oils also offer pleasant aromas that can freshen up your home. Avoid using essential oils that are known to stain or discolor fabrics, especially on light-colored furniture. Always dilute the essential oil properly before applying it to your furniture.
Q: What if I don’t have essential oils? Can I still use this DIY dust-free maintenance trick?
A: Yes, you can still use this trick even without essential oils. The base solution of water and vinegar (or lemon juice) will still help to repel dust and clean your furniture. The essential oils simply add an extra layer of protection and a pleasant scent. If you don’t have essential oils, you can add a few drops of your favorite fragrance oil or simply use the base solution on its own.
Q: Will this DIY dust-free maintenance solution leave a residue on my furniture?
A: When applied correctly, this solution should not leave a noticeable residue. However, it’s important to use the solution sparingly and to wipe away any excess moisture with a clean, dry cloth. If you notice a residue, it could be due to using too much solution or not wiping it away properly. Try diluting the solution further or using a different type of cloth.
Q: Is this DIY dust-free maintenance solution safe for children and pets?
A: While the ingredients in this solution are generally considered safe, it’s always a good idea to exercise caution when using any cleaning product around children and pets. Keep the solution out of reach of children and pets, and avoid spraying it directly onto surfaces that they may come into contact with. If you’re concerned about potential allergies or sensitivities, test the solution on a small, inconspicuous area first. If your pet ingests the solution, contact your veterinarian immediately.
Q: Can I use this DIY dust-free maintenance solution on electronics?
A: No, this solution is not recommended for use on electronics. The moisture in the solution could damage sensitive electronic components. Instead, use a dry microfiber cloth specifically designed for cleaning electronics.
Q: How do I store the leftover DIY dust-free maintenance solution?
A: Store the leftover solution in a clean, airtight spray bottle in a cool, dark place. This will help to prevent the essential oils from degrading and the solution from becoming contaminated. Be sure to label the bottle clearly so that you don’t accidentally use it for something else. The solution should last for several weeks when stored properly.
Q: I have very dusty furniture. Should I dust it first before applying the solution?
A: Yes, it’s always a good idea to dust your furniture first before applying the DIY dust-free maintenance solution. This will remove any loose dust and debris, allowing the solution to penetrate the surface more effectively. Use a microfiber cloth or a vacuum cleaner with a soft brush attachment to dust your furniture thoroughly.

Leave a Comment