
DIY Natural Peroxide Cleaner: Are you tired of harsh chemicals lurking in your cleaning supplies? Do you dream of a sparkling clean home without the worry of exposing your family and pets to potentially harmful toxins? I know I do! That’s why I’m so excited to share this simple, effective, and incredibly affordable DIY trick with you.
For generations, resourceful homemakers have sought natural alternatives to commercial cleaning products. While the exact origins of using peroxide for cleaning are difficult to pinpoint, its disinfecting properties have been recognized for decades. Think of it as a modern twist on age-old wisdom, harnessing the power of readily available ingredients for a healthier home.
In today’s world, where we’re increasingly conscious of the environmental impact and potential health risks associated with synthetic chemicals, creating your own DIY Natural Peroxide Cleaner is more relevant than ever. Not only will you be reducing your exposure to harsh substances, but you’ll also be saving money and contributing to a more sustainable lifestyle. This simple hack is a game-changer for anyone looking to create a cleaner, healthier, and happier home environment. Let’s dive in and discover how easy it is!
DIY Natural Peroxide Cleaner: A Sparkling Home, Naturally!
Hey everyone! I’m so excited to share one of my favorite DIY cleaning hacks with you: a natural peroxide cleaner! I’ve been using this for years, and it’s seriously a game-changer. It’s effective, eco-friendly, and saves you a ton of money compared to store-bought cleaners. Plus, you know exactly what’s going into it – no harsh chemicals or mystery ingredients!
This cleaner is fantastic for disinfecting surfaces, brightening laundry, and even tackling tough stains. I use it in my kitchen, bathroom, and pretty much everywhere else in my house. Let’s dive into how to make it!
What You’ll Need
Before we get started, let’s gather our supplies. This is a super simple recipe, so you probably already have most of these things on hand.
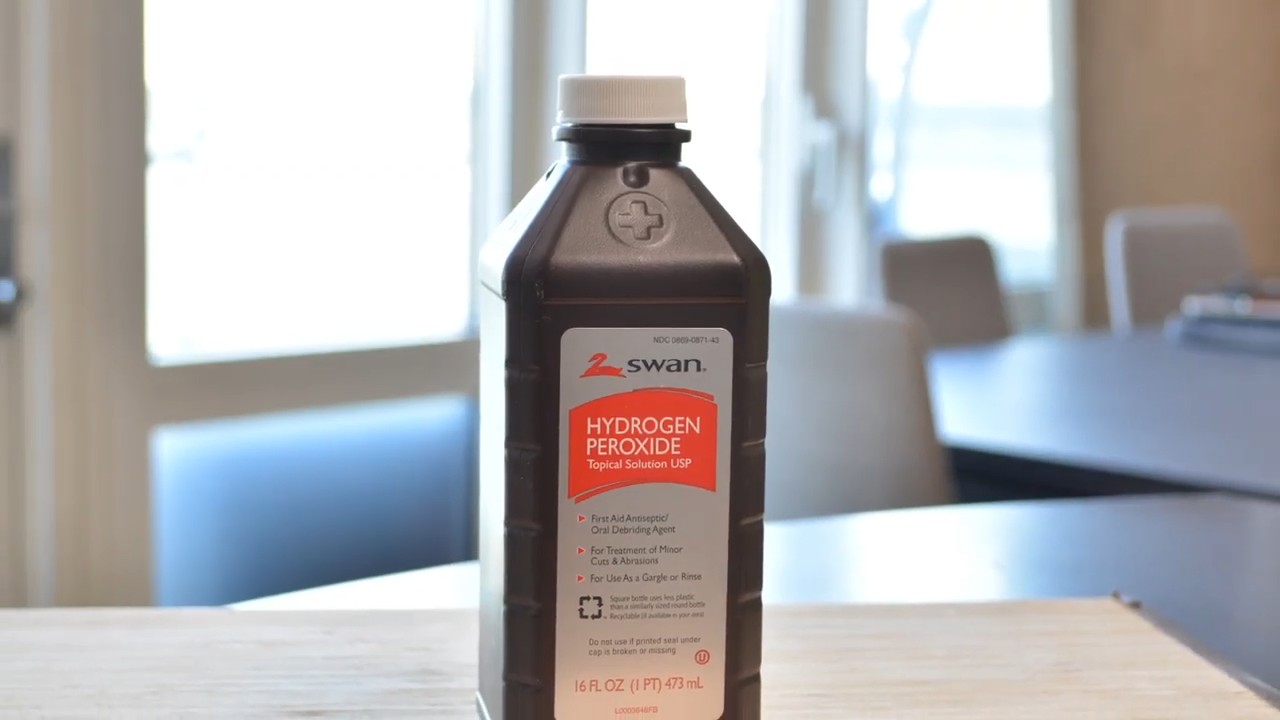
* **Hydrogen Peroxide (3%):** This is the star of the show! You can find it at any drugstore or supermarket. Make sure it’s the standard 3% solution.
* **Distilled Water:** Using distilled water helps prevent mineral buildup and keeps your cleaner fresh for longer. Tap water is okay in a pinch, but distilled is best.
* **White Vinegar:** Vinegar adds extra cleaning power and helps cut through grease and grime.
* **Lemon Essential Oil (Optional):** This adds a lovely scent and has some antibacterial properties. You can substitute with other essential oils like tea tree, lavender, or eucalyptus, depending on your preference.
* **Spray Bottle:** A clean, empty spray bottle is essential for dispensing your cleaner. I recommend using a dark-colored bottle to protect the hydrogen peroxide from light, which can degrade its effectiveness.
* **Measuring Cups and Spoons:** For accurate measurements.
* **Funnel (Optional):** Makes pouring liquids into the spray bottle easier and less messy.
Step-by-Step Instructions
Alright, let’s get mixing! This is so easy, you’ll be done in minutes.
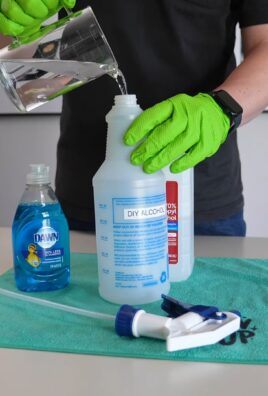
1. **Prepare Your Spray Bottle:** Make sure your spray bottle is clean and dry. If you’ve used it for other cleaners before, rinse it thoroughly with soap and water to remove any residue.
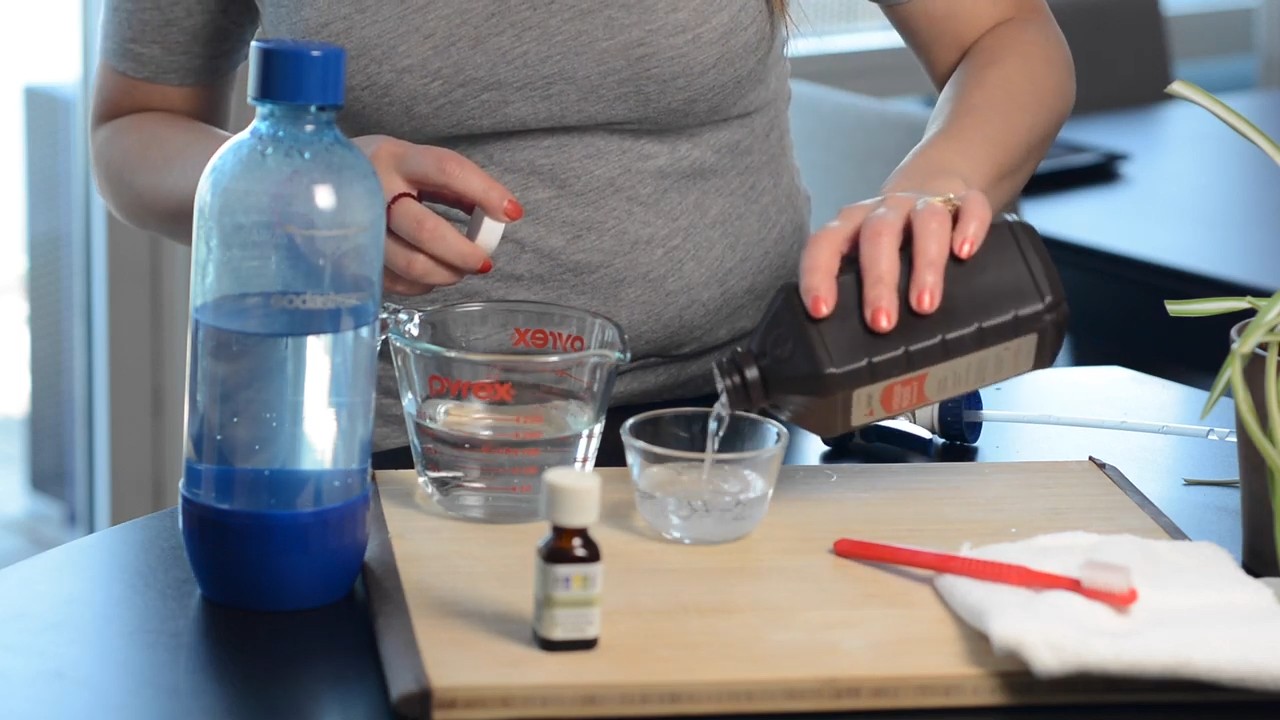
2. **Combine Hydrogen Peroxide and Water:** In your measuring cup, combine 1 cup of 3% hydrogen peroxide and 1 cup of distilled water. Pour this mixture into your spray bottle using a funnel if desired.
3. **Add White Vinegar:** Now, add 1/2 cup of white vinegar to the spray bottle. Be careful when mixing hydrogen peroxide and vinegar, as they can create peracetic acid, which can be irritating in high concentrations. The amounts we are using are safe for cleaning, but always ensure good ventilation.
4. **Add Essential Oil (Optional):** If you’re using essential oil, add 10-15 drops to the spray bottle. I love the fresh scent of lemon, but feel free to experiment with other oils.
5. **Shake Well:** Secure the spray nozzle onto the bottle and shake well to combine all the ingredients.
6. **Label Your Bottle:** This is important! Label your bottle clearly as “Natural Peroxide Cleaner” so you don’t accidentally mix it up with other cleaning products.
Using Your Natural Peroxide Cleaner
Now that you’ve made your cleaner, let’s put it to work! Here are some of my favorite ways to use it:
* **Kitchen Countertops:** Spray the cleaner onto your countertops and wipe clean with a damp cloth. It’s great for disinfecting after preparing food.
* **Bathroom Surfaces:** Use it on sinks, toilets, and showers to kill germs and remove soap scum.
* **Cutting Boards:** Spray your cutting boards with the cleaner after each use to prevent the spread of bacteria. Let it sit for a few minutes before rinsing.
* **Laundry Stain Remover:** Spray the cleaner directly onto stains before washing. It works wonders on blood, grass, and other tough stains. Always test on an inconspicuous area first to ensure colorfastness.
* **Toilet Bowl Cleaner:** Pour about 1/2 cup of the cleaner into your toilet bowl and let it sit for 15-20 minutes before scrubbing and flushing.
* **Floor Cleaner:** Add 1/4 cup of the cleaner to a bucket of warm water and use it to mop your floors. This is safe for most floor types, but always test in an inconspicuous area first.
* **Brightening Laundry:** Add 1 cup of the cleaner to your washing machine along with your regular detergent to brighten whites and remove stains.
Important Safety Tips
While this cleaner is natural, it’s still important to use it safely.
* **Never Mix with Bleach:** Mixing hydrogen peroxide with bleach can create toxic fumes. Always use them separately.
* **Test on Inconspicuous Areas:** Before using the cleaner on any surface, test it on a small, hidden area to make sure it doesn’t cause any discoloration or damage.
* **Avoid Contact with Eyes:** Hydrogen peroxide can irritate your eyes. If you get it in your eyes, rinse them thoroughly with water.
* **Store in a Dark Bottle:** Light can degrade the effectiveness of hydrogen peroxide, so store your cleaner in a dark-colored bottle.
* **Keep Out of Reach of Children and Pets:** As with all cleaning products, keep this cleaner out of reach of children and pets.
* **Ventilation:** Ensure good ventilation when using the cleaner, especially in enclosed spaces.
Troubleshooting
Sometimes, things don’t go exactly as planned. Here are some common issues you might encounter and how to fix them:
* **Cleaner Smells Too Strong:** If the vinegar smell is too strong for you, reduce the amount of vinegar or add more essential oil.
* **Cleaner Doesn’t Seem to Be Working:** Make sure you’re using fresh hydrogen peroxide. It can lose its effectiveness over time. Also, try letting the cleaner sit on the surface for a few minutes before wiping it clean.
* **Spray Bottle Clogs:** This can happen if you’re using tap water with a lot of minerals. Try using distilled water instead. You can also try cleaning the spray nozzle with a pin or needle.
* **Discoloration on Surfaces:** If you notice any discoloration, stop using the cleaner immediately and rinse the surface with water. This is rare, but it can happen on certain materials.
Why This Cleaner Works
You might be wondering why this simple cleaner is so effective. Here’s a little science behind it:
* **Hydrogen Peroxide:** Hydrogen peroxide is a powerful oxidizing agent, which means it can kill bacteria, viruses, and fungi. It also helps to break down stains and brighten surfaces.
* **White Vinegar:** Vinegar is a natural acid that helps to dissolve grease, grime, and mineral deposits. It also has some antibacterial properties.
* **Lemon Essential Oil:** Lemon essential oil is a natural disinfectant and deodorizer. It also adds a pleasant scent.
The combination of these ingredients creates a powerful and effective cleaner that is safe for your home and the environment.
Variations and Add-Ins
Want to customize your cleaner even further? Here are some ideas:
* **Tea Tree Oil:** Add tea tree oil for extra antibacterial power. It’s great for cleaning bathrooms and kitchens.
* **Eucalyptus Oil:** Eucalyptus oil has a refreshing scent and can help to clear congestion. It’s a good choice for cleaning during cold and flu season.
* **Baking Soda:** Add a tablespoon of baking soda to the mixture for extra scrubbing power. This is great for cleaning sinks and tubs.
* **Castile Soap:** Add a teaspoon of castile soap for extra cleaning power. This is a gentle and natural soap that is safe for most surfaces.
Frequently Asked Questions
I get a lot of questions about this cleaner, so I thought I’d answer some of the most common ones here:
* **Can I use this cleaner on granite countertops?** It’s generally not recommended to use vinegar on granite, as it can etch the surface over time. You can still use the hydrogen peroxide and water mixture, but skip the vinegar.
* **How long does this cleaner last?** This cleaner will last for about 1-2 months. After that, the hydrogen peroxide may start to lose its effectiveness.
* **Can I use this cleaner on wood floors?** It’s best to avoid using this cleaner on wood floors, as the vinegar can damage the finish.
* **Can I use this cleaner on stainless steel?** Yes, this cleaner is safe to use on stainless steel. Just be sure to wipe it dry after cleaning to prevent water spots.
* **Is this cleaner safe for pets?** While the ingredients are generally safe, it’s best to keep pets away from the cleaner while you’re using it.
Final Thoughts
I hope you enjoy making and using this natural peroxide cleaner as much as I do! It’s a simple, effective, and eco-friendly way to keep your home sparkling clean. Let me know in the comments if you have any questions or if you try any variations! Happy cleaning!
Conclusion
Forget harsh chemicals and sky-high prices! This DIY Natural Peroxide Cleaner is a game-changer for anyone seeking a powerful, eco-friendly, and budget-conscious cleaning solution. We’ve shown you how simple it is to harness the natural cleaning power of hydrogen peroxide, transforming it into a versatile cleaner that tackles everything from grimy countertops to stubborn stains.
Why is this a must-try? Because it’s effective, safe for your family and pets (when used as directed, of course!), and incredibly cost-effective. You’re not just cleaning; you’re making a conscious choice to reduce your environmental impact and avoid exposing your loved ones to potentially harmful chemicals found in many commercial cleaners. Plus, the satisfaction of creating something so useful with your own two hands is an added bonus!
But the beauty of this DIY Natural Peroxide Cleaner lies in its adaptability. Feel free to experiment with different essential oils to create your own signature scent. Lavender, lemon, tea tree, and eucalyptus are all excellent choices, each offering its own unique aroma and added antibacterial properties. For extra cleaning power on tough stains, consider adding a tablespoon of washing soda to your mixture. Remember to always test in an inconspicuous area first, especially on delicate surfaces.
Ready to ditch the store-bought cleaners and embrace a more natural approach? We urge you to give this DIY Natural Peroxide Cleaner a try. It’s quick, easy, and the results speak for themselves. We’re confident you’ll be amazed at how effectively it cleans and disinfects your home.
And don’t stop there! We want to hear about your experiences. Share your tips, variations, and before-and-after photos in the comments below. Let’s build a community of eco-conscious cleaners and inspire others to make the switch to a healthier, more sustainable way of life. Your feedback is invaluable, and we can all learn from each other’s successes (and even the occasional mishap!). So, grab your ingredients, mix up a batch, and get ready to experience the cleaning power of nature! Let us know how this DIY Natural Peroxide Cleaner transforms your cleaning routine!
Frequently Asked Questions (FAQ)
Is hydrogen peroxide safe to use around pets and children?
Yes, when used responsibly and according to the instructions provided. The 3% hydrogen peroxide solution commonly found in drugstores is generally considered safe for household use. However, it’s crucial to store it out of reach of children and pets, just as you would with any cleaning product. Avoid direct contact with skin and eyes, and always ensure proper ventilation when using it. While diluted hydrogen peroxide is relatively safe, ingestion can cause irritation and discomfort. If ingestion occurs, contact a medical professional or veterinarian immediately. Never mix hydrogen peroxide with other cleaning products, especially bleach, as this can create dangerous fumes. After cleaning surfaces with the DIY Natural Peroxide Cleaner, allow them to air dry completely before allowing children or pets to come into contact with them.
Can I use a higher concentration of hydrogen peroxide?
While higher concentrations of hydrogen peroxide are available, they are not recommended for general household cleaning. These stronger solutions are significantly more corrosive and can cause severe skin and eye irritation, as well as damage to surfaces. Stick to the standard 3% hydrogen peroxide solution for safe and effective cleaning. If you require a stronger cleaning solution for a specific task, consult a professional cleaning service or research appropriate safety precautions and dilution methods for higher concentrations. Always prioritize safety when handling any chemical, even a relatively mild one like hydrogen peroxide.
What surfaces can I safely clean with this DIY Natural Peroxide Cleaner?
This DIY Natural Peroxide Cleaner is generally safe for use on a wide variety of surfaces, including countertops (granite, quartz, laminate), sinks, toilets, showers, floors (tile, linoleum), and appliances. However, it’s always best to test the cleaner in an inconspicuous area first, especially on delicate or porous surfaces like wood, painted surfaces, or fabrics. Avoid using it on natural stone like marble, as it can potentially etch the surface over time. When cleaning electronics, always spray the cleaner onto a cloth first, rather than directly onto the device, to prevent damage. If you are unsure about a particular surface, err on the side of caution and test a small area before proceeding.
How long does the DIY Natural Peroxide Cleaner last?
The DIY Natural Peroxide Cleaner is best used within a few weeks of mixing. Hydrogen peroxide naturally degrades over time, especially when exposed to light and air. To maximize its effectiveness, store the cleaner in a dark-colored spray bottle in a cool, dark place. You’ll notice a decrease in its cleaning power as it degrades, so it’s best to mix a fresh batch every few weeks to ensure optimal results. If you notice the solution losing its fizz or becoming less effective, it’s time to make a new batch.
Can I add other ingredients to this cleaner?
Yes, you can customize this cleaner to suit your specific needs. As mentioned earlier, essential oils are a great addition for fragrance and added antibacterial properties. Washing soda can boost its cleaning power for tough stains. However, avoid mixing hydrogen peroxide with vinegar, as this creates peracetic acid, which can be irritating to the respiratory system. Also, never mix it with bleach, as this can create toxic chlorine gas. Always research the compatibility of any additional ingredients before adding them to your DIY Natural Peroxide Cleaner.
Why is my spray bottle fizzing after I mix the cleaner?
A little fizzing is normal, especially immediately after mixing, as the hydrogen peroxide decomposes slightly. However, excessive fizzing could indicate that the hydrogen peroxide is degrading rapidly or that you’ve added an incompatible ingredient. Make sure you’re using a clean spray bottle and that you haven’t added anything that could react with the hydrogen peroxide. If the fizzing is excessive or continues for an extended period, discard the mixture and start fresh.
Can I use this cleaner to disinfect?
Yes, hydrogen peroxide is a known disinfectant. To effectively disinfect surfaces, spray the DIY Natural Peroxide Cleaner and allow it to sit for at least 5-10 minutes before wiping it away. This dwell time allows the hydrogen peroxide to kill bacteria and viruses. For heavily soiled surfaces, clean them first before disinfecting. Remember that proper disinfection requires adequate contact time, so don’t just spray and wipe immediately.
Is this DIY Natural Peroxide Cleaner septic-safe?
Yes, this cleaner is generally considered septic-safe. Hydrogen peroxide breaks down into water and oxygen, which are not harmful to septic systems. However, it’s always a good idea to use any cleaning product sparingly when you have a septic system. Avoid flushing large quantities of any cleaner down the drain, and ensure that your septic system is properly maintained.
What if I get the cleaner in my eyes?
If you get the DIY Natural Peroxide Cleaner in your eyes, immediately flush them with cool water for at least 15 minutes. Remove contact lenses if possible. Seek medical attention if irritation persists.
How does this DIY Natural Peroxide Cleaner compare to commercial cleaners?
This DIY Natural Peroxide Cleaner offers a natural and eco-friendly alternative to many commercial cleaners. It’s effective at cleaning and disinfecting, and it avoids the harsh chemicals and artificial fragrances found in many store-bought products. While some commercial cleaners may offer specialized formulas for specific cleaning tasks, this DIY cleaner provides a versatile and cost-effective solution for general household cleaning. By making your own cleaner, you have greater control over the ingredients and can avoid potentially harmful chemicals.
Leave a Comment