
DIY Home Decor Ideas – ever feel like your living space is missing that special something? Like it needs a personal touch, a spark of your own unique personality? I know I have! For centuries, people have been adorning their homes, transforming them from mere shelters into reflections of their inner selves. From ancient cave paintings to elaborate Victorian embellishments, the desire to create a beautiful and personalized home is deeply ingrained in human history.
But let’s be honest, not all of us have the budget for a complete interior design overhaul. That’s where the magic of DIY comes in! This article is your treasure map to unlocking a world of creative possibilities, offering simple yet impactful DIY Home Decor Ideas that won’t break the bank. We’ll explore clever hacks and easy projects that can breathe new life into any room, regardless of your skill level.
Why is this so important? Because your home should be your sanctuary, a place where you feel comfortable, inspired, and truly yourself. These DIY tricks and hacks will empower you to create a space that reflects your style, boosts your mood, and makes you genuinely happy to be home. So, grab your tools, unleash your inner artist, and let’s get started on transforming your house into a home you truly love!
DIY Quick Lime Cleaning Power: Revive Your Home!
Hey everyone! I’m super excited to share my go-to method for tackling stubborn grime and buildup using quick lime. Now, before we dive in, a HUGE disclaimer: **Quick lime (calcium oxide) is caustic and can cause burns. Safety is paramount! Always wear gloves, eye protection, and a mask when working with it. Ensure adequate ventilation.** This isn’t a project to rush; take your time and be careful.
This method is fantastic for cleaning drains, removing rust, and even tackling tough stains on concrete. But remember, always test a small, inconspicuous area first to ensure it doesn’t damage the surface.
Safety First! Essential Precautions
Before we even think about mixing anything, let’s get the safety gear sorted. Seriously, don’t skip this part!
* Gloves: Heavy-duty, chemical-resistant gloves are a must. Think the kind you’d use for serious cleaning projects.
* Eye Protection: Goggles, not just glasses, are crucial. You want a tight seal around your eyes to prevent any splashes from getting in.
* Mask: A dust mask or respirator will protect you from inhaling any quick lime particles.
* Ventilation: Work in a well-ventilated area. Open windows and doors, or even better, work outdoors.
* Clothing: Wear old clothes that you don’t mind getting ruined. Long sleeves and pants are recommended.
* Water Source: Keep a source of running water nearby in case of accidental skin contact.
* Children and Pets: Keep children and pets far away from the work area.
Understanding Quick Lime: What It Is and How It Works
Quick lime, or calcium oxide (CaO), is produced by heating limestone. When you add water to it, it undergoes a chemical reaction called slaking, forming calcium hydroxide (Ca(OH)₂), also known as slaked lime or hydrated lime. This reaction generates heat, sometimes a lot of heat! The resulting slaked lime is a strong alkaline substance that can dissolve grease, grime, and other organic matter.
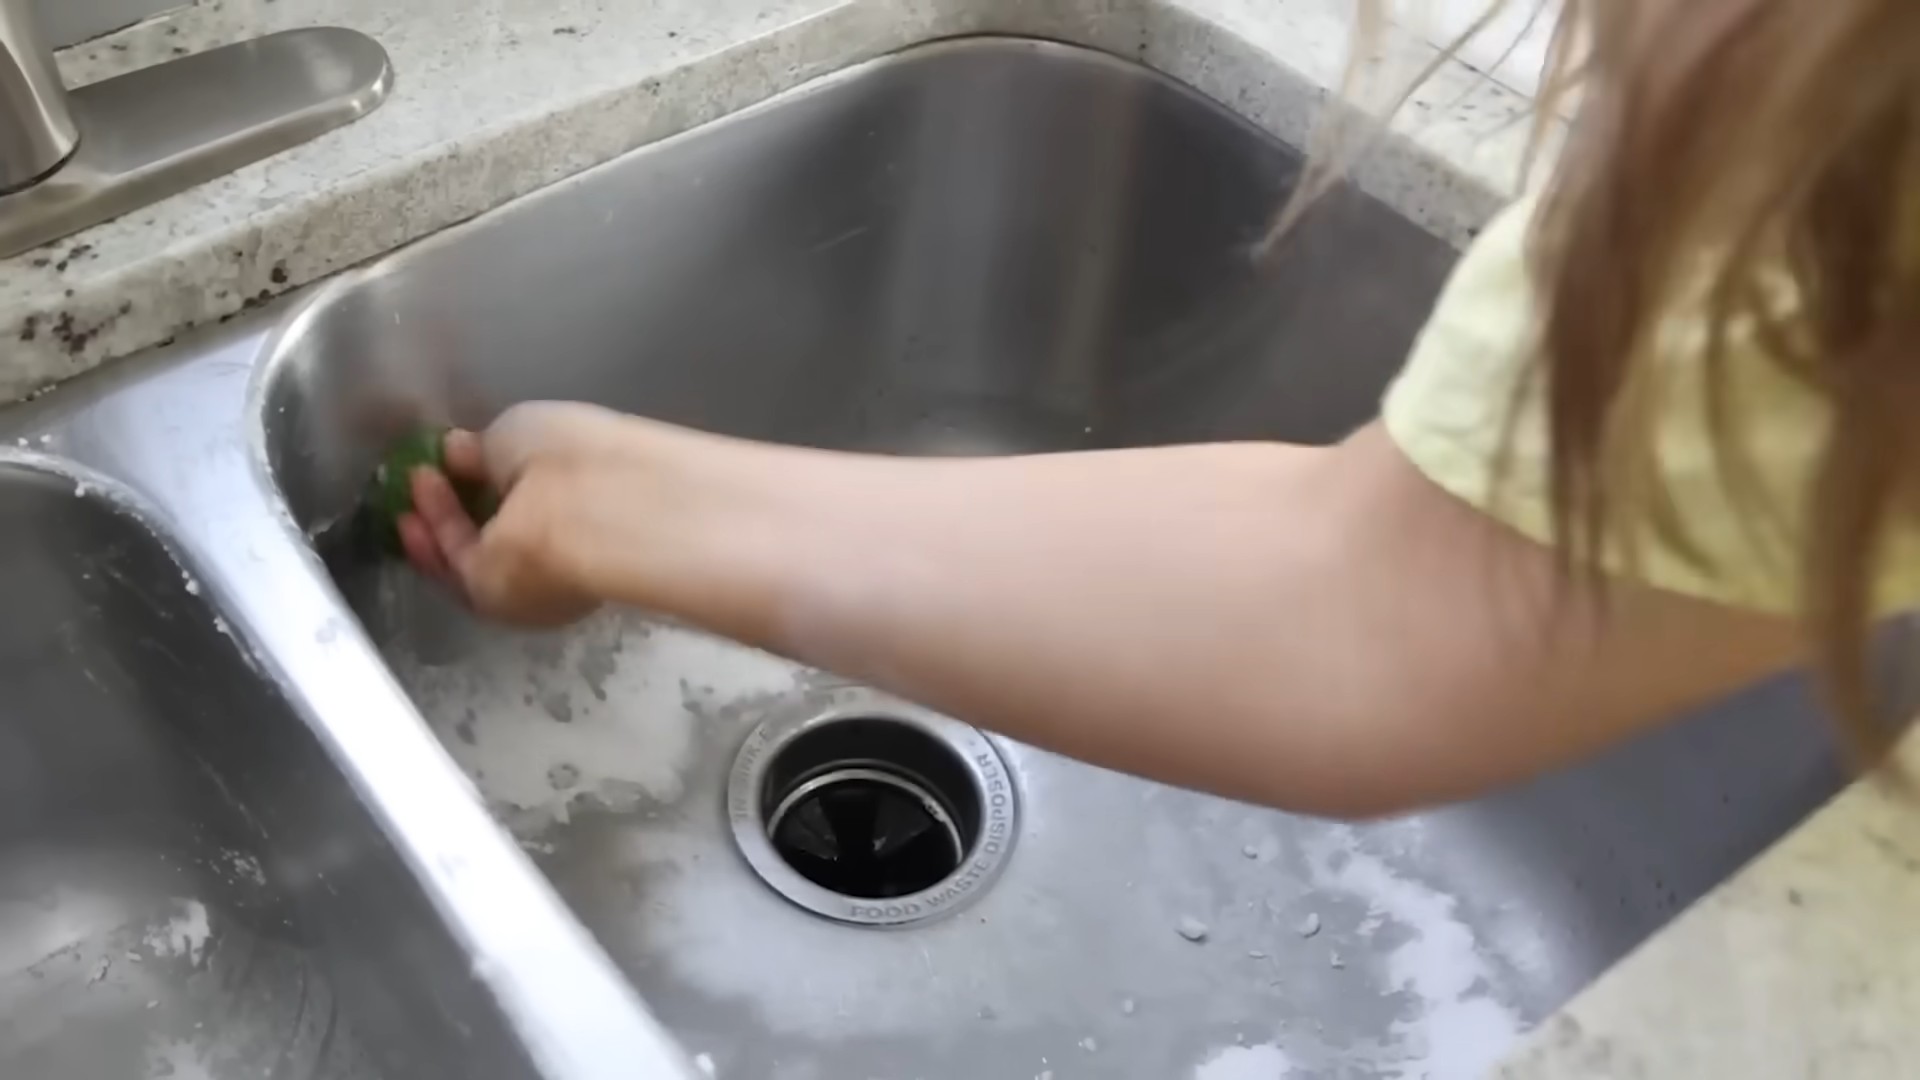
Cleaning Drains with Quick Lime: Unclogging Made Easy (But Safe!)
Clogged drains are the bane of my existence! This method is powerful, but again, be extremely careful.
1. Prepare the Area: Clear the area around the drain. Remove any standing water. Put on your gloves, goggles, and mask.
2. Measure Quick Lime: Carefully measure out about 1/2 cup of quick lime. I like to use a disposable cup or container for this.
3. Slowly Add Water: Slowly and carefully add about 1 cup of cold water to the quick lime. **Remember, this will create heat and steam!** Do it gradually to avoid splashing.
4. Pour into Drain: Once the reaction has subsided a bit (it will still be hot!), carefully pour the mixture down the drain.
5. Let It Sit: Let the mixture sit in the drain for at least 30 minutes, or even longer for stubborn clogs. I usually let it sit for a couple of hours.
6. Flush with Hot Water: After the waiting period, flush the drain with plenty of hot water. Be careful, as the drain may still be hot.
7. Repeat if Necessary: If the drain is still clogged, repeat the process. However, I wouldn’t recommend doing it more than twice in a row. If it’s still clogged after that, you might need to call a plumber.
Important Note: This method is not suitable for all types of pipes. Avoid using it on PVC pipes, as the heat generated can damage them. Cast iron or metal pipes are generally okay, but always proceed with caution.
Removing Rust with Quick Lime: A Powerful Solution
Rust can make anything look old and neglected. Quick lime can help!
1. Prepare the Rusty Object: Remove any loose rust or debris from the object using a wire brush.
2. Create a Quick Lime Paste: In a container, slowly add water to quick lime until you form a thick paste. The consistency should be similar to toothpaste.
3. Apply the Paste: Apply the paste to the rusted areas of the object. Make sure to cover the rust completely.
4. Let It Sit: Let the paste sit for several hours, or even overnight for heavily rusted items.
5. Scrub and Rinse: After the waiting period, scrub the object with a wire brush or scouring pad. The rust should come off easily. Rinse the object thoroughly with water.
6. Dry and Protect: Dry the object completely and apply a rust-preventative coating, such as paint or oil, to prevent future rusting.
Important Note: This method may not be suitable for delicate or antique items. Always test a small, inconspicuous area first.
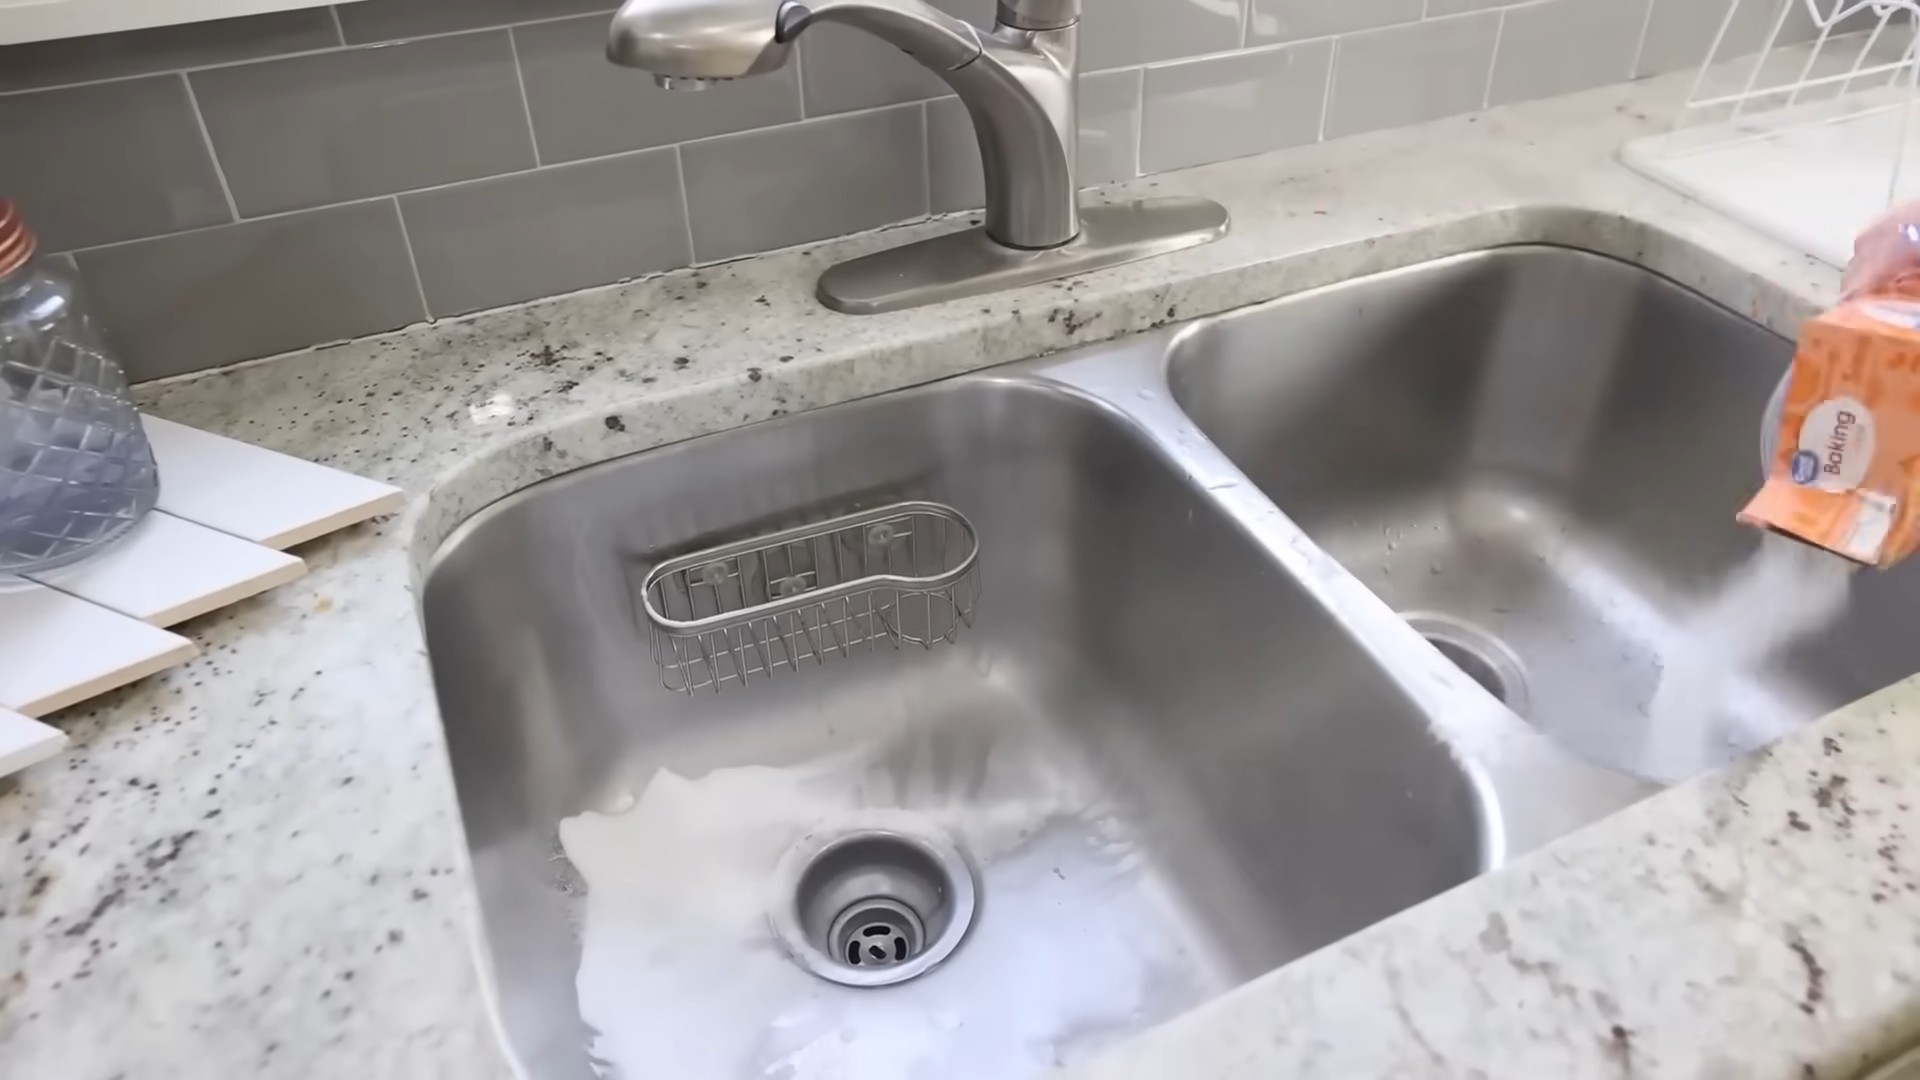
Cleaning Concrete Stains with Quick Lime: Brighten Up Your Surfaces
Concrete stains can be tough to remove, but quick lime can help lift them.
1. Prepare the Concrete Surface: Sweep or vacuum the concrete surface to remove any loose dirt or debris.
2. Create a Quick Lime Solution: In a bucket, slowly add water to quick lime until you create a solution that is the consistency of milk.
3. Apply the Solution: Apply the solution to the stained areas of the concrete. You can use a brush or mop to apply it.
4. Let It Sit: Let the solution sit for several hours, or even overnight for stubborn stains. Keep the area moist by spraying it with water occasionally.
5. Scrub and Rinse: After the waiting period, scrub the concrete with a stiff brush. Rinse the concrete thoroughly with water.
6. Repeat if Necessary: If the stain is still visible, repeat the process.
Important Note: This method can lighten the color of the concrete. Always test a small, inconspicuous area first. Also, be aware that the alkaline nature of the solution can affect plants, so protect any nearby vegetation.
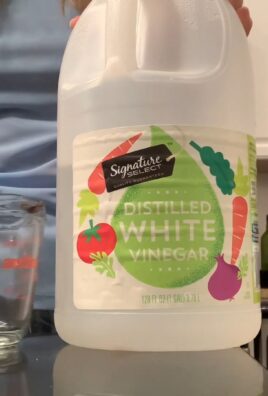
Neutralizing and Disposing of Quick Lime Waste
Once you’re done cleaning, you’ll need to neutralize and dispose of the quick lime waste properly.
1. Neutralize the Waste: Add vinegar or another mild acid to the waste to neutralize the alkalinity. You can test the pH using pH strips to ensure it’s neutral.
2. Dispose of Properly: Once neutralized, you can dispose of the waste in accordance with your local regulations. In most cases, it can be disposed of in the trash. However, it’s always best to check with your local waste management authority.
3. Clean Your Tools: Thoroughly clean all tools and containers that came into contact with quick lime with soap and water.
Troubleshooting: Common Issues and Solutions
* The quick lime isn’t reacting: Make sure you’re using fresh quick lime. If it’s been exposed to air for a long time, it may have already reacted with moisture and lost its effectiveness.
* The drain is still clogged: The clog may be too severe for this method. You may need to use a drain snake or call a plumber.
* The rust isn’t coming off: The rust may be too deeply embedded. You may need to use a more aggressive method, such as sandblasting.
* The concrete stain isn’t lifting: The stain may be permanent. Some stains, such as oil stains, can be very difficult to remove completely.
Alternative Cleaning Solutions (If You’re Hesitant About Quick Lime)
I understand that working with quick lime can be intimidating. If you’re not comfortable using it, here are some alternative cleaning solutions:
* Baking Soda and Vinegar: A classic combination for unclogging drains.
* Commercial Drain Cleaners: Use with caution, as they can be harsh and corrosive.
* Rust Removers: Available at most hardware stores.
* Concrete Cleaners: Designed specifically for cleaning concrete surfaces.
Final Thoughts: Proceed with Caution and Enjoy the Results!
Quick lime can be a powerful cleaning tool, but it’s essential to use it safely and responsibly. Always wear protective gear, work in a well-ventilated area, and follow the instructions carefully. With a little caution and effort, you can achieve amazing results and revive your home! Remember to always test in an inconspicuous area first! Happy cleaning!
Conclusion
So, there you have it! Transforming your living space doesn’t require a hefty budget or professional help. These DIY home decor ideas offer a fantastic way to inject personality, creativity, and a touch of your own unique style into every corner of your home. We’ve explored simple yet impactful projects, from repurposing old materials to crafting eye-catching wall art, all designed to be accessible and enjoyable for everyone.
The beauty of these DIY projects lies in their adaptability. Feel free to experiment with different colors, textures, and materials to perfectly match your existing decor or create a completely new aesthetic. For instance, if you loved the painted mason jar idea, consider using metallic paints for a glamorous touch, or distressing the jars for a rustic, farmhouse vibe. With the floating shelves, think about incorporating live plants for a touch of greenery or displaying your favorite book collection for a personalized library feel.
Remember, the goal is to create a space that reflects who you are and makes you feel comfortable and inspired. Don’t be afraid to step outside the box and let your imagination run wild. These DIY home decor ideas are merely a starting point; the possibilities are truly endless.
What makes these DIY projects a must-try? They offer a cost-effective alternative to expensive store-bought decorations, allowing you to save money while still achieving a stylish and personalized home. They provide a creative outlet, allowing you to express your individuality and develop new skills. And perhaps most importantly, they give you a sense of accomplishment and pride in creating something beautiful with your own two hands.
We strongly encourage you to give these DIY home decor ideas a try. Start with a project that resonates with you and gradually work your way up to more complex designs. Don’t be discouraged if your first attempt isn’t perfect; the learning process is part of the fun. The most important thing is to enjoy the journey and create something that you truly love.
Once you’ve completed your DIY masterpiece, we’d love to see it! Share your creations with us on social media using #DIYHomeDecorMagic. We can’t wait to see how you’ve transformed your space and inspired others with your creativity. Your experiences and insights can help others embark on their own DIY adventures. Let’s build a community of passionate DIYers who are dedicated to creating beautiful and personalized homes.
Variations and Further Inspiration
Consider these variations to further personalize your DIY projects:
* **Upcycled Furniture:** Breathe new life into old furniture with a fresh coat of paint, new hardware, or even fabric upholstery.
* **Personalized Photo Displays:** Create unique photo displays using string lights, clothespins, or even repurposed picture frames.
* **Handmade Candles:** Craft your own scented candles using essential oils and natural waxes for a cozy and inviting atmosphere.
* **DIY Wall Decals:** Design and cut out your own wall decals using vinyl or contact paper to add a touch of whimsy to your walls.
* **Themed Decor:** Tailor your DIY projects to specific themes, such as a beach theme, a bohemian theme, or a minimalist theme.
Remember, the key to successful DIY home decor is to have fun and let your creativity shine. Don’t be afraid to experiment, make mistakes, and learn from your experiences. With a little bit of effort and imagination, you can transform your home into a stylish and personalized sanctuary that you’ll love for years to come.
FAQ
Here are some frequently asked questions about DIY home decor ideas to help you get started:
What are the best DIY home decor ideas for beginners?
For beginners, it’s best to start with simple projects that require minimal tools and skills. Some great options include:
* **Painted Mason Jars:** These are incredibly easy to make and can be used for storage, decoration, or even as vases.
* **Floating Shelves:** These are relatively simple to install and can add a touch of style and functionality to any room.
* **DIY Wall Art:** Create your own abstract art using canvas, paint, and simple techniques like splatter painting or color blocking.
* **Upcycled Picture Frames:** Give old picture frames a new lease on life with a fresh coat of paint or decorative embellishments.
* **String Lights Decor:** Drape string lights around furniture, plants, or walls to create a cozy and inviting atmosphere.
Where can I find inspiration for DIY home decor projects?
There are countless sources of inspiration for DIY home decor projects. Some popular options include:
* **Pinterest:** This is a treasure trove of DIY ideas, tutorials, and inspiration photos.
* **Instagram:** Follow DIY bloggers and home decor accounts for daily inspiration and project ideas.
* **YouTube:** Watch video tutorials for step-by-step instructions on how to complete various DIY projects.
* **Home Decor Magazines:** Browse magazines for stylish home decor ideas and inspiration.
* **Online Blogs:** Many websites and blogs are dedicated to DIY home decor, offering a wealth of information and inspiration.
What are some essential tools and materials for DIY home decor projects?
The specific tools and materials you’ll need will vary depending on the project, but some essential items include:
* **Paint:** Choose a variety of colors and finishes to suit your style.
* **Brushes:** Invest in a good set of paintbrushes in different sizes.
* **Sandpaper:** Use sandpaper to smooth surfaces before painting or staining.
* **Measuring Tape:** Accurate measurements are crucial for many DIY projects.
* **Scissors:** A good pair of scissors is essential for cutting fabric, paper, and other materials.
* **Glue Gun:** A glue gun is a versatile tool for attaching various materials.
* **Drill:** A drill is necessary for installing shelves, hanging pictures, and other tasks.
* **Hammer:** A hammer is useful for driving nails and other fasteners.
* **Screwdriver:** A screwdriver is needed for tightening and loosening screws.
* **Safety Glasses:** Protect your eyes from debris and splinters.
How can I save money on DIY home decor projects?
There are several ways to save money on DIY home decor projects:
* **Repurpose and Upcycle:** Use old materials and furniture to create new and unique pieces.
* **Shop at Thrift Stores an
So, there you have it! Transforming your living space doesn’t require a hefty budget or professional help. These DIY home decor ideas offer a fantastic way to inject personality, creativity, and a touch of your own unique style into every corner of your home. We’ve explored simple yet impactful projects, from repurposing old materials to crafting eye-catching wall art, all designed to be accessible and enjoyable for everyone.
The beauty of these DIY projects lies in their adaptability. Feel free to experiment with different colors, textures, and materials to perfectly match your existing decor or create a completely new aesthetic. For instance, if you loved the painted mason jar idea, consider using metallic paints for a glamorous touch, or distressing the jars for a rustic, farmhouse vibe. With the floating shelves, think about incorporating live plants for a touch of greenery or displaying your favorite book collection for a personalized library feel.
Remember, the goal is to create a space that reflects who you are and makes you feel comfortable and inspired. Don’t be afraid to step outside the box and let your imagination run wild. These DIY home decor ideas are merely a starting point; the possibilities are truly endless.
What makes these DIY projects a must-try? They offer a cost-effective alternative to expensive store-bought decorations, allowing you to save money while still achieving a stylish and personalized home. They provide a creative outlet, allowing you to express your individuality and develop new skills. And perhaps most importantly, they give you a sense of accomplishment and pride in creating something beautiful with your own two hands.
We strongly encourage you to give these DIY home decor ideas a try. Start with a project that resonates with you and gradually work your way up to more complex designs. Don’t be discouraged if your first attempt isn’t perfect; the learning process is part of the fun. The most important thing is to enjoy the journey and create something that you truly love.
Once you’ve completed your DIY masterpiece, we’d love to see it! Share your creations with us on social media using #DIYHomeDecorMagic. We can’t wait to see how you’ve transformed your space and inspired others with your creativity. Your experiences and insights can help others embark on their own DIY adventures. Let’s build a community of passionate DIYers who are dedicated to creating beautiful and personalized homes.
Variations and Further Inspiration
Consider these variations to further personalize your DIY projects:
* **Upcycled Furniture:** Breathe new life into old furniture with a fresh coat of paint, new hardware, or even fabric upholstery.
* **Personalized Photo Displays:** Create unique photo displays using string lights, clothespins, or even repurposed picture frames.
* **Handmade Candles:** Craft your own scented candles using essential oils and natural waxes for a cozy and inviting atmosphere.
* **DIY Wall Decals:** Design and cut out your own wall decals using vinyl or contact paper to add a touch of whimsy to your walls.
* **Themed Decor:** Tailor your DIY projects to specific themes, such as a beach theme, a bohemian theme, or a minimalist theme.
Remember, the key to successful DIY home decor is to have fun and let your creativity shine. Don’t be afraid to experiment, make mistakes, and learn from your experiences. With a little bit of effort and imagination, you can transform your home into a stylish and personalized sanctuary that you’ll love for years to come.
FAQ
Here are some frequently asked questions about DIY home decor ideas to help you get started:
What are the best DIY home decor ideas for beginners?
For beginners, it’s best to start with simple projects that require minimal tools and skills. Some great options include:
* **Painted Mason Jars:** These are incredibly easy to make and can be used for storage, decoration, or even as vases.
* **Floating Shelves:** These are relatively simple to install and can add a touch of style and functionality to any room.
* **DIY Wall Art:** Create your own abstract art using canvas, paint, and simple techniques like splatter painting or color blocking.
* **Upcycled Picture Frames:** Give old picture frames a new lease on life with a fresh coat of paint or decorative embellishments.
* **String Lights Decor:** Drape string lights around furniture, plants, or walls to create a cozy and inviting atmosphere.
Where can I find inspiration for DIY home decor projects?
There are countless sources of inspiration for DIY home decor projects. Some popular options include:
* **Pinterest:** This is a treasure trove of DIY ideas, tutorials, and inspiration photos.
* **Instagram:** Follow DIY bloggers and home decor accounts for daily inspiration and project ideas.
* **YouTube:** Watch video tutorials for step-by-step instructions on how to complete various DIY projects.
* **Home Decor Magazines:** Browse magazines for stylish home decor ideas and inspiration.
* **Online Blogs:** Many websites and blogs are dedicated to DIY home decor, offering a wealth of information and inspiration.
What are some essential tools and materials for DIY home decor projects?
The specific tools and materials you’ll need will vary depending on the project, but some essential items include:
* **Paint:** Choose a variety of colors and finishes to suit your style.
* **Brushes:** Invest in a good set of paintbrushes in different sizes.
* **Sandpaper:** Use sandpaper to smooth surfaces before painting or staining.
* **Measuring Tape:** Accurate measurements are crucial for many DIY projects.
* **Scissors:** A good pair of scissors is essential for cutting fabric, paper, and other materials.
* **Glue Gun:** A glue gun is a versatile tool for attaching various materials.
* **Drill:** A drill is necessary for installing shelves, hanging pictures, and other tasks.
* **Hammer:** A hammer is useful for driving nails and other fasteners.
* **Screwdriver:** A screwdriver is needed for tightening and loosening screws.
* **Safety Glasses:** Protect your eyes from debris and splinters.
How can I save money on DIY home decor projects?
There are several ways to save money on DIY home decor projects:
* **Repurpose and Upcycle:** Use old materials and furniture to create new and unique pieces.
* **Shop at Thrift Stores and Garage Sales:** Find affordable materials and furniture at thrift stores and garage sales.
* **Use Coupons and Discounts:** Look for coupons and discounts on craft supplies and home decor items.
* **Buy in Bulk:** Purchase materials in bulk to save money on larger projects.
* **DIY Instead of Buying:** Create your own decorations and accessories instead of buying them from stores.
How can I personalize my DIY home decor projects?
Personalizing your DIY home decor projects is what makes them truly special. Here are some tips:
* **Choose Colors and Patterns You Love:** Select colors and patterns that reflect your personal style and preferences.
* **Incorporate Personal Items:** Display photos, souvenirs, and other personal items in your decor.
* **Add Handmade Touches:** Incorporate handmade elements, such as embroidery, knitting, or painting.
* **Create Custom Designs:** Design your own patterns, stencils, or artwork to add a unique touch.
* **Reflect Your Interests:** Incorporate elements that reflect your hobbies, interests, and passions.
What if I make a mistake on a DIY project?
Don’t worry if you make a mistake on a DIY project. Everyone makes mistakes, and it’s all part of the learning process. Here are some tips for dealing with mistakes:
* **Don’t Panic:** Take a deep breath and assess the situation.
* **Try to Fix It:** See if you can fix the mistake with a little bit of effort.
* **Cover It Up:** If you can’t fix the mistake, try to cover it up with paint, fabric, or other materials.
* **Embrace It:** Sometimes, mistakes can lead to unexpected and beautiful results.
* **Learn From It:** Use the mistake as a learning opportunity and try to avoid making the same mistake again.
Remember, DIY home decor is all about having fun and expressing your creativity. Don’t be afraid to experiment, make mistakes, and learn from your experiences. With a little bit of effort and imagination, you can transform your home into a stylish and personalized sanctuary that you’ll love for years to come.


Leave a Comment