
DIY bottle planters: Ever looked at a plastic bottle and thought, “There has to be a better use for this?” Well, you’re in luck! We’re diving headfirst into the wonderful world of upcycling and gardening, combining the two to create something beautiful and sustainable. Forget those expensive store-bought planters; we’re about to show you how to transform humble plastic bottles into charming homes for your favorite plants.
The concept of repurposing materials for gardening isn’t new. Throughout history, resourceful gardeners have used everything from old tires to broken pottery to cultivate their green spaces. This ingenuity reflects a deep connection to the earth and a desire to make the most of available resources. Today, with growing concerns about plastic waste, the need for creative solutions like DIY bottle planters is more pressing than ever.
Why should you try this DIY trick? Because it’s incredibly easy, budget-friendly, and a fantastic way to reduce your environmental footprint! Plus, it’s a fun project for the whole family. Imagine the satisfaction of watching your seedlings sprout in a planter you created yourself. I’m excited to share these simple yet effective hacks that will not only beautify your home but also contribute to a greener planet. Let’s get started and turn those plastic bottles into thriving miniature gardens!
DIY Bottle Planters: A Fun and Eco-Friendly Project!
Hey there, fellow plant lovers! I’m so excited to share this super easy and rewarding DIY project with you: turning old plastic bottles into adorable planters! Not only is it a fantastic way to recycle and reduce waste, but it also adds a touch of personalized charm to your home or garden. Plus, it’s incredibly budget-friendly! Let’s dive in!
Materials You’ll Need
Before we get started, let’s gather all the necessary materials. Don’t worry, most of these are probably already lying around your house!
* Plastic Bottles: Any size will do! Soda bottles, water bottles, juice bottles – the possibilities are endless. Just make sure they’re clean and dry. I personally love using the larger 2-liter bottles for bigger plants.
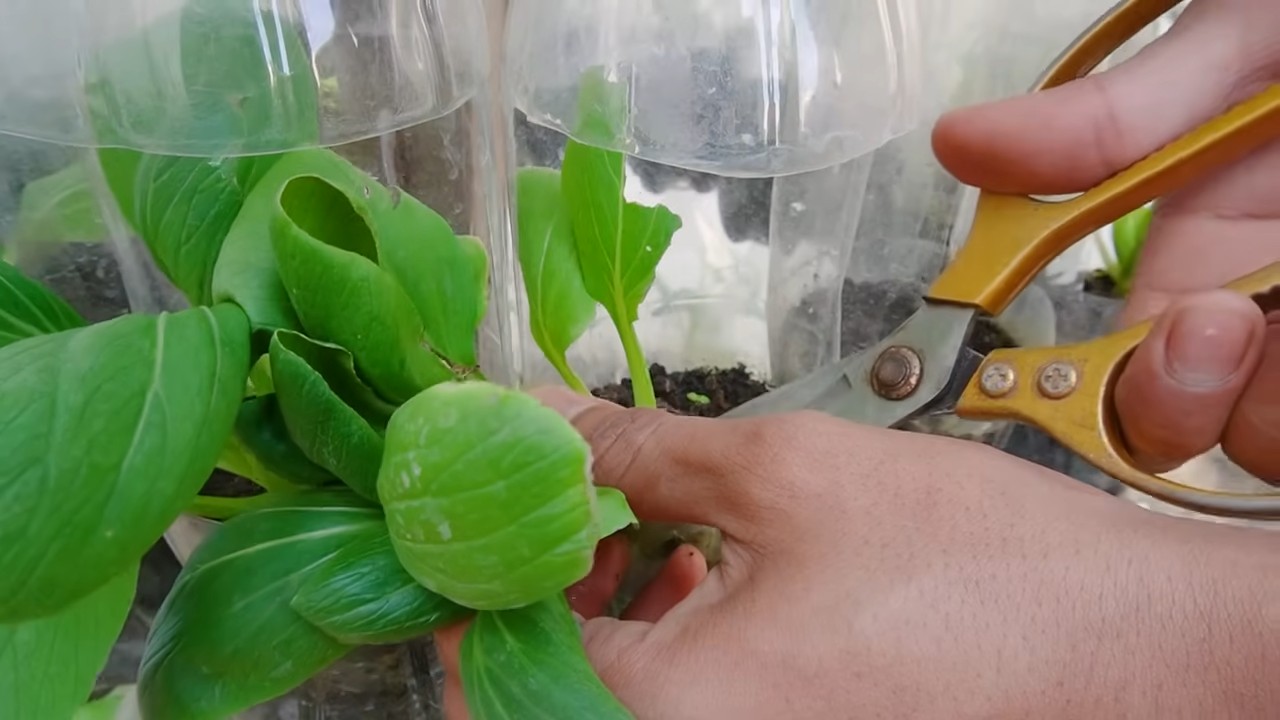
* Scissors or a Craft Knife: Be careful with these! A sharp pair of scissors or a craft knife will be needed to cut the bottles. If you’re using a craft knife, a cutting mat is a good idea to protect your work surface.
* Soil: Choose a potting mix that’s appropriate for the type of plants you’ll be growing.
* Plants or Seeds: This is the fun part! Select your favorite flowers, herbs, or vegetables. Succulents and herbs are great options for beginners.
* Water: For watering your plants, of course!
* Optional:
* Paint (acrylic or spray paint)
* Markers (permanent markers work best)
* Decorative items (buttons, beads, twine, etc.)
* Sandpaper (for smoothing rough edges)
* Drill or nail (for drainage holes)
Preparing the Bottles
This is where we transform those ordinary plastic bottles into something special!
1. Clean the Bottles: Make sure your bottles are thoroughly cleaned inside and out. Remove any labels and sticky residue. Warm, soapy water works wonders. Rinse them well and let them dry completely. This will help the paint adhere better if you plan on decorating them.
2. Decide on Your Design: Think about what kind of planter you want to create. Do you want a simple, straight-cut planter, or something more decorative with scalloped edges or animal shapes? I often sketch out my ideas on paper first to get a better visual.
3. Mark Your Cutting Line: Use a marker to draw a line around the bottle where you want to cut. For a basic planter, you’ll usually cut the bottle in half. You can also cut out sections to create unique shapes. If you’re making an animal planter, draw the outline of the animal’s ears, nose, etc.
4. Cut the Bottle: Carefully cut along the marked line using scissors or a craft knife. If you’re using a craft knife, be sure to use a cutting mat and take your time. For thicker bottles, you might need to score the plastic first with the knife before cutting all the way through.
5. Smooth the Edges (Optional): After cutting, the edges of the plastic can be sharp. Use sandpaper to smooth them down for a safer and more polished look. This is especially important if you have kids or pets around.
Decorating Your Planters (Optional)
This is where your creativity can really shine! There are so many ways to personalize your bottle planters.
1. Painting: Acrylic paint and spray paint are both great options. If you’re using acrylic paint, you might need to apply a few coats for full coverage. Spray paint is faster and often provides a more even finish. Before painting, you can lightly sand the plastic to help the paint adhere better. Let the paint dry completely before moving on to the next step.
2. Drawing: Use permanent markers to draw designs, patterns, or even faces on your planters. This is a fun way to add a personal touch. I love drawing simple floral patterns or geometric shapes.
3. Adding Decorative Elements: Get creative with buttons, beads, twine, and other decorative items. You can glue them onto the planter to create unique textures and designs. Twine can be wrapped around the planter for a rustic look.
Creating Drainage
Proper drainage is essential for healthy plants. Without it, the roots can become waterlogged and rot.
1. Drill or Poke Holes: Use a drill or a nail to create drainage holes in the bottom of the bottle. I usually make 3-4 holes, depending on the size of the planter. If you’re using a nail, heat it up with a lighter or stove burner (be careful!) to make it easier to poke through the plastic.
Planting Your Plants
Now for the most exciting part – planting your plants!
1. Add Soil: Fill the bottle planter with potting mix, leaving about an inch of space at the top.
2. Plant Your Plants or Seeds: Gently remove your plant from its original container and place it in the bottle planter. If you’re planting seeds, follow the instructions on the seed packet.
3. Water Thoroughly: Water the soil until it’s evenly moist. Be careful not to overwater.
4. Place in a Sunny Location: Most plants need plenty of sunlight to thrive. Place your bottle planter in a sunny location, such as a windowsill or balcony.
Alternative Planting Methods: Self-Watering Bottle Planters
Want to take your bottle planter game to the next level? Try creating a self-watering planter! This is perfect for busy people or those who tend to forget to water their plants.
1. Cut the Bottle: Cut the bottle in half, as you would for a regular planter.
2. Invert the Top Half: Invert the top half of the bottle and place it inside the bottom half.
3. Add a Wick: Cut a strip of cotton cloth or use a piece of cotton rope. Thread the wick through the bottle neck so that one end is submerged in the water in the bottom half of the bottle, and the other end is in the soil in the top half. This wick will draw water up to the soil, keeping it consistently moist.
4. Add Soil and Plant: Fill the top half of the bottle with soil and plant your plants as usual.
5. Add Water: Fill the bottom half of the bottle with water.
6. Monitor the Water Level: Check the water level regularly and refill as needed.
Hey there, fellow plant lovers! I’m so excited to share this super easy and rewarding DIY project with you: turning old plastic bottles into adorable planters! Not only is it a fantastic way to recycle and reduce waste, but it also adds a touch of personalized charm to your home or garden. Plus, it’s incredibly budget-friendly! Let’s dive in!
Materials You’ll Need
Before we get started, let’s gather all the necessary materials. Don’t worry, most of these are probably already lying around your house!
* Plastic Bottles: Any size will do! Soda bottles, water bottles, juice bottles – the possibilities are endless. Just make sure they’re clean and dry. I personally love using the larger 2-liter bottles for bigger plants.
* Scissors or a Craft Knife: Be careful with these! A sharp pair of scissors or a craft knife will be needed to cut the bottles. If you’re using a craft knife, a cutting mat is a good idea to protect your work surface.
* Soil: Choose a potting mix that’s appropriate for the type of plants you’ll be growing.
* Plants or Seeds: This is the fun part! Select your favorite flowers, herbs, or vegetables. Succulents and herbs are great options for beginners.
* Water: For watering your plants, of course!
* Optional:
* Paint (acrylic or spray paint)
* Markers (permanent markers work best)
* Decorative items (buttons, beads, twine, etc.)
* Sandpaper (for smoothing rough edges)
* Drill or nail (for drainage holes)
Preparing the Bottles
This is where we transform those ordinary plastic bottles into something special!
1. Clean the Bottles: Make sure your bottles are thoroughly cleaned inside and out. Remove any labels and sticky residue. Warm, soapy water works wonders. Rinse them well and let them dry completely. This will help the paint adhere better if you plan on decorating them.
2. Decide on Your Design: Think about what kind of planter you want to create. Do you want a simple, straight-cut planter, or something more decorative with scalloped edges or animal shapes? I often sketch out my ideas on paper first to get a better visual.
3. Mark Your Cutting Line: Use a marker to draw a line around the bottle where you want to cut. For a basic planter, you’ll usually cut the bottle in half. You can also cut out sections to create unique shapes. If you’re making an animal planter, draw the outline of the animal’s ears, nose, etc.
4. Cut the Bottle: Carefully cut along the marked line using scissors or a craft knife. If you’re using a craft knife, be sure to use a cutting mat and take your time. For thicker bottles, you might need to score the plastic first with the knife before cutting all the way through.
5. Smooth the Edges (Optional): After cutting, the edges of the plastic can be sharp. Use sandpaper to smooth them down for a safer and more polished look. This is especially important if you have kids or pets around.
Decorating Your Planters (Optional)
This is where your creativity can really shine! There are so many ways to personalize your bottle planters.
1. Painting: Acrylic paint and spray paint are both great options. If you’re using acrylic paint, you might need to apply a few coats for full coverage. Spray paint is faster and often provides a more even finish. Before painting, you can lightly sand the plastic to help the paint adhere better. Let the paint dry completely before moving on to the next step.
2. Drawing: Use permanent markers to draw designs, patterns, or even faces on your planters. This is a fun way to add a personal touch. I love drawing simple floral patterns or geometric shapes.
3. Adding Decorative Elements: Get creative with buttons, beads, twine, and other decorative items. You can glue them onto the planter to create unique textures and designs. Twine can be wrapped around the planter for a rustic look.
Creating Drainage
Proper drainage is essential for healthy plants. Without it, the roots can become waterlogged and rot.
1. Drill or Poke Holes: Use a drill or a nail to create drainage holes in the bottom of the bottle. I usually make 3-4 holes, depending on the size of the planter. If you’re using a nail, heat it up with a lighter or stove burner (be careful!) to make it easier to poke through the plastic.
Planting Your Plants
Now for the most exciting part – planting your plants!
1. Add Soil: Fill the bottle planter with potting mix, leaving about an inch of space at the top.
2. Plant Your Plants or Seeds: Gently remove your plant from its original container and place it in the bottle planter. If you’re planting seeds, follow the instructions on the seed packet.
3. Water Thoroughly: Water the soil until it’s evenly moist. Be careful not to overwater.
4. Place in a Sunny Location: Most plants need plenty of sunlight to thrive. Place your bottle planter in a sunny location, such as a windowsill or balcony.
Alternative Planting Methods: Self-Watering Bottle Planters
Want to take your bottle planter game to the next level? Try creating a self-watering planter! This is perfect for busy people or those who tend to forget to water their plants.
1. Cut the Bottle: Cut the bottle in half, as you would for a regular planter.
2. Invert the Top Half: Invert the top half of the bottle and place it inside the bottom half.
3. Add a Wick: Cut a strip of cotton cloth or use a piece of cotton rope. Thread the wick through the bottle neck so that one end is submerged in the water in the bottom half of the bottle, and the other end is in the soil in the top half. This wick will draw water up to the soil, keeping it consistently moist.
4. Add Soil and Plant: Fill the top half of the bottle with soil and plant your plants as usual.
5. Add Water: Fill the bottom half of the bottle with water.
6. Monitor the Water Level: Check the water level regularly and refill as needed.
Hanging Bottle Planters
Want to add a vertical element to your garden? Hanging bottle planters are a great option!
1. Prepare the Bottle: Cut the bottle as desired and decorate it.
2. Create Hanging Holes: Use a drill or a nail to create holes near the top of the bottle. You’ll need at least three holes, evenly spaced around the bottle.
3. Thread the Hanging Material: Thread twine, rope, or wire through the holes to create a hanger. Make sure the hanger is strong enough to support the weight of the planter and the soil.
4. Plant and Hang: Plant your plants and hang the planter in a sunny location.
Tips and Tricks for Success
* Choose the Right Plants: Consider the size of the bottle and the amount of sunlight available when choosing your plants. Smaller plants like succulents, herbs, and small flowers are ideal for bottle planters.
* Don’t Overwater: Overwatering is a common mistake. Allow the soil to dry out slightly between waterings.
* Fertilize Regularly: Plants in containers need regular fertilization. Use a balanced liquid fertilizer according to the instructions on the label.
* Repot as Needed: As your plants grow, they may outgrow their bottle planters. Repot them into larger containers as needed.
* Get Creative with Decoration: Don’t be afraid to experiment with different decorating techniques. The possibilities are endless!
* Safety First: Always be careful when using sharp tools like scissors and craft knives. Supervise children closely when they’re participating in this project.
I hope you enjoyed this DIY tutorial! I’m sure your bottle planters will add a touch of green and personality to your space. Happy planting!

Conclusion
So, there you have it! Transforming discarded plastic bottles into charming, functional planters is not just a clever upcycling project; it’s a small act of environmental stewardship that brings beauty and life into your home or garden. This DIY bottle planters project is a win-win: you reduce waste, save money, and cultivate your green thumb all at once.
But why is this a must-try? Beyond the obvious environmental and economic benefits, creating your own bottle planters offers a unique opportunity for personalization and creativity. Store-bought planters, while convenient, often lack the character and charm that comes from a handmade creation. With DIY bottle planters, you have complete control over the size, shape, color, and design of your planters, allowing you to perfectly match them to your existing décor or create a vibrant, eclectic display.
Imagine a vertical garden cascading down your balcony, each bottle planter bursting with colorful herbs or flowers. Picture a windowsill adorned with miniature bottle planters, each holding a different succulent or cactus. The possibilities are truly endless.
And don’t think you’re limited to just one type of plant. Bottle planters are surprisingly versatile and can accommodate a wide range of greenery. Herbs like basil, mint, and oregano thrive in these small containers, making them perfect for kitchen gardens. Succulents and cacti are also excellent choices, as they require minimal watering and are well-suited to the limited space. For a splash of color, consider planting annual flowers like petunias, pansies, or impatiens.
Looking for variations? Try painting your bottle planters with vibrant colors or intricate designs. Use different sizes and shapes of bottles to create a visually interesting display. Add drainage holes to the bottom of the bottles to prevent overwatering. Or, get creative with the hanging mechanism. Instead of using string or wire, try repurposing old belts, scarves, or even bicycle chains.
For a more rustic look, consider wrapping your bottle planters in twine or burlap. This will not only add texture and visual interest but also help to insulate the roots of your plants. You can also experiment with different types of soil. For succulents and cacti, use a well-draining potting mix. For herbs and vegetables, use a nutrient-rich soil that is specifically formulated for container gardening.
Another fun variation is to create self-watering bottle planters. This is a great option for those who tend to forget to water their plants. To make a self-watering planter, simply cut a plastic bottle in half, invert the top half into the bottom half, and fill the bottom half with water. The soil will draw water up from the bottom, keeping your plants consistently moist.
We encourage you to embrace your inner artist and experiment with different techniques and materials. Don’t be afraid to make mistakes – that’s how you learn and grow! The most important thing is to have fun and enjoy the process of creating something beautiful and sustainable.
So, grab those empty plastic bottles, gather your supplies, and get ready to embark on a rewarding DIY adventure. We’re confident that you’ll be amazed at what you can create.
Once you’ve created your own DIY bottle planters, we’d love to see your creations! Share your photos and experiences with us on social media using #DIYBottlePlanters. Let’s inspire others to join the upcycling movement and create a more sustainable future, one bottle planter at a time. We can’t wait to see what you come up with!
Frequently Asked Questions (FAQ)
What types of plastic bottles are best for making planters?
The best types of plastic bottles for making planters are those that are sturdy and can hold their shape well. Soda bottles, water bottles, and juice bottles are all good options. Avoid using bottles that are too thin or flimsy, as they may not be able to support the weight of the soil and plants. Also, consider the color of the bottle. Clear bottles allow more light to reach the roots, which can be beneficial for some plants, while colored bottles can help to protect the roots from excessive sunlight. Ultimately, the best type of bottle is the one that you have readily available and that meets your specific needs.
How do I properly clean the plastic bottles before using them as planters?
Cleaning the plastic bottles thoroughly is crucial to prevent the growth of mold and bacteria, which can harm your plants. Start by rinsing the bottles with warm, soapy water. Use a bottle brush to scrub the inside of the bottles, removing any residue or debris. Pay special attention to the bottom of the bottles, where dirt and grime tend to accumulate. After scrubbing, rinse the bottles thoroughly with clean water to remove all traces of soap. Finally, allow the bottles to air dry completely before using them as planters. You can also sanitize the bottles by rinsing them with a diluted bleach solution (1 part bleach to 10 parts water) after washing them with soap and water. Be sure to rinse thoroughly with clean water after sanitizing.
What kind of soil should I use for my DIY bottle planters?
The type of soil you should use for your DIY bottle planters depends on the type of plants you’re growing. For most plants, a general-purpose potting mix will work well. This type of soil is typically a blend of peat moss, perlite, and vermiculite, which provides good drainage and aeration. For succulents and cacti, use a well-draining potting mix that is specifically formulated for these types of plants. This type of soil typically contains a higher proportion of sand or gravel, which helps to prevent root rot. For herbs and vegetables, use a nutrient-rich soil that is specifically formulated for container gardening. This type of soil typically contains added compost or fertilizer, which provides the plants with the nutrients they need to thrive. Regardless of the type of soil you choose, make sure it is fresh and free of pests and diseases.
How do I ensure proper drainage in my bottle planters?
Proper drainage is essential for preventing overwatering and root rot. To ensure proper drainage in your bottle planters, you need to create drainage holes in the bottom of the bottles. You can do this by using a drill, a nail, or a sharp knife. Be careful not to make the holes too large, as this can cause the soil to leak out. A few small holes are usually sufficient. You can also add a layer of gravel or pebbles to the bottom of the bottles before adding the soil. This will help to improve drainage and prevent the soil from becoming waterlogged. Another option is to use a self-watering planter, which has a built-in reservoir that allows the plants to draw water up from the bottom as needed.
How often should I water my plants in bottle planters?
The frequency of watering depends on several factors, including the type of plant, the size of the planter, the type of soil, and the weather conditions. As a general rule, you should water your plants when the top inch of soil feels dry to the touch. Avoid overwatering, as this can lead to root rot. When watering, water thoroughly until the water drains out of the drainage holes. Allow the excess water to drain away completely before placing the planter back in its location. During hot, dry weather, you may need to water your plants more frequently. During cool, wet weather, you may need to water them less frequently. It’s always best to err on the side of underwatering rather than overwatering.
Can I grow vegetables in DIY bottle planters?
Yes, you can definitely grow vegetables in DIY bottle planters! However, it’s important to choose vegetables that are well-suited to container gardening and that have shallow root systems. Some good options include lettuce, spinach, radishes, carrots, and herbs like basil, mint, and oregano. You’ll also need to make sure that the bottle planters are large enough to accommodate the root systems of the vegetables you’re growing. For larger vegetables like tomatoes or peppers, you’ll need to use larger bottles or containers. Be sure to provide your vegetables with plenty of sunlight and water, and fertilize them regularly to ensure they get the nutrients they need to thrive.
How do I hang my bottle planters?
There are many different ways to hang your bottle planters, depending on your preferences and the materials you have available. One simple option is to use string or wire. Simply drill two holes in the top of the bottle, thread the string or wire through the holes, and tie a knot to secure it. You can then hang the planter from a hook, a nail, or a branch. Another option is to use a macrame hanger. Macrame hangers are decorative and can add a touch of bohemian style to your garden. You can also repurpose old belts, scarves, or even bicycle chains to create unique and eye-catching hangers. Be creative and experiment with different materials and techniques to find the hanging method that works best for you. Make sure the hanging mechanism is strong enough to support the weight of the planter and the soil and plants inside.
Leave a Comment