
Concrete yard corn – sounds like an oxymoron, right? I know, the image of a sprawling cornfield probably doesn’t immediately spring to mind when you think of a concrete jungle. But what if I told you that you can actually grow delicious, homegrown corn, even if your backyard is more pavement than pasture?
For centuries, corn has been a staple crop, deeply woven into the fabric of countless cultures. From the ancient civilizations of Mesoamerica, where it was revered as a sacred gift, to its modern-day role as a global food source, corn has nourished and sustained communities worldwide. But you don’t need acres of farmland to tap into this rich agricultural heritage.
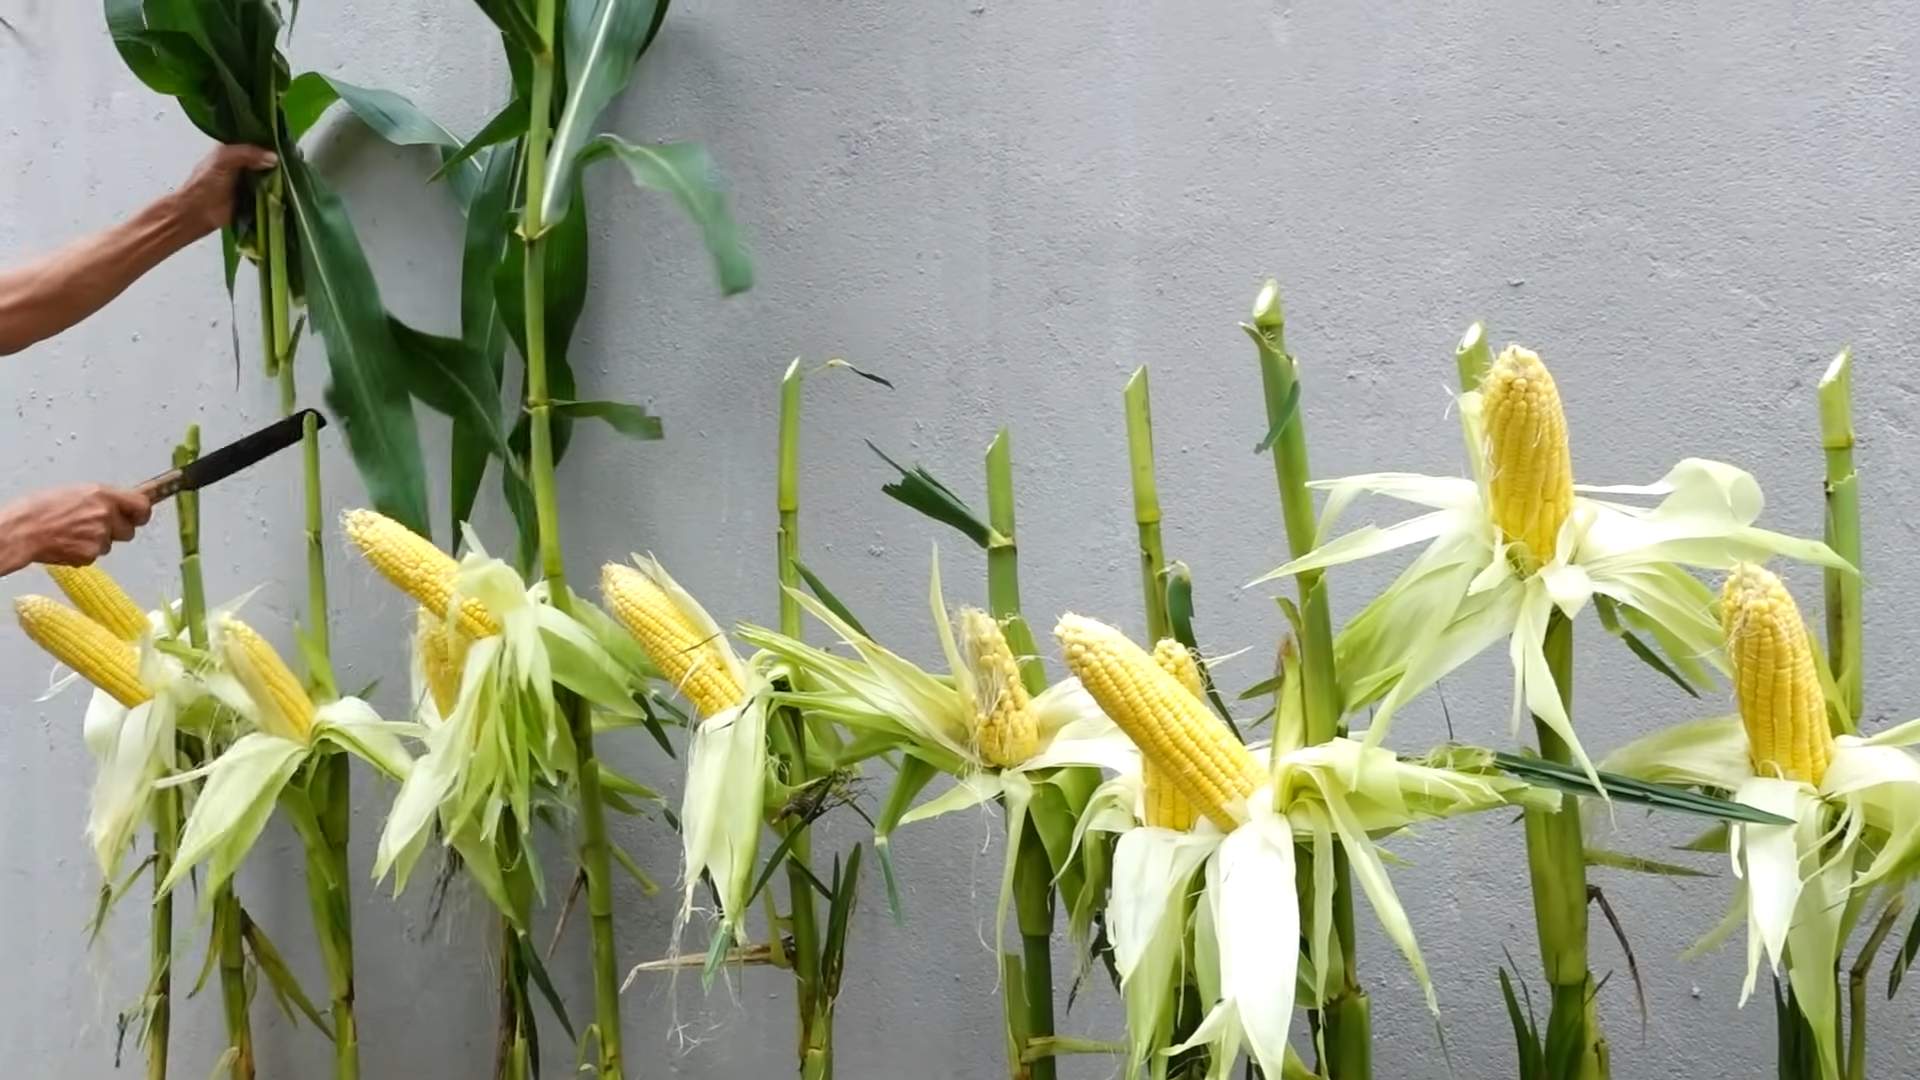
Let’s face it, fresh, sweet corn on the cob is one of summer’s greatest pleasures. But store-bought corn just doesn’t compare to the flavor of corn picked straight from the stalk. And that’s where this DIY guide comes in! I’m going to show you some clever tricks and hacks to successfully cultivate concrete yard corn. Whether you’re looking to save money, enjoy healthier, fresher produce, or simply connect with nature in a unique way, growing your own corn in a limited space is surprisingly achievable. Get ready to transform your concrete jungle into a mini-cornfield and enjoy the sweet taste of success!
DIY Concrete Cornhole Boards: A Weekend Project for Years of Fun
Okay, let’s be honest, who doesn’t love a good game of cornhole? But those flimsy wooden boards? They warp, they crack, and they definitely don’t stand up to the elements. That’s why I decided to build my own set of concrete cornhole boards. They’re practically indestructible, look amazing, and will be the envy of everyone at your next backyard barbecue. This project is a bit involved, but trust me, the end result is totally worth it.
Materials You’ll Need:
* Concrete Mix: I recommend a high-strength concrete mix. You’ll need enough to fill your forms, so calculate the volume beforehand.
* Plywood: For building the forms. I used ¾-inch plywood for extra sturdiness.
* 2×4 Lumber: For reinforcing the forms and creating the frame for the legs.
* Melamine Board (Optional): This gives a super smooth finish to the concrete. If you want a rougher look, skip this.
* Rebar or Wire Mesh: For reinforcing the concrete. This is crucial to prevent cracking.
* Cornhole Bags: Obviously! You can buy them or make your own.
* Wood Screws: For assembling the forms and attaching the legs.
* Concrete Sealer: To protect the concrete from the elements and stains.
* Paint or Stain (Optional): To decorate your boards.
* Leg Hardware: Hinges, bolts, and wing nuts for attaching the folding legs.
* Sandpaper: For smoothing any rough edges.
Tools You’ll Need:
* Circular Saw or Table Saw: For cutting the plywood and lumber.
* Drill/Driver: For assembling the forms and attaching the legs.
* Measuring Tape: Accuracy is key!
* Level: To ensure a perfectly flat playing surface.
* Concrete Mixer (Optional): Makes mixing the concrete much easier, but you can do it by hand in a wheelbarrow.
* Trowel: For smoothing the concrete.
* Rubber Mallet: For tapping the forms to release air bubbles.
* Safety Glasses: Always protect your eyes!
* Gloves: Concrete can be harsh on your skin.
* Dust Mask: When working with concrete dust.
* Clamps: To hold the forms together while the glue dries.
* Hole Saw (6-inch diameter): For cutting the cornhole.
Phase 1: Building the Forms
This is arguably the most important step. The forms determine the shape and size of your cornhole boards, so take your time and be precise.
1. Cut the Plywood: You’ll need to cut the plywood into the following pieces for each board:
* One piece for the base: 24 inches x 48 inches (regulation cornhole board size).
* Four pieces for the sides: Two pieces at 4 inches x 48 inches, and two pieces at 4 inches x 24 inches.
* If using melamine, cut a piece to the same size as the base (24 inches x 48 inches).
2. Assemble the Form:
* If using melamine, attach it to the base piece of plywood with screws, making sure the smooth melamine side is facing up. This will be the surface that the concrete will be poured against.
* Attach the side pieces to the base using wood screws. Make sure the corners are square and the seams are tight. I like to use wood glue in addition to screws for extra strength. Clamp the pieces together while the glue dries.
* Reinforce the corners with 2×4 blocks cut to fit snugly inside the corners. Screw these blocks into the side pieces for added stability.
3. Cut the Hole Form:
* Using your 6-inch hole saw, cut a hole in a piece of scrap plywood. This will be used to create the cornhole opening.
* Position the hole form in the center of the board, 9 inches down from the top edge. Secure it in place with screws from the outside of the form. Make sure it’s centered and level.
4. Seal the Seams:
* To prevent concrete from leaking out, seal all the seams of the form with silicone caulk. This will also help to create a smoother finish.
Phase 2: Mixing and Pouring the Concrete
Now for the fun (and messy) part!
1. Prepare the Rebar/Wire Mesh:
* Cut the rebar or wire mesh to fit inside the form, leaving about an inch of space around the edges. This will provide reinforcement and prevent cracking.
* Bend the rebar to conform to the shape of the form, ensuring it’s evenly distributed.
2. Mix the Concrete:
* Follow the instructions on the concrete mix bag. Add water gradually until you achieve a thick, but pourable consistency.
* If using a concrete mixer, add the dry mix and water according to the manufacturer’s instructions.
* If mixing by hand, use a shovel to thoroughly combine the dry mix and water in a wheelbarrow.
3. Pour the Concrete:
* Pour a layer of concrete into the form, about halfway up.
* Place the rebar or wire mesh on top of the concrete layer.
* Pour the remaining concrete into the form, filling it to the top.
4. Vibrate the Concrete:
* Use a rubber mallet to tap the sides of the form. This will help to release any trapped air bubbles and ensure the concrete settles evenly. You can also use a vibratory tool if you have one.
5. Smooth the Surface:
* Use a trowel to smooth the surface of the concrete. Make sure it’s perfectly level.
* For a smoother finish, you can use a float after the initial troweling.
6. Cure the Concrete:
* Cover the concrete with plastic sheeting to prevent it from drying out too quickly.
* Allow the concrete to cure for at least 7 days. Keep it moist by spraying it with water periodically. This is crucial for achieving maximum strength.
Phase 3: Demolding and Finishing
Almost there! Now it’s time to reveal your concrete masterpieces.
1. Demold the Boards:
* Carefully remove the screws from the form.
* Gently tap the sides of the form with a rubber mallet to loosen the concrete.
* Lift the form away from the concrete board. If it’s stuck, you may need to use a pry bar. Be careful not to damage the concrete.
2. Sand the Edges:
* Use sandpaper to smooth any rough edges or imperfections. Start with a coarse grit and gradually move to a finer grit.
3. Drill Leg Attachment Holes:
* Measure and mark the locations for the leg attachment hardware. Typically, these are placed about 4 inches from the corners on the underside of the board.
* Drill pilot holes for the bolts.
4. Paint or Stain (Optional):
* If you want to decorate your boards, now is the time. You can paint them with exterior-grade paint or stain them with concrete stain.
* Consider using stencils to create designs or patterns.
* Let the paint or stain dry completely before applying the sealer.
5. Apply Concrete Sealer:
* Apply a concrete sealer to protect the concrete from the elements and stains. Follow the manufacturer’s instructions.
* Apply multiple coats for added protection.
Phase 4: Attaching the Legs
The final step!
1. Build the Legs:
* Cut the 2×4 lumber into four pieces for the legs. The length will depend on how high you want your boards to be, but the standard height is 12 inches at the back.
* Cut the ends of the legs at an angle so they sit flush with the ground when folded out.
2. Attach the Legs:
* Attach the legs to the underside of the board using hinges, bolts, and wing nuts.
* Make sure the legs fold out smoothly and lock into place securely.
3. Test and Adjust:
* Test the boards to make sure they are level and stable.
* Adjust the legs as needed.
Final Touches
* Consider adding rubber feet to the legs to prevent them from slipping on hard surfaces.
* You can also add a carrying handle to make it easier to transport the boards.
And that’s it! You now have a set of incredibly durable and stylish concrete corn
Conclusion
So, there you have it! Transforming that stubborn concrete yard corn into a delicious, usable ingredient is not only possible, but surprisingly simple. We’ve walked you through the process, demystifying each step and providing tips to ensure your success. Why is this DIY trick a must-try? Because it unlocks a world of culinary possibilities from something that might otherwise be considered waste. Imagine the satisfaction of using corn you grew yourself, even if it’s a bit… challenging to harvest! Beyond the cost savings, it’s about resourcefulness, sustainability, and connecting with your food on a deeper level.
This method isn’t just about salvaging hard corn; it’s about embracing the unexpected and turning a potential problem into a delicious opportunity. Think of the incredible dishes you can create: hearty corn stews, creamy polenta, or even homemade corn tortillas with a uniquely robust flavor. The possibilities are truly endless.
Variations and Suggestions
Don’t be afraid to experiment! Once you’ve mastered the basic technique, consider these variations:
* **Spice it up:** Add a pinch of chili powder or smoked paprika to the soaking water for a subtle smoky heat that will infuse the corn.
* **Herb Infusion:** Introduce fresh herbs like thyme or rosemary to the cooking water for an aromatic twist.
* **Roasting for Depth:** After boiling, try roasting the softened corn kernels in the oven with a drizzle of olive oil and your favorite seasonings for a deeper, more complex flavor. This works particularly well if you plan to use the corn in salads or as a side dish.
* **Cornmeal Creation:** Once dried, grind the softened corn into homemade cornmeal for polenta, cornbread, or even as a coating for fried foods. The texture will be slightly different from commercially produced cornmeal, offering a unique rustic quality.
* **Animal Feed Supplement:** If you have livestock or poultry, the softened corn can be a valuable and nutritious supplement to their diet. Ensure the corn is thoroughly cooked and cooled before feeding it to animals.
We wholeheartedly encourage you to try this DIY trick for transforming your concrete yard corn. It’s a rewarding experience that connects you to the origins of your food and empowers you to be more resourceful in the kitchen. We are confident that you will find this method to be a game-changer.
But don’t just take our word for it! We want to hear about your experiences. Did you try a variation that worked particularly well? Did you encounter any challenges along the way? Share your tips, tricks, and photos in the comments below. Let’s build a community of resourceful cooks who are passionate about making the most of every ingredient. Your insights could help others discover the joy of transforming concrete yard corn into something truly special. So, get cooking, get creative, and get sharing! We can’t wait to see what you create!
Frequently Asked Questions (FAQ)
**Q: What exactly is “concrete yard corn,” and why is it so hard?**
A: “Concrete yard corn” is a term we’re using to describe corn that has become excessively hard and dry, often due to being left on the stalk for too long, improper storage, or specific environmental conditions. This can happen when the corn isn’t harvested at the peak of ripeness, or if it’s exposed to prolonged periods of dryness. The kernels become very dense and difficult to chew, making them unsuitable for typical corn-on-the-cob consumption.
**Q: Can I use this method for any type of hard corn, or is it specific to “concrete yard corn?”**
A: While we’re focusing on “concrete yard corn,” this method can be adapted for any type of hard, dried corn, including field corn or dent corn. The key is to adjust the soaking and cooking times based on the specific hardness of the corn. Start with the recommended times and check the corn frequently for tenderness.
**Q: How long does the entire process take, from soaking to being ready to eat?**
A: The entire process can take anywhere from 24 to 48 hours, depending on the hardness of the corn and the method you choose. The soaking period is typically 12-24 hours, followed by a cooking time that can range from 1 to 3 hours. Drying time, if you choose to dry the corn for grinding into cornmeal, can take several days.
**Q: What if I don’t have a pressure cooker? Can I still use this method?**
A: Absolutely! While a pressure cooker significantly reduces cooking time, you can definitely use a regular pot on the stovetop. Simply increase the cooking time accordingly. Check the corn frequently for tenderness, adding more water as needed to prevent it from drying out. It may take 2-3 hours of simmering to achieve the desired softness.
**Q: How do I know when the corn is soft enough?**
A: The best way to check for doneness is to taste a few kernels. They should be tender and easily chewable, with no hard or gritty texture. If they’re still too firm, continue cooking for longer, checking every 30 minutes.
**Q: Can I freeze the cooked corn for later use?**
A: Yes, cooked corn freezes very well. Allow the corn to cool completely, then transfer it to freezer-safe bags or containers. Be sure to remove as much air as possible to prevent freezer burn. Frozen cooked corn can be stored for up to 6 months.
**Q: What are some specific dishes I can make with this softened corn?**
A: The possibilities are endless! Here are a few ideas:
* **Corn Stew:** Add the softened corn to your favorite stew recipe for a hearty and flavorful meal.
* **Polenta:** Grind the dried corn into cornmeal and use it to make creamy polenta.
* **Corn Tortillas:** Use the cornmeal to make homemade corn tortillas.
* **Corn Salad:** Combine the cooked corn with diced vegetables, herbs, and a vinaigrette for a refreshing salad.
* **Cornbread:** Add the cornmeal to your favorite cornbread recipe for a rustic and flavorful twist.
* **Succotash:** Combine the corn with lima beans, tomatoes, and other vegetables for a classic succotash dish.
**Q: Is there any risk of the corn being unsafe to eat if it’s been sitting in my yard for a while?**
A: While this method can salvage hard corn, it’s crucial to inspect the corn carefully before using it. Discard any corn that shows signs of mold, rot, or insect infestation. If you’re unsure about the safety of the corn, it’s always best to err on the side of caution and discard it. Proper storage is key to preventing spoilage.
**Q: Can I use this method to soften corn that’s already been removed from the cob?**
A: Yes, you can use this method for kernels that have already been removed from the cob. Simply follow the same soaking and cooking instructions, adjusting the cooking time as needed.
**Q: What’s the best way to dry the corn after cooking if I want to make cornmeal?**
A: The best way to dry the corn is to spread it out in a single layer on a baking sheet and dry it in a low oven (around 170°F or 77°C) for several hours, or until it’s completely dry and brittle. You can also use a dehydrator if you have one. Alternatively, you can air-dry the corn in a well-ventilated area, but this will take several days.
**Q: What kind of grinder should I use to make cornmeal?**
A: A grain mill is ideal for grinding corn into cornmeal. However, you can also use a high-powered blender or food processor. If using a blender or food processor, pulse the corn in short bursts to avoid overheating the motor. You may need to sift the cornmeal to remove any larger pieces.
**Q: Does this method affect the nutritional value of the corn?**
A: The soaking and cooking process may slightly reduce the nutritional value of the corn, particularly some water-soluble vitamins. However, the corn will still retain a significant amount of its fiber, minerals, and carbohydrates. The benefits of salvaging and using the corn outweigh the minor loss of nutrients.
**Q: I tried this method, and my corn is still a little tough. What did I do wrong?**
A: If your corn is still tough after following the instructions, it likely needs more cooking time. The hardness of the corn can vary depending on its age and variety. Continue cooking the corn for longer, checking it every 30 minutes until it reaches the desired tenderness. Also, ensure that the corn is fully submerged in water during cooking.
We hope these FAQs have answered your questions and inspired you to try this DIY trick for transforming your concrete yard corn. Happy cooking!

Leave a Comment