
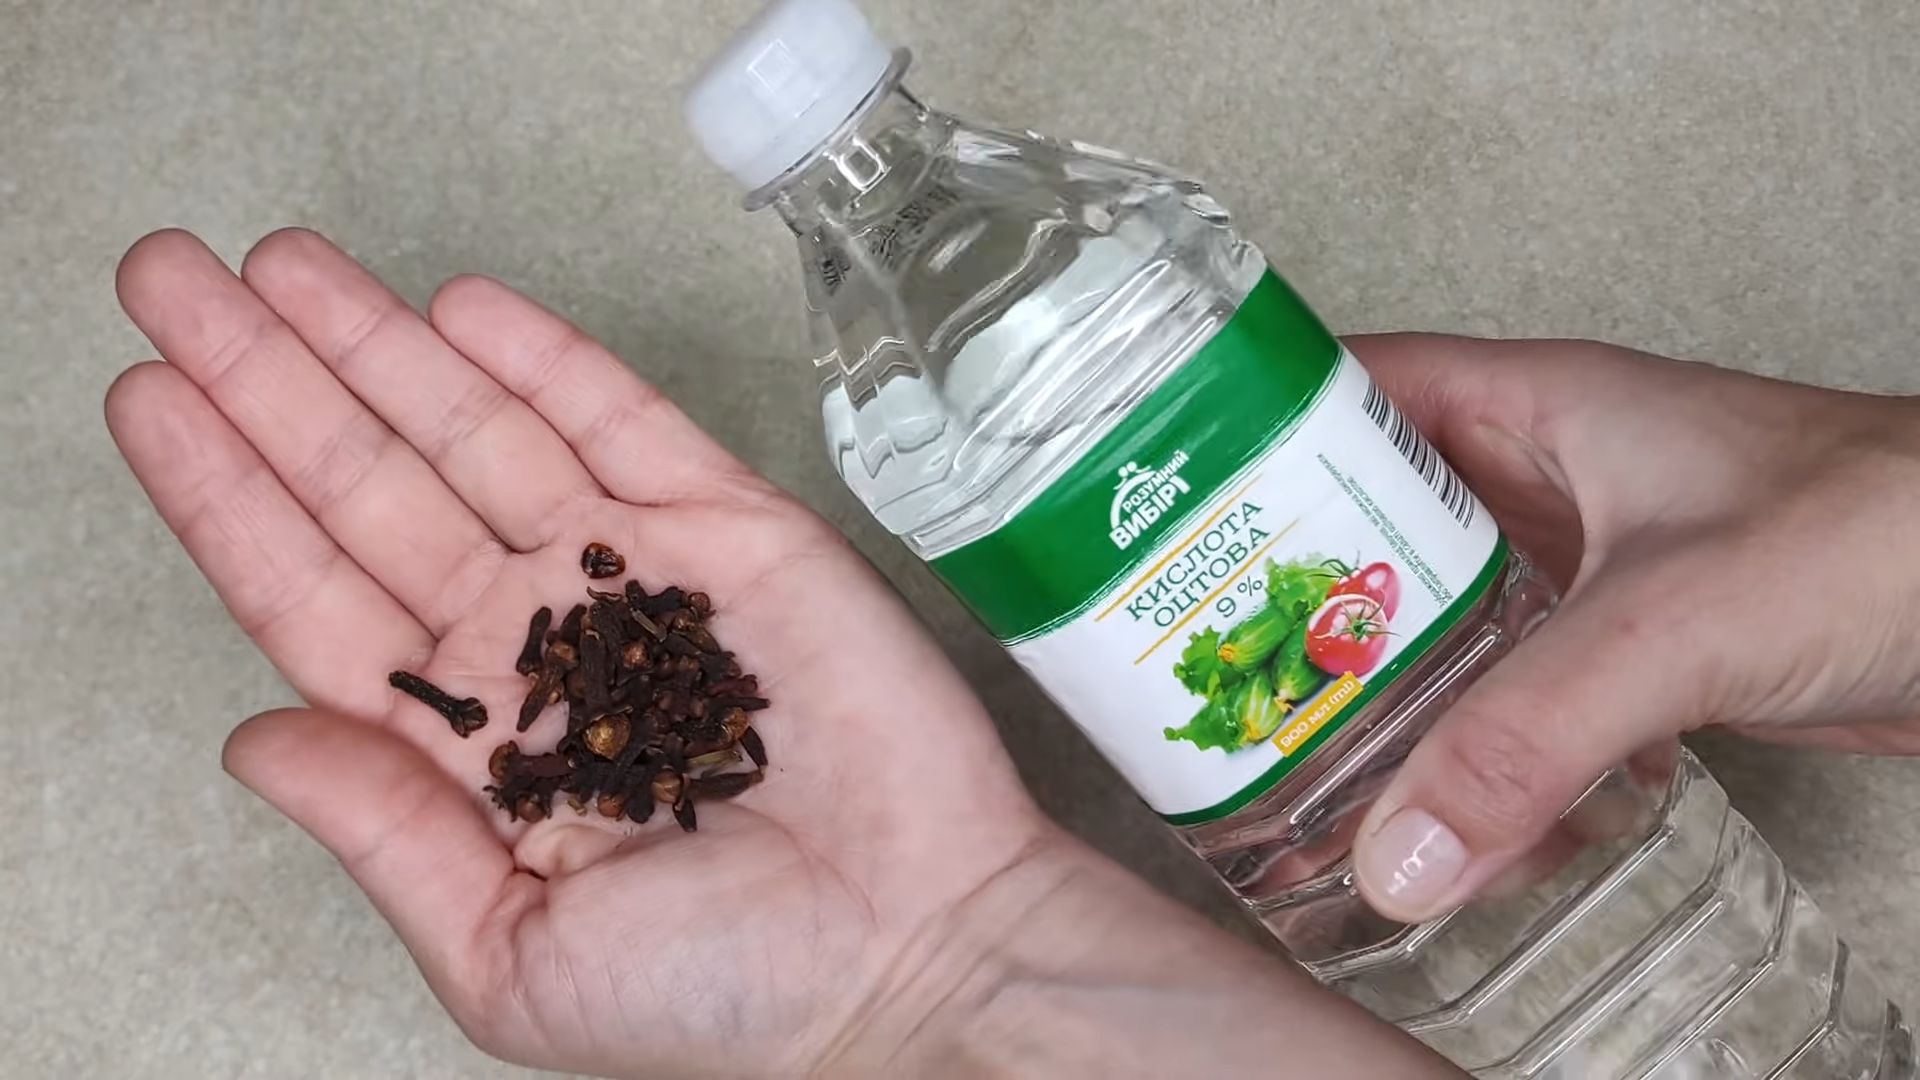
Clove infused vinegar uses are more diverse and fascinating than you might imagine! Have you ever wondered how to naturally boost your garden’s health and deter pesky insects without resorting to harsh chemicals? I’m here to tell you, the answer might just be sitting in your spice rack and pantry. For centuries, cloves have been prized not only for their culinary uses but also for their potent medicinal and insect-repelling properties. Vinegar, a staple in households worldwide, has a rich history dating back to ancient civilizations, used for everything from preserving food to cleaning.
Combining these two powerhouses creates a simple yet incredibly effective solution for a variety of gardening needs. In this DIY guide, I’ll walk you through the easy steps to create your own clove-infused vinegar and unlock its potential to protect your precious plants. Many gardeners struggle with common issues like aphids, fungal diseases, and nutrient deficiencies. This natural remedy offers a gentle, eco-friendly alternative to conventional treatments, helping you cultivate a thriving garden while minimizing your environmental impact. So, let’s dive in and discover the magic of clove infused vinegar uses for a healthier, happier garden!
Growing Chili Peppers: From Seed to Sizzling Harvest!
Okay, chili pepper enthusiasts, gather ’round! I’m going to walk you through everything I know about growing these fiery little gems, from starting them indoors to harvesting a bumper crop. Get ready to add some serious heat to your garden and your kitchen!
Getting Started: Seeds and Supplies
Before we even think about planting, let’s make sure we have everything we need. This is crucial for a smooth and successful chili-growing journey.
* Chili Pepper Seeds: Obviously! Choose varieties that suit your taste and climate. I personally love Jalapeños for their versatility, Habaneros for intense heat, and Bell Peppers (yes, they’re technically chili peppers!) for a milder option. Experiment!
* Seed Starting Trays or Small Pots: These will be our nurseries for the baby peppers.
* Seed Starting Mix: This is a light, sterile soil mix specifically designed for seedlings. Regular potting soil can be too heavy.
* Heat Mat (Optional but Recommended): Chili peppers love warmth, especially during germination. A heat mat will significantly improve your success rate.
* Grow Lights (Also Optional but Recommended): If you’re starting seeds indoors, grow lights will provide the necessary light for healthy growth, especially if you don’t have a super sunny windowsill.
* Watering Can or Spray Bottle: For gentle watering.
* Labels and a Permanent Marker: To keep track of which peppers are which! Trust me, you’ll thank yourself later.
* Potting Soil: For transplanting into larger pots or directly into the garden.
* Fertilizer: A balanced fertilizer for young plants and a bloom-boosting fertilizer once they start flowering.
* Gardening Gloves: To protect your hands.
* Trowel or Small Shovel: For transplanting.
Phase 1: Starting Seeds Indoors (8-10 Weeks Before Last Frost)
This is where the magic begins! Starting your chili pepper seeds indoors gives them a head start, especially in cooler climates.
1. Prepare Your Seed Starting Trays: Fill your seed starting trays or small pots with seed starting mix. Gently tap the trays to settle the mix.
2. Sow the Seeds: Make a small indentation (about ¼ inch deep) in the soil of each cell or pot. Place 2-3 seeds in each indentation. This increases your chances of at least one seed germinating.
3. Cover the Seeds: Gently cover the seeds with a thin layer of seed starting mix.
4. Water Gently: Use a watering can or spray bottle to moisten the soil. Avoid overwatering, as this can lead to rot. The soil should be damp, not soggy.
5. Provide Warmth: Place the seed starting trays on a heat mat. The ideal soil temperature for chili pepper germination is between 75-85°F (24-29°C).
6. Provide Light: If you’re using grow lights, position them a few inches above the seed starting trays. If you’re using a windowsill, choose the sunniest one you have. Rotate the trays regularly to ensure even light exposure.
7. Maintain Moisture: Keep the soil consistently moist, but not waterlogged. Check the soil daily and water as needed. You can also cover the trays with a clear plastic dome or plastic wrap to help retain moisture. Just remember to remove it once the seedlings emerge to prevent fungal diseases.
8. Be Patient: Chili pepper seeds can take anywhere from 7 to 21 days to germinate, depending on the variety and conditions. Don’t give up!
9. Thin the Seedlings: Once the seedlings have developed their first true leaves (the second set of leaves that appear after the initial seed leaves), thin them out by snipping off the weaker seedlings at the soil line with scissors. Leave only the strongest seedling in each cell or pot.
Phase 2: Transplanting Seedlings
Once your seedlings have grown a bit stronger, it’s time to give them more space to grow.
1. Harden Off the Seedlings: Before transplanting your seedlings outdoors, you need to “harden them off.” This process gradually acclimates them to the outdoor environment. Start by placing the seedlings outdoors in a sheltered location for an hour or two each day, gradually increasing the amount of time they spend outdoors over the course of a week or two. Protect them from direct sunlight and strong winds during this process.
2. Choose a Location: Chili peppers need at least 6-8 hours of sunlight per day. Choose a location in your garden that receives plenty of sunlight. The soil should be well-draining and rich in organic matter.
3. Prepare the Soil: Amend the soil with compost or other organic matter to improve drainage and fertility.
4. Dig the Holes: Dig holes that are slightly larger than the root balls of your seedlings. Space the holes according to the mature size of the chili pepper variety you’re growing. Generally, 18-24 inches apart is a good rule of thumb.
5. Transplant the Seedlings: Gently remove the seedlings from their trays or pots. Be careful not to damage the roots. Place the seedlings in the holes and backfill with soil. Gently firm the soil around the base of the plants.
6. Water Thoroughly: Water the seedlings thoroughly after transplanting.
7. Mulch: Apply a layer of mulch around the base of the plants to help retain moisture, suppress weeds, and regulate soil temperature.
Phase 3: Ongoing Care
Now that your chili peppers are in the ground, it’s time to provide them with the care they need to thrive.
* Watering: Water your chili peppers regularly, especially during hot, dry weather. Water deeply and infrequently, allowing the soil to dry out slightly between waterings. Avoid overwatering, as this can lead to root rot.
* Fertilizing: Fertilize your chili peppers every 2-3 weeks with a balanced fertilizer. Once they start flowering, switch to a bloom-boosting fertilizer to encourage fruit production. Follow the instructions on the fertilizer label.
* Pruning: Pruning isn’t strictly necessary, but it can help improve air circulation and encourage bushier growth. You can prune away any dead or yellowing leaves.
* Pest and Disease Control: Keep an eye out for pests and diseases. Common pests of chili peppers include aphids, spider mites, and whiteflies. Common diseases include blossom end rot and fungal diseases. Treat any problems promptly with appropriate organic pest control methods or fungicides.
* Support: Some chili pepper varieties, especially those with heavy fruit production, may need support to prevent them from falling over. You can use stakes or cages to support the plants.
Troubleshooting Common Problems
Even with the best care, you might encounter some problems along the way. Here are a few common issues and how to address them:
* Blossom End Rot: This is a common problem that causes the bottom of the chili peppers to rot. It’s usually caused by a calcium deficiency. To prevent blossom end rot, make sure your soil is rich in calcium and water your plants consistently. You can also add calcium to the soil by using bone meal or eggshells.
* Aphids: These tiny insects can suck the sap from your chili pepper plants, causing them to weaken and become stunted. You can control aphids by spraying them with a strong stream of water or by using insecticidal soap.
* Spider Mites: These tiny pests can also suck the sap from your chili pepper plants, causing them to develop yellow spots and webbing. You can control spider mites by spraying them with a strong stream of water or by using insecticidal soap.
* Fungal Diseases: Fungal diseases can cause spots, lesions, and rot on your chili pepper plants. To prevent fungal diseases, make sure your plants have good air circulation and avoid overwatering. You can also treat fungal diseases with fungicides.
Phase 4: Harvesting Your Chili Peppers
This is the most rewarding part! Knowing when to harvest is key to getting the best flavor and heat.
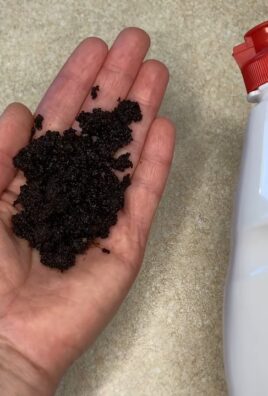
1. Timing is Everything: The best time to harvest chili peppers depends on the variety and your personal preference. Generally, chili peppers are ready to harvest when they have reached their mature size and color. Before we even think about planting, let’s make sure we have everything we need. This is crucial for a smooth and successful chili-growing journey. * Chili Pepper Seeds: Obviously! Choose varieties that suit your taste and climate. I personally love Jalapeños for their versatility, Habaneros for intense heat, and Bell Peppers (yes, they’re technically chili peppers!) for a milder option. Experiment! This is where the magic begins! Starting your chili pepper seeds indoors gives them a head start, especially in cooler climates. 1. Prepare Your Seed Starting Trays: Fill your seed starting trays or small pots with seed starting mix. Gently tap the trays to settle the mix. Once your seedlings have grown a bit stronger, it’s time to give them more space to grow. 1. Harden Off the Seedlings: Before transplanting your seedlings outdoors, you need to “harden them off.” This process gradually acclimates them to the outdoor environment. Start by placing the seedlings outdoors in a sheltered location for an hour or two each day, gradually increasing the amount of time they spend outdoors over the course of a week or two. Protect them from direct sunlight and strong winds during this process. Now that your chili peppers are in the ground, it’s time to provide them with the care they need to thrive. * Watering: Water your chili peppers regularly, especially during hot, dry weather. Water deeply and infrequently, allowing the soil to dry out slightly between waterings. Avoid overwatering, as this can lead to root rot. Even with the best care, you might encounter some problems along the way. Here are a few common issues and how to address them: * Blossom End Rot: This is a common problem that causes the bottom of the chili peppers to rot. It’s usually caused by a calcium deficiency. To prevent blossom end rot, make sure your soil is rich in calcium and water your plants consistently. You can also add calcium to the soil by using bone meal or eggshells. This is the most rewarding part! Knowing when to harvest is key to getting the best flavor and heat. 1. Timing is Everything: The best time to harvest chili peppers depends on the variety and your personal preference. Generally, chili peppers are ready to harvest when they have reached their mature size and color. So, there you have it! Clove infused vinegar, a simple yet incredibly powerful DIY trick, is more than just a cleaning agent; it’s a natural, cost-effective, and wonderfully fragrant solution for a multitude of household needs. We’ve explored its versatility, from banishing fruit flies to adding a subtle, spicy warmth to your favorite vinaigrettes. But why is this DIY trick a must-try? First and foremost, it’s about control. You know exactly what’s going into your cleaning and culinary creations. No harsh chemicals, no artificial fragrances, just the pure, potent power of cloves and vinegar working in harmony. In a world increasingly concerned with sustainability and natural living, clove infused vinegar offers a tangible way to reduce your reliance on commercially produced products and embrace a more eco-friendly lifestyle. Second, it’s about effectiveness. The antimicrobial and antifungal properties of cloves, combined with the cleaning prowess of vinegar, create a formidable force against germs, grime, and unwanted odors. Whether you’re tackling stubborn stains in the kitchen or freshening up your bathroom, this infused vinegar delivers impressive results without the need for harsh chemicals. Third, it’s about the delightful aroma. Unlike the often pungent smell of plain vinegar, clove infused vinegar boasts a warm, inviting fragrance that transforms chores into a more pleasant experience. Imagine cleaning your countertops and being greeted by the comforting scent of cloves – a far cry from the harsh chemical odors of conventional cleaners. But the beauty of this DIY trick lies in its adaptability. Feel free to experiment with different types of vinegar. White vinegar is a great all-purpose option, but apple cider vinegar can add a subtle sweetness, particularly when used in culinary applications. You can also adjust the clove concentration to suit your preferences. For a more intense clove flavor and aroma, use more cloves or allow the mixture to infuse for a longer period. Variations and Suggestions: * Citrus Boost: Add citrus peels (orange, lemon, or grapefruit) to the infusion for an extra burst of freshness and cleaning power. We encourage you to try this simple yet transformative DIY trick and experience the benefits for yourself. It’s easy to make, cost-effective, and incredibly versatile. Once you’ve tried it, we’re confident that clove infused vinegar will become a staple in your home. Don’t just take our word for it – give it a try! We’re eager to hear about your experiences. Share your tips, variations, and success stories in the comments below. Let’s build a community of DIY enthusiasts who are passionate about natural cleaning and sustainable living. Your feedback will not only inspire others but also help us refine and improve this already amazing DIY trick. So, go ahead, infuse some vinegar, and let the magic of cloves transform your home! Clove infused vinegar is simply vinegar that has been steeped with cloves, allowing the vinegar to absorb the cloves’ beneficial properties and aroma. You should make it because it’s a natural, cost-effective, and versatile alternative to commercial cleaning products and culinary ingredients. It harnesses the antimicrobial and antifungal properties of cloves, making it effective for cleaning, deodorizing, and even adding a unique flavor to your cooking. Plus, it’s a sustainable way to reduce your reliance on harsh chemicals. White vinegar is the most common and versatile choice for cleaning purposes due to its high acidity. Apple cider vinegar is a good option for culinary applications, as it adds a subtle sweetness and fruity note. You can also experiment with other types of vinegar, such as red wine vinegar or rice vinegar, depending on your desired flavor profile. The infusion time can vary depending on your preference. A minimum of one week is recommended to allow the vinegar to fully absorb the clove’s properties. However, for a stronger flavor and aroma, you can infuse it for up to two weeks or even longer. The longer it infuses, the more potent the vinegar will become. Store clove infused vinegar in a cool, dark place, away from direct sunlight. A pantry or cupboard is ideal. The vinegar will keep indefinitely, although the clove aroma may diminish slightly over time. While clove infused vinegar is generally safe for most surfaces, it’s always a good idea to test it on an inconspicuous area first, especially on delicate materials like marble or granite. Avoid using it on waxed furniture or unfinished wood, as the acidity of the vinegar can damage these surfaces. Clove infused vinegar has a wide range of uses, including: * Cleaning: Use it to clean countertops, sinks, toilets, and other surfaces. Its antimicrobial properties make it effective against germs and bacteria. Yes, you can reuse the cloves after infusing the vinegar. They will have lost some of their flavor and aroma, but they can still be used in potpourri, sachets, or even added to your compost pile. Clove infused vinegar is generally safe for pets and children when used as a cleaning agent, but it’s important to keep it out of their reach. Avoid spraying it directly on pets or allowing children to ingest it. As with any cleaning product, it’s always best to exercise caution and supervise children when using it. Yes, you can add essential oils to clove infused vinegar to enhance its aroma and cleaning properties. Some good options include clove essential oil, cinnamon essential oil, orange essential oil, and lemon essential oil. Add a few drops of your favorite essential oil to the infused vinegar and shake well before using. Cloudiness in clove infused vinegar is normal and doesn’t indicate spoilage. It’s simply a result of the natural compounds in the cloves precipitating out of the solution. You can filter the vinegar through a coffee filter or cheesecloth to remove the cloudiness if desired, but it’s not necessary. The vinegar is still perfectly safe and effective to use.
2. Color Changes: Most chili peppers start out green and then change color as they ripen. The final color depends on the variety. For example, Jalapeños turn red, Habaneros turn orange, and Bell Peppers turn red, yellow, or orange.
3. Firmness: The chili peppers should be firm to the touch.
4. Harvesting Technique:Getting Started: Seeds and Supplies
* Seed Starting Trays or Small Pots: These will be our nurseries for the baby peppers.
* Seed Starting Mix: This is a light, sterile soil mix specifically designed for seedlings. Regular potting soil can be too heavy.
* Heat Mat (Optional but Recommended): Chili peppers love warmth, especially during germination. A heat mat will significantly improve your success rate.
* Grow Lights (Also Optional but Recommended): If you’re starting seeds indoors, grow lights will provide the necessary light for healthy growth, especially if you don’t have a super sunny windowsill.
* Watering Can or Spray Bottle: For gentle watering.
* Labels and a Permanent Marker: To keep track of which peppers are which! Trust me, you’ll thank yourself later.
* Potting Soil: For transplanting into larger pots or directly into the garden.
* Fertilizer: A balanced fertilizer for young plants and a bloom-boosting fertilizer once they start flowering.
* Gardening Gloves: To protect your hands.
* Trowel or Small Shovel: For transplanting.Phase 1: Starting Seeds Indoors (8-10 Weeks Before Last Frost)
2. Sow the Seeds: Make a small indentation (about ¼ inch deep) in the soil of each cell or pot. Place 2-3 seeds in each indentation. This increases your chances of at least one seed germinating.
3. Cover the Seeds: Gently cover the seeds with a thin layer of seed starting mix.
4. Water Gently: Use a watering can or spray bottle to moisten the soil. Avoid overwatering, as this can lead to rot. The soil should be damp, not soggy.
5. Provide Warmth: Place the seed starting trays on a heat mat. The ideal soil temperature for chili pepper germination is between 75-85°F (24-29°C).
6. Provide Light: If you’re using grow lights, position them a few inches above the seed starting trays. If you’re using a windowsill, choose the sunniest one you have. Rotate the trays regularly to ensure even light exposure.
7. Maintain Moisture: Keep the soil consistently moist, but not waterlogged. Check the soil daily and water as needed. You can also cover the trays with a clear plastic dome or plastic wrap to help retain moisture. Just remember to remove it once the seedlings emerge to prevent fungal diseases.
8. Be Patient: Chili pepper seeds can take anywhere from 7 to 21 days to germinate, depending on the variety and conditions. Don’t give up!
9. Thin the Seedlings: Once the seedlings have developed their first true leaves (the second set of leaves that appear after the initial seed leaves), thin them out by snipping off the weaker seedlings at the soil line with scissors. Leave only the strongest seedling in each cell or pot.Phase 2: Transplanting Seedlings
2. Choose a Location: Chili peppers need at least 6-8 hours of sunlight per day. Choose a location in your garden that receives plenty of sunlight. The soil should be well-draining and rich in organic matter.
3. Prepare the Soil: Amend the soil with compost or other organic matter to improve drainage and fertility.
4. Dig the Holes: Dig holes that are slightly larger than the root balls of your seedlings. Space the holes according to the mature size of the chili pepper variety you’re growing. Generally, 18-24 inches apart is a good rule of thumb.
5. Transplant the Seedlings: Gently remove the seedlings from their trays or pots. Be careful not to damage the roots. Place the seedlings in the holes and backfill with soil. Gently firm the soil around the base of the plants.
6. Water Thoroughly: Water the seedlings thoroughly after transplanting.
7. Mulch: Apply a layer of mulch around the base of the plants to help retain moisture, suppress weeds, and regulate soil temperature.Phase 3: Ongoing Care
* Fertilizing: Fertilize your chili peppers every 2-3 weeks with a balanced fertilizer. Once they start flowering, switch to a bloom-boosting fertilizer to encourage fruit production. Follow the instructions on the fertilizer label.
* Pruning: Pruning isn’t strictly necessary, but it can help improve air circulation and encourage bushier growth. You can prune away any dead or yellowing leaves.
* Pest and Disease Control: Keep an eye out for pests and diseases. Common pests of chili peppers include aphids, spider mites, and whiteflies. Common diseases include blossom end rot and fungal diseases. Treat any problems promptly with appropriate organic pest control methods or fungicides.
* Support: Some chili pepper varieties, especially those with heavy fruit production, may need support to prevent them from falling over. You can use stakes or cages to support the plants.Troubleshooting Common Problems
* Aphids: These tiny insects can suck the sap from your chili pepper plants, causing them to weaken and become stunted. You can control aphids by spraying them with a strong stream of water or by using insecticidal soap.
* Spider Mites: These tiny pests can also suck the sap from your chili pepper plants, causing them to develop yellow spots and webbing. You can control spider mites by spraying them with a strong stream of water or by using insecticidal soap.
* Fungal Diseases: Fungal diseases can cause spots, lesions, and rot on your chili pepper plants. To prevent fungal diseases, make sure your plants have good air circulation and avoid overwatering. You can also treat fungal diseases with fungicides.Phase 4: Harvesting Your Chili Peppers
2. Color Changes: Most chili peppers start out green and then change color as they ripen. The final color depends on the variety. For example, Jalapeños turn red, Habaneros turn orange, and Bell Peppers turn red, yellow, or orange.
3. Firmness: The chili peppers should be firm to the touch.
4. Harvesting Technique: Use pruning shears or scissors to cut the chili peppers from the plant. Leave a small piece of stem attached to the pepper.
5. Handling with Care: Be careful when handling chili peppers, especially hot varieties. Wear gloves to protect your hands from the capsaicin, the compound that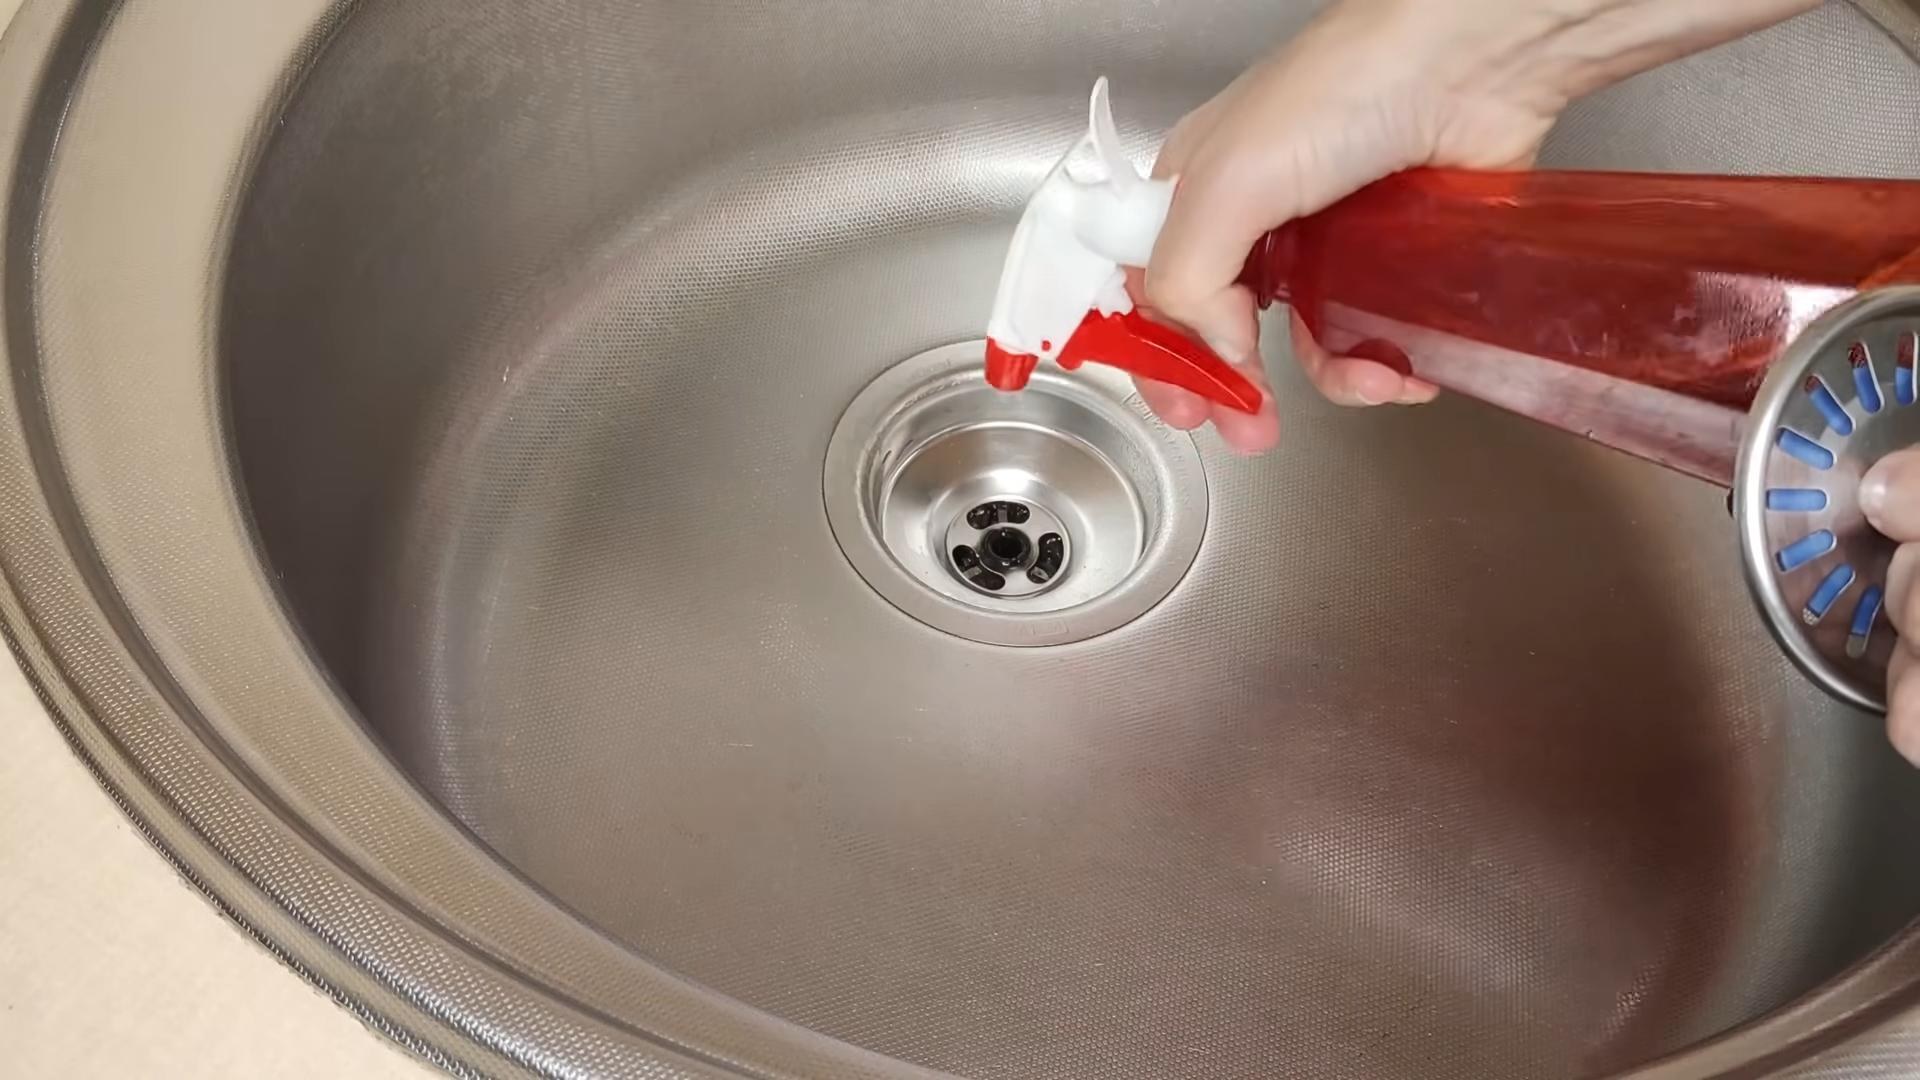
Conclusion
* Herbaceous Blend: Combine cloves with other herbs like rosemary, thyme, or lavender for a unique and aromatic cleaning solution.
* Spicy Kick: Add a pinch of cayenne pepper to the infusion for an extra boost of cleaning power and a subtle spicy aroma.
* Culinary Creations: Use clove infused vinegar to create unique vinaigrettes, marinades, and pickling solutions. Its warm, spicy flavor pairs well with roasted vegetables, salads, and grilled meats.
* DIY Air Freshener: Dilute clove infused vinegar with water in a spray bottle and use it as a natural air freshener.Frequently Asked Questions (FAQ)
What exactly is clove infused vinegar, and why should I make it?
What type of vinegar is best for making clove infused vinegar?
How long does it take to infuse the vinegar with cloves?
How do I store clove infused vinegar?
Can I use clove infused vinegar on all surfaces?
What are some specific uses for clove infused vinegar?
* Deodorizing: Use it to eliminate odors in your home, such as pet odors, smoke odors, and musty smells.
* Fruit Fly Trap: Pour a small amount of clove infused vinegar into a bowl and cover it with plastic wrap, poking a few small holes in the top. The fruit flies will be attracted to the vinegar and trapped inside.
* Vinaigrettes: Use it to create unique and flavorful vinaigrettes for salads.
* Marinades: Use it as a marinade for meats, poultry, or vegetables.
* Pickling: Use it to pickle vegetables, adding a warm, spicy flavor.
* Hair Rinse: Diluted clove infused vinegar can be used as a hair rinse to add shine and remove buildup.
* Weed Killer: Spray undiluted clove infused vinegar on weeds to kill them naturally.Can I reuse the cloves after infusing the vinegar?
Is clove infused vinegar safe for pets and children?
Can I add essential oils to clove infused vinegar?
What if my clove infused vinegar becomes cloudy?
Leave a Comment