
Growing Sweet Potatoes Monthly might sound like a gardener’s dream, or perhaps a daunting task! But trust me, with a few clever tricks and a little DIY magic, you can enjoy a continuous harvest of these delicious and nutritious root vegetables. For centuries, sweet potatoes have been a staple in diets around the world, from their origins in Central and South America to their widespread cultivation in Asia and Africa. They’re not just tasty; they’re packed with vitamins, minerals, and fiber, making them a fantastic addition to any healthy meal.
Have you ever found yourself craving that sweet, earthy flavor of a freshly harvested sweet potato, only to realize you’re out of season? That’s where this DIY guide comes in! I’m going to share some simple yet effective techniques that will allow you to extend your sweet potato harvest and enjoy them more frequently. Imagine the satisfaction of pulling up a sweet potato you nurtured yourself, knowing exactly where it came from and how it was grown. No more relying solely on grocery stores – you’ll have a sustainable source right in your backyard.
This article isn’t just about growing sweet potatoes monthly; it’s about empowering you to take control of your food supply, connect with nature, and enjoy the rewarding experience of home gardening. So, grab your gardening gloves, and let’s dive into the world of continuous sweet potato cultivation!

DIY Oven Cleaner: Banishing Grease with Baking Soda and Vinegar
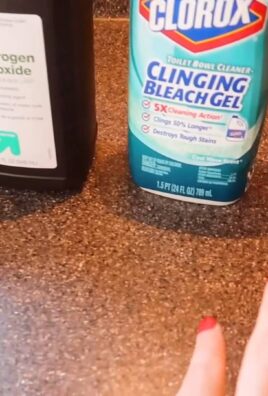
Okay, let’s face it: cleaning the oven is nobody’s favorite chore. But a sparkling clean oven makes cooking so much more enjoyable (and maybe even improves your baking!). Store-bought oven cleaners can be harsh and full of chemicals I’d rather avoid. So, I’m going to share my go-to method for a powerful, yet natural, oven cleaner using just baking soda and vinegar. Trust me, it works wonders on even the greasiest ovens!
What You’ll Need
Before we dive in, let’s gather our supplies. This is a pretty simple list, which is one of the things I love about this method.
* Baking Soda: The star of the show! It’s a mild alkali that helps to dissolve grease and grime.
* White Vinegar: The acidic counterpart to baking soda, creating a fizzing action that lifts away stubborn messes.
* Water: For creating a paste and rinsing.
* Spray Bottle: To easily apply the vinegar.
* Spatula or Scraper: For removing large chunks of baked-on food.
* Rubber Gloves: To protect your hands (baking soda can be drying).
* Sponge or Scrub Brush: For scrubbing away the loosened grime.
* Paper Towels or Rags: For wiping down the oven.
* Old Towels or Newspaper: To protect your floor from spills.
* Small Bowl: For mixing the baking soda paste.
Prepping Your Oven for Cleaning
Before we get to the fun part (well, maybe not fun, but necessary!), we need to prep the oven. This will make the cleaning process much easier.
1. Remove Oven Racks: Take out all the oven racks and set them aside. I usually soak mine in hot, soapy water in the sink while I’m cleaning the oven itself. This gives them a head start on getting clean.
2. Protect Your Floor: Lay down old towels or newspaper around the base of the oven to catch any drips or spills. This will save you from having to clean your floor afterward.
3. Scrape Away Loose Debris: Use a spatula or scraper to remove any large chunks of baked-on food from the bottom and sides of the oven. The less there is to dissolve, the better!
4. Lightly Dampen the Interior: Use a damp sponge or cloth to lightly moisten the interior surfaces of the oven. This will help the baking soda paste adhere better.
Making and Applying the Baking Soda Paste
Now for the magic ingredient! We’re going to create a baking soda paste that will work its wonders overnight.
1. Mix the Paste: In a small bowl, combine 1/2 cup of baking soda with enough water to form a thick, spreadable paste. I usually start with a few tablespoons of water and add more gradually until I get the right consistency. You want it to be thick enough to stick to the oven walls, but not so thick that it’s difficult to spread.
2. Apply the Paste: Using your hands (with gloves on, of course!), spread the baking soda paste all over the interior surfaces of the oven, avoiding the heating elements. I like to apply a thicker layer to areas with particularly stubborn grease or baked-on food. Don’t forget the door!
3. Let it Sit Overnight: This is the key! Let the baking soda paste sit in the oven for at least 12 hours, or even overnight. This gives the baking soda time to work its magic and break down the grease and grime.
Cleaning Up the Next Day
Okay, the waiting is over! Now it’s time to see the results of our overnight baking soda treatment.
1. Inspect the Oven: After the baking soda paste has sat overnight, you’ll likely notice that it has turned brown and crusty. This is a good sign! It means the baking soda has absorbed the grease and grime.
2. Spray with Vinegar: Fill your spray bottle with white vinegar. Generously spray the baking soda paste with vinegar. You’ll see it start to fizz and bubble – this is the chemical reaction between the baking soda and vinegar, which helps to loosen the remaining grime.
3. Scrub Away the Grime: Using a sponge or scrub brush, scrub away the loosened grime. You may need to use a little elbow grease, especially in areas with stubborn buildup. The fizzing action of the vinegar should make this process much easier.
4. Rinse Thoroughly: Once you’ve scrubbed away all the grime, rinse the oven thoroughly with a damp sponge or cloth. You may need to rinse several times to remove all traces of baking soda and vinegar.
5. Dry the Oven: Use paper towels or rags to dry the interior of the oven. Make sure to remove any remaining moisture.
6. Clean the Oven Racks: Remember those oven racks we soaked earlier? Now’s the time to give them a good scrub with a sponge or scrub brush. Rinse them thoroughly and dry them before putting them back in the oven.
7. Reassemble and Enjoy: Once the oven is completely dry, replace the oven racks. Now you have a sparkling clean oven, ready for your next culinary adventure!
Dealing with Stubborn Spots
Sometimes, even with the baking soda and vinegar treatment, there might be a few stubborn spots that just won’t budge. Don’t worry, I have a few tricks up my sleeve!
* More Baking Soda Paste: For particularly stubborn spots, try applying a fresh layer of baking soda paste and letting it sit for a few more hours.
* Steel Wool: For really tough baked-on food, you can use a steel wool pad to scrub the area. Be careful not to scratch the oven surface, especially if it’s self-cleaning. Test in an inconspicuous area first.
* Lemon Juice: Lemon juice is a natural degreaser and can help to loosen stubborn grime. Cut a lemon in half and rub it directly on the affected area. Let it sit for a few minutes, then scrub and rinse.
Tips for Keeping Your Oven Clean
Prevention is always better than cure! Here are a few tips to help keep your oven clean and prevent future buildup:
* Wipe Up Spills Immediately: The easiest way to prevent baked-on food is to wipe up spills as soon as they happen.
* Use Oven Liners: Oven liners can catch drips and spills, making cleanup much easier.
* Regular Cleaning: Even if you don’t have any major spills, try to give your oven a quick wipe-down every few weeks to prevent buildup.
* Self-Cleaning Cycle: If your oven has a self-cleaning cycle, use it periodically to burn off any accumulated grease and grime. However, be aware that self-cleaning cycles can produce strong odors and high temperatures, so make sure to ventilate your kitchen well. I personally prefer the baking soda and vinegar method because it’s more natural and doesn’t produce any harsh f
Okay, let’s face it: cleaning the oven is nobody’s favorite chore. But a sparkling clean oven makes cooking so much more enjoyable (and maybe even improves your baking!). Store-bought oven cleaners can be harsh and full of chemicals I’d rather avoid. So, I’m going to share my go-to method for a powerful, yet natural, oven cleaner using just baking soda and vinegar. Trust me, it works wonders on even the greasiest ovens!
What You’ll Need
Before we dive in, let’s gather our supplies. This is a pretty simple list, which is one of the things I love about this method.
* Baking Soda: The star of the show! It’s a mild alkali that helps to dissolve grease and grime.
* White Vinegar: The acidic counterpart to baking soda, creating a fizzing action that lifts away stubborn messes.
* Water: For creating a paste and rinsing.
* Spray Bottle: To easily apply the vinegar.
* Spatula or Scraper: For removing large chunks of baked-on food.
* Rubber Gloves: To protect your hands (baking soda can be drying).
* Sponge or Scrub Brush: For scrubbing away the loosened grime.
* Paper Towels or Rags: For wiping down the oven.
* Old Towels or Newspaper: To protect your floor from spills.
* Small Bowl: For mixing the baking soda paste.
Prepping Your Oven for Cleaning
Before we get to the fun part (well, maybe not fun, but necessary!), we need to prep the oven. This will make the cleaning process much easier.
1. Remove Oven Racks: Take out all the oven racks and set them aside. I usually soak mine in hot, soapy water in the sink while I’m cleaning the oven itself. This gives them a head start on getting clean.
2. Protect Your Floor: Lay down old towels or newspaper around the base of the oven to catch any drips or spills. This will save you from having to clean your floor afterward.
3. Scrape Away Loose Debris: Use a spatula or scraper to remove any large chunks of baked-on food from the bottom and sides of the oven. The less there is to dissolve, the better!
4. Lightly Dampen the Interior: Use a damp sponge or cloth to lightly moisten the interior surfaces of the oven. This will help the baking soda paste adhere better.
Making and Applying the Baking Soda Paste
Now for the magic ingredient! We’re going to create a baking soda paste that will work its wonders overnight.
1. Mix the Paste: In a small bowl, combine 1/2 cup of baking soda with enough water to form a thick, spreadable paste. I usually start with a few tablespoons of water and add more gradually until I get the right consistency. You want it to be thick enough to stick to the oven walls, but not so thick that it’s difficult to spread.
2. Apply the Paste: Using your hands (with gloves on, of course!), spread the baking soda paste all over the interior surfaces of the oven, avoiding the heating elements. I like to apply a thicker layer to areas with particularly stubborn grease or baked-on food. Don’t forget the door!
3. Let it Sit Overnight: This is the key! Let the baking soda paste sit in the oven for at least 12 hours, or even overnight. This gives the baking soda time to work its magic and break down the grease and grime.
Cleaning Up the Next Day
Okay, the waiting is over! Now it’s time to see the results of our overnight baking soda treatment.
1. Inspect the Oven: After the baking soda paste has sat overnight, you’ll likely notice that it has turned brown and crusty. This is a good sign! It means the baking soda has absorbed the grease and grime.
2. Spray with Vinegar: Fill your spray bottle with white vinegar. Generously spray the baking soda paste with vinegar. You’ll see it start to fizz and bubble – this is the chemical reaction between the baking soda and vinegar, which helps to loosen the remaining grime.
3. Scrub Away the Grime: Using a sponge or scrub brush, scrub away the loosened grime. You may need to use a little elbow grease, especially in areas with stubborn buildup. The fizzing action of the vinegar should make this process much easier.
4. Rinse Thoroughly: Once you’ve scrubbed away all the grime, rinse the oven thoroughly with a damp sponge or cloth. You may need to rinse several times to remove all traces of baking soda and vinegar.
5. Dry the Oven: Use paper towels or rags to dry the interior of the oven. Make sure to remove any remaining moisture.
6. Clean the Oven Racks: Remember those oven racks we soaked earlier? Now’s the time to give them a good scrub with a sponge or scrub brush. Rinse them thoroughly and dry them before putting them back in the oven.
7. Reassemble and Enjoy: Once the oven is completely dry, replace the oven racks. Now you have a sparkling clean oven, ready for your next culinary adventure!
Dealing with Stubborn Spots
Sometimes, even with the baking soda and vinegar treatment, there might be a few stubborn spots that just won’t budge. Don’t worry, I have a few tricks up my sleeve!
* More Baking Soda Paste: For particularly stubborn spots, try applying a fresh layer of baking soda paste and letting it sit for a few more hours.
* Steel Wool: For really tough baked-on food, you can use a steel wool pad to scrub the area. Be careful not to scratch the oven surface, especially if it’s self-cleaning. Test in an inconspicuous area first.
* Lemon Juice: Lemon juice is a natural degreaser and can help to loosen stubborn grime. Cut a lemon in half and rub it directly on the affected area. Let it sit for a few minutes, then scrub and rinse.
Tips for Keeping Your Oven Clean
Prevention is always better than cure! Here are a few tips to help keep your oven clean and prevent future buildup:
* Wipe Up Spills Immediately: The easiest way to prevent baked-on food is to wipe up spills as soon as they happen.
* Use Oven Liners: Oven liners can catch drips and spills, making cleanup much easier.
* Regular Cleaning: Even if you don’t have any major spills, try to give your oven a quick wipe-down every few weeks to prevent buildup.
* Self-Cleaning Cycle: If your oven has a self-cleaning cycle, use it periodically to burn off any accumulated grease and grime. However, be aware that self-cleaning cycles can produce strong odors and high temperatures, so make sure to ventilate your kitchen well. I personally prefer the baking soda and vinegar method because it’s more natural and doesn’t produce any harsh fumes.
Why This Method Works
So, why does this baking soda and vinegar method work so well? It’s all about the chemistry!
* Baking Soda (Sodium Bicarbonate): Baking soda is a mild alkali, which means it can neutralize acids and dissolve grease and grime.
* Vinegar (Acetic Acid): Vinegar is a mild acid, which reacts with baking soda to create carbon dioxide gas. This fizzing action helps to lift away stubborn messes.
Together, baking soda and vinegar create a powerful cleaning combination that is both effective and natural. Plus, it’s much cheaper and safer than using harsh chemical oven cleaners.
Safety First!
While this method is generally safe, it’s always important to take a few precautions:
* Wear Rubber Gloves: Baking soda can be drying to the skin, so wear rubber gloves to protect your hands.
* Avoid Contact with Eyes: Avoid getting baking soda or vinegar in your eyes. If you do, rinse immediately with plenty of water.
* Ventilate Your Kitchen: While this method doesn’t produce harsh fumes like chemical oven cleaners, it’s still a good idea to ventilate your kitchen while you’re cleaning.
* Unplug Your Oven: Before you start cleaning, unplug your oven to prevent any accidental electrical shocks.
Final Thoughts
Cleaning the oven might not be the most glamorous task, but with this simple baking soda and vinegar method, it doesn’t have to be a dreaded chore. I hope this guide has helped you banish grease and grime from your oven and enjoy a sparkling clean cooking space! Happy cleaning!
Conclusion
So, there you have it! Growing sweet potatoes monthly, while it might sound ambitious, is entirely achievable with a little planning and the right techniques. We’ve walked through the process, from sprouting slips to harvesting your delicious, homegrown sweet potatoes, and hopefully, you’re feeling inspired to give it a try.
This isn’t just about having a constant supply of sweet potatoes; it’s about connecting with your food, understanding the growing cycle, and enjoying the satisfaction of nurturing something from start to finish. Imagine the joy of serving a dish made with sweet potatoes you personally cultivated, knowing exactly where they came from and the care that went into them. That’s a reward in itself!
But why is this monthly approach a must-try? Because it eliminates the feast-or-famine cycle that often comes with traditional sweet potato growing. Instead of a single, massive harvest, you’ll have a steady stream of these nutritious and versatile vegetables, ready to be incorporated into your favorite recipes. Think sweet potato fries on demand, creamy sweet potato soup whenever the mood strikes, or even homemade sweet potato baby food for the little ones. The possibilities are endless!
Don’t be afraid to experiment with different varieties of sweet potatoes to find your favorites. Beauregard is a classic choice, known for its vibrant orange flesh and sweet flavor. But there are also white-fleshed varieties like Bonita, purple-skinned varieties like Stokes Purple, and even Japanese sweet potatoes with their unique chestnut-like flavor. Each variety offers a slightly different taste and texture, so exploring them is part of the fun.
Consider also experimenting with different growing methods. While we’ve focused on container gardening, you can adapt these principles to raised beds or even in-ground planting, depending on your space and climate. Just remember to provide well-draining soil and plenty of sunlight.
And speaking of climate, if you live in a cooler region, you might need to start your slips indoors earlier in the season or provide extra protection during colder months. A simple cold frame or row cover can make a big difference in extending your growing season.
Growing sweet potatoes monthly is a rewarding experience that will keep you supplied with fresh produce.
We encourage you to take the plunge and try growing sweet potatoes monthly. It’s a learning process, so don’t be discouraged if you encounter a few challenges along the way. The important thing is to learn from your mistakes and keep experimenting.
Once you’ve harvested your first batch of sweet potatoes, we’d love to hear about your experience! Share your tips, tricks, and photos in the comments below. Let’s create a community of sweet potato enthusiasts and learn from each other. Happy growing!
Frequently Asked Questions (FAQ)
What are sweet potato slips, and where do I get them?
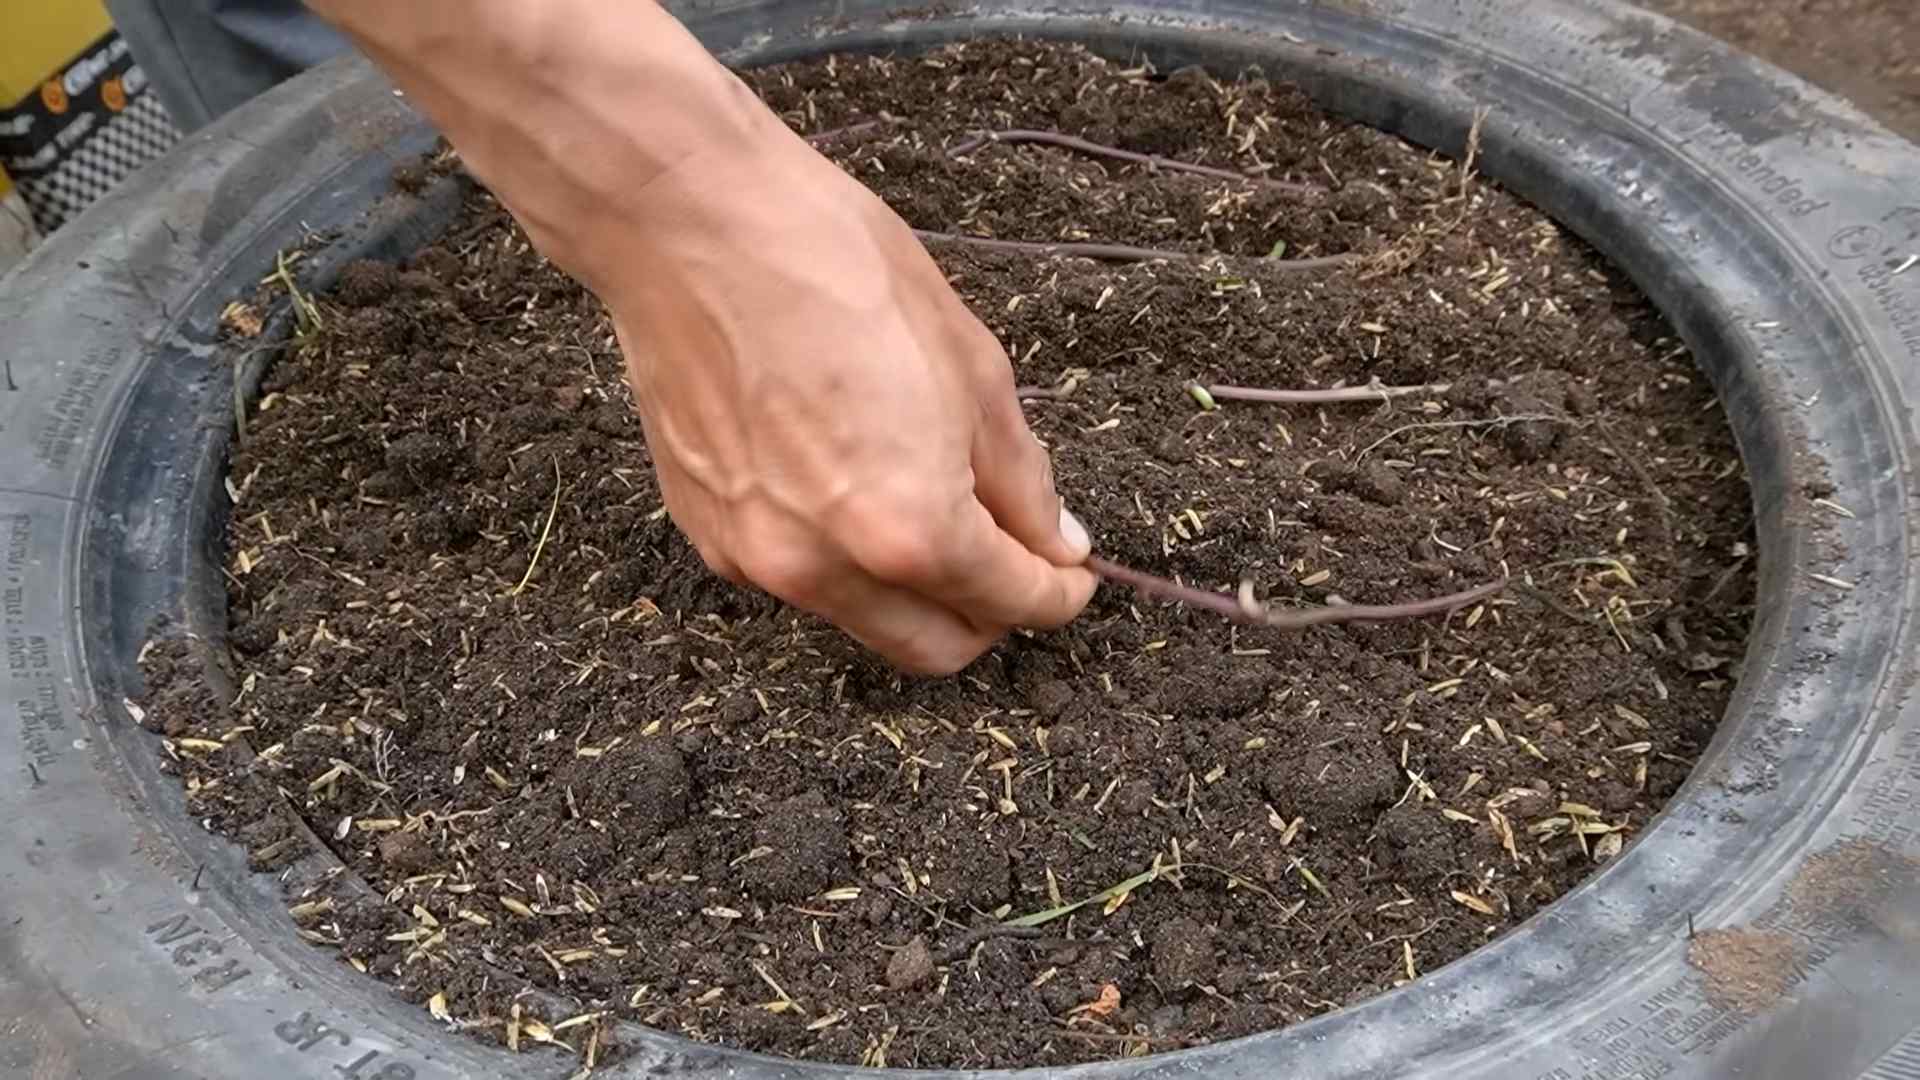
Sweet potato slips are the sprouts that grow from a mature sweet potato. They are essentially baby sweet potato plants. You can purchase slips from nurseries or online retailers specializing in vegetable starts. Alternatively, you can easily grow your own slips by suspending a sweet potato in water or burying it in moist soil. Keep the potato in a warm, sunny location, and within a few weeks, you should see sprouts emerging. Once the sprouts are several inches long, you can gently twist them off and root them in water before planting.
How much sunlight do sweet potatoes need?
Sweet potatoes thrive in full sun, meaning they need at least 6-8 hours of direct sunlight per day. Insufficient sunlight can result in smaller yields and less flavorful sweet potatoes. If you’re growing sweet potatoes indoors or in a partially shaded area, consider supplementing with grow lights to ensure they receive adequate light.
What kind of soil is best for growing sweet potatoes?
Sweet potatoes prefer well-draining, sandy loam soil. Heavy clay soil can become waterlogged and hinder root development. If your soil is heavy, amend it with compost, sand, and other organic matter to improve drainage and aeration. The ideal soil pH for sweet potatoes is between 6.0 and 6.5.
How often should I water sweet potatoes?
Water sweet potatoes regularly, especially during dry periods. Keep the soil consistently moist, but avoid overwatering, which can lead to root rot. A good rule of thumb is to water deeply once or twice a week, depending on the weather and soil conditions. Check the soil moisture by sticking your finger a few inches into the soil. If it feels dry, it’s time to water.
When is the best time to harvest sweet potatoes?
The best time to harvest sweet potatoes is typically 90-120 days after planting the slips, depending on the variety. A good indicator that they are ready is when the leaves start to turn yellow and the vines begin to die back. However, you can also harvest a few “new” sweet potatoes earlier if you want smaller, more tender roots. To harvest, carefully dig around the plant with a garden fork, being careful not to damage the sweet potatoes.
How do I cure sweet potatoes after harvesting?
Curing sweet potatoes is essential for developing their sweetness and improving their storage life. To cure them, gently brush off any excess soil and place them in a warm, humid location (80-85°F and 85-90% humidity) for 7-10 days. A greenhouse, sunroom, or even a warm bathroom can work well. After curing, store the sweet potatoes in a cool, dry, and well-ventilated place (55-60°F) for several months.
Can I grow sweet potatoes in containers?
Yes, sweet potatoes can be successfully grown in containers, making them a great option for gardeners with limited space. Choose a large container (at least 20 gallons) with drainage holes. Fill it with well-draining potting mix and plant the slips. Water regularly and fertilize as needed.
What are some common pests and diseases that affect sweet potatoes?
Some common pests that can affect sweet potatoes include sweet potato weevils, flea beetles, and aphids. Diseases include stem rot, black rot, and scurf. To prevent these problems, practice good sanitation, use disease-resistant varieties, and monitor your plants regularly for signs of infestation or disease. If you spot any problems, take action promptly to control them.
How do I store sweet potatoes for long-term storage?
After curing, store sweet potatoes in a cool, dry, and well-ventilated place (55-60°F). Avoid storing them in the refrigerator, as this can cause them to develop a hard core and lose their flavor. Properly cured and stored sweet potatoes can last for several months.
Can I eat the sweet potato leaves?
Yes, sweet potato leaves are edible and nutritious. They can be cooked like spinach or other leafy greens. Choose young, tender leaves for the best flavor. They are a good source of vitamins A and C, as well as fiber.
What are some good companion plants for sweet potatoes?
Good companion plants for sweet potatoes include beans, peas, thyme, and oregano. These plants can help to deter pests and improve soil health. Avoid planting sweet potatoes near fennel, as it can inhibit their growth.
How do I deal with vine borers on my sweet potato plants?
Vine borers can be a problem for sweet potato plants. Look for signs of their presence, such as wilting vines and small holes in the stems. If you find vine borers, you can try to remove them manually by slitting the stem and extracting the larvae. You can also use row covers to protect your plants from the moths that lay the eggs.
What are some creative ways to use my homegrown sweet potatoes?
Beyond the usual sweet potato fries and casseroles, get creative with your homegrown sweet potatoes! Try making sweet potato gnocchi, sweet potato hummus, sweet potato black bean burgers, or even sweet potato pie filling. The possibilities are endless!
How can I ensure I’m *growing sweet potatoes monthly* successfully?
The key to successfully growing sweet potatoes monthly is staggered planting. Start new slips every few weeks to ensure a continuous harvest. Keep track of your planting dates and harvest times to optimize your schedule. Also, be sure to provide adequate sunlight, water, and nutrients to your plants throughout the growing season. Regular monitoring and proactive pest and disease management are also crucial for success.

Leave a Comment