
Chili bottle gardening tips are your secret weapon to unlocking a thriving garden, even if you’re short on space or time! Have you ever looked at those empty chili bottles piling up and thought, “There has to be a better use for these?” Well, you’re in luck! This isn’t just about recycling; it’s about creating a sustainable and beautiful mini-garden with a touch of upcycled charm.
For centuries, resourceful gardeners have found innovative ways to cultivate plants using readily available materials. From ancient terracotta pots to repurposed containers, the spirit of making the most of what you have is deeply rooted in gardening history. Now, we’re bringing that tradition into the 21st century with a spicy twist!
Let’s be honest, gardening can sometimes feel intimidating. All those fancy tools and complicated instructions can be overwhelming. But what if I told you that you could grow delicious herbs, vibrant flowers, or even small vegetables using nothing more than empty chili bottles and a little bit of know-how? That’s where these chili bottle gardening tips come in. They’re simple, budget-friendly, and perfect for beginners. Plus, it’s a fantastic way to reduce waste and add a unique touch to your home or balcony. So, ditch the gardening overwhelm and get ready to transform those empty bottles into a flourishing green oasis!
Turning Empty Chili Bottles into Thriving Herb Gardens
Hey there, fellow DIY enthusiasts! Ever look at those empty chili sauce bottles piling up and think, “There has to be a better use for these?” Well, you’re in luck! Today, I’m going to walk you through a super fun and eco-friendly project: transforming those discarded chili bottles into adorable and functional herb gardens. Not only is this a great way to recycle, but it also adds a touch of spice (pun intended!) to your kitchen or balcony. Let’s get started!
What You’ll Need
Before we dive in, let’s gather our supplies. This is a pretty low-cost project, and you probably have most of these items lying around already.
* Empty Chili Bottles: Obviously! Make sure they’re thoroughly cleaned and free of any chili residue. I recommend using bottles with wider mouths for easier planting.
* Potting Soil: Choose a good quality potting mix that’s suitable for herbs.
* Herb Seeds or Seedlings: Pick your favorite herbs! Basil, mint, parsley, chives – the possibilities are endless.
* Gravel or Pebbles: For drainage.
* Drill with a Diamond-Tipped Drill Bit (Optional): If you want to add drainage holes to the bottom of the bottles.
* Gloves: To protect your hands.
* Watering Can or Spray Bottle: For watering your herbs.
* Labels and a Marker: To identify your herbs.
* Optional Decorative Elements: Paint, twine, burlap, anything you want to use to personalize your little gardens!
Preparing the Chili Bottles
This is a crucial step to ensure your herbs thrive. We need to make sure the bottles are clean and, ideally, have proper drainage.
1. Cleaning the Bottles: This is probably the least glamorous part, but it’s essential. Rinse the bottles thoroughly with warm, soapy water. Use a bottle brush to scrub away any stubborn chili residue. I sometimes soak them in hot water with a bit of baking soda to get rid of any lingering smells. Rinse them again and let them dry completely.
2. Adding Drainage (Optional but Recommended): This is where the drill comes in. If you want to add drainage holes, carefully drill a few holes in the bottom of each bottle. This step is important to prevent root rot. Use a diamond-tipped drill bit specifically designed for glass.
* Safety First! Wear safety glasses and gloves.
* Go Slow: Apply gentle pressure and let the drill do the work. Don’t force it, or you risk cracking the glass.
* Water Helps: Keep the area wet while drilling to reduce friction and prevent the glass from overheating. I usually do this under a slow stream of water.
If you don’t have a drill, don’t worry! You can still create drainage by adding a generous layer of gravel or pebbles to the bottom of the bottle. This will help prevent the roots from sitting in water.
3. Decorating the Bottles (Optional): Now for the fun part! This is where you can get creative and personalize your herb gardens. Here are a few ideas:
* Painting: Use acrylic paint to create colorful designs. You can paint the entire bottle or just add accents.
* Twine or Burlap: Wrap the bottles with twine or burlap for a rustic look. Secure the ends with glue.
* Labels: Create cute labels to identify your herbs. You can use chalkboard paint, write directly on the bottle with a permanent marker, or print out labels and glue them on.
* Stencils: Use stencils to create intricate patterns.
Let your imagination run wild! There are no rules here.
Planting Your Herbs
Now that our bottles are prepped and decorated, it’s time to plant our herbs!
1. Adding Drainage Layer: If you didn’t drill drainage holes, add a layer of gravel or pebbles to the bottom of each bottle. This layer should be about 1-2 inches thick. This will help prevent water from pooling around the roots and causing them to rot.
2. Filling with Potting Soil: Carefully fill the bottles with potting soil, leaving about an inch of space at the top. Gently tap the bottle to settle the soil.
3. Planting Seeds or Seedlings:
* Seeds: If you’re using seeds, follow the instructions on the seed packet for planting depth and spacing. Sprinkle the seeds evenly over the soil and cover them with a thin layer of potting mix.
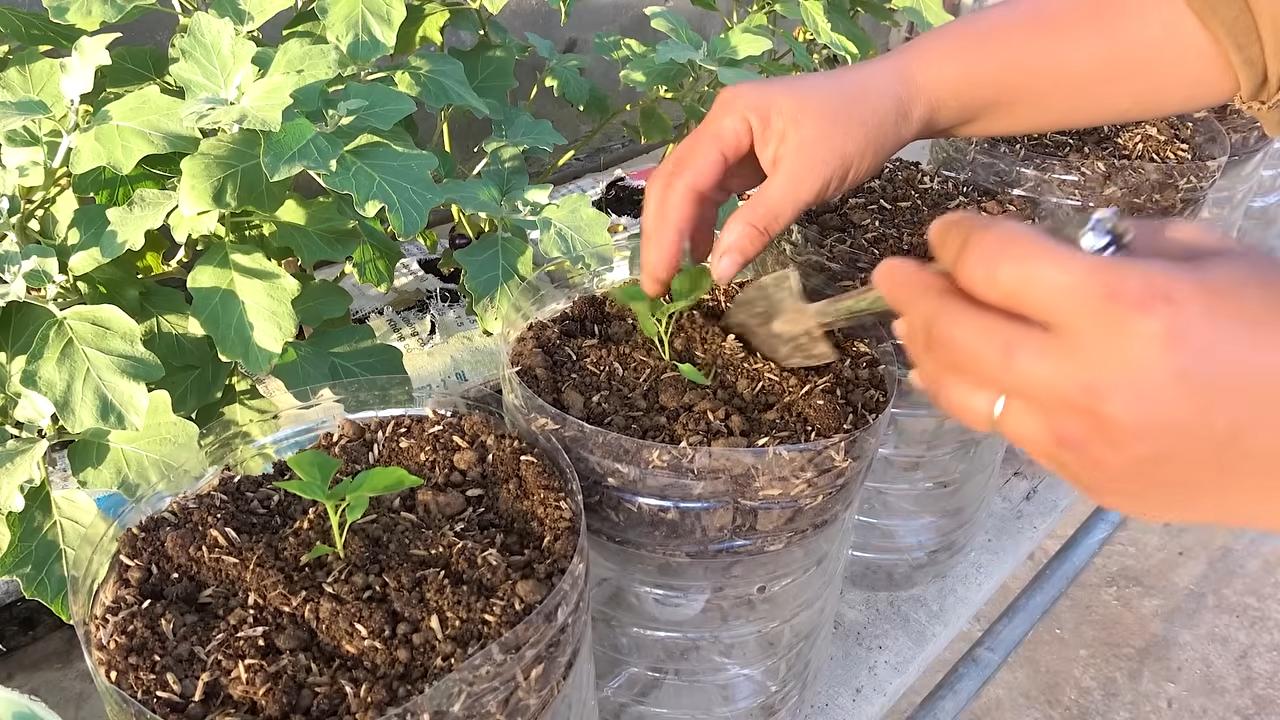
* Seedlings: If you’re using seedlings, gently remove them from their containers. Loosen the roots slightly and place the seedling in the center of the bottle. Fill in around the roots with potting soil and gently pat it down.
4. Watering: Water your herbs gently after planting. Use a watering can or spray bottle to avoid disturbing the soil. Water until the soil is moist but not soggy.
5. Labeling: Don’t forget to label your herbs! This will help you keep track of what you’ve planted and avoid any confusion later on.
Caring for Your Herb Gardens
Now that your herb gardens are planted, it’s important to provide them with the proper care to ensure they thrive.
1. Sunlight: Most herbs need at least 6 hours of sunlight per day. Place your chili bottle gardens in a sunny location, such as a windowsill or balcony. If you don’t have enough natural light, you can supplement with a grow light.
2. Watering: Water your herbs regularly, but don’t overwater them. The soil should be moist but not soggy. Check the soil moisture by sticking your finger into the soil. If the top inch of soil is dry, it’s time to water.
3. Fertilizing: Feed your herbs with a balanced liquid fertilizer every few weeks. Follow the instructions on the fertilizer package.
4. Pruning: Prune your herbs regularly to encourage growth. Pinch off the tips of the stems to promote bushier growth. You can also harvest leaves as needed for cooking.
5. Pest Control: Keep an eye out for pests, such as aphids or spider mites. If you notice any pests, treat them with an organic insecticide or insecticidal soap.
Troubleshooting
Even with the best care, sometimes things can go wrong. Here are a few common problems and how to fix them:
* Yellowing Leaves: This could be a sign of overwatering, underwatering, or nutrient deficiency. Check the soil moisture and adjust your watering schedule accordingly. If the soil is dry, water more frequently. If the soil is soggy, water less frequently. You may also need to fertilize your herbs.
* Leggy Growth: This is usually caused by insufficient sunlight. Move your herb gardens to a sunnier location or supplement with a grow light.
* Root Rot: This is caused by overwatering and poor drainage. Make sure your bottles have adequate drainage and avoid overwatering. If you suspect root rot, you may need to repot your herbs in fresh soil.
* Pests: As mentioned earlier, keep an eye out for pests and treat them promptly.
Enjoying Your Herb Gardens
Congratulations! You’ve successfully transformed empty chili bottles into thriving herb gardens. Now you can enjoy fresh, homegrown herbs right at your fingertips. Use them in your cooking, add them to salads, or make herbal teas. The possibilities are endless!
Remember to harvest your herbs regularly to encourage growth. The more you harvest, the more they’ll produce.
This project is not only fun and rewarding, but it’s also a great way to reduce waste and live a more sustainable lifestyle. So, next time you finish a bottle of chili sauce, don’t throw it away! Turn it into a beautiful and functional herb garden. Happy gardening!
Conclusion
So, there you have it! Transforming empty chili bottles into miniature gardens is more than just a quirky upcycling project; it’s a sustainable, space-saving, and surprisingly rewarding way to bring a touch of green into your life. We’ve explored the simple steps, from preparing the bottles to choosing the right plants, and hopefully, dispelled any doubts you might have had about the feasibility of this endeavor.
But why is this DIY trick a must-try? Beyond the obvious environmental benefits of reducing waste, chili bottle gardening offers a unique opportunity to connect with nature, even if you’re short on space or gardening experience. Imagine the satisfaction of nurturing tiny herbs, vibrant succulents, or even miniature vegetables, all thriving within the confines of a repurposed chili bottle. It’s a conversation starter, a visual delight, and a testament to your resourcefulness.
Furthermore, the versatility of this method allows for endless customization. Feel free to experiment with different types of chili bottles – the size and shape can significantly impact the aesthetic appeal of your miniature garden. Consider painting the bottles with vibrant colors or adding decorative elements like twine or beads to personalize them further. You could even create a tiered garden by stacking multiple bottles on top of each other, creating a visually stunning and space-efficient display.
For those seeking a more advanced challenge, try incorporating a self-watering system into your chili bottle garden. This can be achieved by using a wick made of cotton or nylon that draws water from a reservoir at the bottom of the bottle up to the soil. This is especially useful for plants that require consistent moisture levels.
Don’t be afraid to get creative with your plant selection, too. While herbs and succulents are popular choices, you can also grow small flowering plants like pansies or petunias, or even miniature vegetables like cherry tomatoes or chili peppers (a fitting tribute to the bottles themselves!). Just be sure to choose plants that are well-suited to the size of the bottle and the amount of sunlight they will receive.
Ultimately, the success of your chili bottle garden hinges on your willingness to experiment and learn. Don’t be discouraged if your first attempt isn’t perfect. Gardening is a journey, and every mistake is an opportunity to learn and improve.
We wholeheartedly encourage you to give this DIY trick a try. It’s a fun, affordable, and environmentally friendly way to add a touch of green to your home. And most importantly, we want to hear about your experiences! Share your photos, tips, and challenges in the comments section below. Let’s create a community of chili bottle gardeners and inspire others to embrace this sustainable and rewarding practice. Let us know what kind of plants you chose, what challenges you faced, and what creative solutions you came up with. Your insights could be invaluable to other aspiring chili bottle gardeners. So, grab those empty chili bottles, gather your supplies, and get ready to embark on a miniature gardening adventure! This **chili bottle gardening** method is a game changer!
Frequently Asked Questions (FAQ)
What types of chili bottles are best for gardening?
Almost any chili bottle can be used, but bottles with wider mouths are generally easier to work with when planting. Clear glass bottles allow you to monitor the soil moisture levels and root growth, but colored glass can add a decorative touch and may help protect the roots from excessive sunlight. Ensure the bottles are thoroughly cleaned and free of any chili residue before planting. Consider the size of the bottle in relation to the plant you intend to grow. Smaller bottles are suitable for herbs and succulents, while larger bottles can accommodate slightly larger plants.
What kind of soil should I use for my chili bottle garden?
A well-draining potting mix is essential for chili bottle gardening. Avoid using garden soil, as it can become compacted and waterlogged in a confined space. A mixture of potting soil, perlite, and vermiculite is ideal, as it provides good drainage, aeration, and moisture retention. You can also add a small amount of compost to enrich the soil with nutrients. Consider the specific needs of the plants you intend to grow. Some plants, like succulents, prefer a sandier soil mix, while others may benefit from a slightly richer soil.
How often should I water my chili bottle garden?
The frequency of watering will depend on the type of plants you’re growing, the size of the bottle, and the environmental conditions. Generally, it’s best to water when the top inch of soil feels dry to the touch. Avoid overwatering, as this can lead to root rot. Ensure the bottle has adequate drainage to prevent water from accumulating at the bottom. A good rule of thumb is to water thoroughly until water drains out of the drainage holes, then allow the soil to dry out slightly before watering again. Observe your plants closely for signs of overwatering or underwatering, such as wilting leaves or yellowing foliage.
What kind of plants are suitable for chili bottle gardening?
Many different types of plants can thrive in a chili bottle garden, but some are better suited than others. Herbs like basil, mint, oregano, and thyme are excellent choices, as they are relatively small and easy to care for. Succulents like echeverias, sedums, and haworthias are also popular, as they are drought-tolerant and require minimal maintenance. Other options include small flowering plants like pansies and petunias, and even miniature vegetables like cherry tomatoes and chili peppers. Consider the amount of sunlight the plants will receive and choose varieties that are well-suited to those conditions.
How much sunlight does my chili bottle garden need?
The amount of sunlight required will depend on the type of plants you’re growing. Most herbs and vegetables need at least six hours of sunlight per day, while succulents can tolerate partial shade. Place your chili bottle garden in a location that receives adequate sunlight, such as a windowsill or a sunny balcony. If you don’t have access to enough natural light, you can supplement with artificial grow lights. Observe your plants closely for signs of insufficient sunlight, such as leggy growth or pale leaves.
How do I prevent pests and diseases in my chili bottle garden?
Prevention is key when it comes to pests and diseases in a chili bottle garden. Use clean potting mix and avoid overwatering, as this can create a favorable environment for fungal diseases. Inspect your plants regularly for signs of pests, such as aphids, spider mites, or whiteflies. If you detect any pests, treat them promptly with an organic insecticide or insecticidal soap. You can also use natural pest repellents like neem oil or garlic spray. Ensure good air circulation around your plants to prevent fungal diseases.
How do I fertilize my chili bottle garden?
Chili bottle gardens, like all container gardens, benefit from regular fertilization. Use a balanced liquid fertilizer diluted to half strength and apply it every two to four weeks during the growing season. Avoid over-fertilizing, as this can damage the plants. You can also add slow-release fertilizer granules to the potting mix at the time of planting. Consider the specific needs of the plants you’re growing. Some plants, like herbs, require less fertilizer than others.
Can I grow chili peppers in a chili bottle?
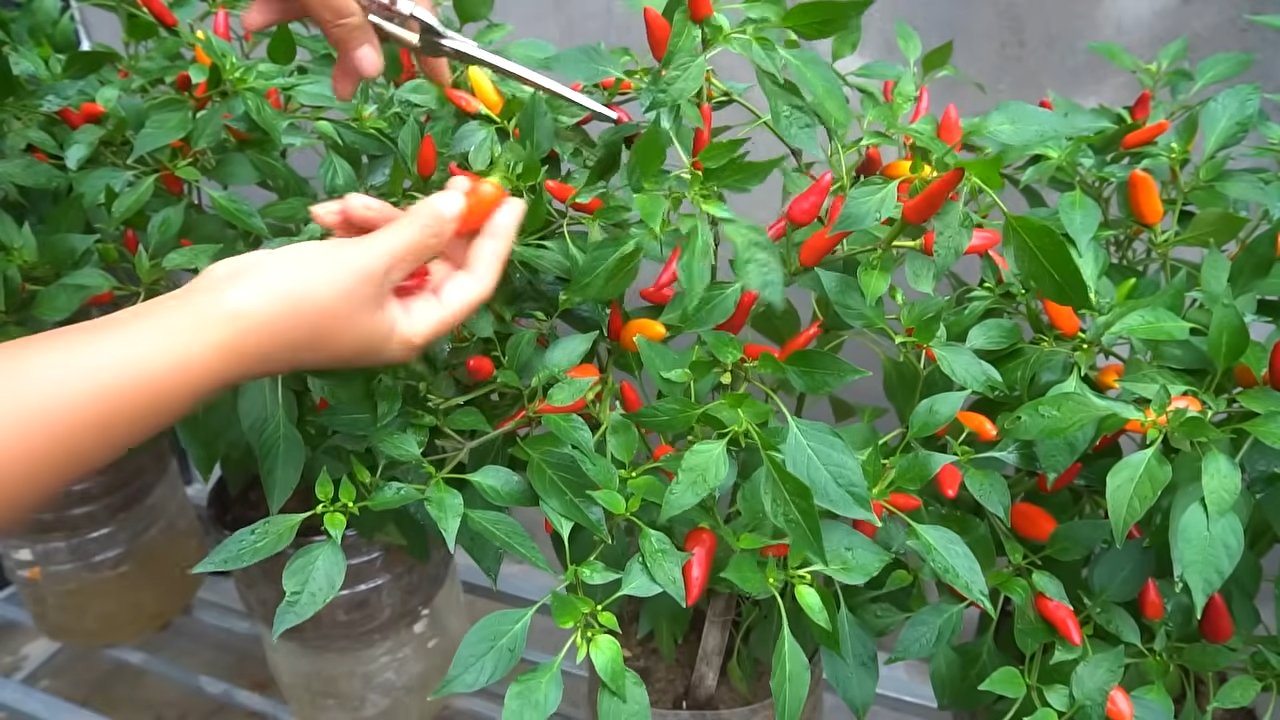
Yes, you can absolutely grow chili peppers in a chili bottle! Choose a small variety of chili pepper, such as Thai chili or bird’s eye chili, that is well-suited to container gardening. Ensure the bottle is large enough to accommodate the plant’s root system. Provide plenty of sunlight and water regularly. You may need to stake the plant to support its growth. Growing chili peppers in a chili bottle is a fun and fitting way to pay homage to the bottle’s original contents.
How do I create drainage in a chili bottle?
Proper drainage is crucial for the success of your chili bottle garden. If your bottle doesn’t have drainage holes, you can create them by carefully drilling holes in the bottom using a drill with a glass or ceramic drill bit. Alternatively, you can add a layer of gravel or pebbles to the bottom of the bottle to improve drainage. This will help prevent water from accumulating at the bottom and causing root rot.
What if my plants outgrow the chili bottle?
If your plants outgrow the chili bottle, you will need to transplant them to a larger container. Choose a pot that is at least twice the size of the chili bottle and fill it with fresh potting mix. Carefully remove the plant from the chili bottle and gently loosen the roots. Plant the plant in the new pot and water thoroughly.

Leave a Comment