
Bottle Grown Kale Harvest: Imagine stepping outside your door and harvesting fresh, vibrant kale, all grown in recycled bottles! Sounds too good to be true? It’s not! For centuries, humans have sought innovative ways to cultivate food, from ancient terraced gardens to modern hydroponics. Now, we’re bringing that ingenuity to your doorstep with a simple, sustainable, and incredibly rewarding DIY project.
Growing your own food, even in a small space, is incredibly empowering. It connects you to nature, reduces your carbon footprint, and provides you with delicious, healthy produce. But let’s face it, not everyone has a sprawling garden. That’s where the magic of bottle gardening comes in! This DIY trick is perfect for apartment dwellers, balcony gardeners, or anyone looking to maximize their space and minimize waste.
This article will guide you through the entire process of achieving a bountiful bottle grown kale harvest. We’ll cover everything from selecting the right bottles and preparing the soil to planting, watering, and harvesting your leafy greens. Get ready to transform your recycled bottles into a thriving vertical garden and enjoy the satisfaction of growing your own food, one bottle at a time! I’m excited to share this easy and rewarding project with you!
Bottle Grown Kale Harvest: From Plastic to Plate!
Hey there, fellow DIY enthusiasts! I’m so excited to share my experience with growing kale in recycled plastic bottles. It’s a fantastic way to reduce waste, save space, and enjoy fresh, homegrown greens. Plus, harvesting your own kale is incredibly rewarding. Let’s dive into how to harvest your bottle-grown kale for the best flavor and yield!
Understanding Your Bottle Kale
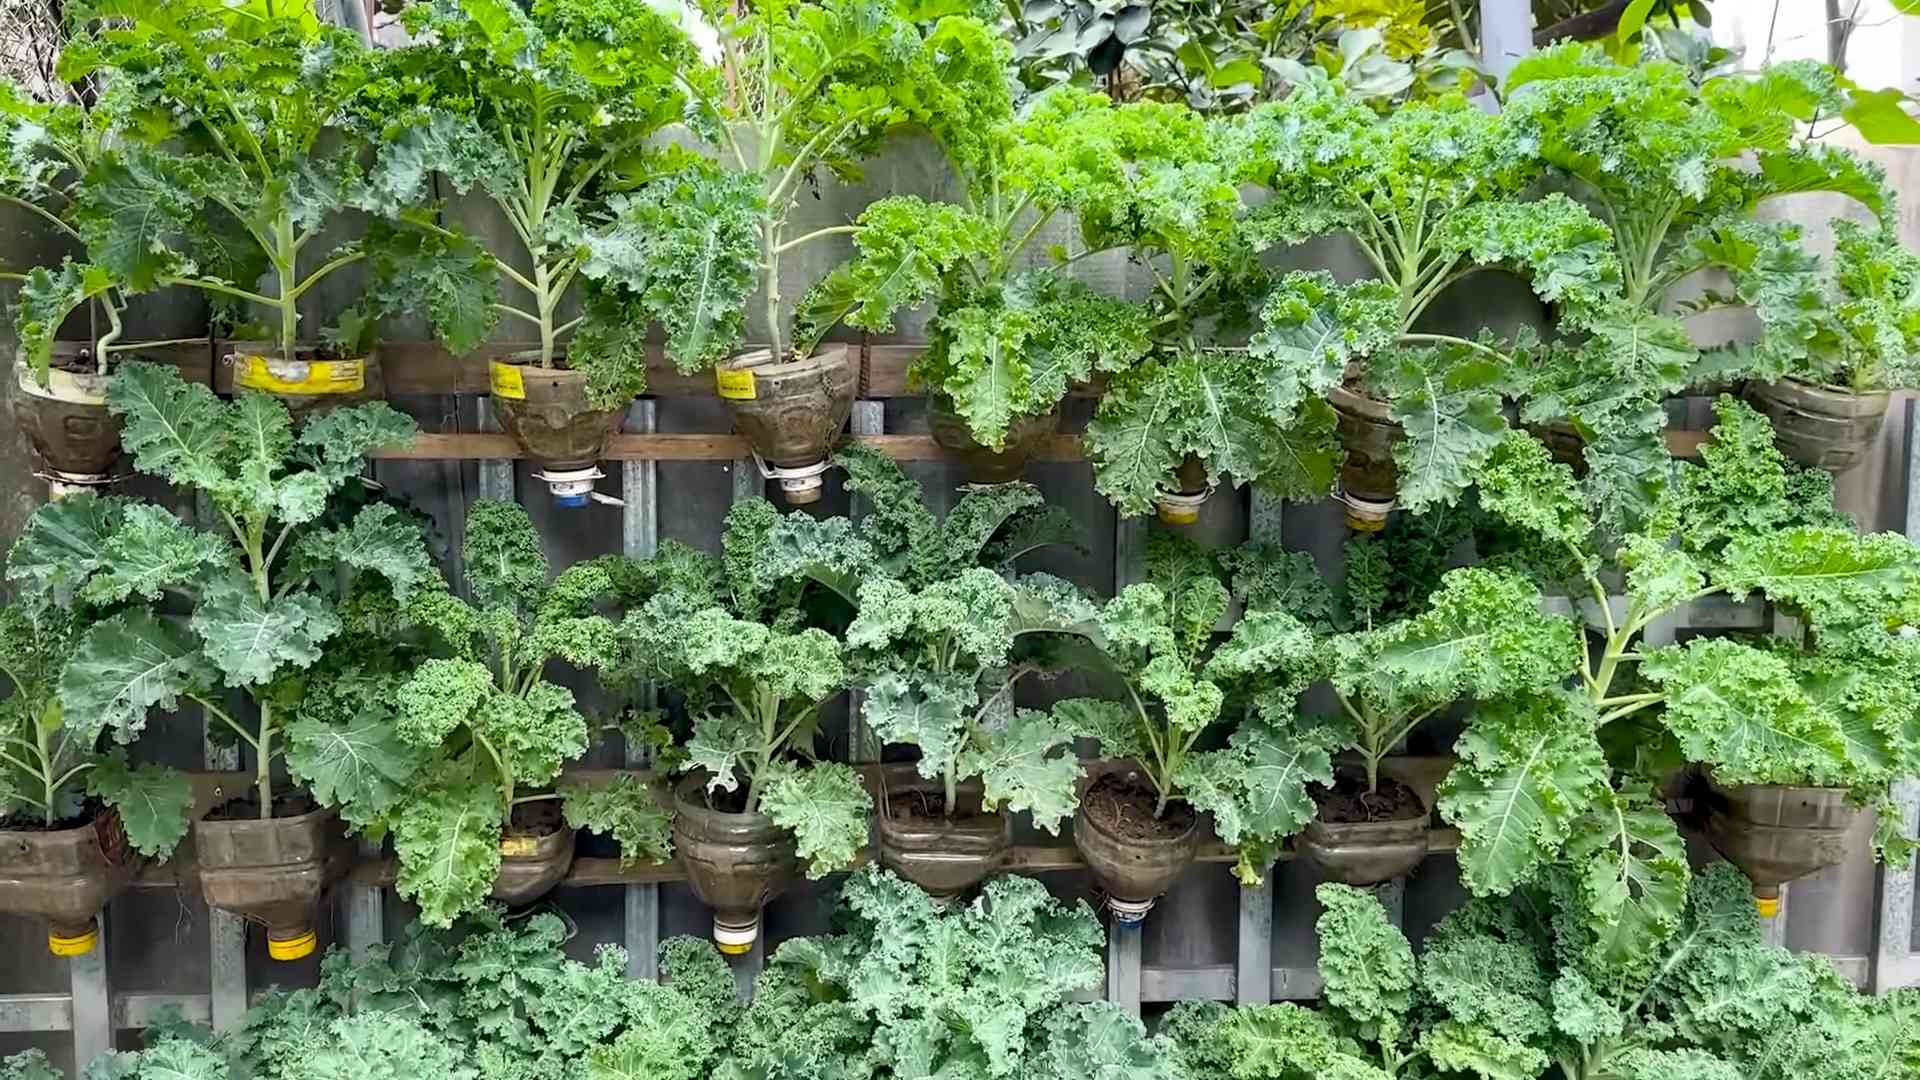
Before we get to the harvesting part, let’s quickly recap what makes bottle-grown kale so special. Growing kale in bottles is perfect for small spaces like balconies, patios, or even sunny windowsills. It’s also a great way to repurpose plastic bottles that would otherwise end up in the landfill.
* Space Saving: Vertical gardening at its finest!
* Recycling: Giving plastic bottles a new life.
* Accessibility: Easy to reach and harvest.
* Control: Better control over soil and watering.
When to Harvest Your Kale
Knowing when to harvest is crucial for getting the best flavor and encouraging continued growth. Here’s what I look for:
* Leaf Size: The leaves should be about the size of your hand (around 4-6 inches long). Smaller leaves are fine to harvest too, but larger leaves will give you a better yield.
* Leaf Color: Look for a deep, vibrant green color. Avoid leaves that are yellowing or browning, as these may be past their prime.
* Plant Maturity: Generally, kale is ready to harvest about 55-75 days after planting. However, this can vary depending on the variety and growing conditions.
* Taste Test: The best way to know if your kale is ready is to taste a small piece. It should be slightly sweet and earthy, not bitter.
Tools You’ll Need
Gathering your tools beforehand will make the harvesting process smooth and efficient. Here’s what I recommend:
* Sharp Scissors or Pruning Shears: Essential for making clean cuts and preventing damage to the plant.
* Basket or Bowl: To collect your harvested kale leaves.
* Gloves (Optional): To protect your hands from dirt and potential irritants.
* Water (Optional): To rinse the leaves after harvesting.
Step-by-Step Harvesting Guide
Alright, let’s get to the fun part! Follow these steps to harvest your bottle-grown kale like a pro:
1. Inspect Your Plants:
Take a good look at your kale plants. Identify the leaves that are ready for harvest based on the size, color, and overall health. Focus on the outer, more mature leaves first.
2. Prepare Your Tools:
Make sure your scissors or pruning shears are clean and sharp. This will ensure clean cuts and prevent the spread of disease. I usually wipe mine down with rubbing alcohol before I start.
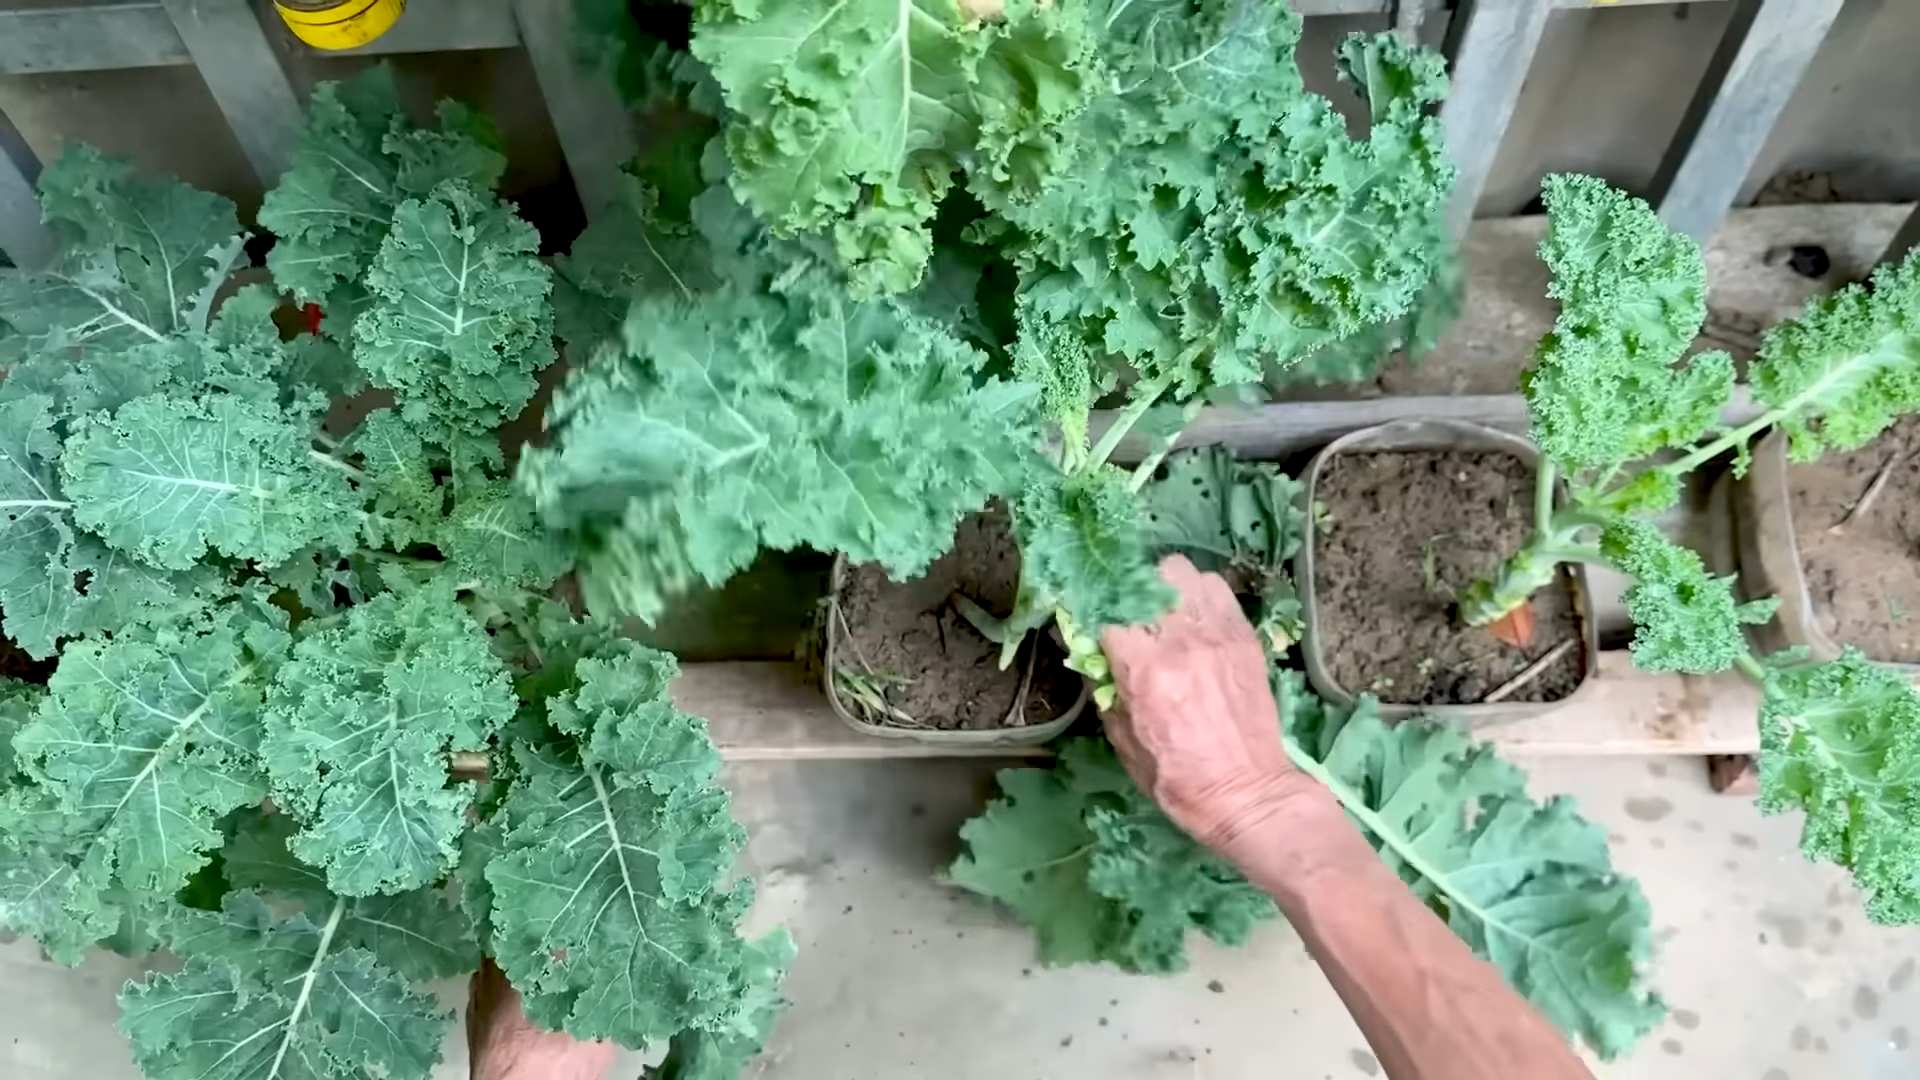
3. Select a Leaf:
Choose a mature leaf that you want to harvest. Gently hold the stem of the leaf with one hand.
4. Make the Cut:
Using your scissors or pruning shears, make a clean cut at the base of the leaf stem, close to the main stem of the plant. Be careful not to damage the main stem or any nearby leaves. I like to cut about half an inch above the soil line if the leaf is very low.
5. Repeat the Process:
Continue harvesting the outer leaves of the plant, working your way around the bottle. Avoid harvesting more than one-third of the plant at a time. This will allow the plant to continue growing and producing new leaves.
6. Handle with Care:
Gently place the harvested leaves in your basket or bowl. Avoid piling them too high, as this can bruise the leaves.
7. Rinse (Optional):
If desired, rinse the harvested leaves with cool water to remove any dirt or debris. Gently pat them dry with a clean towel or salad spinner.
8. Store Properly:
Store your harvested kale leaves in a plastic bag or container in the refrigerator. They should stay fresh for up to a week. I find that wrapping them in a slightly damp paper towel helps to keep them crisp.
Encouraging Continued Growth
Harvesting your kale properly not only provides you with fresh greens but also encourages the plant to keep producing. Here are a few tips to keep your bottle-grown kale thriving:
* Don’t Over-Harvest: As mentioned earlier, avoid harvesting more than one-third of the plant at a time. This will allow the plant to recover and continue growing.
* Water Regularly: Keep the soil consistently moist, but not waterlogged. Check the soil moisture level regularly and water when the top inch feels dry.
* Fertilize: Feed your kale plants with a balanced fertilizer every few weeks to provide them with the nutrients they need to grow. I like to use a liquid fertilizer diluted to half strength.
* Remove Yellowing Leaves: Regularly remove any yellowing or damaged leaves. This will help to prevent the spread of disease and keep the plant healthy.
* Pest Control: Keep an eye out for pests like aphids or cabbage worms. If you spot any, treat them with an organic insecticide or insecticidal soap. I prefer to use neem oil as a natural pest control solution.
* Sunlight: Ensure your kale plants receive at least 6 hours of sunlight per day. If you’re growing them indoors, you may need to supplement with artificial light.
* Rotate Your Bottles: If you have multiple bottles, rotate them periodically to ensure that all sides of the plants receive adequate sunlight.
Troubleshooting Common Issues
Even with the best care, you might encounter some issues while growing kale in bottles. Here are a few common problems and how to address them:
* Yellowing Leaves: This could be a sign of overwatering, underwatering, nutrient deficiency, or disease. Check the soil moisture level, fertilize if necessary, and inspect the plant for signs of disease.
* Stunted Growth: This could be caused by insufficient sunlight, poor soil, or pest infestation. Ensure the plant is getting enough sunlight, amend the soil with compost or fertilizer, and treat any pests.
* Bitter Taste: This can be caused by heat stress or lack of water. Keep the plants well-watered and provide shade during the hottest part of the day.
* Pest Infestation: Common pests include aphids, cabbage worms, and flea beetles. Treat them with an organic insecticide or insecticidal soap.
Enjoying Your Harvest
Now that you’ve harvested your beautiful bottle-grown kale, it’s time to enjoy the fruits (or rather, leaves!) of your labor. Here are a few ideas:
* Salads: Add fresh kale leaves to your favorite salads for a boost of nutrients and flavor.
* Smoothies: Blend kale into your smoothies for a healthy and delicious drink.
* Soups: Add chopped kale to soups and stews for added texture and nutrition.
* Sautéed: Sauté kale with garlic, olive oil, and a pinch of salt for a simple and flavorful side dish.
* Kale Chips: Bake kale leaves with olive oil and seasonings for a healthy and crunchy snack.
* Juicing: Juice kale for a concentrated dose of vitamins and minerals.
Beyond the Bottle: Expanding Your Kale Growing
Once you’ve mastered growing kale in bottles, you might want to explore other ways to grow this versatile green. Here are a few ideas:
* Raised Beds: Plant kale in raised beds for a larger-scale garden.
* Containers: Grow kale in larger containers on your patio or balcony.
* Companion Planting: Plant kale alongside other vegetables that benefit from its presence, such as onions, garlic, and herbs.
* Succession Planting: Plant kale seeds every few weeks to ensure a continuous harvest throughout the growing season.
Final Thoughts
Growing kale in recycled plastic bottles is a rewarding and sustainable way to enjoy fresh, homegrown greens. With a little care and attention, you can harvest a bountiful crop of delicious kale from your own backyard (or balcony!). I hope this guide has inspired you to give it a try. Happy gardening!
Conclusion
So, there you have it! Transforming a simple plastic bottle into a thriving kale garden is not just a fun project; it’s a sustainable, space-saving, and incredibly rewarding way to enjoy fresh, nutritious greens right at your fingertips. We’ve walked you through the process, from preparing your bottle to harvesting your bountiful crop of bottle grown kale.
But why is this DIY trick a must-try? Beyond the sheer novelty of growing vegetables in a recycled container, this method offers several compelling advantages. Firstly, it’s incredibly accessible. Whether you live in a sprawling suburban home or a tiny apartment, the bottle garden requires minimal space and resources. Secondly, it’s a fantastic way to reduce waste and contribute to a more sustainable lifestyle. Instead of tossing those plastic bottles into the recycling bin (or worse, the landfill), you’re giving them a new lease on life as miniature vertical gardens. Thirdly, it’s a surprisingly efficient way to grow kale. The enclosed environment helps retain moisture, protects the plants from harsh weather, and minimizes pest infestations.
This method is perfect for beginners and experienced gardeners alike.
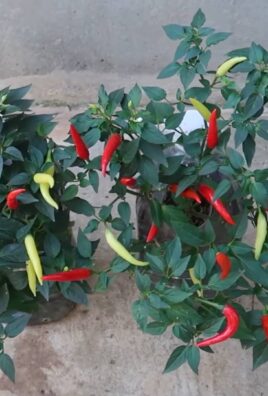
Looking for variations? Absolutely! While we’ve focused on kale, the same principle can be applied to other leafy greens like spinach, lettuce, and even herbs like basil and parsley. Experiment with different bottle sizes and shapes to create a visually appealing vertical garden. Consider adding drainage holes at the bottom of the bottle to prevent waterlogging. You can also try using different types of soil or even hydroponic solutions for a more advanced growing experience. For those in colder climates, bringing your bottle gardens indoors during the winter months will allow you to enjoy fresh greens year-round. You can also use grow lights to supplement natural sunlight.
Don’t be afraid to get creative and personalize your bottle garden to suit your own preferences and needs. The possibilities are endless!
We wholeheartedly encourage you to give this DIY bottle grown kale project a try. It’s a simple, affordable, and incredibly satisfying way to connect with nature, reduce waste, and enjoy fresh, healthy food. And most importantly, it’s a lot of fun!
Once you’ve harvested your first crop of bottle grown kale, we’d love to hear about your experience. Share your photos, tips, and tricks in the comments section below. Let’s build a community of bottle garden enthusiasts and inspire others to embrace this sustainable and rewarding gardening method. What challenges did you face? What successes did you celebrate? What unique variations did you try? Your feedback will help us refine this guide and empower others to embark on their own bottle gardening adventures. Happy growing!
Frequently Asked Questions (FAQ)
What type of plastic bottle is best for growing kale?
Ideally, you should use food-grade plastic bottles, such as those that previously contained water, juice, or soda. Avoid bottles that have held harsh chemicals or cleaning products, as these could contaminate the soil and harm your plants. PET (Polyethylene Terephthalate) bottles, commonly used for water and soda, are a good choice. Ensure the bottle is thoroughly cleaned with soap and water before use. The size of the bottle will depend on the variety of kale you’re growing, but a 2-liter bottle is generally a good starting point.
How often should I water my bottle grown kale?
The frequency of watering will depend on several factors, including the climate, the type of soil you’re using, and the size of the bottle. As a general rule, you should water your kale when the top inch of soil feels dry to the touch. Avoid overwatering, as this can lead to root rot. Ensure the bottle has adequate drainage to prevent water from accumulating at the bottom. During hot, dry weather, you may need to water your kale daily, while during cooler, wetter weather, you may only need to water it every few days. Observe your plants closely and adjust your watering schedule accordingly.
What kind of soil should I use for my bottle garden?
A well-draining potting mix is essential for growing healthy kale in a bottle garden. Avoid using garden soil, as it can be too heavy and compact, leading to poor drainage and root problems. A good potting mix should contain a blend of peat moss, perlite, and vermiculite. You can also add compost to the mix to provide additional nutrients. Alternatively, you can create your own potting mix by combining equal parts of peat moss, perlite, and compost. Ensure the soil is loose and airy to allow for proper root growth.
How much sunlight does bottle grown kale need?
Kale thrives in full sun, meaning it needs at least six hours of direct sunlight per day. If you’re growing your kale indoors, place the bottle garden near a sunny window or use grow lights to supplement natural sunlight. Insufficient sunlight can lead to leggy growth and reduced yields. If you’re growing your kale outdoors, choose a location that receives plenty of sunlight throughout the day. Be mindful of the intensity of the sun, especially during the hottest part of the day. If the leaves start to wilt or scorch, consider providing some shade during the afternoon.
How do I fertilize my bottle grown kale?
Kale is a heavy feeder, meaning it requires a steady supply of nutrients to grow and thrive. You can fertilize your kale with a balanced liquid fertilizer, such as a 10-10-10 or 20-20-20 formula. Follow the instructions on the fertilizer label and apply it every two to three weeks. Alternatively, you can use a slow-release granular fertilizer, which will provide nutrients over a longer period of time. Incorporate the granular fertilizer into the soil when you plant your kale. You can also supplement with compost tea or worm castings to provide additional nutrients and beneficial microbes.
How do I protect my bottle grown kale from pests and diseases?
The enclosed environment of a bottle garden can help minimize pest infestations, but it’s still important to be vigilant. Common kale pests include aphids, cabbage worms, and flea beetles. You can control these pests by handpicking them off the plants, spraying them with insecticidal soap, or using a biological control agent like Bacillus thuringiensis (Bt). To prevent diseases, ensure the bottle has adequate drainage and avoid overwatering. Good air circulation is also important. If you notice any signs of disease, such as yellowing leaves or spots, remove the affected leaves immediately.
When is the best time to harvest my bottle grown kale?
You can start harvesting kale leaves when they are about 4-6 inches long. Harvest the outer leaves first, leaving the inner leaves to continue growing. This will encourage the plant to produce more leaves. Avoid harvesting more than one-third of the plant at a time, as this can stress the plant and reduce its yield. Kale leaves are best harvested in the morning, after the dew has dried. They can be stored in the refrigerator for up to a week.
Can I grow different varieties of kale in a bottle garden?
Yes, you can grow different varieties of kale in a bottle garden. Some popular varieties include curly kale, lacinato kale (also known as dinosaur kale), and red Russian kale. Consider the size and growth habit of the variety when choosing which one to grow in a bottle. Smaller, more compact varieties are generally better suited for bottle gardens. You can also experiment with growing different varieties in separate bottles to see which ones thrive best in your environment.
How long will my bottle grown kale last?
With proper care, your bottle grown kale can last for several months. Kale is a biennial plant, meaning it typically lives for two years. However, in some climates, it may only last for one growing season. To prolong the life of your kale, continue to fertilize it regularly and protect it from pests and diseases. You can also prune the plant to encourage new growth. Eventually, the plant will start to bolt (produce flowers), which will make the leaves bitter. At this point, you can harvest the remaining leaves and start a new bottle garden.

Leave a Comment