
Bitter Gourd Growing Tips: Unlock the secrets to a bountiful harvest right in your backyard! Have you ever dreamt of plucking fresh, vibrant bitter gourds straight from your own garden? It’s easier than you think, and this DIY guide is your key to success. For generations, bitter gourd, also known as karela, has been a staple in Asian and African cuisines, celebrated not only for its unique flavor but also for its impressive health benefits. From traditional Ayurvedic medicine to modern culinary creations, this vegetable holds a special place in many cultures.
But let’s be honest, growing bitter gourd can sometimes feel like a challenge. Maybe your vines are struggling, or perhaps you’re not getting the yield you hoped for. That’s where these insider tips and tricks come in! I’m here to share my tried-and-true methods for cultivating thriving bitter gourd plants, even if you’re a beginner gardener.
Why do you need these bitter gourd growing tips? Because with a little know-how, you can avoid common pitfalls, maximize your harvest, and enjoy the satisfaction of growing your own healthy, delicious produce. Imagine the pride of serving a home-cooked meal featuring bitter gourd you nurtured from seed to table! Let’s get started and transform your garden into a bitter gourd paradise!
Growing Bitter Gourd Like a Pro: My DIY Guide
Hey there, fellow gardening enthusiasts! I’m so excited to share my tried-and-true method for growing bitter gourd, also known as bitter melon or karela. It’s a unique vegetable with a distinct, well, bitter taste, but it’s incredibly nutritious and a staple in many cuisines. Don’t let the bitterness scare you off! With the right techniques, you can cultivate a thriving bitter gourd vine right in your own backyard. I’ve learned a lot over the years, and I’m here to guide you through every step, from seed to harvest.
Getting Started: Seeds and Soil
Before we dive into the nitty-gritty, let’s talk about the essentials: seeds and soil. Choosing the right variety and preparing the soil properly are crucial for a successful harvest.
* Choosing the Right Variety: There are several varieties of bitter gourd available, each with slightly different characteristics in terms of size, shape, and bitterness. Do some research to find a variety that suits your taste and climate. Some popular choices include ‘Long Green,’ ‘White Long,’ and ‘Chinese Bitter Melon.’ I personally prefer ‘Long Green’ because it’s relatively easy to grow and has a good balance of bitterness.
* Starting from Seed vs. Seedlings: You can start bitter gourd from seed or purchase seedlings from a nursery. Starting from seed is more economical, but it requires a bit more patience. Seedlings offer a head start, but they can be more expensive. I usually start from seed because I enjoy the process of watching them sprout and grow.
* Preparing the Soil: Bitter gourd thrives in well-drained, fertile soil with a slightly acidic to neutral pH (6.0-7.0). Before planting, amend your soil with plenty of organic matter, such as compost or well-rotted manure. This will improve drainage, aeration, and nutrient content. I like to add a generous amount of compost to my garden beds a few weeks before planting.
Step-by-Step Planting Guide
Now, let’s get our hands dirty! Here’s a detailed guide to planting bitter gourd, whether you’re starting from seed or using seedlings.
1. Seed Scarification (If Starting from Seed): Bitter gourd seeds have a tough outer coating that can hinder germination. To improve germination rates, you can scarify the seeds by gently rubbing them with sandpaper or nicking them with a knife. Be careful not to damage the inner seed. I usually rub them gently on a piece of sandpaper a few times.
2. Soaking the Seeds (If Starting from Seed): After scarification, soak the seeds in warm water for 24-48 hours. This will further soften the seed coat and encourage germination. I find that soaking them in a thermos keeps the water warm longer.
3. Starting Seeds Indoors (Optional): If you live in a cooler climate with a short growing season, you can start your bitter gourd seeds indoors 4-6 weeks before the last expected frost. Sow the seeds in small pots or seed trays filled with seed-starting mix. Keep the soil moist and warm (around 75-85°F). I use a heat mat to maintain the ideal temperature.
4. Direct Sowing (If Starting from Seed): If you live in a warmer climate with a long growing season, you can directly sow the seeds into your garden bed after the last frost. Plant the seeds about 1/2 inch deep and 12-18 inches apart.
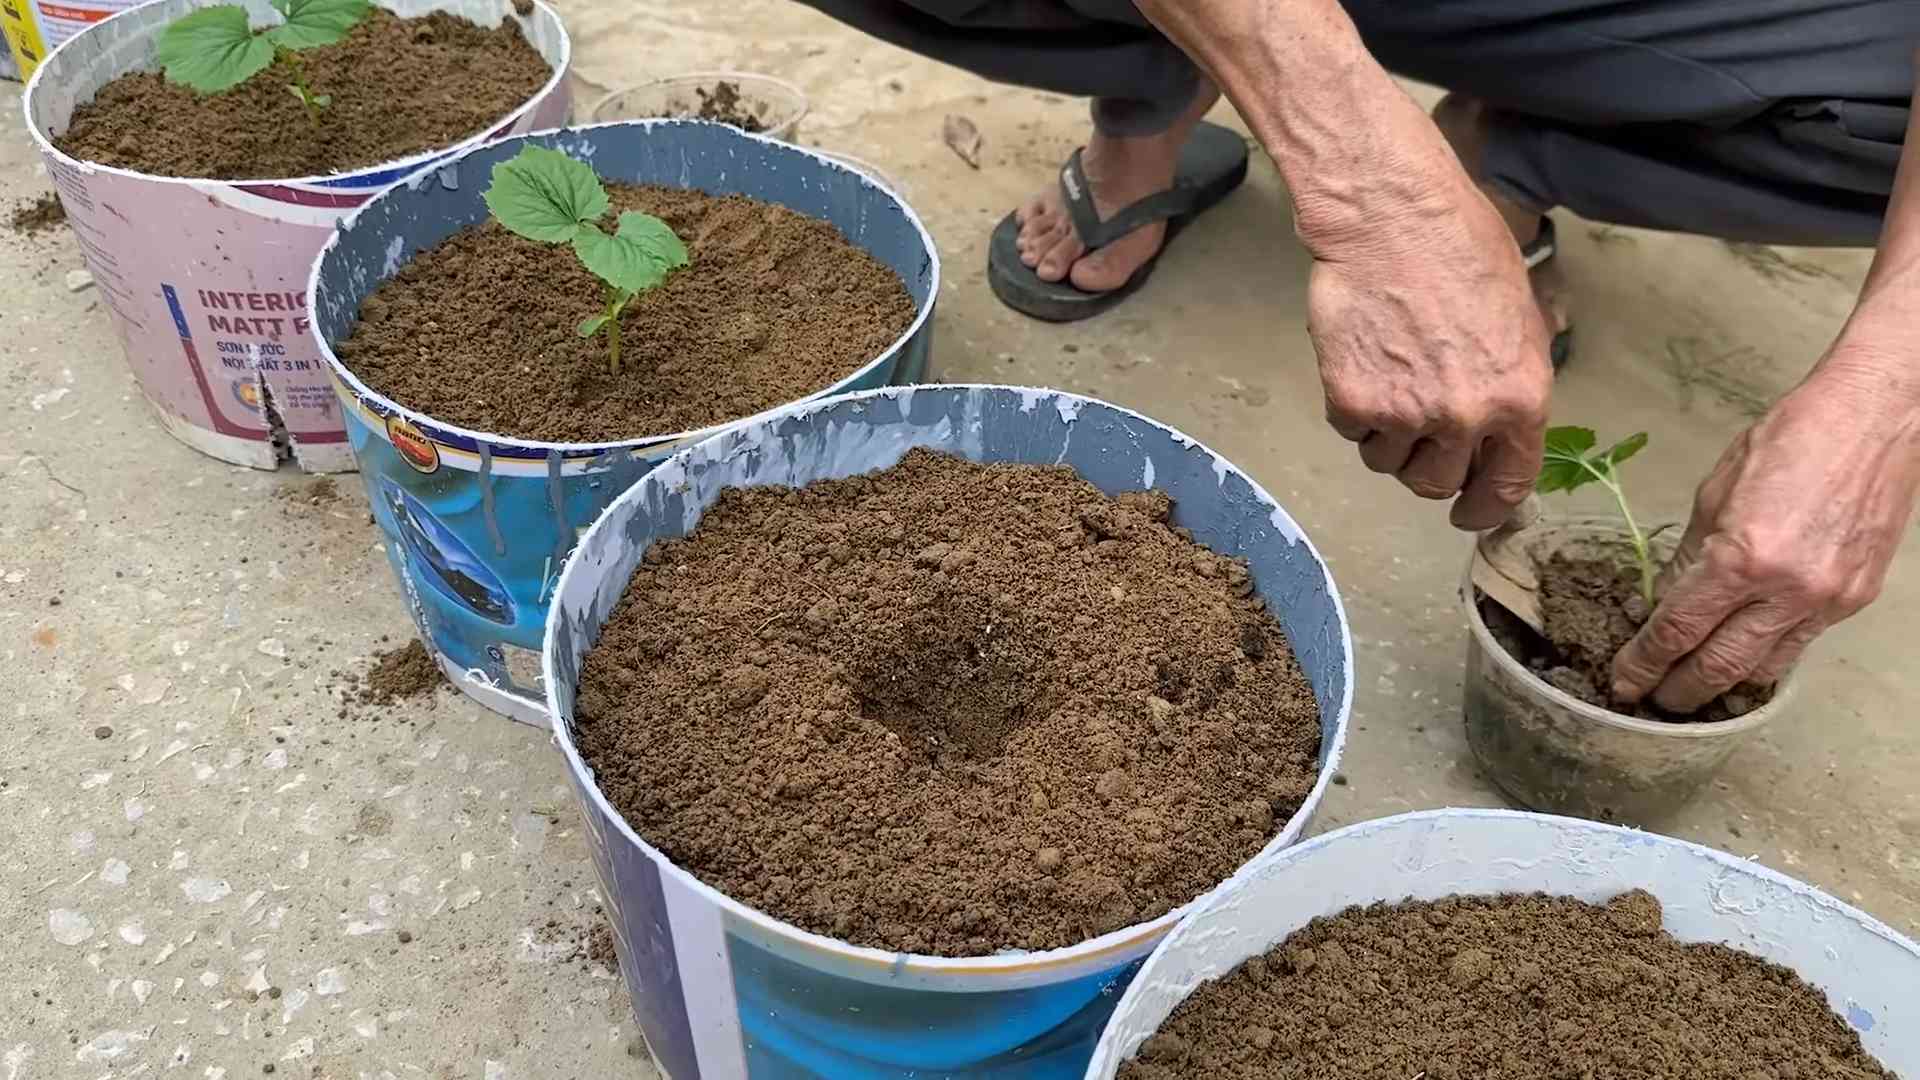
5. Transplanting Seedlings (If Using Seedlings): If you purchased seedlings from a nursery or started your own indoors, transplant them into your garden bed after the last frost. Dig a hole slightly larger than the root ball of the seedling. Gently remove the seedling from its container and place it in the hole. Backfill with soil and water thoroughly.
6. Choosing a Sunny Location: Bitter gourd needs at least 6-8 hours of sunlight per day to thrive. Choose a location in your garden that receives plenty of sunlight.
7. Providing Support: Bitter gourd is a climbing vine, so it needs a trellis, fence, or other support structure to grow on. Install the support structure before or shortly after planting. I use a sturdy trellis made of bamboo poles and twine.
8. Watering: Water the newly planted seeds or seedlings regularly, keeping the soil moist but not waterlogged.
Caring for Your Bitter Gourd Vine
Once your bitter gourd vine is established, it’s important to provide proper care to ensure healthy growth and a bountiful harvest.
* Watering: Water your bitter gourd vine regularly, especially during hot, dry weather. Aim to keep the soil consistently moist but not waterlogged. I usually water deeply every few days, depending on the weather.
* Fertilizing: Fertilize your bitter gourd vine every 2-3 weeks with a balanced fertilizer. You can also use organic fertilizers, such as compost tea or fish emulsion. I like to alternate between a balanced fertilizer and compost tea.
* Pruning: Pruning can help to improve air circulation and encourage fruit production. Remove any dead or diseased leaves and stems. You can also prune the vine to control its size and shape. I usually prune the vine lightly to remove any overcrowded areas.
* Pest and Disease Control: Bitter gourd can be susceptible to certain pests and diseases, such as aphids, spider mites, and powdery mildew. Monitor your vine regularly for signs of infestation or disease. If you spot any problems, take action immediately. I use organic pest control methods, such as neem oil and insecticidal soap.
* Pollination: Bitter gourd flowers are usually pollinated by insects, such as bees and butterflies. However, if you’re not seeing much fruit production, you may need to hand-pollinate the flowers. To hand-pollinate, use a small brush to transfer pollen from the male flowers to the female flowers. The female flowers have a small fruit behind the flower.
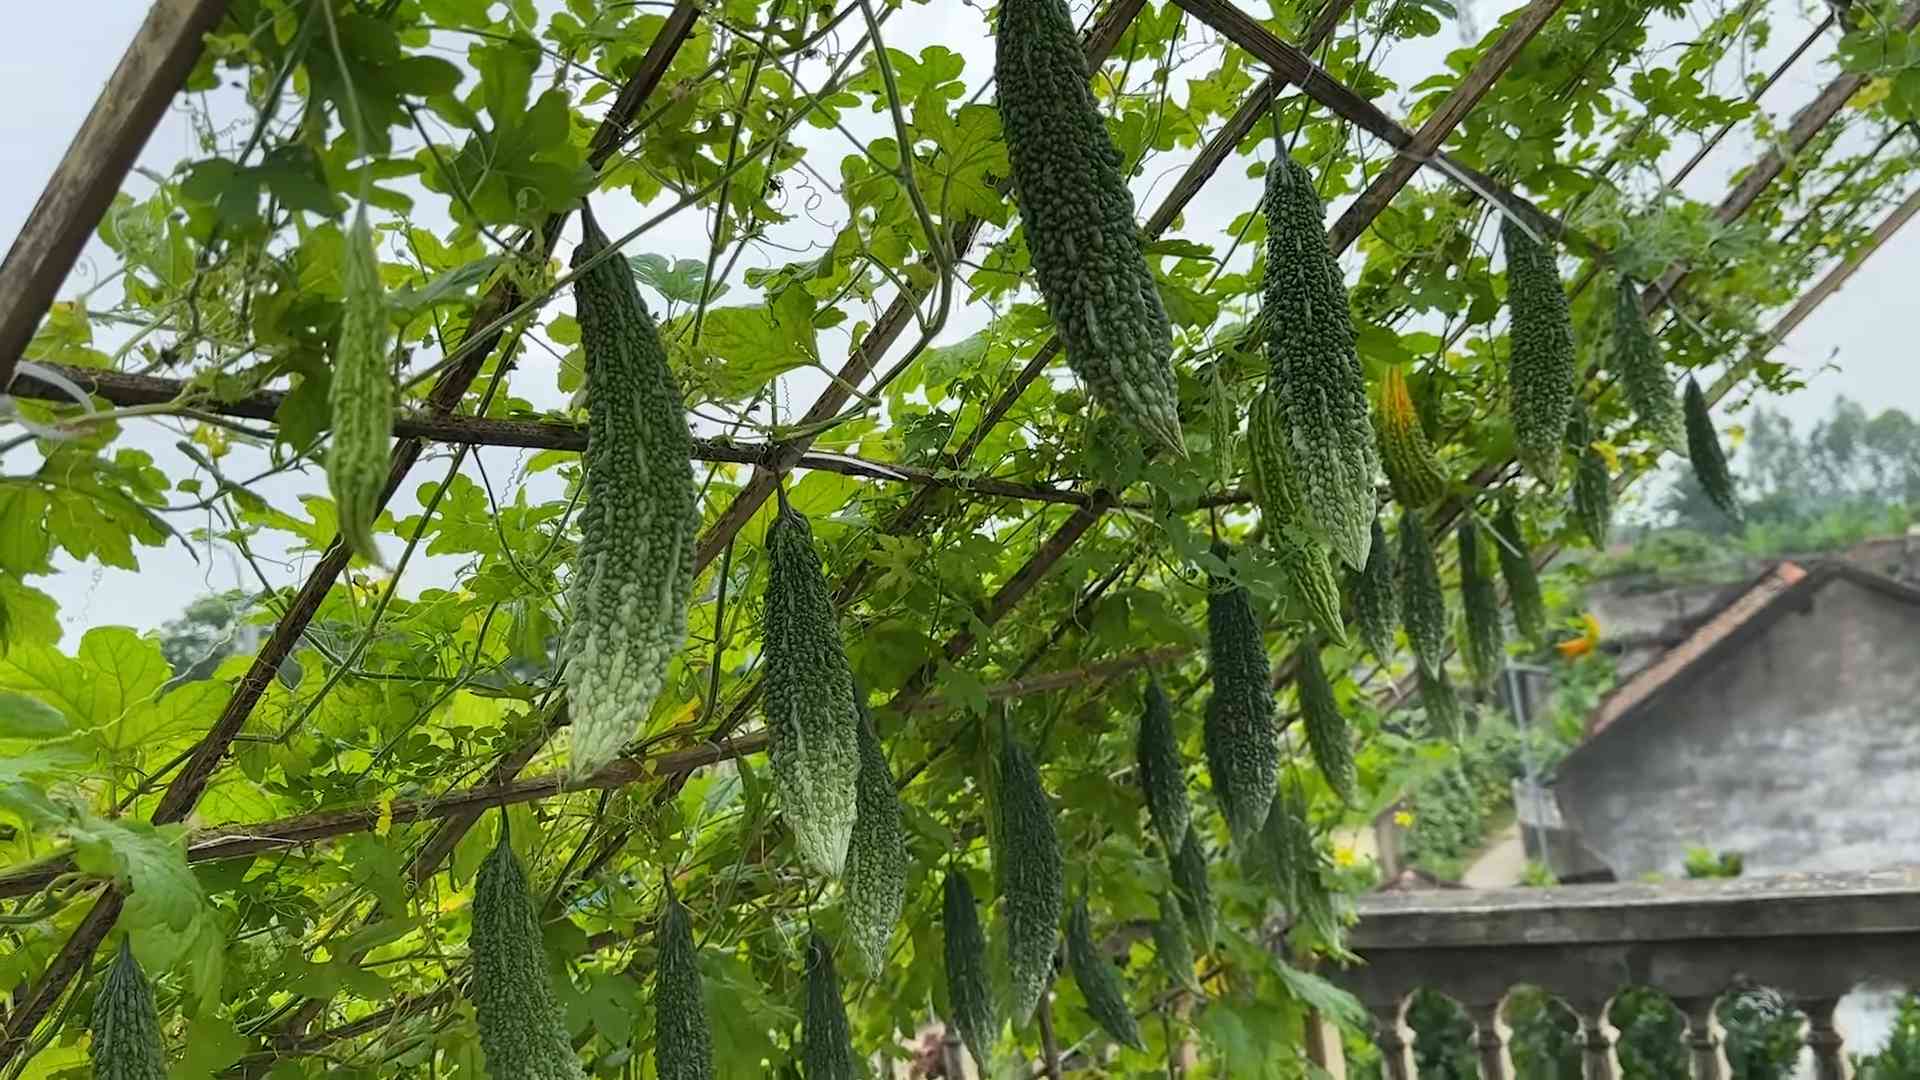
Harvesting Your Bitter Gourd
The moment we’ve all been waiting for! Harvesting your homegrown bitter gourd is incredibly rewarding.
* When to Harvest: Bitter gourd is typically ready to harvest about 2-3 months after planting. The fruits should be firm and green, but not too hard. The size of the fruit will vary depending on the variety. I usually harvest them when they’re about 6-8 inches long.
* How to Harvest: Use a sharp knife or pruning shears to cut the bitter gourd from the vine. Be careful not to damage the vine.
* Storing Bitter Gourd: Bitter gourd can be stored in the refrigerator for up to a week. Wrap the fruits in a plastic bag to prevent them from drying out.
Dealing with Common Problems
Even with the best care, you might encounter some challenges along the way. Here are some common problems and how to address them:
* Poor Germination: If your seeds aren’t germinating, make sure they’re fresh and that you’ve scarified and soaked them properly. Also, ensure the soil is warm enough.
* Yellowing Leaves: Yellowing leaves can indicate a nutrient deficiency or overwatering. Check the soil moisture and fertilize if necessary.
* Lack of Fruit Production: If your vine is growing well but not producing fruit, it could be due to poor pollination. Try hand-pollinating the flowers.
* Pest Infestations: Regularly inspect your vine for pests and take action immediately if you spot any problems.
My Favorite Bitter Gourd Recipes
Now that you’ve harvested your bitter gourd, it’s time to enjoy the fruits of your labor! Here are a few of my favorite recipes:
* Bitter Gourd Stir-Fry: This is a classic dish that’s quick and easy to make. Simply stir-fry sliced bitter gourd with onions, garlic, and your favorite vegetables.
* Bitter Gourd Curry: This is a more flavorful and complex dish that’s perfect for a special occasion. Simmer sliced bitter gourd in a rich curry sauce with spices and coconut milk.
* Bitter Gourd Chips: These are a healthy and delicious snack. Slice the bitter gourd thinly, toss with olive oil and spices, and bake until crispy.
I hope this guide has inspired you to grow your own bitter gourd! It’s a challenging but rewarding vegetable to cultivate, and the unique flavor is well worth the effort. Happy gardening!
Conclusion
So, there you have it! Mastering the art of growing bitter gourd doesn’t have to be a bitter experience. By implementing these simple yet effective DIY tricks, you’re well on your way to harvesting a bountiful crop of this nutritious and versatile vegetable right in your own backyard. We’ve covered everything from optimizing soil conditions and providing adequate support to tackling common pests and diseases with natural solutions. Remember, patience and consistent care are key to success.
Why is this a must-try? Because growing your own bitter gourd allows you to control the entire process, ensuring you have access to fresh, organic produce free from harmful chemicals. Plus, there’s an undeniable satisfaction in nurturing a plant from seed to harvest, knowing you played an active role in providing healthy food for yourself and your family. It’s a sustainable and rewarding practice that connects you with nature and empowers you to take charge of your food supply.
But don’t stop there! Feel free to experiment with different varieties of bitter gourd to discover your personal favorite. Try growing them in containers if you have limited space, or explore companion planting to enhance growth and deter pests naturally. Consider adding a trellis or archway for your bitter gourd vines to climb, creating a beautiful and productive garden feature. You can even try fermenting your bitter gourd for a unique and healthy probiotic-rich treat.
We’ve provided you with the tools and knowledge to embark on this exciting gardening adventure. Now, it’s your turn to put them into practice. Don’t be afraid to get your hands dirty, embrace the challenges, and celebrate the successes along the way. We are confident that with a little effort and dedication, you’ll be enjoying homegrown bitter gourd in no time.
We encourage you to try these **bitter gourd growing tips** and share your experiences with us! Let us know what worked best for you, any challenges you encountered, and any creative solutions you discovered. Your insights can help other gardeners learn and grow, creating a vibrant community of home-grown food enthusiasts. Share your photos, stories, and tips in the comments section below. We can’t wait to hear from you! Happy gardening!
Frequently Asked Questions (FAQ)
Q: How long does it take to grow bitter gourd from seed?
A: Generally, it takes about 60 to 75 days from planting seeds to harvesting your first bitter gourds. However, this can vary depending on the variety, climate, and growing conditions. Starting seeds indoors a few weeks before the last expected frost can give you a head start. Ensure the soil temperature is consistently warm, ideally between 75-85°F (24-29°C), for optimal germination. Soaking the seeds in warm water for 24 hours before planting can also improve germination rates.
Q: What are the best soil conditions for growing bitter gourd?
A: Bitter gourd thrives in well-drained, fertile soil rich in organic matter. The ideal soil pH is between 6.0 and 6.8. Before planting, amend your soil with compost, well-rotted manure, or other organic amendments to improve drainage, fertility, and water retention. Avoid heavy clay soils, as they can become waterlogged and hinder root growth. If you have clay soil, consider growing bitter gourd in raised beds or containers with a well-draining potting mix. Regular soil testing can help you determine if your soil needs any specific nutrient amendments.
Q: How often should I water my bitter gourd plants?
A: Bitter gourd plants need consistent moisture, especially during hot and dry weather. Water deeply and regularly, aiming to keep the soil consistently moist but not waterlogged. The frequency of watering will depend on your climate, soil type, and the size of your plants. As a general rule, water when the top inch of soil feels dry to the touch. Avoid overhead watering, as it can increase the risk of fungal diseases. Drip irrigation or soaker hoses are excellent options for delivering water directly to the roots. Mulching around the plants can also help retain moisture and suppress weeds.
Q: What are some common pests and diseases that affect bitter gourd?
A: Common pests that can affect bitter gourd include aphids, squash bugs, cucumber beetles, and fruit flies. Diseases include powdery mildew, downy mildew, and fusarium wilt. Regularly inspect your plants for signs of pests or diseases. Use organic pest control methods such as neem oil, insecticidal soap, or handpicking pests. Ensure good air circulation around your plants to prevent fungal diseases. Remove any infected leaves or plants promptly to prevent the spread of disease. Crop rotation can also help reduce the risk of soilborne diseases.
Q: How do I know when my bitter gourd is ready to harvest?
A: Bitter gourds are typically harvested when they are still green and slightly immature. The skin should be firm and smooth, and the gourd should be relatively tender. Overripe bitter gourds will turn yellow or orange and become more bitter. The size of the gourd at harvest will depend on the variety. Use a sharp knife or pruning shears to cut the gourd from the vine, leaving a short stem attached. Regular harvesting encourages the plant to produce more fruit.
Q: Can I grow bitter gourd in containers?
A: Yes, you can successfully grow bitter gourd in containers, especially if you have limited garden space. Choose a large container, at least 15-20 gallons in size, with good drainage holes. Use a high-quality potting mix that is well-draining and rich in organic matter. Provide a sturdy trellis or support structure for the vines to climb. Water regularly and fertilize every 2-3 weeks with a balanced liquid fertilizer. Container-grown bitter gourds may require more frequent watering and fertilization than those grown in the ground.
Q: How can I reduce the bitterness of bitter gourd?
A: Bitter gourd is known for its distinctive bitter taste, but there are several ways to reduce the bitterness. Soaking the sliced bitter gourd in salted water for 30 minutes before cooking can help draw out some of the bitterness. You can also blanch the bitter gourd in boiling water for a few minutes before cooking. Another technique is to rub the sliced bitter gourd with salt and then squeeze out the excess water. Cooking bitter gourd with acidic ingredients like vinegar or lemon juice can also help balance the bitterness.
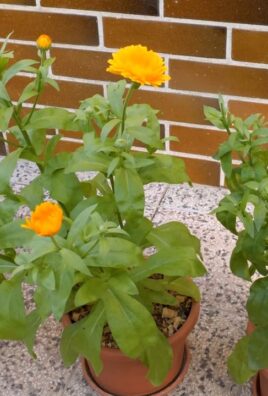
Q: What are some good companion plants for bitter gourd?
A: Companion planting can be beneficial for bitter gourd, helping to attract beneficial insects, deter pests, and improve overall plant health. Good companion plants for bitter gourd include basil, marigolds, nasturtiums, and rosemary. These plants can help repel common pests like aphids and squash bugs. Legumes like beans and peas can also be beneficial, as they fix nitrogen in the soil, which can improve plant growth. Avoid planting bitter gourd near potatoes or other members of the cucurbit family (like cucumbers and melons), as they can compete for resources or attract similar pests and diseases.
Leave a Comment