
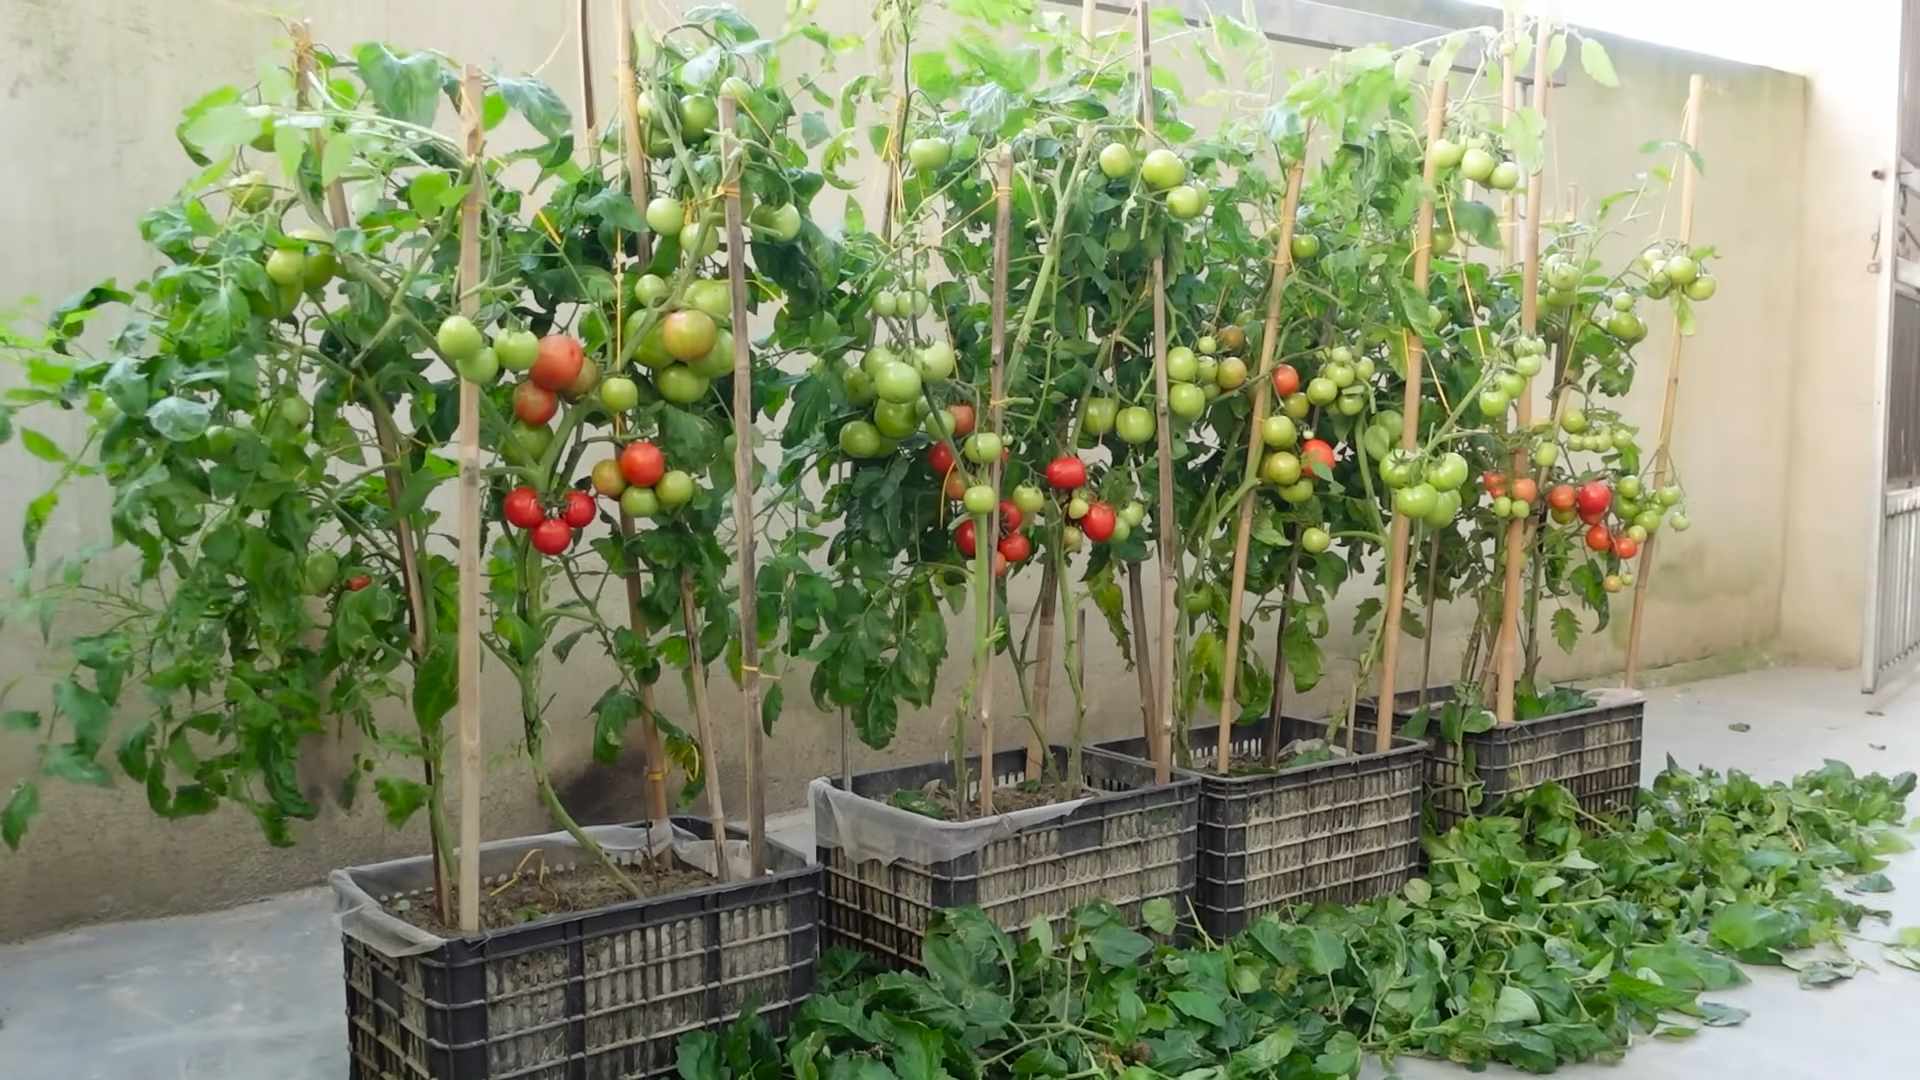
Container tomatoes producing trick – ever dreamt of harvesting baskets overflowing with juicy, sun-ripened tomatoes, all from the comfort of your balcony or patio? I know I have! For years, I struggled to get more than a handful of sad, small tomatoes from my container plants. It felt like a gardening mystery I couldn’t crack. But, I’m here to tell you, the secret isn’t some expensive fertilizer or complicated technique. It’s a simple, yet incredibly effective trick that will transform your container tomato game.
Growing tomatoes in containers has become increasingly popular, especially in urban environments where garden space is limited. While the practice itself is relatively modern, the love for tomatoes stretches back centuries. Originating in South America, tomatoes were initially viewed with suspicion in Europe, but eventually, their vibrant flavor and versatility won hearts (and stomachs!) worldwide. Now, we’re bringing that rich history to our patios and balconies.
Why do you need this container tomatoes producing trick? Because let’s face it, store-bought tomatoes just don’t compare to the taste of homegrown. And with a few simple adjustments, you can maximize your yield and enjoy a bountiful harvest, even in a small space. This DIY hack addresses the common challenges of container gardening, such as limited root space and nutrient availability. Get ready to unlock the full potential of your container tomatoes and enjoy the freshest, most flavorful tomatoes you’ve ever tasted!
Supercharge Your Container Tomatoes: The Upside-Down Bottle Watering Trick!
Hey there, fellow gardeners! Are you tired of your container tomatoes drying out too quickly, or worse, getting blossom end rot? I know I was! That’s why I’m so excited to share this simple, yet incredibly effective, DIY trick that will revolutionize your container tomato growing game: the upside-down bottle watering system. This method delivers water directly to the roots, minimizing water waste, preventing fungal diseases, and promoting healthier, more productive tomato plants. Trust me, once you try this, you’ll never go back!
Why This Trick Works Wonders
Before we dive into the how-to, let’s quickly understand why this method is so beneficial:
* Consistent Watering: The bottle acts as a reservoir, providing a slow and steady supply of water directly to the root zone. This eliminates the feast-or-famine cycle that can stress tomato plants and lead to problems like blossom end rot.
* Reduced Water Waste: Surface watering often leads to evaporation and runoff. This method delivers water precisely where it’s needed, conserving water and saving you money.
* Healthier Plants: By keeping the foliage dry, you minimize the risk of fungal diseases like early blight and Septoria leaf spot.
* Deeper Root Growth: The consistent moisture encourages roots to grow deeper into the soil, making the plant more resilient to drought and nutrient deficiencies.
* Less Weeding: A drier soil surface discourages weed germination.
Materials You’ll Need
Gathering your supplies is the first step to success. Here’s what you’ll need:
* Plastic Bottles: I prefer using 2-liter soda bottles, but any sturdy plastic bottle will work. The size of the bottle will depend on the size of your container. For smaller containers, use smaller bottles.
* Drill or Screwdriver: To create drainage holes in the bottle cap.
* Scissors or Utility Knife: To cut the bottom off the bottle.
* Potting Soil: To fill the container around the bottle.
* Your Tomato Plant: Of course!
* Water: To fill the bottles.
* Optional: Landscape Fabric or Burlap: To wrap the bottle and make it more aesthetically pleasing.
Step-by-Step Instructions: Building Your Upside-Down Bottle Watering System
Alright, let’s get our hands dirty! Follow these steps to create your own upside-down bottle watering system:
1. Prepare the Bottle Cap: This is a crucial step for proper water flow. Using your drill or screwdriver, carefully create several small holes in the bottle cap. I usually aim for about 5-7 holes, each about 1/8 inch in diameter. The number of holes will affect the water flow rate, so experiment to find what works best for your climate and soil type. If you live in a very hot, dry climate, you might want to add a few more holes.
2. Cut Off the Bottom of the Bottle: Using your scissors or utility knife, carefully cut off the bottom of the plastic bottle. Make sure the cut is clean and even. This will be the opening you use to fill the bottle with water. Be careful not to cut yourself!
3. Dig a Hole in Your Container: In the center of your container, dig a hole large enough to accommodate the bottle, leaving the neck of the bottle (with the cap attached) exposed. The depth of the hole should be such that the bottle is buried up to its shoulder.
4. Insert the Bottle: Carefully insert the bottle, neck-down, into the hole you just dug. Make sure the bottle is stable and doesn’t wobble. The bottle cap should be buried deep enough that the soil line will be just below the cut edge of the bottle.
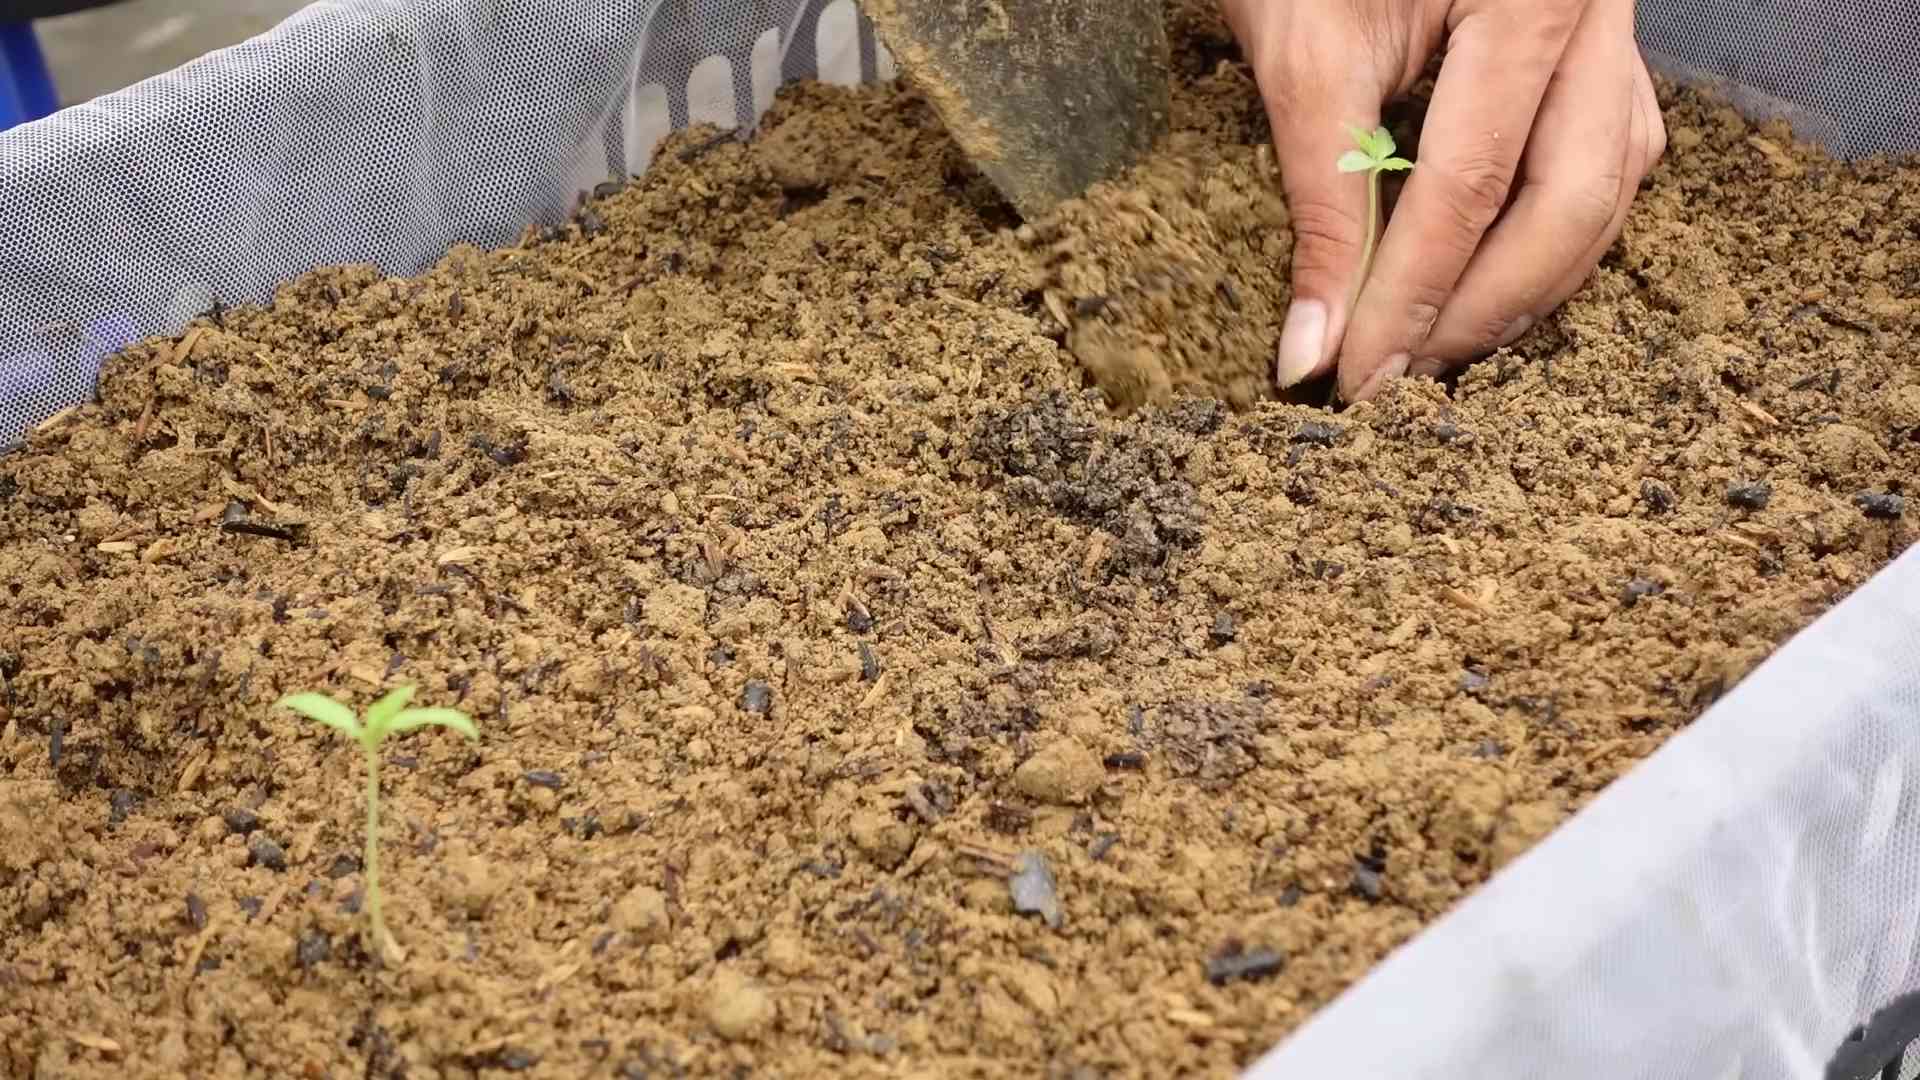
5. Plant Your Tomato Plant: Now, carefully plant your tomato plant around the bottle. Be gentle with the roots and make sure the plant is positioned correctly.
6. Fill the Container with Potting Soil: Fill the remaining space in the container with potting soil, gently packing it around the bottle and the tomato plant. Leave a couple of inches of space at the top of the container for watering.
7. Water Thoroughly: Water the soil around the tomato plant thoroughly to help settle the soil and encourage root growth.
8. Fill the Bottle with Water: Now, the magic happens! Fill the upside-down bottle with water. You’ll see the water slowly seep out of the holes in the cap and into the surrounding soil.
9. Monitor and Refill: Keep an eye on the water level in the bottle and refill it as needed. The frequency of refilling will depend on the weather, the size of your container, and the size of your tomato plant. In hot weather, you may need to refill the bottle every day or two.
Tips and Tricks for Success
Here are a few extra tips to help you get the most out of this watering system:
* Choose the Right Bottle Size: The size of the bottle should be proportional to the size of your container. A 2-liter bottle is usually sufficient for a 5-gallon container. For larger containers, you may want to use multiple bottles or larger bottles.
* Consider Bottle Placement: For larger containers, you might want to use two or three bottles spaced evenly around the tomato plant. This will ensure that the roots receive consistent moisture from all sides.
* Use Dark-Colored Bottles: Dark-colored bottles will help prevent algae growth inside the bottle. If you’re using clear bottles, you can wrap them with landscape fabric or burlap to block out the sunlight.
* Add Fertilizer to the Water: You can add diluted liquid fertilizer to the water in the bottle to provide your tomato plants with a boost of nutrients. Just be sure to follow the instructions on the fertilizer label.
* Clean the Bottles Regularly: Over time, the bottles may become clogged with soil or algae. Clean them out periodically to ensure proper water flow.
* Mulch Around the Plant: Add a layer of mulch around the base of the tomato plant to help retain moisture and suppress weeds.
* Watch for Pests and Diseases: Even with this watering system, it’s important to monitor your tomato plants for pests and diseases. Take action promptly if you notice any problems.
* Experiment with Different Bottle Types: Don’t be afraid to experiment with different types of bottles to see what works best for you. Some gardeners prefer using wine bottles or glass bottles. Just be careful not to break them!
* Consider the Soil Type: The type of soil you use will affect the water flow rate. Sandy soils will drain more quickly than clay soils. Adjust the number of holes in the bottle cap accordingly.
* Adjust Watering Based on Weather: During periods of heavy rain, you may not need to refill the bottle as often. Conversely, during hot, dry spells, you may need to refill it more frequently.
Troubleshooting Common Issues
Even with the best planning, you might encounter a few hiccups. Here’s how to troubleshoot some common issues:
* Bottle Drains Too Quickly: If the bottle is draining too quickly, it could be due to too many holes in the cap or a very porous soil. Try reducing the number of holes or amending your soil with compost or peat moss to improve its water-holding capacity.
* Bottle Drains Too Slowly: If the bottle is draining too slowly, it could be due to clogged holes or a compacted soil. Clean out the holes and aerate the soil around the bottle.
* Blossom End Rot: Even with consistent watering, blossom end rot can still occur if the soil is deficient in calcium. Amend your soil with bone meal or add a calcium supplement to the water.
* Fungal Diseases: While this watering system helps prevent fungal diseases, they can still occur in humid conditions. Ensure good air circulation around your tomato plants and consider using a fungicide if necessary.
Adapting for Different Container Sizes
The beauty of this trick is its adaptability. Here’s how to adjust it for various container sizes:
* Small Containers (1-3 gallons): Use smaller bottles, like water bottles or juice bottles. You might only need one bottle per container.
* Medium Containers (5-10 gallons): A 2-liter soda bottle works well. Consider using two bottles spaced evenly around the plant for better coverage.
* Large Containers (15+ gallons): Use multiple 2-liter bottles or larger bottles, like gallon jugs. Space them evenly around the plant to ensure consistent moisture throughout the root zone.
Beyond Tomatoes: Other Plants That Benefit
While this trick is fantastic for tomatoes, it can also benefit other plants that prefer consistent moisture, such as:
* Peppers
* Eggplants
* Cucumbers
* Squash
* Herbs (like basil and oregano)
Just be sure to adjust the bottle size and watering frequency based on the specific needs of each plant.
Aesthetic Considerations: Making it Look Good
Let
Conclusion
So, there you have it! This simple yet incredibly effective container tomatoes producing trick is a game-changer for anyone who dreams of harvesting juicy, flavorful tomatoes right from their patio, balcony, or even a sunny windowsill. We’ve walked you through the process, highlighting the key steps that will transform your container tomato plants from struggling seedlings to bountiful producers.
Why is this a must-try? Because it addresses the fundamental needs of tomato plants grown in containers: consistent moisture, adequate nutrients, and strong support. By implementing this method, you’re not just growing tomatoes; you’re creating an optimal environment for them to thrive. You’ll witness a significant increase in fruit production, healthier plants, and a more rewarding gardening experience overall. Forget the disappointment of stunted growth and meager harvests – this trick unlocks the full potential of your container tomatoes.
But don’t stop there! Experiment with different variations to tailor the technique to your specific needs and preferences. For example, if you live in a particularly hot climate, consider using a larger container or adding a layer of mulch to further insulate the soil and retain moisture. You could also incorporate slow-release fertilizer pellets into the soil mix for a sustained nutrient boost. Another variation is to use different types of support structures, such as tomato cages or stakes, depending on the variety of tomato you’re growing. Determinate (bush) varieties may benefit from a cage, while indeterminate (vining) varieties might require more substantial staking.
Furthermore, consider companion planting in your container. Basil, marigolds, and other herbs can deter pests and attract beneficial insects, creating a healthier ecosystem for your tomato plants. This is a great way to naturally enhance the growth and flavor of your tomatoes.
The beauty of this container tomatoes producing trick lies in its simplicity and adaptability. It’s a technique that can be easily implemented by gardeners of all skill levels, from beginners to seasoned pros. The results speak for themselves – vibrant, healthy plants laden with delicious tomatoes.
We are confident that this method will revolutionize your container gardening experience. Don’t just take our word for it, though. Give it a try and see the difference for yourself! We encourage you to embrace this simple yet powerful technique and unlock the full potential of your container tomato plants.
We are eager to hear about your experiences! Share your results, variations, and any tips you discover along the way in the comments section below. Let’s build a community of successful container tomato growers and learn from each other’s successes. Happy gardening!
Frequently Asked Questions (FAQ)
What type of container is best for growing tomatoes?
The ideal container size for growing tomatoes is at least 10 gallons, but 15-20 gallons is even better, especially for indeterminate varieties. Choose a container made of plastic, terracotta, or fabric. Ensure the container has adequate drainage holes to prevent waterlogging. Dark-colored containers can heat up quickly in direct sunlight, so consider lighter colors or placing them in a partially shaded area. Fabric pots are excellent because they allow for air pruning of the roots, promoting healthier root development.
What kind of soil should I use for container tomatoes?
Avoid using garden soil in containers, as it can become compacted and poorly drained. Instead, opt for a high-quality potting mix specifically formulated for containers. A good potting mix should be lightweight, well-draining, and rich in organic matter. You can also amend the potting mix with compost or other organic materials to further improve its fertility and water retention. Consider adding perlite or vermiculite to enhance drainage and aeration.
How often should I water my container tomatoes?
Watering frequency depends on several factors, including the weather, the size of the container, and the type of tomato plant. Generally, you should water your container tomatoes deeply whenever the top inch of soil feels dry to the touch. During hot, dry weather, you may need to water daily or even twice a day. Avoid overwatering, as this can lead to root rot. Use a watering can or a hose with a gentle spray nozzle to avoid damaging the plants.
How much sunlight do container tomatoes need?
Tomatoes require at least 6-8 hours of direct sunlight per day to thrive. Choose a location that receives ample sunlight throughout the day. If you live in a particularly hot climate, you may need to provide some afternoon shade to prevent the plants from overheating. If you don’t have access to enough natural sunlight, you can supplement with grow lights.
What kind of fertilizer should I use for container tomatoes?
Tomatoes are heavy feeders and require regular fertilization to produce abundant fruit. Use a balanced fertilizer specifically formulated for tomatoes, such as a 5-10-5 or 10-10-10 formula. Follow the instructions on the fertilizer package for application rates and frequency. You can also use organic fertilizers, such as compost tea or fish emulsion. Avoid over-fertilizing, as this can lead to excessive foliage growth and reduced fruit production. Side-dress your plants with compost every few weeks to provide a slow-release source of nutrients.
How do I support my container tomato plants?
Tomato plants, especially indeterminate varieties, need support to prevent them from sprawling and breaking under the weight of the fruit. Use tomato cages, stakes, or trellises to provide support. Install the support structure early in the growing season, before the plants become too large. Tie the stems of the tomato plants to the support structure using soft twine or plant ties.
What are some common pests and diseases that affect container tomatoes?
Common pests that affect container tomatoes include aphids, whiteflies, and tomato hornworms. Diseases include early blight, late blight, and blossom end rot. Inspect your plants regularly for signs of pests or diseases. Treat infestations with insecticidal soap or neem oil. Prevent diseases by providing good air circulation, avoiding overhead watering, and using disease-resistant varieties. Blossom end rot is often caused by calcium deficiency, so amend the soil with calcium or use a calcium-rich fertilizer.
How do I prevent blossom end rot in my container tomatoes?
Blossom end rot, a common problem in tomatoes, is caused by a calcium deficiency, often due to inconsistent watering. To prevent it, ensure consistent watering, especially during fruit development. Add calcium to the soil by incorporating bone meal or crushed eggshells. You can also use a calcium-specific fertilizer. Mulching around the base of the plant helps retain moisture and prevent fluctuations in soil moisture levels.
Can I grow different varieties of tomatoes in containers?
Yes, you can grow different varieties of tomatoes in containers. Choose varieties that are well-suited for container gardening, such as determinate (bush) varieties or dwarf varieties. Indeterminate (vining) varieties can also be grown in containers, but they will require larger containers and more support. Consider the size and growth habit of the variety when selecting a container.
How do I prune my container tomato plants?
Pruning can help improve air circulation, reduce disease, and encourage fruit production. Remove suckers (the small shoots that grow between the main stem and the branches) to direct the plant’s energy towards fruit production. Prune away any yellowing or diseased leaves. For indeterminate varieties, you can also prune the lower leaves to improve air circulation and prevent soil-borne diseases.
What do I do if my tomato plant is not producing fruit?
Several factors can contribute to a lack of fruit production, including insufficient sunlight, poor pollination, and nutrient deficiencies. Ensure your plants are receiving at least 6-8 hours of direct sunlight per day. Gently shake the plants or use a small brush to transfer pollen from one flower to another to improve pollination. Fertilize regularly with a balanced tomato fertilizer. Check the soil pH and adjust if necessary.
How do I know when my tomatoes are ripe?
Tomatoes are typically ripe when they have reached their mature color and are slightly soft to the touch. The color will vary depending on the variety. Gently twist the tomato from the vine; if it comes off easily, it’s ripe. Ripe tomatoes will also have a distinct aroma.
Can I overwinter my container tomato plants?
In some climates, you can overwinter your container tomato plants by bringing them indoors before the first frost. Prune the plants back significantly and place them in a sunny location. Water sparingly and avoid fertilizing during the winter months. In the spring, gradually acclimate the plants to outdoor conditions before transplanting them back into their containers. However, the yield the following year may be less than a newly started plant.
What are some good companion plants for container tomatoes?
Good companion plants for container tomatoes include basil, marigolds, onions, garlic, and carrots. Basil repels tomato hornworms and whiteflies, while marigolds deter nematodes and other pests. Onions and garlic can help prevent fungal diseases. Carrots improve soil drainage and aeration. Avoid planting tomatoes near brassicas (such as cabbage and broccoli) or fennel, as they can inhibit growth.
Leave a Comment