
Growing Kale in Soil Bags: Unlock the secrets to a bountiful harvest, even without a traditional garden! Have you ever dreamed of fresh, vibrant kale gracing your dinner table, but felt limited by space or soil conditions? Well, dream no more! This DIY guide is your passport to cultivating delicious, nutritious kale right in your own backyard, balcony, or even patio – all thanks to the magic of soil bags.
For centuries, humans have sought innovative ways to cultivate food, adapting to diverse environments and limited resources. From ancient terrace farming to modern hydroponics, the desire to grow our own sustenance has driven ingenuity. Using soil bags for gardening is a modern twist on this age-old tradition, offering a simple, accessible, and cost-effective solution for urban dwellers and gardening enthusiasts alike.
Why should you embrace this DIY trick? Because growing kale in soil bags is incredibly versatile! It bypasses the need for extensive digging, tilling, or weeding. Plus, it allows you to control the soil quality, ensuring your kale receives the perfect nutrients for optimal growth. Imagine the satisfaction of harvesting your own organic kale, knowing exactly where it came from and how it was grown. This guide will walk you through every step, from selecting the right soil to troubleshooting common problems, empowering you to become a kale-growing pro in no time. Let’s get started!
Growing Kale in Soil Bags: A Beginner’s Guide
Hey there, fellow gardening enthusiasts! I’m so excited to share one of my favorite gardening hacks with you: growing kale in soil bags! It’s a fantastic way to maximize space, minimize weeding, and enjoy fresh, homegrown kale even if you don’t have a traditional garden bed. Trust me, once you try this, you’ll be hooked.
Why Grow Kale in Soil Bags?
Before we dive into the how-to, let’s talk about why this method is so awesome:
* Space Saver: Perfect for small patios, balconies, or even just a sunny corner.
* Easy Weeding: Less ground contact means fewer weeds to battle. Hallelujah!
* Great Drainage: Soil bags naturally provide excellent drainage, which kale loves.
* Portable Garden: You can move your kale around to chase the sun or protect it from harsh weather.
* Cost-Effective: Soil bags are relatively inexpensive, especially compared to raised beds.
* Beginner-Friendly: This method is super simple, even if you’re a complete newbie to gardening.
Materials You’ll Need
Okay, let’s gather our supplies. Here’s what you’ll need to get started:
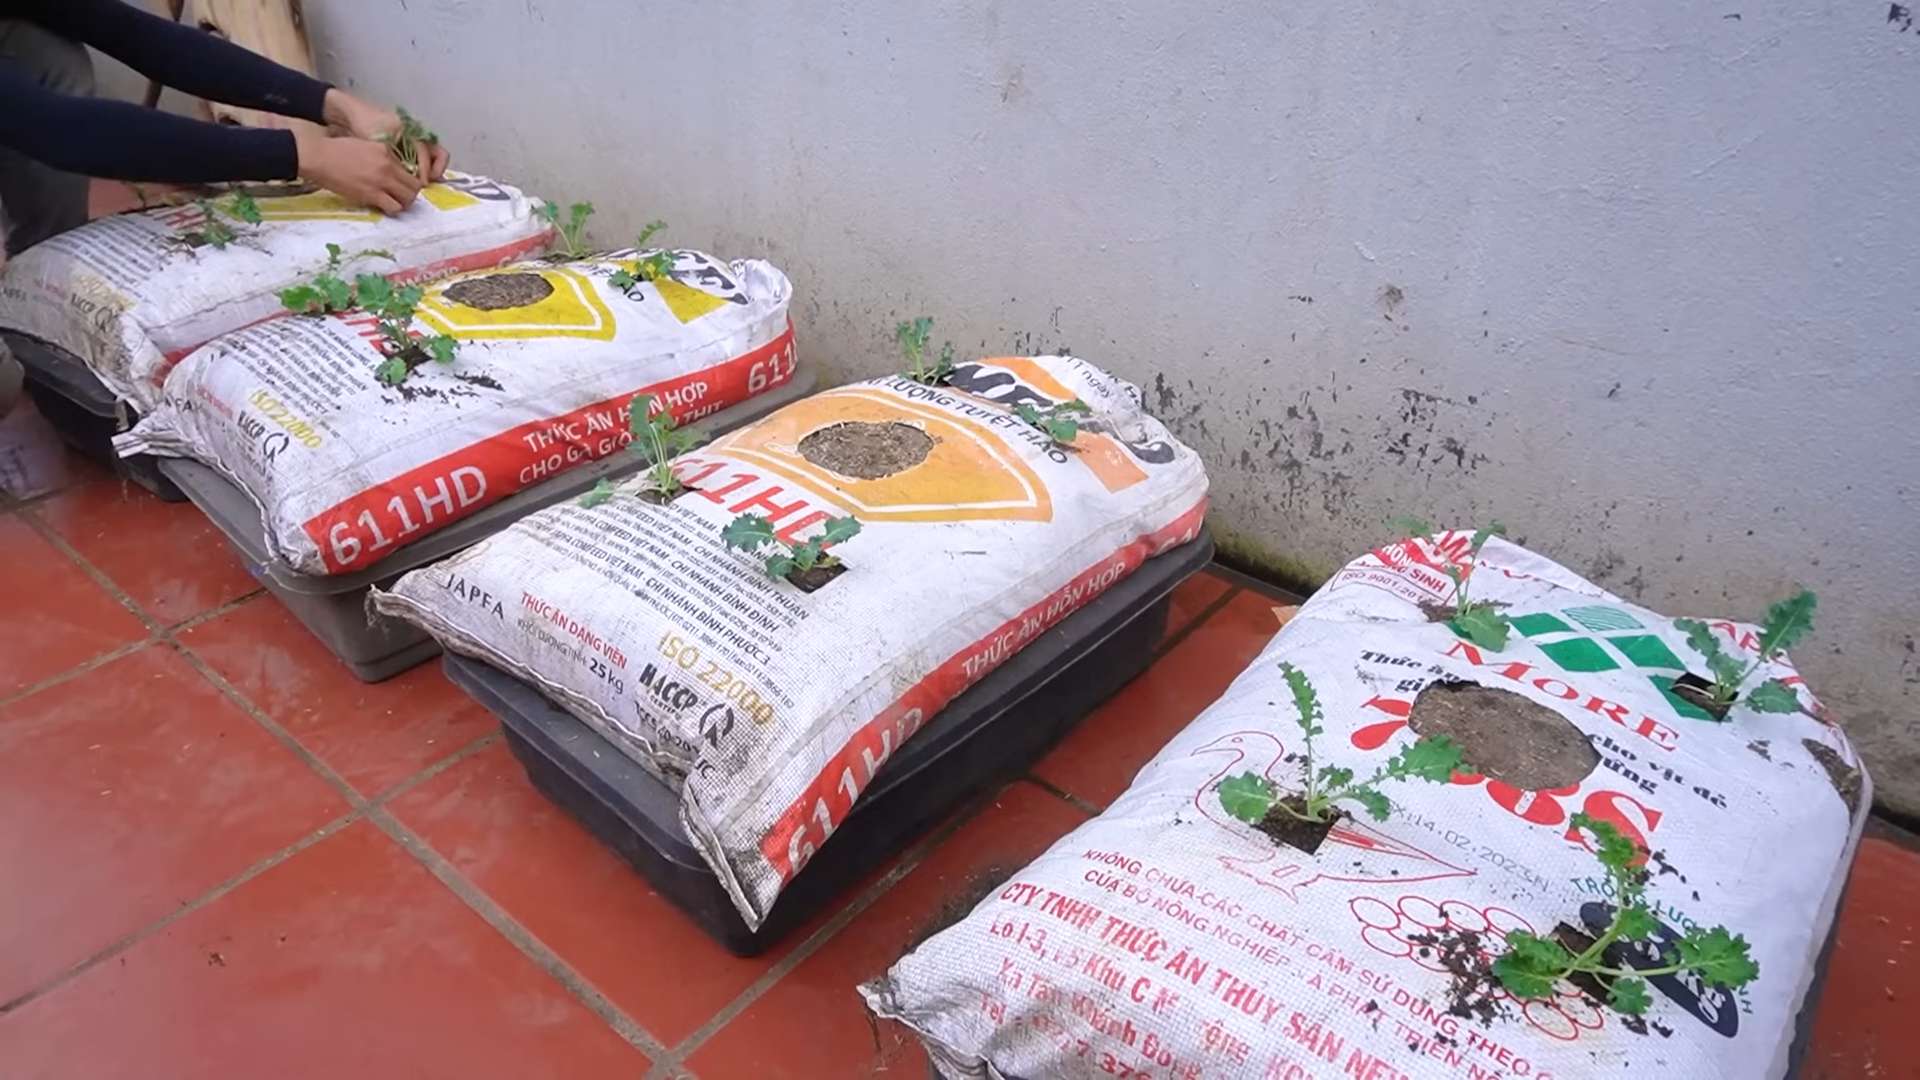
* Soil Bags: Choose heavy-duty polypropylene bags. The size depends on how much kale you want to grow. I usually go for bags that are around 2 cubic feet. You can find these at most garden centers or online.
* Potting Mix: Don’t skimp on the potting mix! Use a high-quality, well-draining mix specifically formulated for vegetables. Avoid using garden soil directly, as it can compact and hinder drainage.
* Kale Seeds or Seedlings: You can start kale from seeds indoors or buy seedlings from a nursery. Seedlings will give you a head start. I personally love starting from seeds, it’s so rewarding!
* Utility Knife or Scissors: For making drainage holes and planting slits.
* Watering Can or Hose: For keeping your kale hydrated.
* Fertilizer (Optional): A balanced, slow-release fertilizer can give your kale a boost.
* Gloves: To keep your hands clean.
* Measuring Cup or Scoop: For fertilizer application (if using).
Step-by-Step Instructions: Planting Your Kale
Alright, let’s get our hands dirty! Here’s how to plant your kale in soil bags:
1. Prepare the Soil Bag:
* Lay the soil bag flat on the ground in the location where you want to grow your kale. Remember, kale needs at least 6 hours of sunlight per day.
* Using your utility knife or scissors, carefully cut several drainage holes in the bottom of the bag. Space them about 6-8 inches apart. This is crucial for preventing waterlogging. I usually make about 10-12 holes per bag.
* Flip the bag over so the drainage holes are facing down.
2. Open the Soil Bag:
* Carefully cut open the top of the soil bag. I usually cut a rectangular opening, leaving a few inches of the bag intact around the edges to create a sort of “raised bed” effect.
* Gently loosen the soil inside the bag with your hands or a small trowel. This will help with aeration and drainage.
3. Add Fertilizer (Optional):
* If you’re using a slow-release fertilizer, now’s the time to add it. Follow the instructions on the fertilizer package for the correct amount. I usually mix it in with the top few inches of soil.
4. Plant Your Kale:
* From Seeds: If you’re starting from seeds, sow them directly into the soil bag. Follow the instructions on the seed packet for spacing and depth. I usually plant a few seeds per spot and then thin them out later, keeping the strongest seedling.
* From Seedlings: If you’re using seedlings, gently remove them from their containers. Dig small holes in the soil bag, spacing them about 12-18 inches apart. Place the seedlings in the holes and gently backfill with soil. Make sure the top of the root ball is level with the surrounding soil.
5. Water Thoroughly:
* After planting, water the soil bag thoroughly until the water drains out of the drainage holes. This will help settle the soil and ensure the roots are well-hydrated.
6. Mulch (Optional):
* Adding a layer of mulch around your kale plants can help retain moisture, suppress weeds, and regulate soil temperature. I like to use straw or shredded leaves.
Maintaining Your Kale Garden
Now that your kale is planted, here’s how to keep it happy and healthy:
1. Watering:
* Kale needs consistent moisture, especially during hot weather. Water deeply whenever the top inch of soil feels dry to the touch. Avoid overwatering, as this can lead to root rot. I usually check the soil moisture every day or two.
2. Fertilizing:
* If you didn’t add a slow-release fertilizer at planting time, you can fertilize your kale every few weeks with a liquid fertilizer. Follow the instructions on the fertilizer package.
3. Sunlight:
* Make sure your kale is getting at least 6 hours of sunlight per day. If you live in a very hot climate, you may need to provide some afternoon shade to prevent the leaves from scorching.
4. Pest Control:
* Keep an eye out for pests like aphids, cabbage worms, and slugs. You can handpick them off the plants, use insecticidal soap, or introduce beneficial insects like ladybugs. I prefer organic pest control methods whenever possible.
5. Weeding:
* Even though soil bags are relatively weed-free, you may still get a few weeds popping up. Pull them out as soon as you see them to prevent them from competing with your kale for nutrients and water.
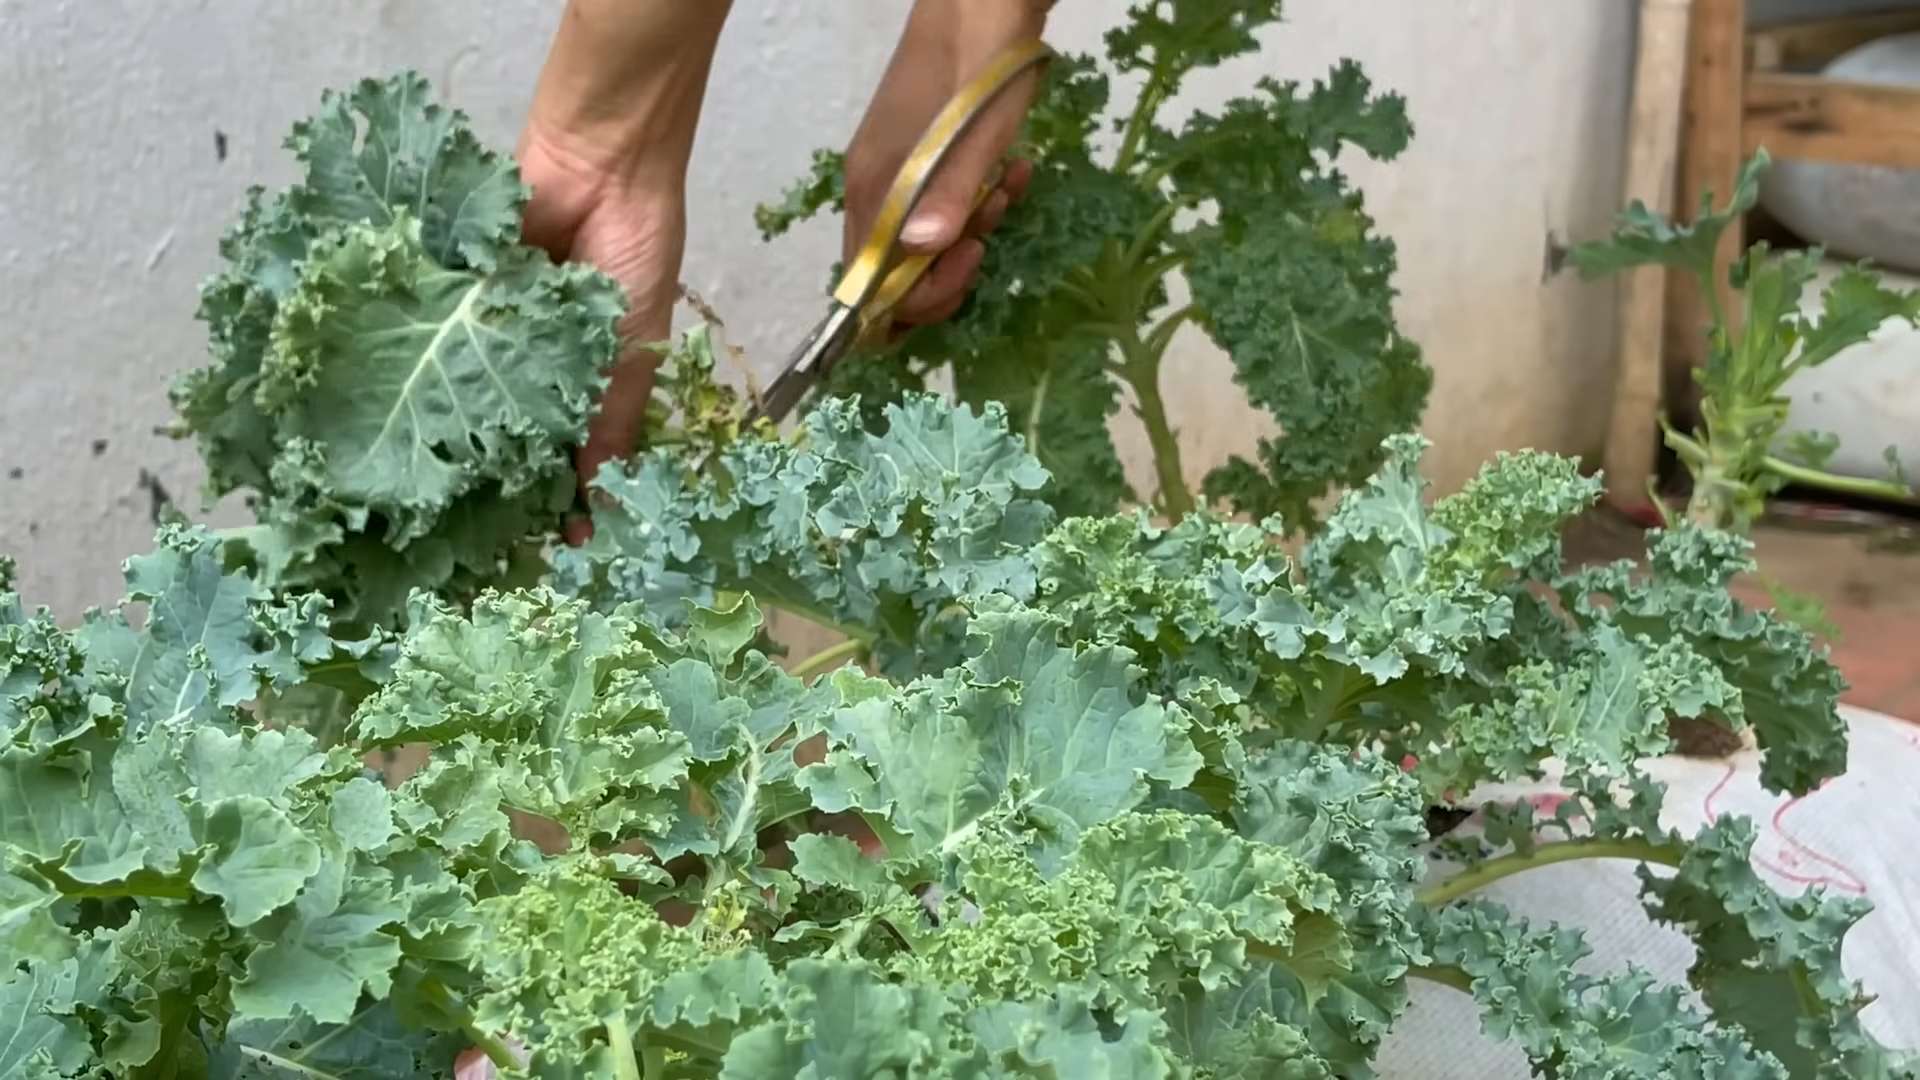
6. Harvesting:
* You can start harvesting kale leaves once they’re about 4-6 inches long. Simply cut off the outer leaves, leaving the inner leaves to continue growing. This will encourage continuous production. I love adding fresh kale to salads, smoothies, and stir-fries!
Troubleshooting
Even with the best care, you might encounter a few challenges. Here are some common problems and how to fix them:
* Yellowing Leaves: This could be a sign of overwatering, underwatering, or nutrient deficiency. Check the soil moisture and adjust your watering schedule accordingly. If the soil is dry, water deeply. If it’s soggy, let it dry out before watering again. You may also need to fertilize your kale.
* Holes in Leaves: This is usually caused by pests like cabbage worms or slugs. Inspect your plants regularly and take action to control the pests.
* Stunted Growth: This could be due to lack of sunlight, poor soil, or nutrient deficiency. Make sure your kale is getting enough sunlight and fertilize it regularly. You may also need to amend the soil with compost or other organic matter.
* Bolting (Premature Flowering): Kale can bolt in hot weather. To prevent bolting, provide some afternoon shade and water regularly. You can also choose bolt-resistant varieties of kale.
Choosing the Right Kale Variety
There are so many different varieties of kale to choose from! Here are a few of my favorites:
* Lacinato (Dinosaur Kale): This is a classic Italian kale with dark green, bumpy leaves. It’s very flavorful and nutritious.
* Curly Kale: This is the most common type of kale, with tightly curled leaves. It’s a bit tougher than other varieties, but it’s still delicious.
* Red Russian Kale: This kale has flat, fringed leaves with a reddish-purple hue. It’s very tender and sweet.
* Redbor Kale: This kale has deeply ruffled, purple leaves. It’s very ornamental and also delicious.
Tips for Success
Here are a few extra tips to help you succeed with growing kale in soil bags:
* Choose the Right Location: Make sure your soil bag is in a location that gets at least 6 hours of sunlight per day.
* Use High-Quality Potting Mix: Don’t skimp on the potting mix! Use a well-draining mix specifically formulated for vegetables.
* Water Regularly: Kale needs consistent moisture, especially during hot weather.
* Fertilize Regularly: Kale is a heavy feeder, so fertilize it regularly with a balanced fertilizer.
* Protect from Pests: Keep an eye out for pests and take action to control them.
* Harvest Regularly: Harvesting kale leaves regularly will encourage continuous production.
* Don’t Be Af
Conclusion
So, there you have it! Growing kale in soil bags is not just a gardening hack; it’s a game-changer for anyone looking to enjoy fresh, homegrown greens, regardless of space constraints or gardening experience. We’ve walked through the simple steps, highlighting how easy it is to transform a humble bag of soil into a thriving kale patch.
Why is this a must-try? Because it democratizes gardening. No sprawling garden beds are needed, no back-breaking tilling, and minimal weeding. It’s a cost-effective, space-saving, and incredibly rewarding way to cultivate your own nutrient-rich kale. Imagine stepping outside your door and harvesting vibrant, leafy greens for your salads, smoothies, or stir-fries. The taste of homegrown kale is simply unparalleled – fresher, crisper, and bursting with flavor that you just can’t find in store-bought varieties.
But the benefits extend beyond just taste and convenience. Growing your own food connects you to the natural world, reduces your carbon footprint, and gives you a sense of accomplishment that’s hard to match. Plus, you have complete control over what goes into your kale, ensuring it’s free from harmful pesticides and chemicals.
Don’t be afraid to experiment! While we’ve focused on kale, this method works beautifully for other leafy greens like spinach, lettuce, and even some herbs. Consider adding companion plants like marigolds around the base of your soil bag to deter pests naturally. You can also try different varieties of kale – curly kale, Tuscan kale (lacinato), or even Russian kale – to discover your personal favorite. For those in warmer climates, consider providing some afternoon shade to prevent the soil from overheating. And for colder climates, you can even move the soil bags indoors or into a greenhouse to extend your growing season.
The key to successful kale cultivation in soil bags is consistent watering and proper drainage. Monitor the moisture levels regularly, especially during hot weather, and ensure that the drainage holes you created are functioning properly. A little bit of compost tea or organic fertilizer can also give your kale a boost, resulting in even more abundant harvests.
We truly believe that anyone can master this DIY trick. It’s a simple, effective, and incredibly satisfying way to bring fresh, healthy food to your table. So, grab a bag of soil, a few kale seedlings, and get started!
We’re eager to hear about your experiences. Did you try growing kale in soil bags? What varieties did you choose? What challenges did you encounter, and how did you overcome them? Share your tips, tricks, and photos in the comments below. Let’s build a community of soil bag gardeners and inspire others to embrace this simple and rewarding way to grow their own food. Happy gardening! This method of growing kale is sure to bring you joy and fresh produce.
Frequently Asked Questions (FAQ)
What type of soil is best for growing kale in soil bags?
The best type of soil for growing kale in soil bags is a well-draining potting mix that is rich in organic matter. Look for a mix that contains ingredients like compost, peat moss, or coconut coir. Avoid using garden soil directly in the bags, as it can become compacted and doesn’t drain as well, potentially leading to root rot. A slightly acidic to neutral pH (around 6.0 to 7.0) is ideal for kale. You can amend the soil with compost or other organic matter to improve its fertility and drainage.
How often should I water my kale plants in soil bags?
Watering frequency depends on several factors, including the weather, the size of the plants, and the type of soil you’re using. Generally, you should water your kale plants when the top inch of soil feels dry to the touch. During hot, dry weather, you may need to water daily, or even twice a day. In cooler, wetter weather, you may only need to water every few days. The key is to monitor the soil moisture regularly and adjust your watering schedule accordingly. Avoid overwatering, as this can lead to root rot. Ensure the drainage holes in your soil bag are functioning properly to prevent water from pooling.
How much sunlight does kale need when grown in soil bags?
Kale thrives in full sun, which means it needs at least 6 hours of direct sunlight per day. However, in hotter climates, kale can benefit from some afternoon shade to prevent the leaves from scorching. If you’re growing kale in soil bags on a patio or balcony, position the bags in a location that receives ample sunlight throughout the day. If you don’t have enough natural sunlight, you can supplement with grow lights.
What are some common pests and diseases that affect kale, and how can I prevent them?
Common pests that affect kale include aphids, cabbage worms, flea beetles, and slugs. Diseases include black rot, clubroot, and downy mildew. To prevent these problems, start with healthy seedlings and use well-draining soil. Regularly inspect your plants for signs of pests or diseases and take action promptly. You can use organic pest control methods like insecticidal soap, neem oil, or diatomaceous earth to control pests. Companion planting with herbs like rosemary or thyme can also help deter pests. To prevent diseases, ensure good air circulation around your plants and avoid overhead watering. Remove any infected leaves promptly to prevent the spread of disease. Crop rotation can also help prevent soilborne diseases.
Can I grow kale in soil bags during the winter?
Yes, you can grow kale in soil bags during the winter, especially in mild climates. Kale is a cold-hardy vegetable that can tolerate frost and even some snow. In colder climates, you can protect your kale plants by moving the soil bags to a sheltered location, such as a greenhouse or cold frame. You can also cover the plants with a frost blanket or row cover to provide extra insulation. Even if the leaves freeze, they will often recover when the weather warms up. Winter-grown kale tends to be sweeter and more flavorful than summer-grown kale.
How do I harvest kale from soil bags?
You can start harvesting kale leaves when they are about 4-6 inches long. Harvest the outer leaves first, leaving the inner leaves to continue growing. Use a sharp knife or scissors to cut the leaves off near the base of the plant. Avoid tearing the leaves, as this can damage the plant. You can harvest kale leaves continuously throughout the growing season. Regular harvesting encourages the plant to produce more leaves.
Can I reuse the soil from the soil bags after harvesting kale?
Yes, you can reuse the soil from the soil bags after harvesting kale, but it’s important to amend it with fresh compost or other organic matter to replenish the nutrients that were used by the kale plants. You can also add some slow-release fertilizer to provide a boost of nutrients for the next crop. If you suspect that the soil may be contaminated with pests or diseases, you can sterilize it by baking it in the oven or solarizing it in the sun. However, it’s often easier and more effective to simply replace the soil with fresh potting mix.
How do I fertilize kale growing in soil bags?
Kale is a heavy feeder, so it benefits from regular fertilization. You can fertilize kale growing in soil bags with a balanced organic fertilizer, such as compost tea, fish emulsion, or seaweed extract. Apply the fertilizer according to the package directions. You can also side-dress the plants with compost or worm castings. Avoid using synthetic fertilizers, as they can burn the roots of the plants. Fertilize your kale plants every 2-3 weeks throughout the growing season.
What are some good companion plants for kale in soil bags?
Good companion plants for kale include herbs like rosemary, thyme, sage, and dill, which can help deter pests. Marigolds are also effective at repelling nematodes and other soil pests. Other beneficial companion plants include onions, garlic, and chives, which can help protect kale from aphids and other insects. Avoid planting kale near members of the brassica family, such as broccoli, cabbage, and cauliflower, as they can attract the same pests and diseases.
How long does it take for kale to grow in soil bags?
The time it takes for kale to grow in soil bags depends on the variety of kale, the growing conditions, and the size of the seedlings you start with. Generally, you can expect to start harvesting kale leaves about 50-75 days after planting. Some varieties of kale may mature faster than others. Providing optimal growing conditions, such as plenty of sunlight, water, and nutrients, will help your kale plants grow faster.

Leave a Comment