
Grow Corn in Bags? Absolutely! Imagine sinking your teeth into sweet, juicy corn you’ve grown yourself, even if you don’t have a sprawling backyard. That’s the magic we’re unlocking today with this incredibly simple and rewarding DIY project. For centuries, corn has been a staple crop, deeply woven into the cultures of the Americas, providing sustenance and playing a vital role in traditions. Now, you can participate in this rich history, no matter your living situation.
But why grow corn in bags? Well, let’s face it, not everyone has access to acres of farmland. Apartment dwellers, balcony gardeners, and those with limited space often feel excluded from the joy of growing their own food. This DIY trick changes everything! It’s a game-changer for urban gardeners, offering a compact and efficient way to cultivate this beloved grain. Plus, it’s a fantastic project for kids, teaching them about plant life cycles and the satisfaction of harvesting their own food. I’m excited to show you how easy it is to bring a little bit of the farm to your home, one bag of corn at a time!
Grow Corn in Bags: A Bumper Harvest on Your Patio!
Hey there, fellow gardening enthusiasts! Ever dreamed of sinking your teeth into sweet, juicy corn you grew yourself, but thought you didn’t have the space? Well, I’m here to tell you that you absolutely can! Growing corn in bags is a fantastic way to enjoy a homegrown harvest, even if you only have a balcony, patio, or small yard. I’ve been doing this for years, and I’m excited to share my secrets with you. It’s easier than you think, and the reward is oh-so-sweet!
Why Grow Corn in Bags?
Before we dive into the how-to, let’s quickly cover why this method is so awesome:
* Space-Saving: This is the biggest advantage! Corn typically needs a lot of space in a traditional garden, but bags allow you to grow it vertically and efficiently.
* Portability: Need to move your corn to chase the sun? No problem! Bags make it easy to relocate your plants.
* Better Soil Control: You have complete control over the soil composition, ensuring your corn gets the nutrients it needs.
* Fewer Weeds: Bags minimize weed competition, making your life easier.
* Earlier Harvest: The soil in bags tends to warm up faster than in the ground, potentially leading to an earlier harvest.
What You’ll Need
Alright, let’s gather our supplies. Here’s what you’ll need to get started:
* Large Grow Bags: I recommend using bags that are at least 15-20 gallons in size. Fabric grow bags are ideal because they allow for good drainage and aeration. You can find these online or at your local garden center.
* Corn Seeds: Choose a variety of corn that’s suitable for your climate and growing season. Sweet corn is a popular choice, but you can also grow popcorn or ornamental corn.
* High-Quality Potting Mix: Don’t skimp on the soil! Use a well-draining potting mix that’s rich in organic matter. I like to mix equal parts of compost, peat moss (or coco coir), and perlite.
* Slow-Release Fertilizer: Corn is a heavy feeder, so a slow-release fertilizer will provide a steady supply of nutrients throughout the growing season. Look for a fertilizer with a balanced NPK ratio (nitrogen, phosphorus, and potassium).
* Watering Can or Hose: You’ll need a way to water your corn regularly.
* Optional:
* Mycorrhizae: These beneficial fungi help plants absorb nutrients and water. You can add them to the soil when you plant your seeds.
* Tomato Cages or Stakes: Corn stalks can get tall and heavy, so you may need to provide support.
* Bird Netting: Birds love to snack on corn seedlings, so netting can help protect your plants.
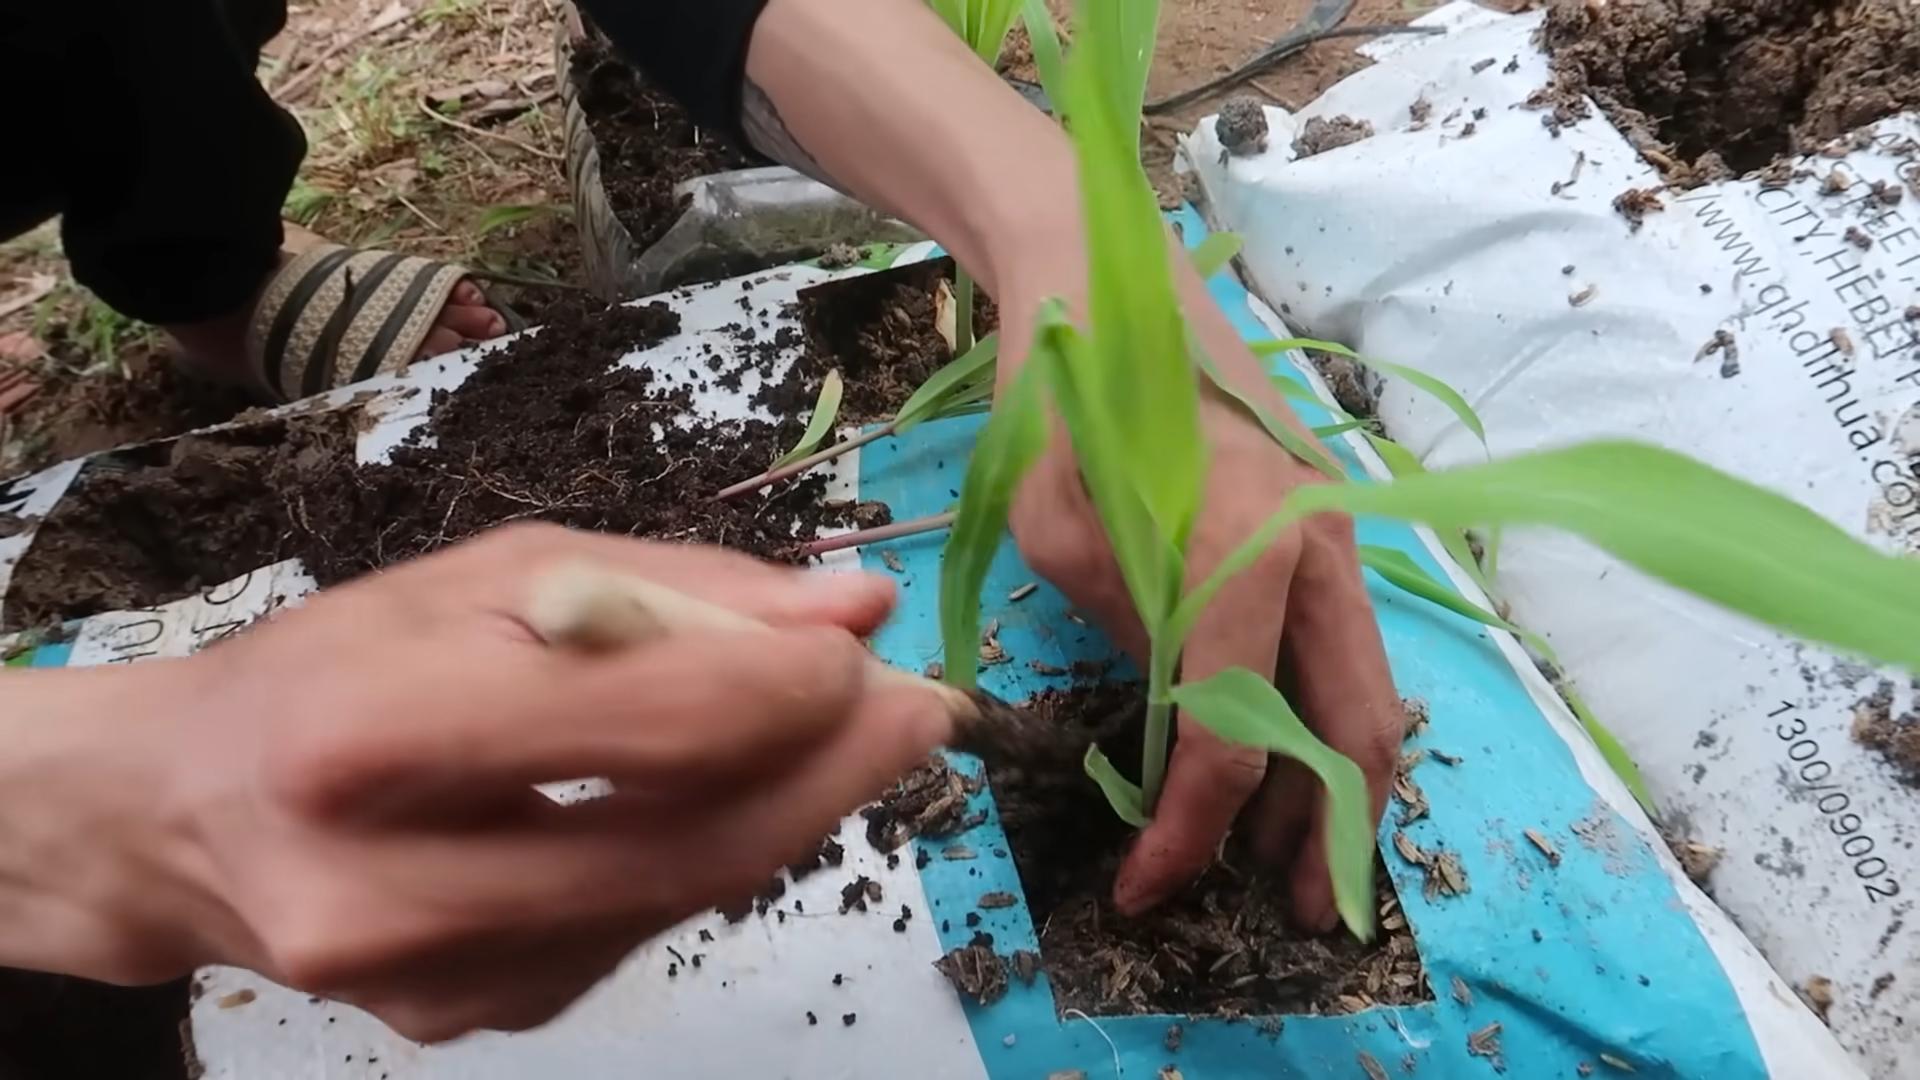
Step-by-Step Instructions: Planting Your Corn
Okay, let’s get our hands dirty! Here’s how to plant your corn seeds in bags:
1. Prepare the Grow Bags: Unfold your grow bags and place them in a sunny location where they’ll receive at least 6-8 hours of direct sunlight per day. Remember, corn needs lots of sun!
2. Mix the Soil: In a large container or wheelbarrow, thoroughly mix your potting mix, compost, peat moss (or coco coir), perlite, and slow-release fertilizer. If you’re using mycorrhizae, mix it in at this stage as well.
3. Fill the Bags: Fill each grow bag with the soil mixture, leaving about 2-3 inches of space at the top.
4. Plant the Seeds: Sow the corn seeds about 1-2 inches deep and 4-6 inches apart. I usually plant 4-6 seeds per bag to ensure good pollination. Remember, corn is wind-pollinated, so you need to plant multiple stalks close together.
5. Water Thoroughly: Gently water the soil until it’s evenly moist but not soggy.
6. Protect from Birds (Optional): If you’re concerned about birds, cover the bags with bird netting until the seedlings emerge.
Caring for Your Corn
Now that your corn is planted, it’s time to provide the care it needs to thrive.
1. Watering: Corn needs consistent moisture, especially during hot weather. Water deeply whenever the top inch of soil feels dry to the touch. Avoid overwatering, as this can lead to root rot.
2. Fertilizing: Even with slow-release fertilizer, you may need to supplement with liquid fertilizer every few weeks. Use a balanced fertilizer or one that’s specifically formulated for corn. Follow the instructions on the fertilizer label.
3. Weeding: Keep the bags free of weeds. Hand-pull any weeds that emerge.
4. Support: As the corn stalks grow taller, they may need support. You can use tomato cages or stakes to prevent them from falling over.
5. Pollination: Corn is wind-pollinated, so it’s important to ensure good air circulation around your plants. You can also gently shake the stalks to help distribute the pollen. If you notice that the silks (the strands that emerge from the developing ears of corn) are not being pollinated, you can hand-pollinate them by collecting pollen from the tassels (the male flowers at the top of the stalks) and dusting it onto the silks.
6. Pest and Disease Control: Keep an eye out for pests and diseases. Common corn pests include corn earworms, aphids, and spider mites. Diseases can include corn smut and rust. Treat any problems promptly with appropriate organic or chemical controls. I prefer to use organic methods whenever possible.
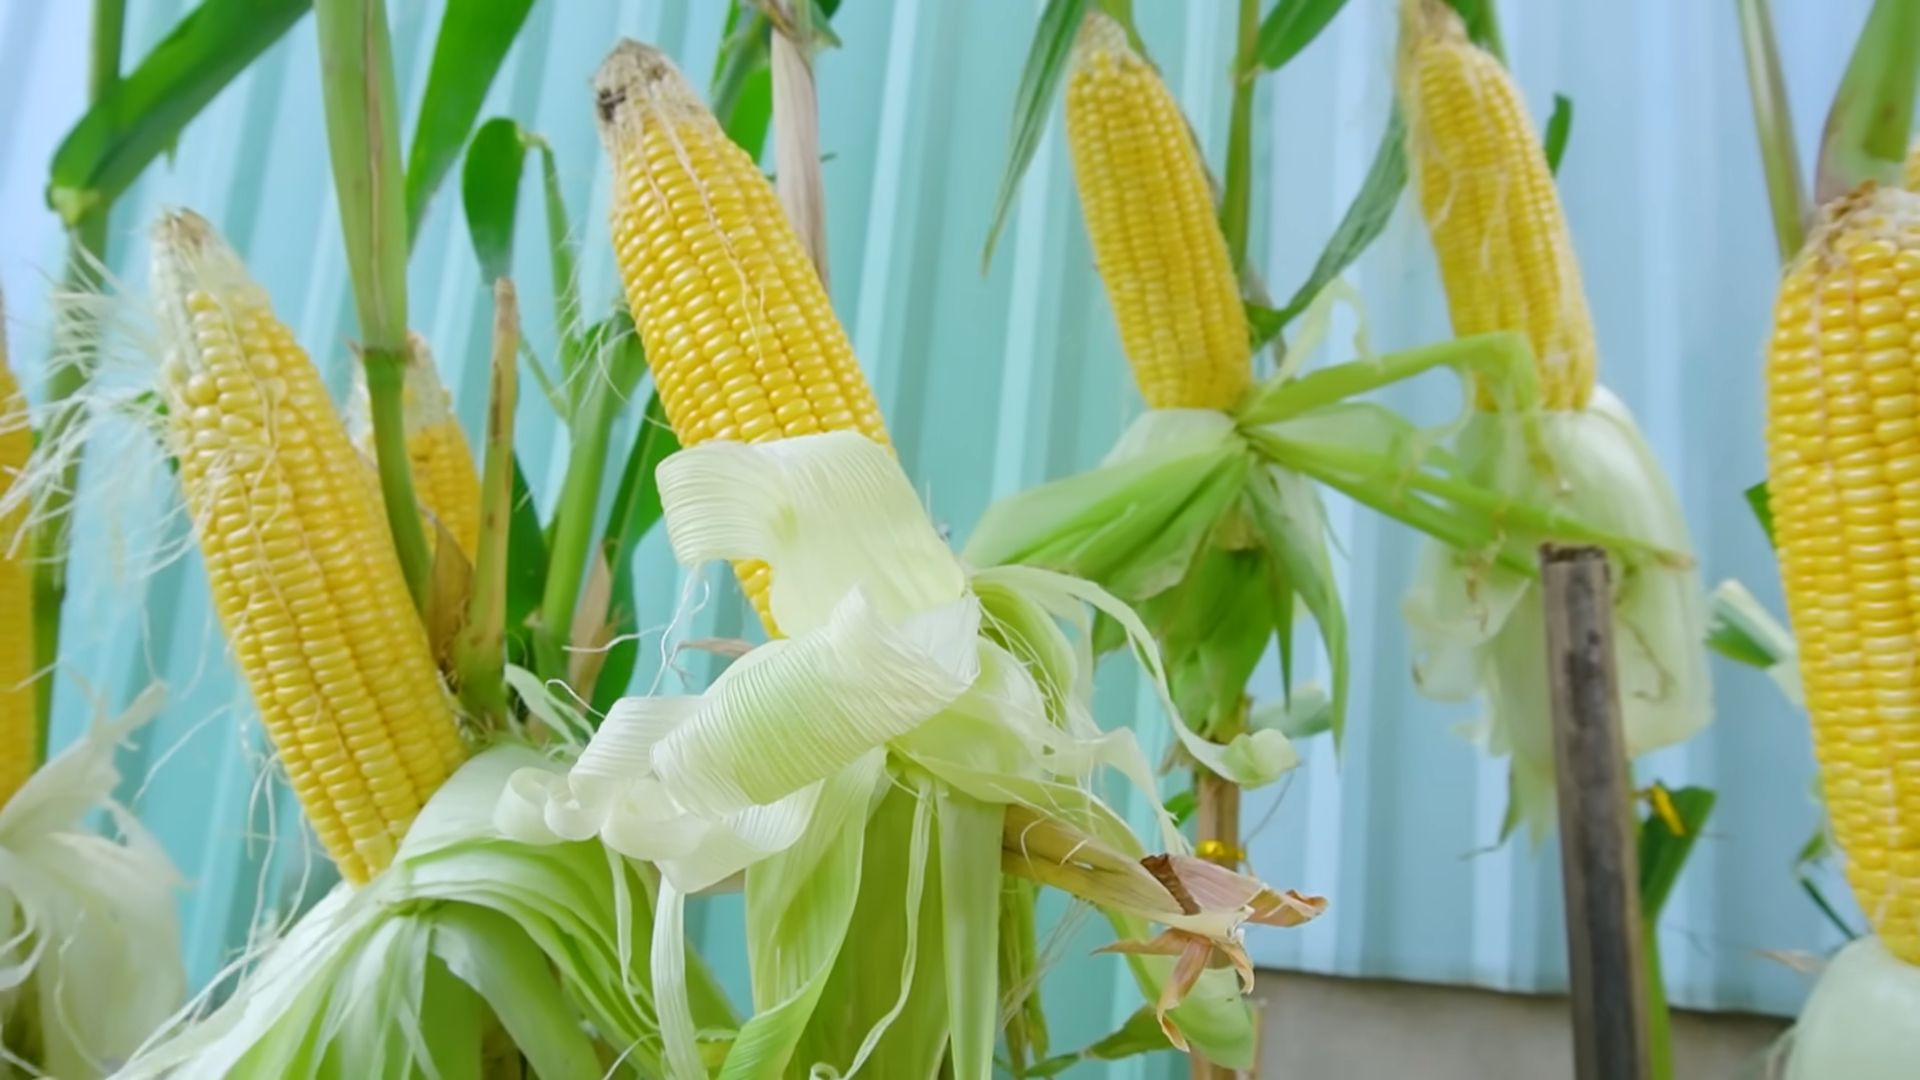
Harvesting Your Corn
The moment we’ve all been waiting for! Here’s how to know when your corn is ready to harvest:
1. Check the Silks: The silks should be dry and brown.
2. Feel the Ears: The ears should feel plump and full.
3. Pierce a Kernel: Gently peel back the husk and pierce a kernel with your fingernail. If the liquid that comes out is milky, the corn is ready to harvest. If it’s clear, the corn needs more time.
4. Harvest: To harvest, grasp the ear firmly and twist it downward.
Troubleshooting
Even with the best care, you may encounter some challenges when growing corn in bags. Here are some common problems and how to fix them:
* Poor Pollination: If your corn ears are not filling out properly, it could be due to poor pollination. Make sure you have enough plants close together, and consider hand-pollinating if necessary.
* Stunted Growth: Stunted growth can be caused by a variety of factors, including nutrient deficiencies, lack of water, or pest infestations. Check the soil pH and nutrient levels, water regularly, and treat any pests or diseases promptly.
* Yellowing Leaves: Yellowing leaves can indicate a nutrient deficiency, especially nitrogen. Fertilize with a balanced fertilizer or one that’s high in nitrogen.
* Corn Earworms: These pests can burrow into the ears of corn and damage the kernels. You can control them by hand-picking them off the plants or by using an organic insecticide.
Tips for Success
Here are a few extra tips to help you grow a bumper crop of corn in bags:
* Choose the Right Variety: Select a corn variety that’s well-suited to your climate and growing season.
* Start Early: You can start your corn seeds indoors a few weeks before the last frost to get a head start on the growing season.
* Provide Plenty of Sunlight: Corn needs at least 6-8 hours of direct sunlight per day.
* Water Regularly: Corn needs consistent moisture, especially during hot weather.
* Fertilize Regularly: Corn is a heavy feeder, so fertilize regularly with a balanced fertilizer.
* Protect from Pests and Diseases: Keep an eye out for pests and diseases and treat any problems promptly.
* Enjoy Your Harvest! There’s nothing quite like the taste of homegrown corn. Enjoy the fruits (or rather, vegetables) of your labor!
Growing corn in bags is a rewarding experience that allows you to enjoy a homegrown harvest, even if you have limited space. With a little bit of care and attention, you can grow a bumper crop of sweet, juicy corn that will impress your friends and family. So, what are you waiting for? Get out there and start planting! I promise, you won’t regret it. Happy gardening!
Conclusion
So, there you have it! Growing corn in bags isn’t just a quirky gardening experiment; it’s a game-changer for anyone with limited space, challenging soil, or a desire for a more controlled growing environment. We’ve walked you through the process, highlighting the benefits and addressing potential pitfalls. But why is this DIY trick a must-try?
Firstly, it democratizes corn cultivation. No sprawling acreage required! Apartment dwellers, balcony gardeners, and those with postage-stamp-sized yards can now enjoy the satisfaction of harvesting their own sweet, juicy corn. Secondly, it offers unparalleled control. You dictate the soil composition, the watering schedule, and the sun exposure, minimizing the risks associated with unpredictable weather and poor native soil. This leads to healthier plants and a potentially larger, more consistent yield. Thirdly, it’s incredibly rewarding. There’s something deeply satisfying about nurturing a plant from seed to harvest, and when that plant produces delicious, homegrown corn, the feeling is amplified tenfold.
But don’t just take our word for it. The beauty of this method lies in its adaptability. Want to experiment with different corn varieties? Go for it! Try heirloom varieties for unique flavors and colors, or stick with your tried-and-true favorites. Consider adding companion plants like beans or squash to your bags to create a mini-ecosystem that benefits all three. You can even tailor the size of your bags to fit your specific needs and space constraints. Smaller bags are great for dwarf varieties, while larger bags can accommodate taller, more robust plants.
And speaking of variations, think about the fertilizer you use. While we recommended a balanced slow-release fertilizer, you can also incorporate organic options like compost tea or worm castings for an extra boost of nutrients. Just be sure to monitor your plants closely and adjust your feeding schedule as needed. Another variation is the type of bag you use. While burlap sacks are a popular choice, you can also use grow bags made from breathable fabric, which can help improve drainage and aeration. Just make sure the bag is sturdy enough to support the weight of the soil and the growing corn plants.
Ultimately, the success of growing corn in bags hinges on your willingness to experiment and adapt. Don’t be afraid to try new things, learn from your mistakes, and fine-tune your approach until you find what works best for you. The journey is just as rewarding as the destination.
We wholeheartedly encourage you to give this DIY trick a try. It’s a fun, educational, and ultimately delicious way to connect with nature and enjoy the fruits (or rather, the kernels) of your labor. And once you’ve harvested your first crop of homegrown corn, we’d love to hear about your experience! Share your photos, tips, and tricks in the comments below. Let’s build a community of bag-grown corn enthusiasts and inspire others to embrace this innovative gardening technique. So, grab your bags, your seeds, and your gardening gloves, and get ready to experience the joy of growing your own corn, no matter where you live! Remember, successful **growing corn in bags** is within your reach!
Frequently Asked Questions (FAQ)
What type of corn is best for growing in bags?
The best type of corn for growing in bags are shorter, more compact varieties. These varieties are less likely to topple over in the bag and are better suited to the limited space. Sweet corn varieties like ‘Early Sunglow’, ‘Golden Bantam’, and ‘Honey Select’ are popular choices. Dwarf corn varieties are also excellent options for smaller bags or limited spaces. Consider your local climate and growing season when selecting a variety. Check seed packets for information on plant height and maturity time to ensure it’s a good fit for your growing conditions.
How many corn plants can I grow in one bag?
The number of corn plants you can grow in one bag depends on the size of the bag and the variety of corn you’re growing. As a general rule, aim for one to two plants per bag for optimal growth. Overcrowding can lead to stunted growth, reduced yields, and increased susceptibility to pests and diseases. If you’re using a smaller bag (e.g., 10-15 gallons), stick to one plant per bag. For larger bags (e.g., 20 gallons or more), you can try planting two plants, but make sure they have enough space to develop their root systems. Proper spacing is crucial for healthy corn growth.
What type of soil should I use for growing corn in bags?
Corn needs well-draining, nutrient-rich soil to thrive. A good potting mix is essential. Avoid using garden soil directly in the bags, as it can become compacted and poorly drained. A mix of equal parts potting soil, compost, and perlite or vermiculite is ideal. The potting soil provides a good base, the compost adds nutrients and improves water retention, and the perlite or vermiculite enhances drainage and aeration. You can also add a slow-release fertilizer to the soil mix to provide a steady supply of nutrients throughout the growing season.
How often should I water corn grown in bags?
Corn plants need consistent moisture, especially during germination and pollination. Water deeply whenever the top inch of soil feels dry to the touch. The frequency of watering will depend on the weather conditions, the size of the bag, and the type of soil you’re using. In hot, dry weather, you may need to water daily. In cooler, wetter weather, you may only need to water every few days. Avoid overwatering, as this can lead to root rot. Ensure the bags have adequate drainage to prevent water from pooling at the bottom.
How much sunlight does corn need when grown in bags?
Corn requires at least 6-8 hours of direct sunlight per day to produce a good yield. Choose a location for your bags that receives plenty of sunlight throughout the day. If you’re growing corn indoors or in a partially shaded area, you may need to supplement with artificial lighting. Rotate the bags regularly to ensure all sides of the plants receive adequate sunlight. Insufficient sunlight can lead to weak, leggy plants and reduced yields.
How do I pollinate corn grown in bags?
Corn is wind-pollinated, so you may need to assist with pollination, especially if you’re growing corn in a sheltered location. When the tassels (male flowers) appear at the top of the plant and the silks (female flowers) emerge from the developing ears, gently shake the tassels to release pollen. You can also collect pollen from the tassels with a small brush and apply it directly to the silks. Repeat this process every day for several days to ensure adequate pollination. Proper pollination is essential for developing full, well-filled ears of corn.
What are some common pests and diseases that affect corn grown in bags?
Common pests that can affect corn include corn earworms, aphids, and spider mites. Diseases include corn smut, rust, and leaf blight. Regularly inspect your plants for signs of pests or diseases. Treat infestations promptly with appropriate insecticides or fungicides. Organic options include neem oil, insecticidal soap, and Bacillus thuringiensis (Bt). Ensure good air circulation around the plants to prevent fungal diseases. Remove any infected leaves or plants to prevent the spread of disease.
How long does it take to grow corn in bags?
The time it takes to grow corn in bags depends on the variety of corn you’re growing and the growing conditions. Generally, it takes about 60-100 days from planting to harvest. Check the seed packet for the specific maturity time for your chosen variety. Monitor your plants closely and harvest the corn when the silks have turned brown and dry, and the kernels are plump and milky when pierced.
Can I reuse the soil in the bags after harvesting the corn?
Yes, you can reuse the soil in the bags after harvesting the corn, but it’s important to replenish the nutrients. Corn is a heavy feeder, so it will deplete the soil of nutrients. Amend the soil with compost, aged manure, or a balanced fertilizer before planting another crop. You can also add a cover crop like clover or buckwheat to the bags to improve soil health. Consider rotating crops to prevent the buildup of pests and diseases.
Leave a Comment