
Grow Arugula at Home? Absolutely! And I’m here to tell you it’s easier than you think. Forget those sad, wilted greens at the grocery store. Imagine stepping into your own backyard (or even just your sunny windowsill!) and harvesting fresh, peppery arugula whenever you crave it.
Arugula, also known as rocket, has a rich history, dating back to ancient Roman times where it was prized for its flavor and purported aphrodisiac qualities. While I can’t promise any romantic miracles, I can guarantee that growing your own arugula will add a delicious and healthy kick to your salads, pizzas, and pesto.
In today’s world, where we’re all trying to eat healthier and be more sustainable, grow arugula at home is a fantastic way to take control of your food source. Plus, let’s be honest, store-bought arugula can be expensive! This DIY guide will walk you through everything you need to know, from seed to salad, making it a fun and rewarding project for gardeners of all levels. So, grab your gardening gloves, and let’s get started!
Grow Your Own Arugula: A Simple DIY Guide
Hey there, fellow garden enthusiasts! I’m so excited to share my experience with growing arugula at home. It’s surprisingly easy, incredibly rewarding, and gives you access to fresh, peppery greens whenever you want them. Forget those sad, wilted bags from the grocery store! Let’s dive into how you can cultivate your own arugula patch, whether you have a sprawling garden or just a sunny windowsill.
Choosing Your Arugula Adventure: Seeds vs. Starts
Before we get our hands dirty, let’s talk about how you want to start your arugula journey. You have two main options:
* Seeds: This is the most common and cost-effective method. Arugula seeds germinate quickly and easily, making it a great choice for beginners. Plus, you get to experience the joy of watching your plants sprout from tiny seeds!
* Starts (Seedlings): If you’re short on time or want a head start, you can purchase arugula seedlings from a local nursery or garden center. This allows you to skip the germination phase and get right to growing.
I personally prefer starting from seeds because it’s more budget-friendly and I love watching the whole process unfold. But either way works perfectly fine!
Gathering Your Supplies: The Arugula Arsenal
To successfully grow arugula, you’ll need a few essential supplies. Here’s a checklist to get you started:
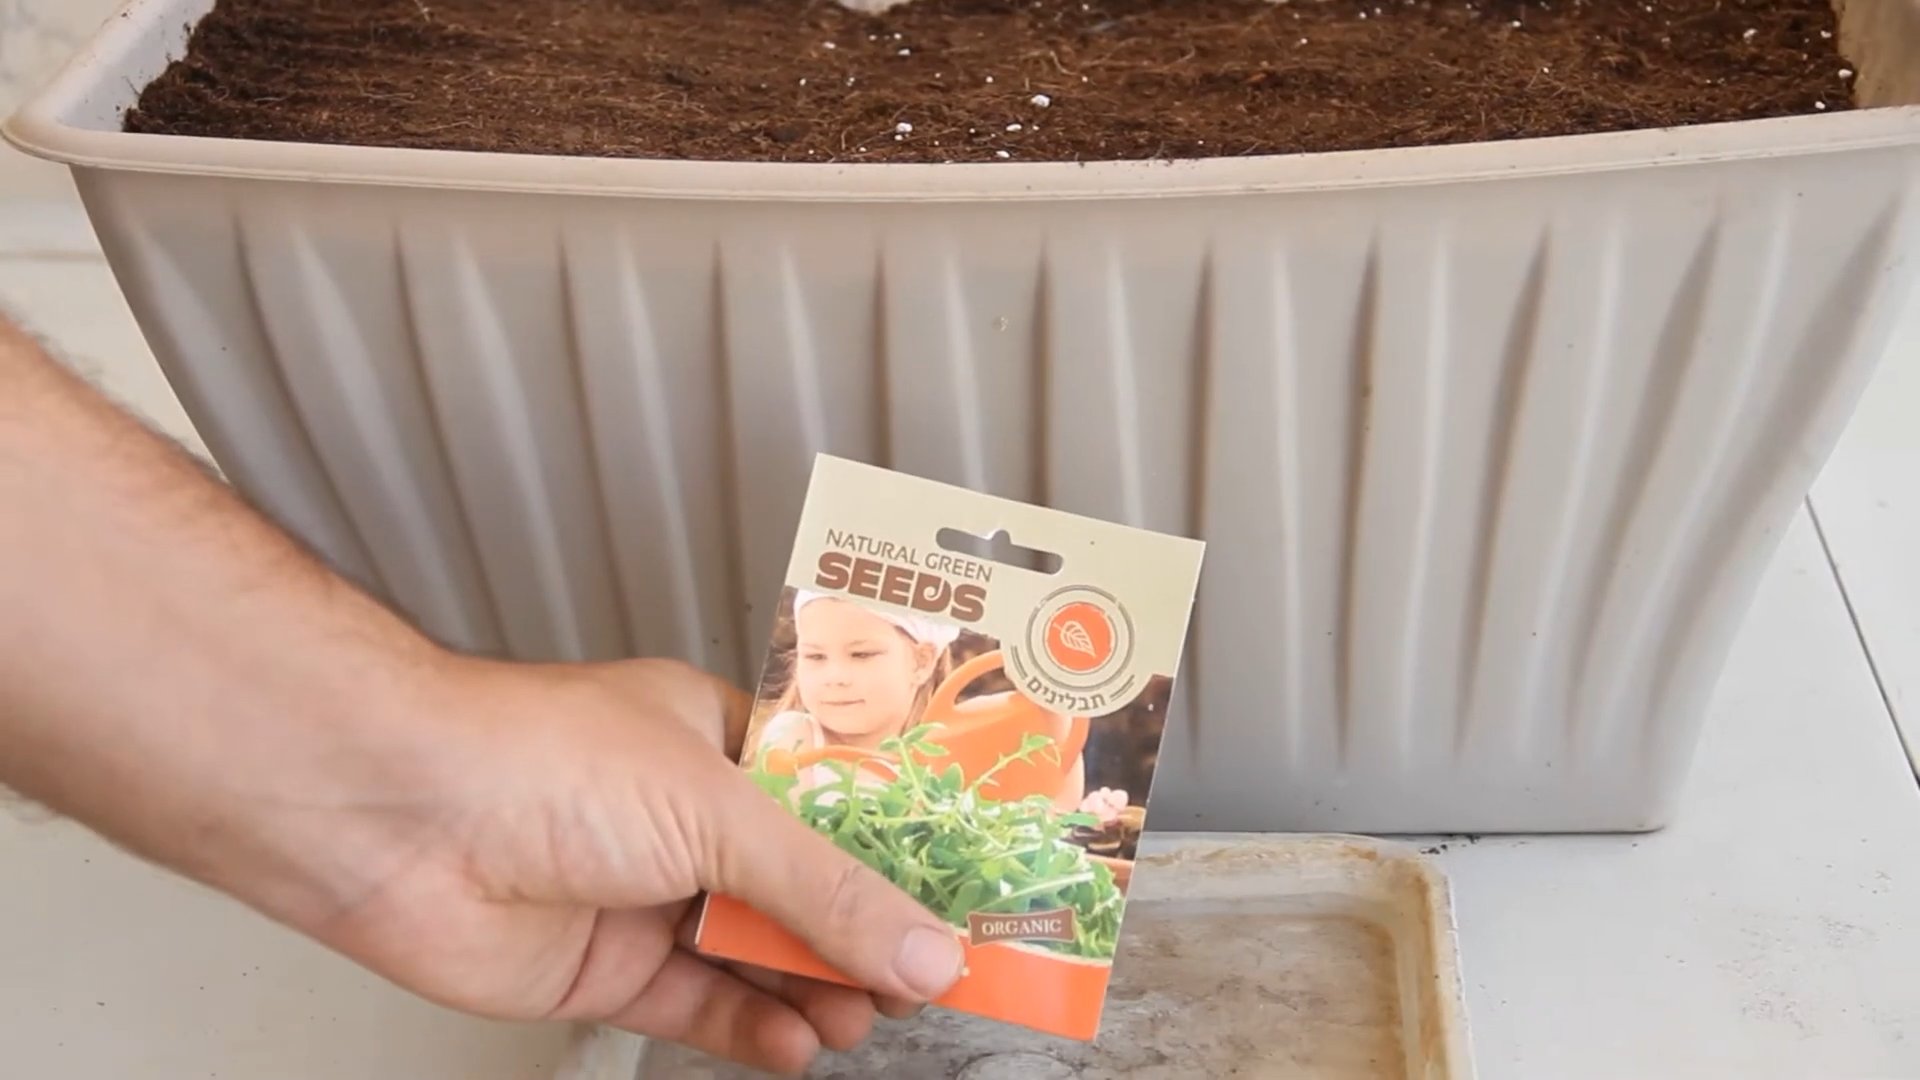
* Arugula Seeds or Seedlings: Obviously! Choose a variety that suits your taste. ‘Roquette’ is a classic choice, but there are also spicier and milder options available.
* Potting Mix or Garden Soil: Arugula prefers well-draining soil that’s rich in organic matter. If you’re growing in containers, use a high-quality potting mix. If you’re planting directly in the garden, amend your soil with compost or other organic matter.
* Container (if growing in pots): Choose a container that’s at least 6 inches deep and wide. Make sure it has drainage holes to prevent waterlogging.
* Watering Can or Hose: You’ll need a way to water your arugula regularly. A gentle watering can is ideal for seedlings.
* Sunlight: Arugula needs at least 6 hours of sunlight per day. Choose a sunny spot in your garden or a bright windowsill.
* Optional: Fertilizer: While not strictly necessary, a balanced liquid fertilizer can help boost growth, especially if your soil is lacking in nutrients.
* Optional: Row Cover or Netting: To protect your arugula from pests like flea beetles, consider using a row cover or netting.
Planting Your Arugula: From Seed to Sprout
Now for the fun part – planting! Here’s a step-by-step guide to getting your arugula off to a great start:
1. Prepare the Soil: Whether you’re using a container or planting directly in the garden, make sure the soil is loose and free of clumps. If you’re using potting mix, simply fill your container. If you’re planting in the garden, till the soil and amend it with compost or other organic matter.
2. Sow the Seeds (if starting from seeds): Sprinkle the arugula seeds evenly over the surface of the soil. You don’t need to bury them too deep – about ¼ inch is perfect. Gently press the seeds into the soil.
3. Plant the Seedlings (if starting from starts): Dig a small hole in the soil that’s large enough to accommodate the root ball of the seedling. Gently remove the seedling from its container and place it in the hole. Backfill with soil and gently press down. Space the seedlings about 4-6 inches apart.
4. Water Thoroughly: After planting, water the soil thoroughly until it’s evenly moist. Be careful not to overwater, as this can lead to root rot.
5. Provide Sunlight: Place your container in a sunny spot or ensure your garden bed receives at least 6 hours of sunlight per day.
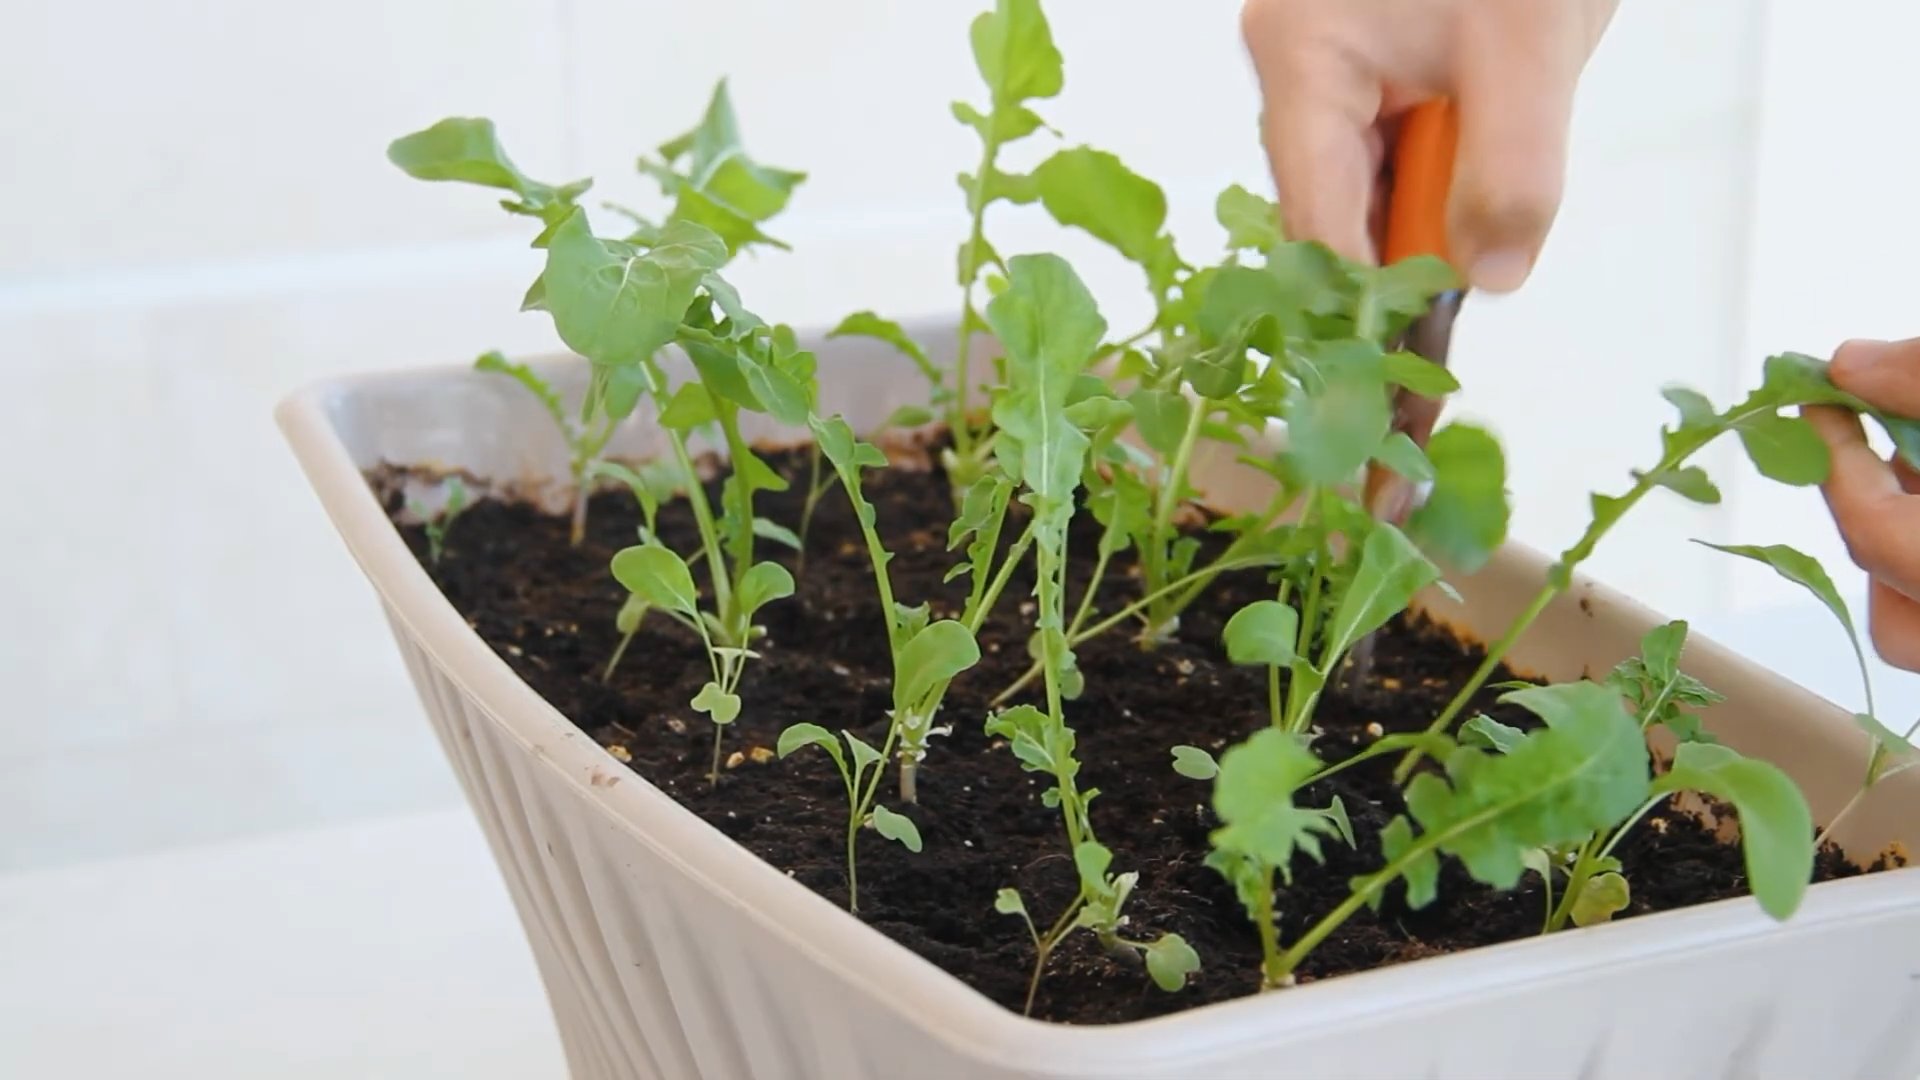
6. Wait and Watch: Arugula seeds typically germinate within 5-7 days. Keep the soil consistently moist during this time. Once the seedlings emerge, thin them out so that they’re about 2-3 inches apart. This will give them enough room to grow.
Caring for Your Arugula: Keeping it Happy and Healthy
Once your arugula is planted, it’s important to provide it with the care it needs to thrive. Here are some tips for keeping your arugula happy and healthy:
* Watering: Arugula needs consistent moisture, but it doesn’t like to be waterlogged. Water deeply whenever the top inch of soil feels dry to the touch. Avoid overhead watering, as this can promote fungal diseases.
* Fertilizing (Optional): If your soil is lacking in nutrients, you can fertilize your arugula every 2-3 weeks with a balanced liquid fertilizer. Follow the instructions on the fertilizer label.
* Weeding: Keep your arugula patch free of weeds, as they can compete for nutrients and water. Gently pull weeds by hand, being careful not to disturb the arugula roots.
* Pest Control: Arugula is susceptible to a few common pests, such as flea beetles and aphids. Flea beetles can create small holes in the leaves, while aphids can suck the sap from the plants. To prevent pest problems, consider using a row cover or netting. You can also spray your arugula with insecticidal soap or neem oil if you notice any pests.
* Bolting: Arugula tends to bolt (go to seed) in hot weather. Bolting can make the leaves taste bitter. To prevent bolting, try to plant your arugula in early spring or late summer. You can also provide shade during the hottest part of the day. If your arugula does bolt, you can still harvest the leaves, but they may not taste as good.
Harvesting Your Arugula: Enjoying the Fruits (or Greens!) of Your Labor
The best part about growing your own arugula is, of course, harvesting it! You can start harvesting arugula leaves about 3-4 weeks after planting.
1. Harvesting Technique: Use scissors or a sharp knife to cut the leaves about an inch above the soil. This will allow the plant to continue producing new leaves.
2. Harvesting Frequency: You can harvest arugula leaves as needed. The more you harvest, the more the plant will produce.
3. Harvesting Time: Harvest arugula in the morning, when the leaves are crisp and fresh.
4. Storage: Store harvested arugula leaves in a plastic bag in the refrigerator. They will typically last for about a week.
Troubleshooting: Addressing Common Arugula Issues
Even with the best care, you might encounter a few challenges when growing arugula. Here are some common issues and how to address them:
* Poor Germination: If your arugula seeds aren’t germinating, it could be due to several factors, such as old seeds, poor soil, or lack of moisture. Make sure you’re using fresh seeds and that the soil is consistently moist.
* Yellowing Leaves: Yellowing leaves can be a sign of nutrient deficiency or overwatering. If you suspect nutrient deficiency, fertilize your arugula with a balanced liquid fertilizer. If you suspect overwatering, allow the soil to dry out slightly before watering again.
* Slow Growth: Slow growth can be caused by a lack of sunlight, poor soil, or pest problems. Make sure your arugula is getting enough sunlight and that the soil is rich in nutrients. Check for pests and take appropriate action if necessary.
* Bitter Taste: As mentioned earlier, bolting can make arugula leaves taste bitter. To prevent bolting, plant your arugula in early spring or late summer and provide shade during the hottest part of the day.
Arugula Varieties: Exploring Your Options
While ‘Roquette’ is a popular and reliable choice, there are many other arugula varieties to explore. Here are a few to consider:
* ‘Sylvetta’: This variety has a more intense, peppery flavor than ‘Roquette’.
* ‘Wasabi’: As the name suggests, this variety has a distinct wasabi-like flavor.
* ‘Astro’: This variety is known for its mild, nutty flavor.
* ‘Italian Cress’: While technically not arugula, Italian cress has a similar peppery flavor and is often used as a substitute.
Experiment with different varieties to find your favorite!
Beyond the Salad Bowl: Creative Ways to Use Arugula
Arugula is delicious in salads, but it’s also incredibly versatile. Here are some other ways to use it:
* Pesto: Arugula pesto is a delicious and peppery alternative to traditional basil pesto.
* Pizza Topping: Add fresh arugula to your pizza after it comes out of the oven for a burst of flavor.
* Sandwiches and Wraps: Arugula adds a peppery kick to sandwiches and wraps.
* Soups and Stews: Stir arugula into soups and stews just before serving
Conclusion
So, there you have it! Growing your own arugula at home is not only surprisingly simple, but it’s also incredibly rewarding. Forget those wilted, overpriced bags at the grocery store. Imagine stepping out to your balcony, patio, or even just a sunny windowsill and harvesting fresh, peppery arugula whenever you need it. The flavor is noticeably brighter and more vibrant than anything you can buy, and you have the satisfaction of knowing exactly where your food came from.
This isn’t just about saving money; it’s about connecting with your food and adding a touch of green to your life. Think of the possibilities! You can toss it into salads for a zesty kick, use it as a flavorful topping for pizzas and sandwiches, or even blend it into pesto for a unique and delicious twist.
Why is this DIY trick a must-try? Because it puts you in control. You control the quality of the soil, the amount of sunlight, and the harvesting schedule. You can even experiment with different varieties of arugula to find your perfect flavor profile. Consider trying ‘Wild Rocket’ for a more intense, peppery bite, or ‘Sylvetta’ for a slightly milder, nuttier taste.
Beyond the basic method, there are so many ways to personalize your arugula growing experience. If you’re short on space, try growing arugula in a vertical garden or hanging basket. For a continuous harvest, sow seeds every two weeks. And if you live in a particularly hot climate, provide some afternoon shade to prevent the leaves from becoming too bitter.
Don’t be intimidated if you’ve never grown anything before. Arugula is incredibly forgiving and thrives even with minimal care. The key is to provide it with well-draining soil, plenty of sunlight, and consistent moisture.
We’ve shown you how easy it is to grow arugula at home, and now it’s your turn to give it a try. We are confident that you will be amazed at how simple and satisfying it is to grow your own fresh greens.
We encourage you to embark on this green adventure and share your experiences with us! Post photos of your arugula harvests on social media using #HomegrownArugula and tell us about your favorite ways to use your fresh greens. What challenges did you face, and what tips did you discover along the way? Your insights could inspire others to start their own arugula gardens and enjoy the benefits of fresh, homegrown produce. Let’s create a community of arugula enthusiasts and celebrate the joy of growing our own food!
Frequently Asked Questions (FAQ)
How long does it take for arugula to grow?
Arugula is a fast-growing green, which is one of the reasons it’s so satisfying to grow at home. You can typically expect to harvest your first leaves within 3-4 weeks of planting the seeds. The exact time will depend on factors like temperature, sunlight, and soil quality, but generally, you’ll be enjoying fresh arugula in no time.
What kind of soil is best for growing arugula?
Arugula prefers well-draining soil that is rich in organic matter. A good starting point is a general-purpose potting mix amended with compost or aged manure. The ideal pH level for arugula is between 6.0 and 7.0. If you’re growing arugula in containers, make sure the pots have drainage holes to prevent waterlogging, which can lead to root rot.
How much sunlight does arugula need?
Arugula thrives in full sun, which means it needs at least 6 hours of direct sunlight per day. However, in hotter climates, providing some afternoon shade can help prevent the leaves from becoming too bitter. If you’re growing arugula indoors, place it near a sunny window or use grow lights to supplement the natural light.
How often should I water arugula?
Arugula needs consistent moisture to thrive. Water regularly, especially during hot and dry weather, to keep the soil evenly moist but not waterlogged. Check the soil moisture by sticking your finger about an inch deep into the soil. If it feels dry, it’s time to water. Avoid overhead watering, as this can promote fungal diseases. Instead, water at the base of the plants.
Can I grow arugula indoors?
Yes, you can absolutely grow arugula indoors! Choose a sunny windowsill that receives at least 4-6 hours of direct sunlight per day. If you don’t have enough natural light, you can use grow lights to supplement. Use a well-draining potting mix and water regularly to keep the soil moist. Consider using a self-watering container to make watering even easier.
How do I harvest arugula?
You can start harvesting arugula leaves when they are about 2-3 inches long. Simply snip off the outer leaves with scissors or your fingers, leaving the inner leaves to continue growing. This cut-and-come-again method allows you to harvest arugula multiple times from the same plant. Harvest in the morning when the leaves are at their peak flavor.
What are some common pests and diseases that affect arugula?
Arugula is generally pest-resistant, but it can be susceptible to certain pests like flea beetles, aphids, and slugs. Flea beetles can create small holes in the leaves, while aphids can suck the sap from the plants. Slugs can also damage the leaves. To control these pests, you can use organic pest control methods like insecticidal soap, diatomaceous earth, or handpicking. Arugula can also be susceptible to fungal diseases like downy mildew and white rust, especially in humid conditions. To prevent these diseases, ensure good air circulation and avoid overhead watering.
Can I grow arugula in the winter?
Yes, you can grow arugula in the winter, especially in mild climates. In colder climates, you can grow arugula indoors or in a greenhouse. Provide adequate light and warmth to ensure healthy growth. You may need to adjust your watering schedule depending on the temperature and humidity levels.
How do I prevent arugula from bolting (going to seed)?
Bolting occurs when arugula is exposed to high temperatures or long days. To prevent bolting, provide some afternoon shade during hot weather and water regularly to keep the soil moist. You can also choose bolt-resistant varieties of arugula. If your arugula starts to bolt, you can still harvest the leaves, but they may become more bitter.
Can I eat arugula flowers?
Yes, arugula flowers are edible and have a similar peppery flavor to the leaves. They can be used as a garnish or added to salads for a pop of color and flavor. The seed pods are also edible and have a slightly spicier taste.
How do I store harvested arugula?
To store harvested arugula, wash and dry the leaves thoroughly. Wrap them in a paper towel and store them in a plastic bag in the refrigerator. Arugula will typically last for about 3-5 days when stored properly.
What are some creative ways to use homegrown arugula?
Beyond salads, arugula can be used in a variety of dishes. Try adding it to pizzas, sandwiches, or wraps for a peppery kick. Blend it into pesto for a unique and flavorful sauce. Use it as a topping for grilled meats or fish. Add it to soups or stews for a boost of flavor and nutrients. The possibilities are endless!


Leave a Comment