
Soil-free rosemary propagation might sound like something out of a science fiction movie, but trust me, it’s a surprisingly simple and rewarding way to expand your herb garden! Have you ever dreamed of having an endless supply of fragrant rosemary for your culinary creations, or perhaps to craft your own aromatic soaps and lotions? Well, I’m here to tell you that dream can become a reality, and you don’t even need a bag of potting mix to do it.
Rosemary, with its woody fragrance and needle-like leaves, has been cherished for centuries. From ancient Greece, where it was believed to improve memory, to medieval Europe, where it symbolized remembrance and fidelity, rosemary boasts a rich cultural history. But beyond its symbolic significance, rosemary is a powerhouse of flavor and fragrance, making it a staple in kitchens and gardens worldwide.
But why bother with soil-free rosemary propagation? Well, traditional methods can be a bit finicky. Rooting rosemary cuttings in soil can be prone to rot, especially if you’re a bit heavy-handed with the watering can (guilty!). This DIY trick offers a cleaner, more controlled environment, significantly increasing your chances of success. Plus, it’s incredibly satisfying to watch those tiny roots emerge in a clear glass of water – a miniature botanical marvel right on your windowsill. So, if you’re looking for a fun, easy, and effective way to multiply your rosemary plants, keep reading! I’m going to share my step-by-step guide to soil-free rosemary propagation, so you can enjoy an abundance of this wonderful herb.
Soil-Free Rosemary Propagation: A DIY Guide
Hey there, fellow plant enthusiasts! I’m super excited to share one of my favorite propagation methods with you – soil-free rosemary propagation! It’s a fantastic way to multiply your rosemary plants without the mess of soil, and honestly, I’ve found it to be incredibly successful. This method relies on water propagation, which is surprisingly simple and allows you to watch those roots develop right before your eyes. Let’s dive in!
What You’ll Need
Before we get started, let’s gather our supplies. You probably have most of these lying around already!
* Sharp, clean pruning shears or scissors: Cleanliness is key to prevent fungal infections!
* Rosemary plant: A healthy, established rosemary plant to take cuttings from.
* Clean glass jars or containers: I prefer clear glass so I can monitor root growth. Small mason jars or even recycled glass bottles work great.
* Water: Tap water is fine, but filtered water is even better.
* Rooting hormone (optional): This can speed up the rooting process, but it’s not essential.
* Spray bottle with water: To keep your cuttings hydrated.
* Well-draining potting mix: For when you’re ready to pot up your rooted cuttings.
* Small pots: To transplant your new rosemary plants.
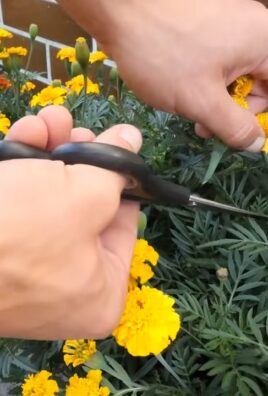
Taking Rosemary Cuttings
Okay, let’s get our hands dirty (well, not really, since we’re doing soil-free propagation!). Taking the cuttings is a crucial step, so pay close attention.
1. Choose Healthy Stems: Look for healthy, vibrant stems on your rosemary plant. Avoid stems that are woody, flowering, or show signs of disease. The ideal stems are semi-hardwood, meaning they’re not too soft and green, but not too woody either. They should be about 4-6 inches long.
2. Make the Cut: Using your clean pruning shears or scissors, make a clean cut just below a leaf node (the point where leaves grow from the stem). A slanted cut can help with water absorption, but a straight cut works just fine too.
3. Remove Lower Leaves: Remove the leaves from the bottom 1-2 inches of the stem. This is important because these submerged leaves will rot in the water and contaminate it, potentially hindering root growth. I usually just pinch them off with my fingers.
4. Optional: Apply Rooting Hormone: If you’re using rooting hormone, dip the cut end of the stem into the powder or liquid. Follow the instructions on the rooting hormone package. This step isn’t necessary, but it can definitely give your cuttings a boost.
5. Prepare Your Cuttings: Now you should have cuttings that are about 4-6 inches long, with the bottom 1-2 inches of the stem bare.
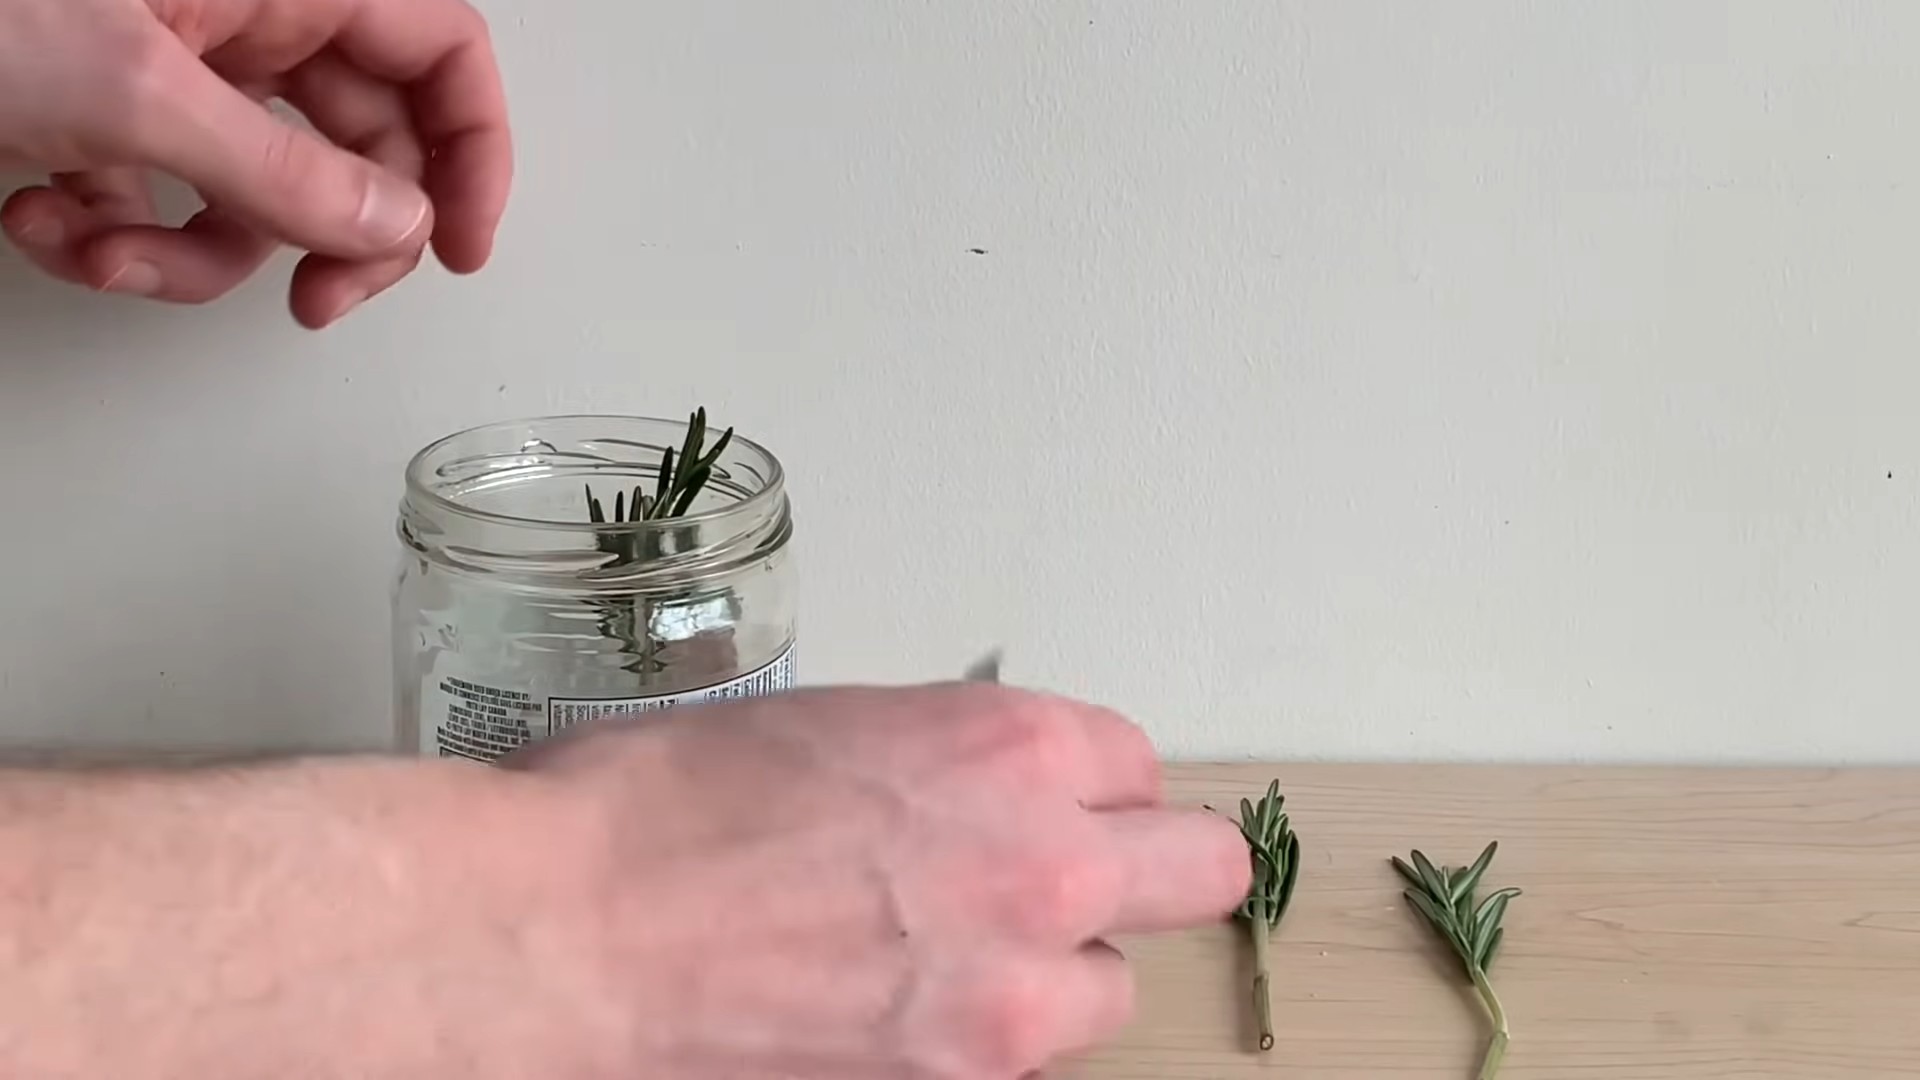
Water Propagation: The Magic Happens
This is where the fun begins! We’re going to let those cuttings work their magic in water.
1. Fill Your Jars: Fill your clean glass jars or containers with water. Make sure the water is fresh and clean.
2. Place Cuttings in Water: Place the rosemary cuttings in the jars, ensuring that the bottom 1-2 inches of the stem (where you removed the leaves) are submerged in water. Don’t overcrowd the jars; give each cutting some space. I usually put 3-4 cuttings in a small mason jar.
3. Find the Right Spot: Place the jars in a bright, indirect light location. Avoid direct sunlight, as it can overheat the water and damage the cuttings. A windowsill that receives morning sun or a spot near a bright window is ideal.
4. Change the Water Regularly: This is super important! Change the water every 2-3 days to keep it fresh and prevent the growth of algae or bacteria. When you change the water, gently rinse the cuttings to remove any debris.
5. Monitor Root Growth: Keep an eye on your cuttings. You should start to see tiny roots emerging from the stem in about 2-4 weeks. Be patient! Rooting times can vary depending on the rosemary variety and environmental conditions.
6. Keep Humidity High: Rosemary loves humidity. If you live in a dry climate, you can increase the humidity around your cuttings by misting them with water from a spray bottle a few times a day. You can also cover the jars with a plastic bag or plastic wrap to create a mini-greenhouse effect, but make sure to vent it regularly to prevent mold growth.
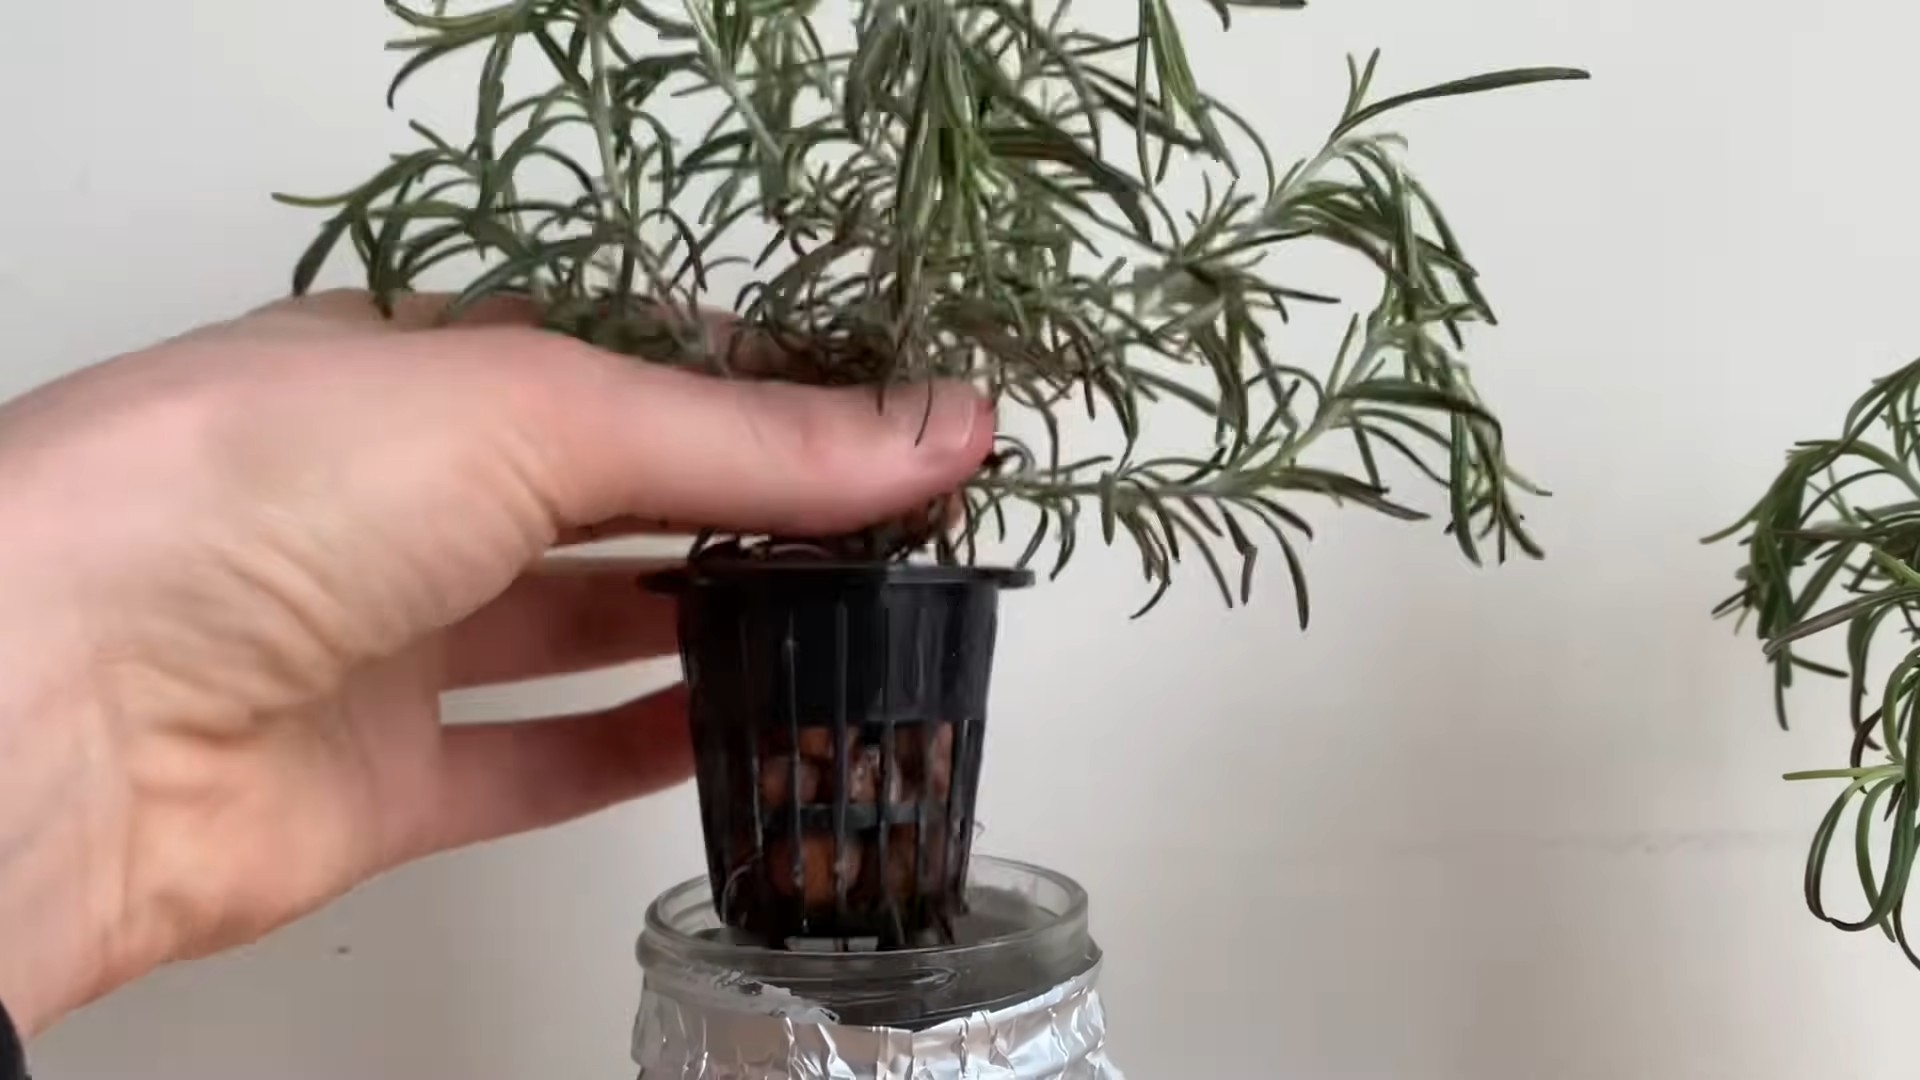
Potting Up Your Rooted Cuttings
Once your cuttings have developed a good root system (about 1-2 inches long), it’s time to pot them up!
1. Prepare Your Pots: Fill your small pots with well-draining potting mix. Rosemary doesn’t like to sit in soggy soil, so good drainage is essential. You can add perlite or sand to your potting mix to improve drainage.
2. Gently Remove Cuttings: Carefully remove the rooted cuttings from the water. Be gentle, as the roots are delicate.
3. Plant the Cuttings: Make a small hole in the potting mix and gently place the rooted cutting in the hole. Cover the roots with potting mix and gently firm the soil around the stem.
4. Water Thoroughly: Water the newly potted cuttings thoroughly, until water drains out of the bottom of the pot.
5. Provide Bright, Indirect Light: Place the potted cuttings in a bright, indirect light location. Avoid direct sunlight for the first few days to allow them to adjust to their new environment.
6. Water Regularly: Water the cuttings regularly, allowing the soil to dry out slightly between waterings. Overwatering can lead to root rot, so be careful not to overdo it.
7. Acclimatize to Outdoor Conditions (Optional): If you plan to plant your rosemary plants outdoors, gradually acclimatize them to outdoor conditions over a period of a week or two. Start by placing them outdoors in a sheltered location for a few hours each day, gradually increasing the amount of time they spend outdoors.
Troubleshooting
Sometimes, things don’t go exactly as planned. Here are a few common problems you might encounter and how to fix them:
* Cuttings Rotting: If your cuttings are rotting, it’s usually due to poor water quality or overcrowding. Make sure to change the water regularly and don’t overcrowd the jars. You can also add a drop or two of hydrogen peroxide to the water to help prevent bacterial growth.
* No Root Growth: If your cuttings aren’t rooting, it could be due to a number of factors, such as poor lighting, low humidity, or unhealthy cuttings. Make sure your cuttings are getting enough light, increase the humidity around them, and use healthy, vibrant stems for cuttings.
* Yellowing Leaves: Yellowing leaves can be a sign of overwatering or underwatering. Make sure you’re watering your cuttings properly and allowing the soil to dry out slightly between waterings.
* Mold Growth: Mold growth can occur if the humidity is too high or if the air circulation is poor. Make sure to vent your mini-greenhouse regularly and provide good air circulation around your cuttings.
Tips for Success
Here are a few extra tips to help you succeed with soil-free rosemary propagation:
* Take Cuttings in Spring or Summer: Rosemary cuttings tend to root more easily during the spring and summer months when the plant is actively growing.
* Use Sharp, Clean Tools: Cleanliness is key to prevent fungal infections. Always use sharp, clean pruning shears or scissors when taking cuttings.
* Be Patient: Rooting can take time, so be patient and don’t give up!
* Experiment: Don’t be afraid to experiment with different techniques and see what works best for you.
I hope this guide has been helpful! Soil-free rosemary propagation is a rewarding and easy way to expand your rosemary collection. Happy propagating!
Conclusion
So, there you have it! Soil-free rosemary propagation is not just a trendy gardening hack; it’s a game-changer for anyone who loves fresh herbs but struggles with traditional methods. We’ve walked you through the simple steps, highlighting the benefits of this clean, efficient, and surprisingly successful technique. Forget the messy soil, the inconsistent watering, and the constant worry about root rot. This method offers a controlled environment, allowing you to witness the magic of root development firsthand.
Why is this a must-try? Because it simplifies the propagation process, making it accessible to even the most novice gardeners. It’s also incredibly rewarding to see those tiny roots emerge, knowing you’ve created a new rosemary plant from a simple cutting. Plus, it’s a fantastic way to expand your herb garden without spending a fortune on new plants.
But don’t stop there! Experiment with different types of rosemary cuttings. Try varying the humidity levels by using different types of covers or adjusting the frequency of misting. You could even add a rooting hormone to the water to potentially speed up the process, although we’ve found it’s often unnecessary. Consider using rainwater or distilled water for optimal results, especially if your tap water is heavily chlorinated.
For a fun variation, try propagating your rosemary cuttings in decorative glass containers. This not only allows you to monitor root growth easily but also adds a touch of greenery to your kitchen windowsill. Imagine a row of elegant glass jars, each nurturing a new rosemary plant, ready to be transplanted into your garden or used in your favorite recipes.
We wholeheartedly encourage you to give this soil-free rosemary propagation method a try. It’s a simple, effective, and enjoyable way to expand your herb garden and enjoy the fresh, aromatic flavor of rosemary year-round. Don’t be intimidated – even if you’ve had trouble with propagation in the past, this method offers a higher chance of success.
Once you’ve successfully propagated your rosemary cuttings, we’d love to hear about your experience! Share your tips, tricks, and photos in the comments below. Let’s build a community of rosemary enthusiasts and learn from each other’s successes (and even the occasional setbacks!). Your insights could help other gardeners discover the joy of soil-free rosemary propagation and unlock the potential of their own green thumbs. So go ahead, grab some rosemary cuttings, and get propagating! You might be surprised at how easy and rewarding it is.
Frequently Asked Questions (FAQ)
What kind of rosemary cuttings work best for soil-free propagation?
The best rosemary cuttings for soil-free propagation are semi-hardwood cuttings. These are stems that are neither too new and green nor too old and woody. Look for stems that are about 4-6 inches long, with healthy leaves. Avoid stems that are flowering, as the plant will put its energy into flowering rather than rooting. The ideal time to take cuttings is in the spring or early summer, when the plant is actively growing. However, you can often propagate rosemary at other times of the year, although the success rate might be slightly lower. Make sure to use clean, sharp pruning shears or a knife to take the cuttings, and remove the leaves from the bottom inch or two of the stem to prevent them from rotting in the water.
How long does it take for rosemary cuttings to root using this method?
The time it takes for rosemary cuttings to root using the soil-free method can vary depending on several factors, including the variety of rosemary, the temperature, and the humidity levels. Generally, you can expect to see roots emerging within 2-4 weeks. However, it’s important to be patient and avoid disturbing the cuttings too much. Check the water regularly and change it every few days to prevent the growth of algae or bacteria. Once the roots are about an inch long, you can transplant the cuttings into pots filled with well-draining potting mix.
What type of water is best for soil-free rosemary propagation?
The best type of water for soil-free rosemary propagation is water that is free of chlorine and other chemicals that can inhibit root growth. Rainwater is an excellent option, as it is naturally soft and pure. Distilled water is another good choice, as it has been purified to remove any impurities. If you are using tap water, it is best to let it sit out for 24 hours to allow the chlorine to evaporate. You can also use a water filter to remove chlorine and other contaminants. Avoid using softened water, as it contains high levels of sodium, which can be harmful to plants.
Can I use rooting hormone to speed up the propagation process?
Yes, you can use rooting hormone to potentially speed up the propagation process, but it is not always necessary. Rosemary is generally easy to root without rooting hormone, especially using the soil-free method. However, if you are having trouble getting your cuttings to root, or if you want to increase your chances of success, you can dip the cut end of the stem in rooting hormone powder or liquid before placing it in the water. Be sure to follow the instructions on the rooting hormone package. Keep in mind that using too much rooting hormone can actually inhibit root growth, so it’s important to use it sparingly.
What do I do after the rosemary cuttings have rooted?
Once the rosemary cuttings have developed roots that are about an inch long, it’s time to transplant them into pots filled with well-draining potting mix. Choose pots that are large enough to accommodate the root system, and make sure they have drainage holes to prevent waterlogging. Gently remove the cuttings from the water and plant them in the potting mix, being careful not to damage the roots. Water the plants thoroughly after planting, and then allow the soil to dry out slightly between waterings. Place the pots in a sunny location, such as a windowsill or a greenhouse. Gradually acclimate the plants to outdoor conditions before transplanting them into the garden.
What are some common problems I might encounter, and how can I fix them?
Some common problems you might encounter during soil-free rosemary propagation include:
* **Rotting cuttings:** This is usually caused by bacteria or fungi in the water. To prevent this, change the water every few days and use clean containers. You can also add a drop of hydrogen peroxide to the water to help kill bacteria.
* **Lack of root growth:** This can be caused by several factors, including poor quality cuttings, insufficient light, or water that is too cold. Make sure you are using healthy, semi-hardwood cuttings, and provide them with plenty of bright, indirect light. You can also try using a rooting hormone to stimulate root growth.
* **Yellowing leaves:** This can be a sign of overwatering or nutrient deficiency. Make sure the potting mix is well-draining and allow the soil to dry out slightly between waterings. You can also fertilize the plants with a balanced liquid fertilizer diluted to half strength.
How often should I change the water during the propagation process?
It’s crucial to change the water every 2-3 days to prevent the buildup of bacteria and algae, which can hinder root development and potentially cause the cuttings to rot. Using clean water ensures a healthy environment for the rosemary cuttings to thrive. When changing the water, gently rinse the container to remove any residue.
Can I propagate rosemary cuttings in the winter?
While spring and early summer are ideal, you can propagate rosemary cuttings in the winter, but you might need to provide extra care. Ensure the cuttings receive adequate light, possibly using a grow light, and maintain a consistent temperature. Avoid placing the cuttings near cold drafts or heating vents. Rooting may take longer during the winter months, so patience is key.
Leave a Comment