
Carrot harvest in your tiny garden might seem like a distant dream, especially if you’re working with limited space. But trust me, it’s absolutely achievable, and incredibly rewarding! I’m here to guide you through some clever DIY tricks and hacks that will transform your small plot into a carrot-growing haven.
For centuries, carrots have been a staple in diets around the world, with evidence suggesting their cultivation dates back to ancient Persia. From vibrant orange varieties to purple and yellow heirlooms, these root vegetables offer a delightful crunch and a wealth of nutrients. But let’s face it, store-bought carrots just don’t compare to the taste of freshly harvested, homegrown ones.
Many people shy away from growing carrots, particularly in small gardens, because they believe it’s too difficult or space-consuming. That’s where these DIY tricks come in! I’ll show you how to maximize your yield, prevent common problems like forked roots, and ensure a bountiful carrot harvest, even if you only have a balcony or a few raised beds. Imagine the satisfaction of pulling those vibrant orange treasures from the soil, knowing you nurtured them from seed to table. Let’s get started and unlock the secrets to a successful carrot harvest in your tiny garden!
Harvesting Carrots from Your Tiny Garden: A Step-by-Step Guide
Okay, so you’ve poured your heart and soul (and probably a lot of compost) into your tiny garden, and now it’s time for the moment of truth: harvesting those beautiful, homegrown carrots! Don’t worry, even if you’re a beginner gardener, I’m here to guide you through the process. It’s easier than you think, and the taste of freshly harvested carrots is absolutely worth it.
Knowing When to Harvest
First things first, how do you know when your carrots are ready to be pulled from the earth? This is a crucial step, as harvesting too early will result in small, underdeveloped carrots, while waiting too long can lead to woody or cracked roots. Here’s what to look for:
* Check the Seed Packet: Your seed packet is your best friend! It will tell you the “days to maturity” for your specific carrot variety. This is an estimate of how long it takes from planting to harvest. Keep in mind that weather conditions can affect this timeline.
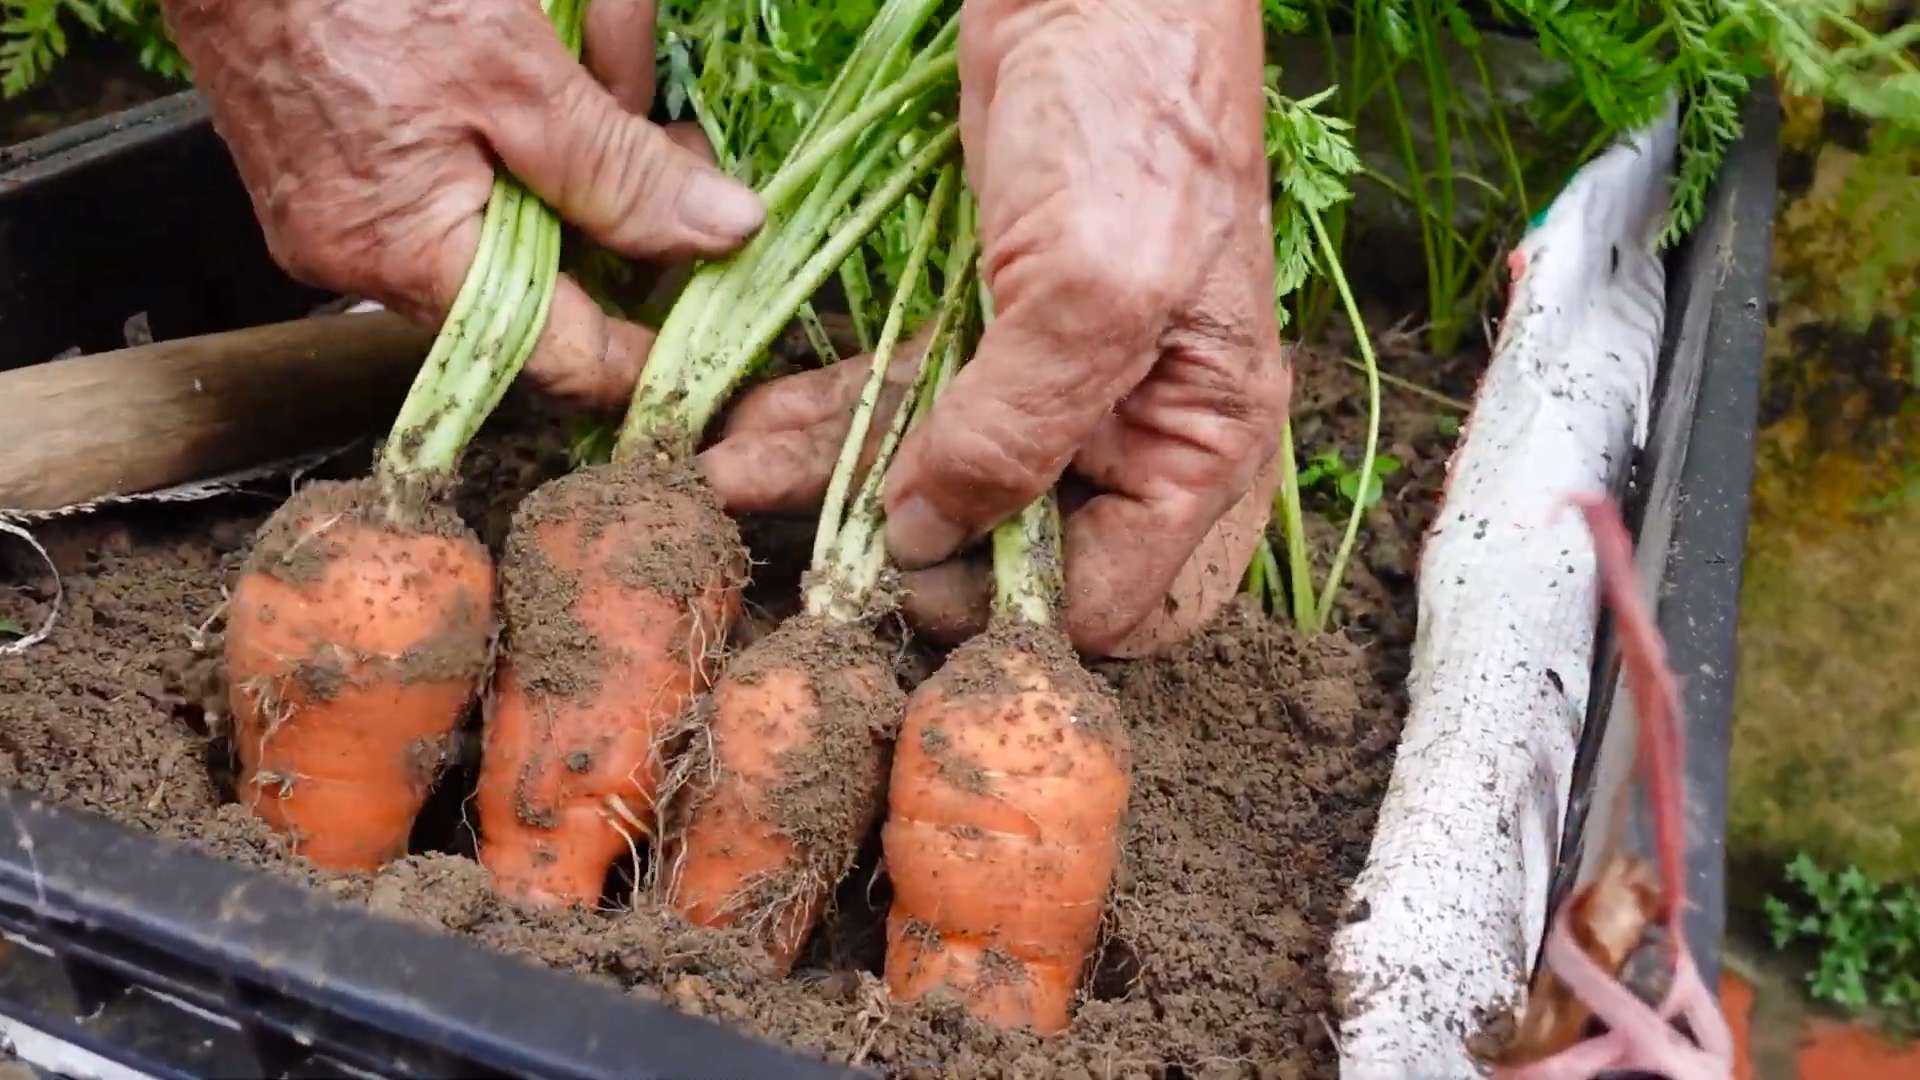
* Observe the Carrot Shoulders: The “shoulders” of the carrots are the part that peeks out above the soil line. As your carrots mature, these shoulders will become more visible and wider. You should be able to get a good idea of their size.
* Gently Feel Around: Carefully brush away a little soil around the base of a carrot to get a better look at its size. You’re aiming for carrots that are at least the size you’d typically find at the grocery store, but don’t be afraid to harvest some smaller ones for snacking!
* Consider a Test Pull: If you’re unsure, sacrifice one carrot! Gently loosen the soil around it and pull it up. This will give you a good indication of the size and quality of the rest of your crop.
Tools You’ll Need
Before you start digging, gather your supplies. Having everything ready will make the harvesting process much smoother.
* Gardening Gloves: Protect your hands from dirt and potential irritants.
* A Garden Fork or Trowel: This is essential for loosening the soil around the carrots, making them easier to pull. A garden fork is especially helpful if your soil is compacted.
* Watering Can or Hose: Watering the soil before harvesting can make it much easier to pull the carrots.
* A Bucket or Basket: To collect your freshly harvested carrots.
* A Knife or Scissors: For trimming the carrot tops.
* A Brush: For gently removing excess soil from the carrots.
The Harvesting Process: Step-by-Step
Alright, let’s get those carrots out of the ground!
1. Water the Soil: A day or two before you plan to harvest, give your carrot bed a good watering. This will soften the soil and make it easier to pull the carrots without breaking them. Avoid overwatering, as soggy soil can make the carrots prone to rot.
2. Loosen the Soil: Using your garden fork or trowel, carefully loosen the soil around the carrots. Insert the fork or trowel a few inches away from the carrot and gently wiggle it back and forth to loosen the soil. Be careful not to damage the carrots.
3. Grasp the Carrot Tops: Grab the carrot tops as close to the base as possible. A firm grip is important, but avoid pulling too hard, as this can cause the tops to break off, leaving the carrot stuck in the ground.
4. Pull Gently but Firmly: With a steady, even motion, pull the carrot straight up out of the ground. Wiggling it slightly from side to side can sometimes help. If the carrot is particularly stubborn, try loosening the soil around it a bit more.
5. Dealing with Stubborn Carrots: If a carrot refuses to budge, don’t force it! Use your trowel or fork to carefully dig around the carrot, loosening the soil as you go. You may need to dig down quite a bit to free the entire root.
6. Harvesting Multiple Carrots: When harvesting multiple carrots from a small space, it’s best to harvest the largest ones first. This will give the remaining carrots more room to grow.
7. Trimming the Tops: Once you’ve pulled a carrot, use your knife or scissors to trim the tops off, leaving about an inch of stem. This will help prevent the carrots from drying out and will also remove any nutrients that the tops might be drawing from the root.
8. Cleaning the Carrots: Gently brush off any excess soil from the carrots. Avoid washing them immediately unless you plan to use them right away. Washing can shorten their storage life.
9. Inspect for Damage: Check each carrot for any signs of damage, such as cracks, splits, or insect damage. Use these carrots first, as they won’t store as well as undamaged ones.
Storing Your Harvest
Now that you’ve got a beautiful bounty of carrots, you’ll want to store them properly to keep them fresh for as long as possible.
* Remove Excess Soil: As mentioned before, gently brush off any excess soil from the carrots.
* Don’t Wash (Yet!): Avoid washing the carrots until you’re ready to use them. Washing can introduce moisture, which can lead to rot.
* Trim the Tops: Make sure the tops are trimmed to about an inch.
* Store in a Cool, Humid Place: The ideal storage conditions for carrots are cool (32-40°F) and humid (90-95% relative humidity). This is often difficult to achieve at home, but here are a few options:
* Refrigerator: Store the carrots in a plastic bag or container in the crisper drawer of your refrigerator. Add a slightly damp paper towel to the bag to help maintain humidity.
* Root Cellar (If You’re Lucky!): If you have a root cellar, this is the perfect place to store your carrots. Pack them in damp sand or sawdust to keep them moist.
* Check Regularly: Check your stored carrots regularly for any signs of spoilage. Remove any carrots that are starting to rot to prevent them from affecting the rest of your crop.
Troubleshooting Common Problems
Even with the best planning, things don’t always go perfectly. Here are a few common problems you might encounter when harvesting carrots and how to deal with them:
* Carrots Breaking When Pulled: This is usually caused by compacted soil or carrots that are too tightly packed together. Make sure to loosen the soil well before harvesting and thin your carrots properly during the growing season.
* Forked or Twisted Carrots: This can be caused by rocks or other obstacles in the soil. Remove any rocks or debris from your garden bed before planting. It can also be caused by inconsistent watering.
* Small Carrots: This can be caused by overcrowding, poor soil fertility, or insufficient sunlight. Thin your carrots properly, amend your soil with compost, and make sure your carrots are getting at least six hours of sunlight per day.
* Carrots Cracking: This is often caused by inconsistent watering, especially after a period of drought. Water your carrots regularly and deeply, especially during dry spells.
Enjoying Your Homegrown Carrots
Congratulations! You’ve successfully harvested carrots from your tiny garden. Now it’s time to enjoy the fruits (or rather, vegetables) of your labor! Here are a few ideas:
* Eat Them Raw: Freshly harvested carrots are incredibly sweet and crunchy. Enjoy them as a snack, in salads, or with dips.
* Roast Them: Roasting carrots brings out their natural sweetness. Toss them with olive oil, herbs, and spices, and roast them in the oven until tender.
* Make Carrot Soup: Carrot soup is a classic comfort food. It’s easy to make and incredibly delicious.
* Bake a Carrot Cake: What better way to use your homegrown carrots than in a delicious carrot cake?
* Juice Them: Carrot juice is a healthy and refreshing drink.
Final Thoughts
Growing your own carrots, even in a tiny garden, is a rewarding experience. It’s a great way to connect with nature, eat healthy, and save money. Don’t be discouraged if your first harvest isn’t perfect. Gardening is a learning process, and with a little practice, you’ll be harvesting beautiful, delicious carrots in no time! Happy gardening!
Conclusion
So, there you have it! Transforming your tiny garden’s carrot harvest into a vibrant, flavorful, and long-lasting treat is not only achievable but incredibly rewarding. This DIY trick, turning your freshly harvested carrots into delicious, naturally preserved carrot chips, is a game-changer for anyone looking to maximize their garden bounty and minimize food waste.
Why is this a must-try? Because it’s more than just a recipe; it’s a sustainable solution. Instead of letting those precious carrots wither away in the crisper drawer, you’re creating a healthy, convenient snack that captures the essence of your garden’s hard work. Imagine the satisfaction of enjoying a crunchy, naturally sweet carrot chip in the dead of winter, a tangible reminder of the summer’s sunshine and your gardening prowess.
Beyond the practicality, this method unlocks a world of flavor possibilities. While the basic recipe focuses on the natural sweetness of the carrots, don’t be afraid to experiment! A sprinkle of cinnamon and nutmeg before dehydrating creates a warm, comforting treat perfect for autumn. A dash of chili powder and cumin adds a spicy kick for those who prefer a savory snack. For a truly unique twist, try tossing the sliced carrots with a touch of maple syrup and smoked paprika before drying. The possibilities are truly endless, limited only by your imagination and taste preferences.
Consider also the variations in texture. For a crispier chip, slice the carrots thinner. For a slightly chewier texture, opt for thicker slices. You can even experiment with different carrot varieties. Nantes carrots, known for their sweetness and tenderness, are ideal for a classic sweet chip. Imperator carrots, with their slightly more robust flavor, hold up well to savory seasonings.
But the real magic lies in the simplicity of this **carrot harvest** preservation method. It requires minimal equipment – a vegetable peeler, a knife or mandoline, and a dehydrator or oven. The process is straightforward, making it accessible to gardeners of all skill levels. And the end result? A healthy, delicious, and shelf-stable snack that you can feel good about eating and sharing.
We wholeheartedly encourage you to give this DIY trick a try. Embrace the opportunity to transform your tiny garden’s carrot harvest into something truly special. Don’t be afraid to experiment with different flavors and textures to create your own signature carrot chips. And most importantly, share your experience! Let us know what variations you tried, what worked best, and what you learned along the way. Your insights will not only inspire others but also contribute to a community of gardeners who are passionate about sustainable living and delicious, homemade food. So, get harvesting, get slicing, and get dehydrating! Your taste buds (and your garden) will thank you.
Frequently Asked Questions (FAQ)
What type of carrots work best for making carrot chips?
While you can use any type of carrot, certain varieties lend themselves particularly well to chip-making. Nantes carrots, known for their sweetness and fine texture, are a popular choice for a classic sweet chip. Imperator carrots, which are longer and have a slightly more robust flavor, are also excellent, especially if you plan to use savory seasonings. Danvers carrots, a versatile and widely available variety, are a good all-around option. Ultimately, the best carrot is the one you have readily available from your garden or local market. Consider the flavor profile you’re aiming for when selecting your carrots.
How thin should I slice the carrots for making chips?
The ideal thickness depends on your desired texture. For crispy chips, aim for slices that are about 1/8 inch thick. This allows the moisture to evaporate quickly during dehydration, resulting in a satisfying crunch. For chewier chips, you can slice them slightly thicker, around 1/4 inch. Keep in mind that thicker slices will require a longer dehydration time. Using a mandoline slicer can help you achieve consistent thickness, ensuring even drying.
Can I make carrot chips without a dehydrator?
Yes, you can definitely make carrot chips in the oven! Preheat your oven to the lowest possible temperature, ideally around 170°F (77°C). Line a baking sheet with parchment paper and spread the carrot slices in a single layer, making sure they don’t overlap. Prop the oven door open slightly to allow moisture to escape. Bake for 2-4 hours, or until the chips are dry and crispy. Flip the chips halfway through the baking time to ensure even drying. Keep a close eye on them to prevent burning, especially if your oven runs hot.
How long do carrot chips last?
Properly dehydrated carrot chips can last for several months when stored in an airtight container in a cool, dark, and dry place. The key is to ensure that the chips are completely dry before storing them. Any residual moisture can lead to mold growth and spoilage. To test for dryness, let a few chips cool completely. They should be crisp and snap easily. If they are still pliable or feel slightly damp, return them to the dehydrator or oven for a bit longer.
What are some creative seasoning ideas for carrot chips?
The possibilities are endless! For a sweet treat, try cinnamon, nutmeg, ginger, or a touch of maple syrup. For a savory snack, consider chili powder, cumin, smoked paprika, garlic powder, onion powder, or even a sprinkle of nutritional yeast for a cheesy flavor. You can also experiment with herbs like rosemary, thyme, or oregano. Don’t be afraid to get creative and mix and match different seasonings to create your own unique flavor combinations. A little bit of sea salt always enhances the flavor.
How do I prevent the carrot chips from sticking to the dehydrator trays?
To prevent sticking, you can lightly grease the dehydrator trays with cooking spray or line them with parchment paper or silicone dehydrator sheets. This is especially helpful if you’re using sticky seasonings like maple syrup or honey. Make sure the carrot slices are spread out in a single layer and not overlapping.
My carrot chips are burning in the oven. What am I doing wrong?
Burning usually indicates that the oven temperature is too high. Make sure your oven is set to the lowest possible temperature. If it still seems too hot, try propping the oven door open a bit wider to allow more heat to escape. Also, keep a close eye on the chips and check them frequently. If they start to brown too quickly, lower the oven temperature further or move the baking sheet to a lower rack.
Can I rehydrate carrot chips?
While carrot chips are primarily enjoyed as a crispy snack, you can rehydrate them if you wish. Simply soak them in warm water for about 15-20 minutes, or until they soften. Rehydrated carrot chips can be added to soups, stews, or stir-fries. Keep in mind that they will not have the same texture as fresh carrots.
Are carrot chips a healthy snack?
Yes, carrot chips are a healthy and nutritious snack! They are a good source of vitamins, minerals, and fiber. They are also low in calories and fat. Making your own carrot chips allows you to control the ingredients and avoid added sugars, preservatives, and unhealthy fats that are often found in commercially produced snacks.
What if my carrots are not organically grown? Should I still make chips?
Even if your carrots are not organically grown, you can still make delicious and healthy chips. Thoroughly wash and scrub the carrots to remove any dirt or residue. Peeling the carrots can also help to reduce any potential pesticide exposure. Ultimately, the decision is yours, but making chips from non-organic carrots is still a healthier option than many processed snacks.

Leave a Comment