
Salt and vinegar uses extend far beyond just flavoring your favorite fish and chips! I’m always on the lookout for clever, cost-effective solutions around the house and garden, and I’ve discovered that this dynamic duo is a powerhouse of potential. Forget expensive, chemical-laden products – nature has already provided us with some incredible tools.
For centuries, salt has been valued not only as a preservative but also for its cleansing properties. Vinegar, with its acidic punch, has been used for cleaning and disinfecting since ancient times. Think about it – our grandmothers probably knew these tricks! They were masters of resourcefulness, using simple ingredients to keep their homes and gardens thriving.
But why should you care about salt and vinegar uses in your garden? Well, let’s face it, gardening can be tough! Pests, weeds, and stubborn stains can quickly turn your green oasis into a source of frustration. This article is your guide to harnessing the natural power of salt and vinegar to tackle common gardening challenges. I’ll show you how to create effective, eco-friendly solutions that will save you money and help your garden flourish. Get ready to unlock the secrets to a healthier, happier garden, all thanks to the humble ingredients in your pantry!

Unlocking the Cleaning Powerhouse: Salt and Vinegar DIY Hacks
Hey there, fellow DIY enthusiasts! Get ready to be amazed because today, we’re diving deep into the wonderful world of salt and vinegar – two kitchen staples that pack a serious cleaning punch. Forget those expensive, chemical-laden cleaners; we’re going natural and budget-friendly! I’m going to show you how to harness the power of these simple ingredients to tackle some of the most common household messes.
The Dynamic Duo: Why Salt and Vinegar Work So Well
Before we jump into the hacks, let’s quickly understand why this combination is so effective. Vinegar, with its acetic acid, is a natural disinfectant and degreaser. It helps break down grime, mineral deposits, and even some types of mold. Salt, on the other hand, acts as a mild abrasive, helping to scrub away stubborn stains and buildup without scratching most surfaces. Together, they’re a cleaning dream team!
Tackling Hard Water Stains: Faucets, Showerheads, and More
Hard water stains are the bane of my existence! Those unsightly white deposits on faucets, showerheads, and even glassware can be so frustrating. But fear not, because salt and vinegar are here to save the day.
Cleaning Faucets and Showerheads
This method is perfect for removing mineral buildup and restoring shine.
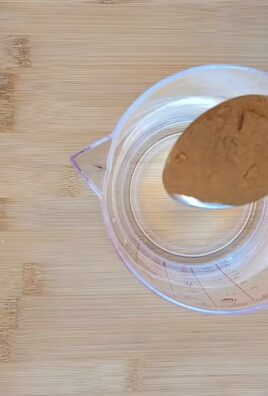
1. Gather Your Supplies: You’ll need white vinegar, salt, a plastic bag (sandwich or gallon size depending on the faucet/showerhead size), a rubber band or twist tie, an old toothbrush, and a clean cloth.
2. Prepare the Solution: In the plastic bag, mix equal parts white vinegar and salt. I usually start with about 1/2 cup of each, but adjust the amount depending on the size of the item you’re cleaning. The goal is to create enough solution to fully submerge the affected area.
3. Submerge and Soak: Carefully place the bag over the faucet or showerhead, ensuring the stained area is completely submerged in the vinegar solution. Secure the bag with a rubber band or twist tie.
4. Patience is Key: Let it soak for at least an hour, or even overnight for really stubborn stains. The longer it soaks, the better the vinegar can break down the mineral deposits.
5. Scrub and Rinse: After soaking, remove the bag and use the old toothbrush to scrub away any remaining residue. Rinse thoroughly with clean water.
6. Dry and Shine: Finally, dry the faucet or showerhead with a clean cloth to prevent water spots. You’ll be amazed at the difference!
Removing Hard Water Stains from Glassware
Cloudy glassware is a common problem, especially if you have hard water. This method will bring back the sparkle.
1. Prepare the Vinegar Bath: Fill a sink or large bowl with equal parts white vinegar and warm water. Add a tablespoon of salt to the mixture.
2. Soak the Glassware: Submerge the affected glassware in the vinegar solution and let it soak for at least 30 minutes. For heavily stained items, you can soak them for a few hours.
3. Scrub Gently: After soaking, use a soft sponge or cloth to gently scrub away any remaining stains. Pay close attention to the areas with the most buildup.
4. Rinse Thoroughly: Rinse the glassware thoroughly with clean water to remove all traces of vinegar and salt.
5. Dry and Admire: Dry the glassware with a clean, lint-free cloth. You’ll be amazed at how clear and sparkling they look!
Cleaning and Deodorizing Your Microwave
Microwaves can get pretty gross, pretty quickly. Splatters, spills, and lingering odors are all part of the microwave experience. But with salt and vinegar, you can easily clean and deodorize your microwave in minutes.
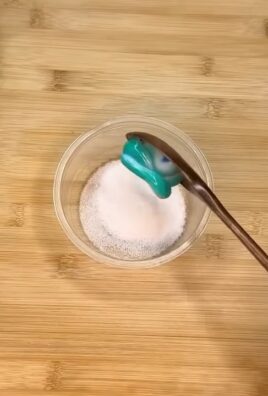
1. Gather Your Supplies: You’ll need a microwave-safe bowl, white vinegar, salt, and a clean cloth or sponge.
2. Create the Cleaning Solution: Fill the microwave-safe bowl with 1 cup of water. Add 2 tablespoons of white vinegar and 1 tablespoon of salt. Stir to dissolve the salt.
3. Microwave Magic: Place the bowl in the microwave and heat on high for 5-7 minutes, or until the solution is boiling and the microwave is filled with steam.
4. Let it Steam: Leave the bowl in the microwave for another 5-10 minutes, allowing the steam to loosen any stuck-on food particles. This is crucial! Don’t open the door immediately.
5. Wipe it Clean: Carefully remove the bowl (it will be hot!) and use a clean cloth or sponge to wipe down the interior of the microwave. The steam will have loosened the grime, making it easy to wipe away.
6. Deodorize and Dry: Leave the microwave door open for a few minutes to air it out and eliminate any lingering odors.
Reviving Rusty Tools and Surfaces
Rust can be a real problem, especially in humid environments. Salt and vinegar can help remove rust from tools, garden implements, and other metal surfaces.
1. Assess the Rust: Determine the severity of the rust. For light rust, a simple soak might be enough. For heavier rust, you might need to scrub a bit more.
2. Prepare the Rust-Removing Bath: In a container large enough to hold the rusty item, mix equal parts white vinegar and salt. You can also add a bit of water if needed to fully submerge the item.
3. Submerge and Soak: Place the rusty item in the vinegar solution, ensuring that the rusted areas are completely submerged.
4. Soaking Time: Let the item soak for several hours, or even overnight for heavily rusted items. The longer it soaks, the more the vinegar will break down the rust.
5. Scrub Away the Rust: After soaking, remove the item from the vinegar solution and use a wire brush or steel wool to scrub away the loosened rust. Be sure to wear gloves to protect your hands.
6. Rinse and Dry: Rinse the item thoroughly with clean water to remove any remaining rust and vinegar. Dry it completely with a clean cloth to prevent further rusting.
7. Protect and Prevent: To prevent future rust, you can apply a thin layer of oil or rust-inhibiting spray to the metal surface.
Cleaning Your Iron
A dirty iron can leave marks on your clothes and affect its performance. Salt and vinegar can help clean the soleplate of your iron and keep it working smoothly.
1. Gather Your Supplies: You’ll need white vinegar, salt, a clean cloth, and an old towel.
2. Prepare the Cleaning Paste: Mix equal parts white vinegar and salt to create a thick paste.
3. Apply the Paste: Spread the paste evenly over the cool soleplate of the iron.
4. Gentle Scrubbing: Use a clean cloth to gently scrub the paste over the soleplate, paying attention to any areas with buildup or stains.
5. Wipe Clean: Wipe away the paste with a clean, damp cloth.
6. Steam Clean: Fill the iron with water and set it to the steam setting. Iron over an old towel to flush out any remaining residue.
7. Dry and Shine: Dry the soleplate with a clean cloth. Your iron should now be clean and ready to use.
Unclogging Drains (Use with Caution!)
While not as powerful as commercial drain cleaners, salt and vinegar can sometimes help unclog minor drain blockages. Use this method with caution, and avoid using it if you’ve recently used chemical drain cleaners, as the combination can create harmful fumes.
1. Pour in the Salt: Pour about 1/2 cup of salt down the drain.
2. Follow with Vinegar: Pour about 1 cup of white vinegar down the drain.
3. Let it Fizz: Let the mixture fizz and sit for about 30 minutes.
4. Flush with Hot Water: Flush the drain with hot water for several minutes to clear the blockage.
5. Repeat if Necessary: If the drain is still clogged, repeat the process. If the clog persists, you may need to try a different method or call a plumber.
Important Considerations and Safety Tips
* Always test on an inconspicuous area first: Before using salt and vinegar on any surface, test it on a small, hidden area to ensure it doesn’t cause any damage or discoloration.
* Avoid using on certain surfaces: Don’t use vinegar on natural stone surfaces like marble or granite, as it can etch the stone. Also, avoid using it on waxed or oiled wood finishes.
* Ventilation is key: When using vinegar, especially in enclosed spaces, make sure to have adequate ventilation.
* Wear gloves: When working with vinegar and salt, especially for rust removal, wear gloves to protect your hands.
*

Conclusion
So, there you have it! This simple yet incredibly effective DIY trick using salt and vinegar is more than just a cleaning hack; it’s a game-changer for maintaining a sparkling home without relying on harsh chemicals. We’ve explored how the humble combination of these two pantry staples can tackle everything from stubborn hard water stains to grimy grout, leaving your surfaces gleaming and your conscience clear.
But why is this DIY method a must-try? Firstly, it’s incredibly cost-effective. Compared to expensive commercial cleaners laden with synthetic fragrances and potentially harmful ingredients, salt and vinegar are readily available and budget-friendly. Secondly, it’s environmentally conscious. By opting for natural cleaning solutions, you’re reducing your exposure to toxins and minimizing your contribution to environmental pollution. Thirdly, it’s surprisingly versatile. As we’ve discussed, the applications are vast, spanning across various surfaces and cleaning challenges.
Don’t be afraid to experiment and adapt the basic recipe to suit your specific needs. For instance, if you’re dealing with particularly stubborn stains, try heating the vinegar slightly before mixing it with the salt. The warmth can help to dissolve the salt more effectively and enhance the cleaning power of the solution. For a more pleasant scent, consider adding a few drops of your favorite essential oil, such as lemon, lavender, or tea tree, to the mixture. These oils not only add a refreshing fragrance but also possess their own antibacterial and antifungal properties, further boosting the cleaning efficacy.
Another variation involves creating a paste for targeted cleaning. Simply mix the salt and vinegar with a small amount of baking soda to form a thick paste. This paste is ideal for scrubbing grout, removing rust stains, or polishing metal surfaces. Remember to always test the solution or paste on an inconspicuous area first to ensure it doesn’t damage the surface.
The beauty of this DIY trick lies in its simplicity and adaptability. It’s a testament to the power of natural ingredients and a reminder that effective cleaning doesn’t have to come at the expense of your health or the environment. We are confident that this **salt and vinegar** cleaning solution will become a staple in your cleaning routine.
We wholeheartedly encourage you to give this DIY trick a try. We are certain you will be amazed by the results. Once you’ve experienced the cleaning power of salt and vinegar firsthand, we’d love to hear about your experience! Share your before-and-after photos, your favorite applications, and any variations you’ve discovered in the comments section below. Let’s build a community of eco-conscious cleaners and share our knowledge to make our homes cleaner and our planet healthier. Your insights could inspire others to embrace this simple yet transformative cleaning solution. So, grab your salt, grab your vinegar, and get ready to experience the magic!
Frequently Asked Questions
Is salt and vinegar safe to use on all surfaces?
No, salt and vinegar is not safe for all surfaces. It’s crucial to exercise caution and test the solution on an inconspicuous area before applying it to the entire surface. Acidic solutions like vinegar can damage certain materials, including:
* **Natural Stone:** Marble, granite, and other natural stones are porous and can be etched or dulled by vinegar.
* **Waxed Surfaces:** Vinegar can strip away wax finishes, leaving the surface looking dull and unprotected.
* **Aluminum:** Vinegar can corrode aluminum, causing pitting and discoloration.
* **Cast Iron:** Prolonged exposure to vinegar can cause rust on cast iron.
* **Certain Plastics:** Some plastics can be discolored or damaged by vinegar.
Always check the manufacturer’s recommendations for cleaning specific surfaces. When in doubt, err on the side of caution and use a milder cleaning solution.
What type of salt and vinegar should I use?
For most cleaning purposes, regular table salt and white distilled vinegar are perfectly adequate. Table salt is readily available and dissolves easily in water. White distilled vinegar is inexpensive and has a high acidity level, making it an effective cleaning agent.
However, you can experiment with other types of salt and vinegar for specific applications. For example, coarse salt can provide extra scrubbing power for tough stains. Apple cider vinegar has a milder scent and may be preferred by those sensitive to the strong odor of white vinegar. Just be aware that apple cider vinegar may leave a slight residue due to its sugar content.
How do I get rid of the vinegar smell?
The strong smell of vinegar is a common concern, but it dissipates quickly once the surface dries. To minimize the odor, ensure proper ventilation by opening windows or turning on a fan. You can also add a few drops of essential oils, such as lemon, lavender, or eucalyptus, to the cleaning solution to mask the vinegar smell. Another option is to rinse the cleaned surface with plain water after applying the salt and vinegar solution.
Can I use salt and vinegar to clean my coffee maker?
Yes, salt and vinegar can be used to clean your coffee maker and remove mineral buildup. Fill the water reservoir with a mixture of equal parts white vinegar and water. Run the coffee maker through a full brewing cycle. Then, run two or three cycles with plain water to rinse away any remaining vinegar. This process will help to descale your coffee maker and improve its performance.
How do I store the salt and vinegar cleaning solution?
You can store the salt and vinegar cleaning solution in a clean, airtight spray bottle or container. Label the container clearly to avoid confusion. Store the solution in a cool, dark place away from direct sunlight. The solution should remain effective for several months. However, if you notice any discoloration or separation, it’s best to discard it and make a fresh batch.
Is salt and vinegar safe for pets and children?
While salt and vinegar are generally considered safe for pets and children, it’s important to take precautions to prevent accidental ingestion or contact with sensitive areas. Keep the cleaning solution out of reach of children and pets. Ensure that the cleaned surfaces are thoroughly dry before allowing children or pets to come into contact with them. If your pet or child ingests the solution or experiences any adverse reactions, consult a veterinarian or medical professional immediately.
Can I mix salt and vinegar with other cleaning products?
It’s generally not recommended to mix salt and vinegar with other cleaning products, especially those containing bleach or ammonia. Mixing certain chemicals can create harmful fumes or reduce the effectiveness of the cleaning solution. Stick to using salt and vinegar on its own or with essential oils for a safe and effective cleaning experience.
How often should I use salt and vinegar to clean?
The frequency of cleaning with salt and vinegar depends on the specific surface and the level of grime. For general cleaning, you can use it as needed. For areas prone to hard water stains or mineral buildup, such as showerheads and faucets, you may need to clean them more frequently, perhaps once a week or every other week. Observe the surfaces and adjust the cleaning frequency accordingly.

Leave a Comment