
Growing Rutabaga in Raised Beds might sound like a niche hobby, but trust me, it’s a game-changer for your fall and winter garden! Have you ever dreamt of pulling up your own sweet, earthy root vegetables even as the snow starts to fall? Well, that dream can become a reality, and I’m here to show you how.
Rutabagas, sometimes called Swedish turnips, have a fascinating history, dating back to the 17th century. They’re believed to be a natural cross between a cabbage and a turnip. For centuries, they’ve been a staple in colder climates, providing essential nutrients during the lean winter months. Think of them as the unsung heroes of the root vegetable world!
But why bother with growing rutabaga in raised beds specifically? Well, raised beds offer several advantages. They provide excellent drainage, which rutabagas love, and they allow you to control the soil quality, ensuring your plants get the nutrients they need. Plus, let’s be honest, they’re just easier on your back! No more endless bending and digging in hard-packed soil.
In this DIY guide, I’ll walk you through every step, from choosing the right seeds to harvesting your delicious rutabagas. I’ll share my favorite tips and tricks for success, so you can enjoy a bountiful harvest of these nutritious and versatile vegetables. Get ready to roll up your sleeves and discover the joy of growing your own rutabagas!
Growing Rutabaga in Raised Beds: A Gardener’s Guide
Hey there, fellow garden enthusiasts! I’m so excited to share my experience growing rutabagas in raised beds. It’s a surprisingly rewarding process, and with a little planning and effort, you can harvest some delicious and nutritious root vegetables right from your backyard. Raised beds make it even easier, offering better drainage and soil control. Let’s dive in!
Why Raised Beds for Rutabagas?
Before we get started, let’s quickly touch on why raised beds are a fantastic choice for rutabagas:
* Improved Drainage: Rutabagas hate soggy soil. Raised beds naturally drain better, preventing root rot and other moisture-related issues.
* Warmer Soil: The soil in raised beds warms up faster in the spring, giving your rutabagas a head start.
* Soil Control: You have complete control over the soil composition in your raised bed, allowing you to create the perfect growing environment.
* Easier Access: Raised beds are easier on your back and knees, making planting, weeding, and harvesting a breeze.
* Pest Control: Raised beds can offer some protection from soil-borne pests.
Materials You’ll Need
Okay, let’s gather our supplies. Here’s what you’ll need to grow rutabagas in raised beds:
* Rutabaga Seeds: Choose a variety that suits your climate and taste preferences. ‘American Purple Top’ is a popular and reliable choice.
* Raised Bed: Pre-built or DIY, make sure it’s at least 12 inches deep.
* Soil Mix: A well-draining mix of compost, topsoil, and peat moss or coco coir.
* Gardening Gloves: To protect your hands.
* Hand Trowel or Garden Fork: For planting and loosening the soil.
* Watering Can or Hose: For watering your rutabagas.
* Organic Fertilizer: A balanced fertilizer to provide essential nutrients.
* Row Covers (Optional): To protect seedlings from pests.
* Mulch (Optional): To retain moisture and suppress weeds.
Step-by-Step Planting Guide
Now for the fun part – planting! Follow these steps for a successful rutabaga harvest:
1. Prepare the Raised Bed:
* Clear the Area: Remove any weeds, rocks, or debris from the raised bed.
* Loosen the Soil: Use a garden fork or hand trowel to loosen the soil to a depth of at least 12 inches. This will improve drainage and allow the rutabaga roots to grow easily.
* Amend the Soil: Incorporate plenty of compost into the soil. Rutabagas are heavy feeders and thrive in nutrient-rich soil. I usually add a generous layer of compost, about 2-3 inches thick, and mix it in thoroughly.
* Level the Surface: Rake the surface of the soil to create a smooth and even planting area.
2. Sow the Seeds:
* Timing is Key: Rutabagas are a cool-season crop, so the best time to plant them is in late spring or early summer for a fall harvest. Check your local frost dates to determine the ideal planting time. You want to give them about 90-100 days to mature before the first hard frost.
* Create Furrows: Use your finger or a hand trowel to create shallow furrows in the soil, about ½ inch deep and 2-3 inches apart.
* Sow the Seeds: Sprinkle the rutabaga seeds thinly along the furrows. Don’t overcrowd them, as this will make thinning more difficult later on.
* Cover the Seeds: Gently cover the seeds with a thin layer of soil.
* Water Gently: Use a watering can with a gentle rose attachment to water the soil thoroughly. Be careful not to wash away the seeds.
3. Thin the Seedlings:
* Wait for True Leaves: Once the seedlings have developed their first set of true leaves (the leaves that look like miniature rutabaga leaves), it’s time to thin them.
* Thin to 4-6 Inches Apart: Carefully remove the weaker seedlings, leaving the strongest ones spaced about 4-6 inches apart. This will give the remaining plants enough room to grow and develop large, healthy roots.
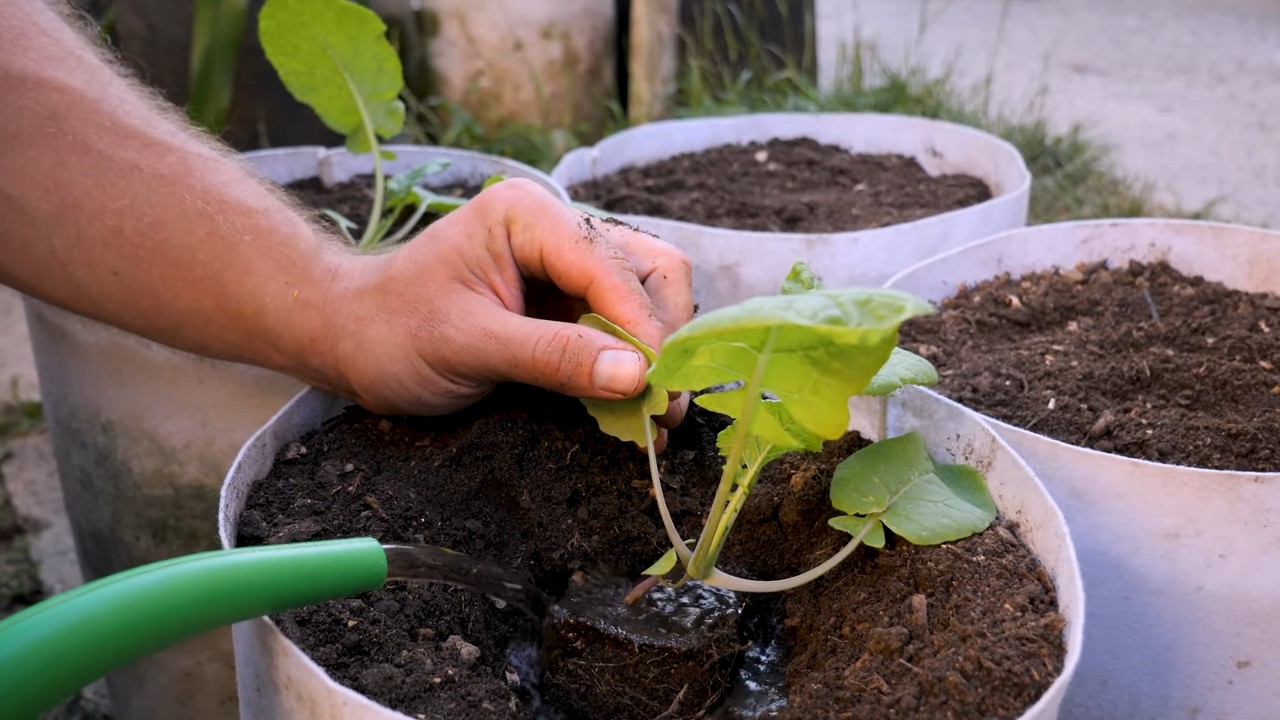
* Don’t Waste the Thinnings: You can transplant the thinned seedlings to another part of the garden or even eat them as microgreens!
4. Watering and Fertilizing:
* Water Regularly: Rutabagas need consistent moisture to thrive. Water deeply whenever the top inch of soil feels dry to the touch. Avoid overwatering, as this can lead to root rot.
* Fertilize Regularly: Rutabagas are heavy feeders, so it’s important to fertilize them regularly. Use a balanced organic fertilizer, following the instructions on the package. I like to fertilize every 2-3 weeks.
5. Weeding and Pest Control:
* Weed Regularly: Keep the raised bed free of weeds, as they can compete with the rutabagas for nutrients and water. Hand-pull weeds carefully to avoid disturbing the rutabaga roots.
* Pest Patrol: Keep an eye out for common rutabaga pests, such as flea beetles, aphids, and cabbage worms. If you spot any pests, take action immediately. You can use organic pest control methods, such as insecticidal soap or neem oil. Row covers can also help to protect seedlings from pests.
6. Mulching (Optional):
* Apply Mulch: Once the seedlings are established, you can apply a layer of mulch around the plants. Mulch helps to retain moisture, suppress weeds, and regulate soil temperature. Straw, wood chips, or shredded leaves are all good choices for mulch.
Harvesting Your Rutabagas
Harvesting is the most rewarding part! Here’s how to know when your rutabagas are ready:
1. Check the Size: Rutabagas are typically ready to harvest when they reach 3-5 inches in diameter.
2. Check the Maturity Date: Refer to the seed packet for the expected maturity date. This will give you a general idea of when to start checking for ripeness.
3. Loosen the Soil: Use a garden fork to loosen the soil around the rutabaga.
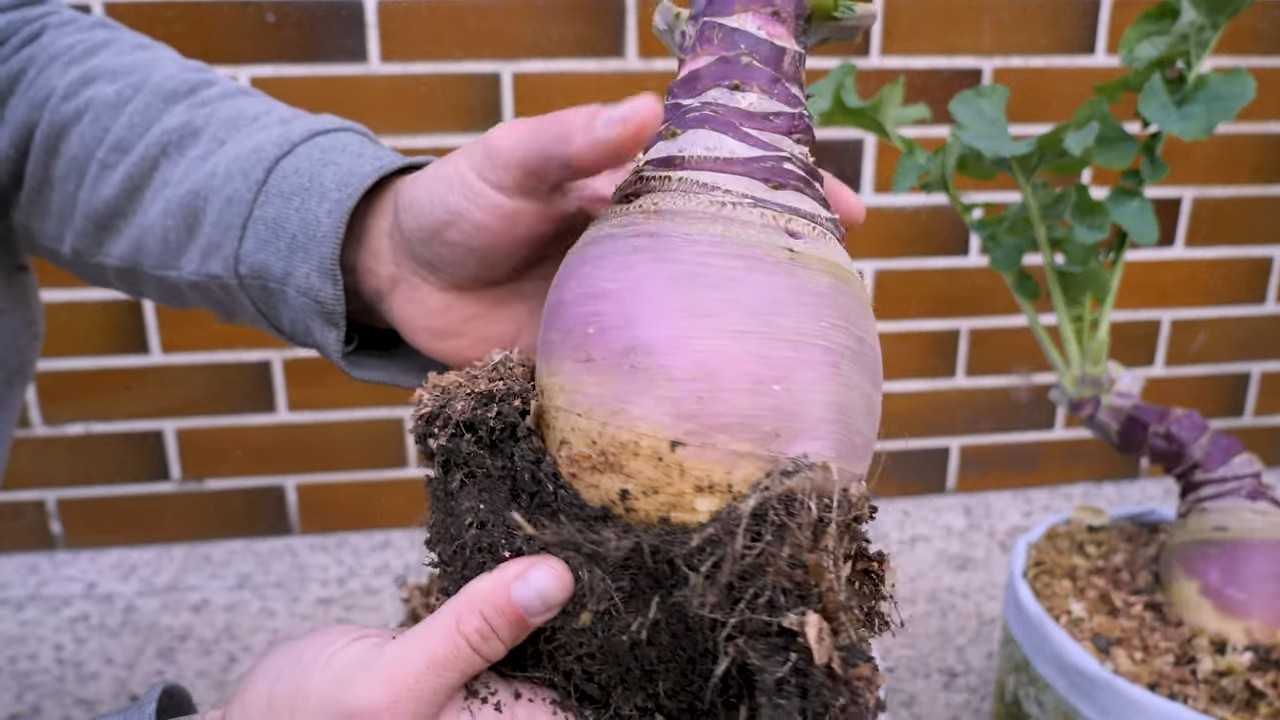
4. Gently Pull: Grasp the base of the plant and gently pull upwards. The rutabaga should come out of the ground easily.
5. Clean and Store: Brush off any excess soil and store the rutabagas in a cool, dry place. They can be stored in the refrigerator for several weeks or in a root cellar for several months.
Troubleshooting Tips
Even with the best planning, you might encounter some challenges. Here are a few common issues and how to address them:
* Slow Growth: If your rutabagas are growing slowly, it could be due to a lack of nutrients or water. Make sure you’re fertilizing regularly and watering deeply whenever the soil feels dry.
* Root Rot: Root rot is a common problem in poorly drained soil. Make sure your raised bed has good drainage and avoid overwatering.
* Pest Infestations: Keep an eye out for pests and take action immediately if you spot any. Organic pest control methods are a safe and effective way to protect your rutabagas.
* Cracked Roots: Inconsistent watering can lead to cracked roots. Ensure consistent watering, especially during dry spells.
Rutabaga Varieties to Consider
Choosing the right variety can make a big difference. Here are a few of my favorites:
* American Purple Top: A classic variety with a purple top and yellow flesh. It’s known for its excellent flavor and storage ability.
* Laurentian: A Canadian heirloom variety with a smooth, round shape and sweet flavor.
* Joan: A newer variety with good disease resistance and a mild flavor.
Using Your Harvest
Now that you’ve harvested your rutabagas, what can you do with them? Here are a few ideas:
* Roasted Rutabaga: Toss rutabaga cubes with olive oil, salt, and pepper, and roast them in the oven until tender and slightly caramelized.
* Mashed Rutabaga: Boil rutabaga cubes until tender, then mash them with butter, milk, and seasonings.
* Rutabaga Fries: Cut rutabaga into fry shapes, toss with olive oil and spices, and bake or air fry until crispy.
* Rutabaga Soup: Add rutabaga to your favorite vegetable soup recipe for a hearty and nutritious meal.
* Fermented Rutabaga: Fer
Conclusion
So, there you have it! Growing rutabaga in raised beds isn’t just a gardening trend; it’s a game-changer for anyone seeking a more bountiful and manageable harvest. We’ve walked through the steps, from selecting the perfect raised bed location to nurturing those precious seedlings into robust, earthy delights. But why is this method a must-try?
Firstly, raised beds offer unparalleled control over your soil. Rutabagas, like many root vegetables, thrive in well-draining, nutrient-rich soil. By using a raised bed, you can create the ideal growing medium, free from the compaction and poor drainage that often plague in-ground gardens. This translates to healthier plants, larger rutabagas, and a significantly reduced risk of root rot and other soil-borne diseases.
Secondly, raised beds make gardening more accessible. Bending and kneeling for extended periods can be tough on the back and knees. Raised beds elevate the growing surface, making planting, weeding, and harvesting much more comfortable, especially for those with mobility issues. This accessibility encourages more frequent interaction with your garden, allowing you to spot and address potential problems early on.
Thirdly, raised beds offer superior pest control. While not a foolproof solution, raised beds create a physical barrier that can deter many ground-dwelling pests. You can also easily add netting or row covers to further protect your rutabagas from insects and other critters.
But the benefits don’t stop there! Consider these variations to further enhance your rutabaga-growing experience:
* Companion Planting: Plant your rutabagas alongside companion plants like marigolds, which deter nematodes, or onions, which repel aphids.
* Succession Planting: Extend your harvest season by planting rutabagas in staggered intervals, a few weeks apart. This ensures a continuous supply of fresh rutabagas throughout the fall and winter.
* Vertical Gardening: While rutabagas are primarily root vegetables, you can utilize the space above your raised bed by adding a trellis for climbing plants like peas or beans. This maximizes your garden’s productivity and adds visual interest.
* Soil Amendments: Experiment with different soil amendments to find what works best for your specific soil conditions. Compost, aged manure, and bone meal are all excellent choices for enriching the soil and providing essential nutrients.
Ultimately, the success of your rutabaga crop depends on your dedication and willingness to experiment. Don’t be afraid to try new things, observe your plants closely, and adjust your approach as needed.
We wholeheartedly encourage you to give growing rutabaga in raised beds a try. It’s a rewarding experience that will not only provide you with delicious, homegrown vegetables but also connect you with nature in a meaningful way. And most importantly, don’t forget to share your experiences! Post photos of your rutabaga harvest on social media, tag us, and let us know what worked (and what didn’t) for you. Your insights can help other gardeners discover the joys of growing their own food. Happy gardening!
Frequently Asked Questions (FAQ)
What is the ideal size for a raised bed for growing rutabagas?
The ideal size for a raised bed depends on the space you have available and the number of rutabagas you want to grow. However, a good starting point is a bed that is 4 feet wide, 8 feet long, and at least 12 inches deep. The width allows you to easily reach the center of the bed from either side, while the length provides ample space for multiple plants. The depth is crucial for rutabagas, as they need sufficient room for their roots to develop. If you’re limited on space, you can opt for a smaller bed, but be sure to adjust the number of plants accordingly. Remember that rutabagas need about 6-8 inches of space between plants.
What type of soil is best for growing rutabagas in raised beds?
Rutabagas thrive in well-draining, fertile soil with a slightly acidic to neutral pH (6.0-7.0). A good soil mix for raised beds typically consists of equal parts topsoil, compost, and peat moss or coconut coir. The topsoil provides structure and minerals, the compost adds organic matter and nutrients, and the peat moss or coconut coir improves drainage and water retention. Avoid using heavy clay soil, as it can become compacted and hinder root development. You can also amend your soil with slow-release fertilizer or bone meal to provide essential nutrients throughout the growing season. Regular soil testing is recommended to ensure that your soil has the proper pH and nutrient levels.
How often should I water my rutabagas in raised beds?
Rutabagas need consistent moisture, especially during germination and early growth. Water deeply and regularly, aiming to keep the soil consistently moist but not waterlogged. The frequency of watering will depend on the weather conditions and the type of soil you’re using. In general, you should water your rutabagas every 2-3 days, or more often during hot, dry spells. Check the soil moisture by sticking your finger about an inch into the soil. If it feels dry, it’s time to water. Avoid overhead watering, as it can promote fungal diseases. Instead, use a soaker hose or drip irrigation system to deliver water directly to the roots.
What are some common pests and diseases that affect rutabagas, and how can I prevent them?
Rutabagas can be susceptible to several pests and diseases, including aphids, flea beetles, cabbage root maggots, clubroot, and powdery mildew. To prevent these problems, start with healthy, disease-free seeds or transplants. Practice crop rotation to avoid building up pests and diseases in the soil. Use row covers to protect your plants from insects. Handpick pests as you see them. For cabbage root maggots, use root collars or diatomaceous earth around the base of the plants. To prevent clubroot, ensure that your soil is well-draining and has a pH above 7.0. For powdery mildew, improve air circulation around your plants and avoid overhead watering. If necessary, use organic pesticides or fungicides to control pests and diseases.
When is the best time to harvest rutabagas grown in raised beds?
Rutabagas are typically ready to harvest in the fall, about 90-100 days after planting. The exact timing will depend on the variety you’re growing and the weather conditions. You can harvest rutabagas when they are about 3-5 inches in diameter. To harvest, loosen the soil around the rutabaga with a garden fork and gently pull it out of the ground. Cut off the greens, leaving about an inch of stem. Rutabagas can be stored in a cool, dry place for several months. You can also leave them in the ground until you need them, as long as the ground doesn’t freeze solid.
Can I grow rutabagas in raised beds in containers?
Yes, you can grow rutabagas in containers, but you’ll need to choose a large container that is at least 12 inches deep and wide. The container should also have drainage holes to prevent waterlogging. Use a well-draining potting mix and follow the same planting and care instructions as for raised beds. Keep in mind that container-grown rutabagas may need more frequent watering and fertilization than those grown in raised beds.
How do I fertilize rutabagas in raised beds?
Rutabagas are heavy feeders and benefit from regular fertilization. Before planting, amend your soil with compost or aged manure. During the growing season, fertilize your rutabagas every 2-3 weeks with a balanced fertilizer or a fertilizer that is high in phosphorus and potassium. Avoid using fertilizers that are high in nitrogen, as they can promote leafy growth at the expense of root development. You can also use organic fertilizers, such as fish emulsion or seaweed extract. Follow the instructions on the fertilizer label for application rates.
What are some good companion plants for rutabagas in raised beds?
Companion planting can help to improve the growth and health of your rutabagas. Some good companion plants for rutabagas include:
* Marigolds: Deter nematodes and other soil pests.
* Onions: Repel aphids and other insects.
* Garlic: Repels aphids and other insects.
* Nasturtiums: Attract aphids away from rutabagas.
* Legumes (peas, beans): Fix nitrogen in the soil, which benefits rutabagas.
* Herbs (rosemary, thyme, sage): Repel insects and attract beneficial insects.
Avoid planting rutabagas near other members of the brassica family (cabbage, broccoli, cauliflower), as they can attract the same pests and diseases.
How can I improve the flavor of my rutabagas?
The flavor of rutabagas can be improved by harvesting them after a frost. The frost converts starches into sugars, making the rutabagas sweeter and more flavorful. You can also improve the flavor by cooking them properly. Rutabagas can be roasted, mashed, boiled, or added to soups and stews. They pair well with butter, herbs, and spices.
Is growing rutabaga in raised beds worth the effort?
Absolutely! While it requires some initial setup and ongoing care, growing rutabaga in raised beds offers numerous benefits, including improved soil control, better

Leave a Comment