
Growing watermelons in bags might sound a little unconventional, right? But trust me, it’s a game-changer for anyone with limited space or challenging soil conditions! For centuries, humans have cultivated watermelons, tracing their origins back to Africa where they were prized for their hydrating properties in arid climates. Now, you don’t need acres of farmland to enjoy the sweet taste of summer.
Have you always dreamed of harvesting your own juicy watermelons but thought you didn’t have the space? Or maybe your garden soil is just not cooperating? That’s where this DIY trick comes in! I’m going to show you how to successfully grow watermelons in bags, even if you’re a complete beginner. This method is perfect for balconies, patios, or small gardens.
This isn’t just about convenience; it’s about taking control of your food source and experiencing the joy of nurturing something from seed to table. Plus, growing watermelons in bags allows for better control over soil quality, watering, and pest management. So, get ready to ditch the store-bought melons and embark on a rewarding gardening adventure. Let’s get started!
Growing Watermelons in Bags: A DIY Guide to Bountiful Harvests
Hey there, fellow gardening enthusiasts! Ever dreamt of harvesting juicy, homegrown watermelons but thought you didn’t have the space? Well, I’m here to tell you that you absolutely can, even without a sprawling garden! I’ve been experimenting with growing watermelons in bags for a few seasons now, and let me tell you, the results have been amazing. It’s a fantastic way to maximize your yield, control the growing environment, and even get a head start on the season. So, grab your gardening gloves, and let’s dive into this fun and rewarding DIY project!
What You’ll Need: The Essential Supplies
Before we get started, let’s gather all the necessary materials. Having everything on hand will make the process smooth and enjoyable.
* Grow Bags: This is the heart of our operation! I recommend using grow bags that are at least 20-25 gallons in size. Fabric grow bags are ideal because they allow for excellent drainage and aeration, preventing root rot. You can find them online or at your local garden center.
* Watermelon Seeds or Seedlings: Choose a variety that’s well-suited to your climate and growing season. Bush or compact varieties like Sugar Baby, Bush Sugar Baby, or Yellow Doll are particularly well-suited for container gardening. You can start from seeds or purchase seedlings from a nursery.
* High-Quality Potting Mix: Don’t skimp on the potting mix! Watermelons are heavy feeders, so you’ll need a rich, well-draining mix. I like to use a blend of compost, peat moss (or coco coir), perlite, and vermiculite.
* Slow-Release Fertilizer: This will provide a steady supply of nutrients throughout the growing season. Look for a fertilizer that’s specifically formulated for fruits and vegetables.
* Water-Soluble Fertilizer: This is for supplemental feeding during the fruiting stage. A balanced fertilizer like 20-20-20 works well.
* Trellis or Support System: Even bush varieties can get quite heavy, so a trellis or support system is essential to keep the vines off the ground and prevent the watermelons from rotting.
* Watering Can or Hose: Consistent watering is crucial for watermelon growth.
* Gardening Gloves: Protect your hands from dirt and potential irritants.
* Trowel or Shovel: For mixing and transferring soil.
* Pruning Shears or Scissors: For trimming and pruning the vines.
* Mulch (Optional): Mulch helps retain moisture, suppress weeds, and regulate soil temperature. Straw, wood chips, or shredded bark are good options.
Step-by-Step Guide: Planting Your Watermelon in a Bag
Now that we have everything we need, let’s get our hands dirty!
1. Prepare the Grow Bags: Unfold your grow bags and place them in a sunny location where they will receive at least 6-8 hours of direct sunlight per day. Watermelons are sun-loving plants, so this is crucial for their growth and fruit production.
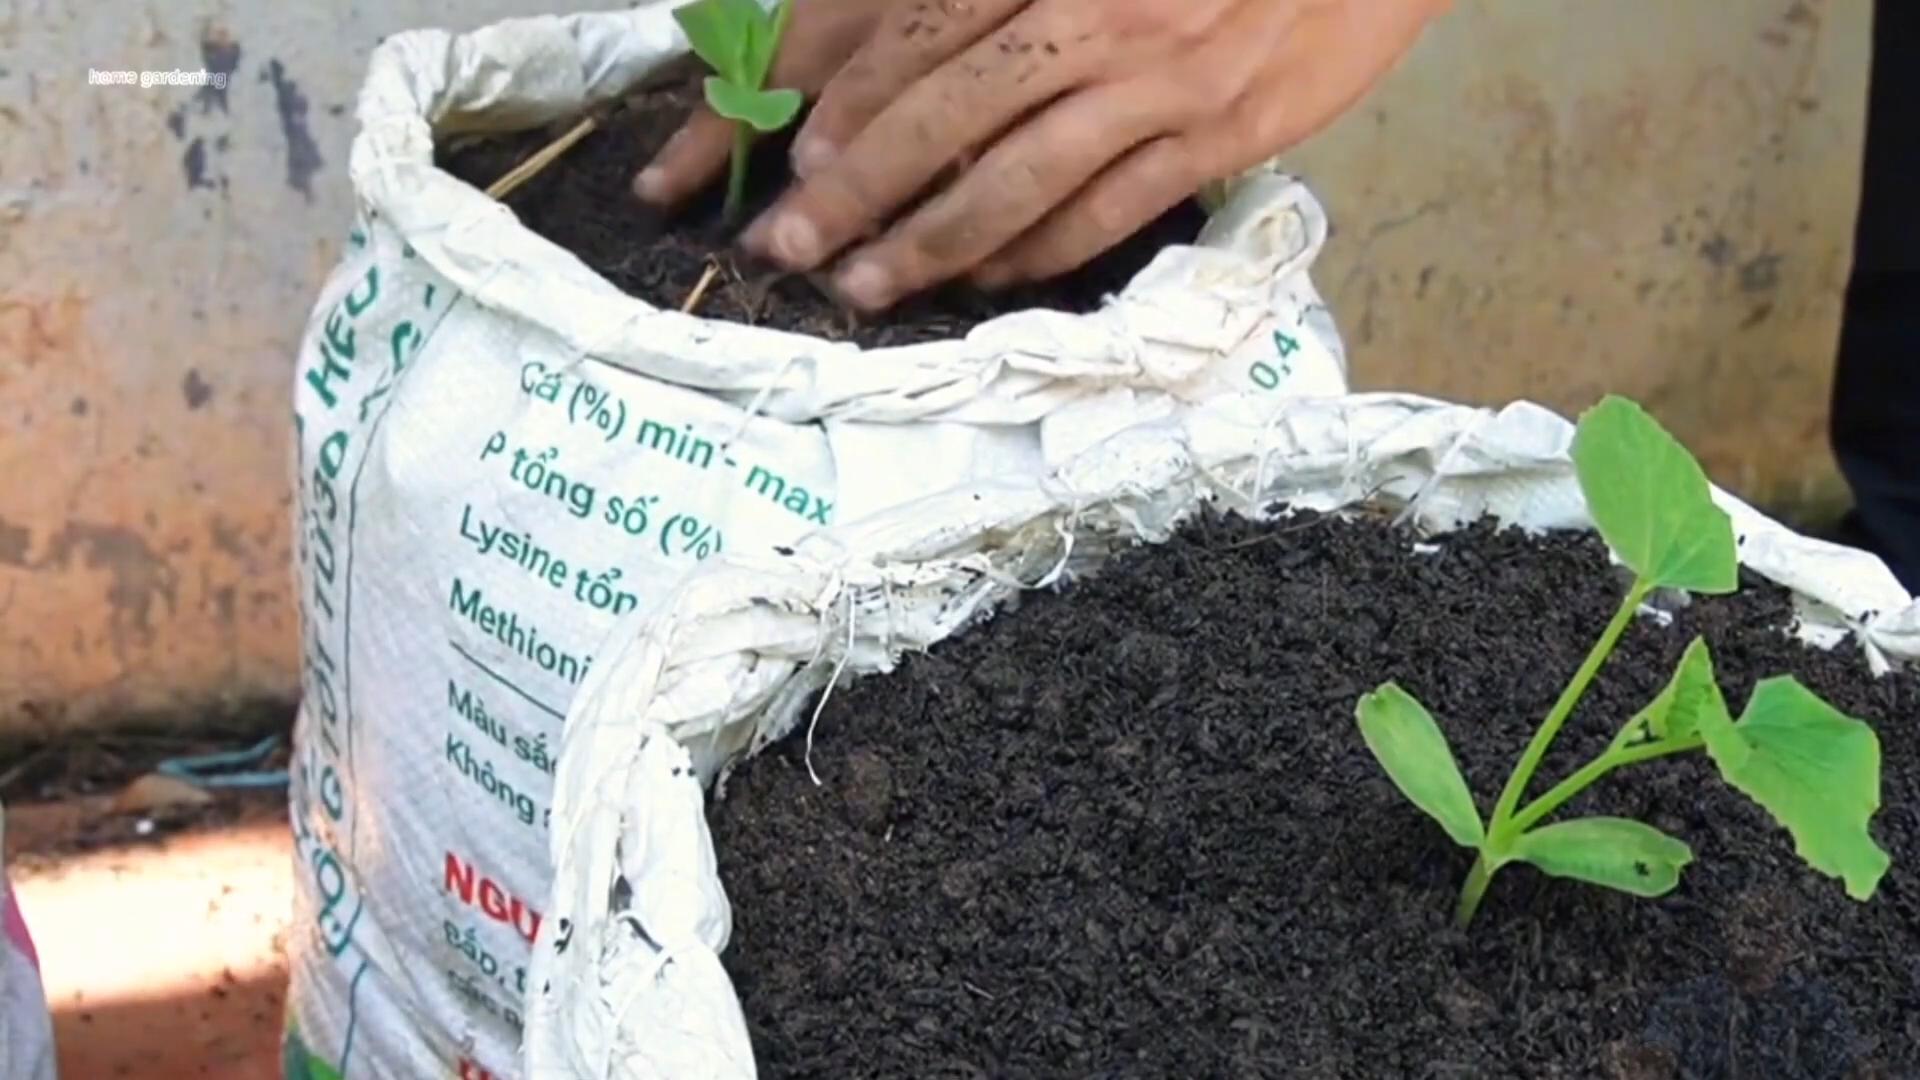
2. Fill the Grow Bags: Fill each grow bag with your high-quality potting mix, leaving about 2-3 inches of space at the top. Gently pat down the soil to remove any air pockets.
3. Plant the Seeds or Seedlings:
* From Seeds: Sow 2-3 watermelon seeds per bag, about 1 inch deep. Space the seeds a few inches apart. Water gently after planting.
* From Seedlings: Carefully remove the seedlings from their containers, gently loosening the roots. Dig a hole in the center of the grow bag that’s large enough to accommodate the root ball. Place the seedling in the hole and backfill with potting mix. Water thoroughly.
4. Water Thoroughly: After planting, water the grow bags thoroughly until water drains out of the bottom. This will help settle the soil and ensure that the roots are well-hydrated.
5. Apply Slow-Release Fertilizer: Sprinkle the slow-release fertilizer evenly over the surface of the soil, following the instructions on the package. Gently mix it into the top inch of soil.
6. Mulch (Optional): Apply a layer of mulch around the base of the plant to help retain moisture and suppress weeds.
7. Install Trellis or Support System: As the watermelon vines grow, they will need support. Install a trellis or other support system near the grow bag. You can use a tomato cage, a wooden trellis, or even a simple stake with twine.
8. Water Regularly: Watermelons need consistent moisture, especially during hot weather. Check the soil moisture regularly and water when the top inch of soil feels dry to the touch. Avoid overwatering, as this can lead to root rot.
9. Thin Seedlings (If Necessary): If you planted multiple seeds per bag, thin the seedlings to one plant per bag once they have developed a few sets of true leaves. Choose the strongest and healthiest seedling and carefully remove the others.
Caring for Your Watermelon Plants: Nurturing Your Crop
Once your watermelon plants are established, it’s important to provide them with the care they need to thrive.
1. Fertilize Regularly: In addition to the slow-release fertilizer, you’ll need to supplement with a water-soluble fertilizer every 2-3 weeks during the fruiting stage. Follow the instructions on the fertilizer package.
2. Prune the Vines: Pruning can help improve air circulation and encourage fruit production. Remove any dead or yellowing leaves. You can also prune the lateral vines to encourage the plant to focus its energy on developing the main fruits.
3. Hand-Pollinate (If Necessary): Watermelons have separate male and female flowers. The female flowers have a small swelling at the base, which will eventually become the watermelon. If you’re not seeing many watermelons developing, you may need to hand-pollinate the flowers. To do this, use a small paintbrush to transfer pollen from the male flowers to the female flowers.
4. Protect from Pests and Diseases: Keep an eye out for common watermelon pests like aphids, squash bugs, and vine borers. You can use insecticidal soap or neem oil to control these pests. Watermelons are also susceptible to diseases like powdery mildew and fusarium wilt. Ensure good air circulation and avoid overwatering to prevent these diseases.
5. Support the Fruits: As the watermelons grow larger, they may need additional support to prevent them from breaking off the vine. You can use slings made from old t-shirts or pantyhose to support the fruits.
6. Monitor Soil Moisture: Even with regular watering, the soil in grow bags can dry out quickly, especially during hot weather. Check the soil moisture daily and water as needed. You can also use a soil moisture meter to get an accurate reading.
7. Rotate the Bags: Every few weeks, rotate the grow bags to ensure that all sides of the plant receive equal sunlight.
Harvesting Your Watermelons: The Sweet Reward
After all your hard work, the moment you’ve been waiting for has finally arrived: harvest time!
1. Check for Ripeness: Watermelons don’t ripen after they’re picked, so it’s important to harvest them at the right time. Here are a few signs that your watermelon is ripe:
* The Tendril Closest to the Fruit is Brown and Dry: This is one of the most reliable indicators of ripeness.
* The Bottom of the Watermelon (Where it Rests on the Ground) is Yellow or Cream-Colored: This is known as the “ground spot.”
* The Watermelon Sounds Hollow When You Tap It: This takes some practice, but a ripe watermelon will have a deep, hollow sound.
* The Skin is Dull and Slightly Waxy: A ripe watermelon will lose its shiny appearance.
2. Harvest Carefully: Use a sharp knife or pruning shears to cut the watermelon from the vine, leaving a few inches of stem attached.
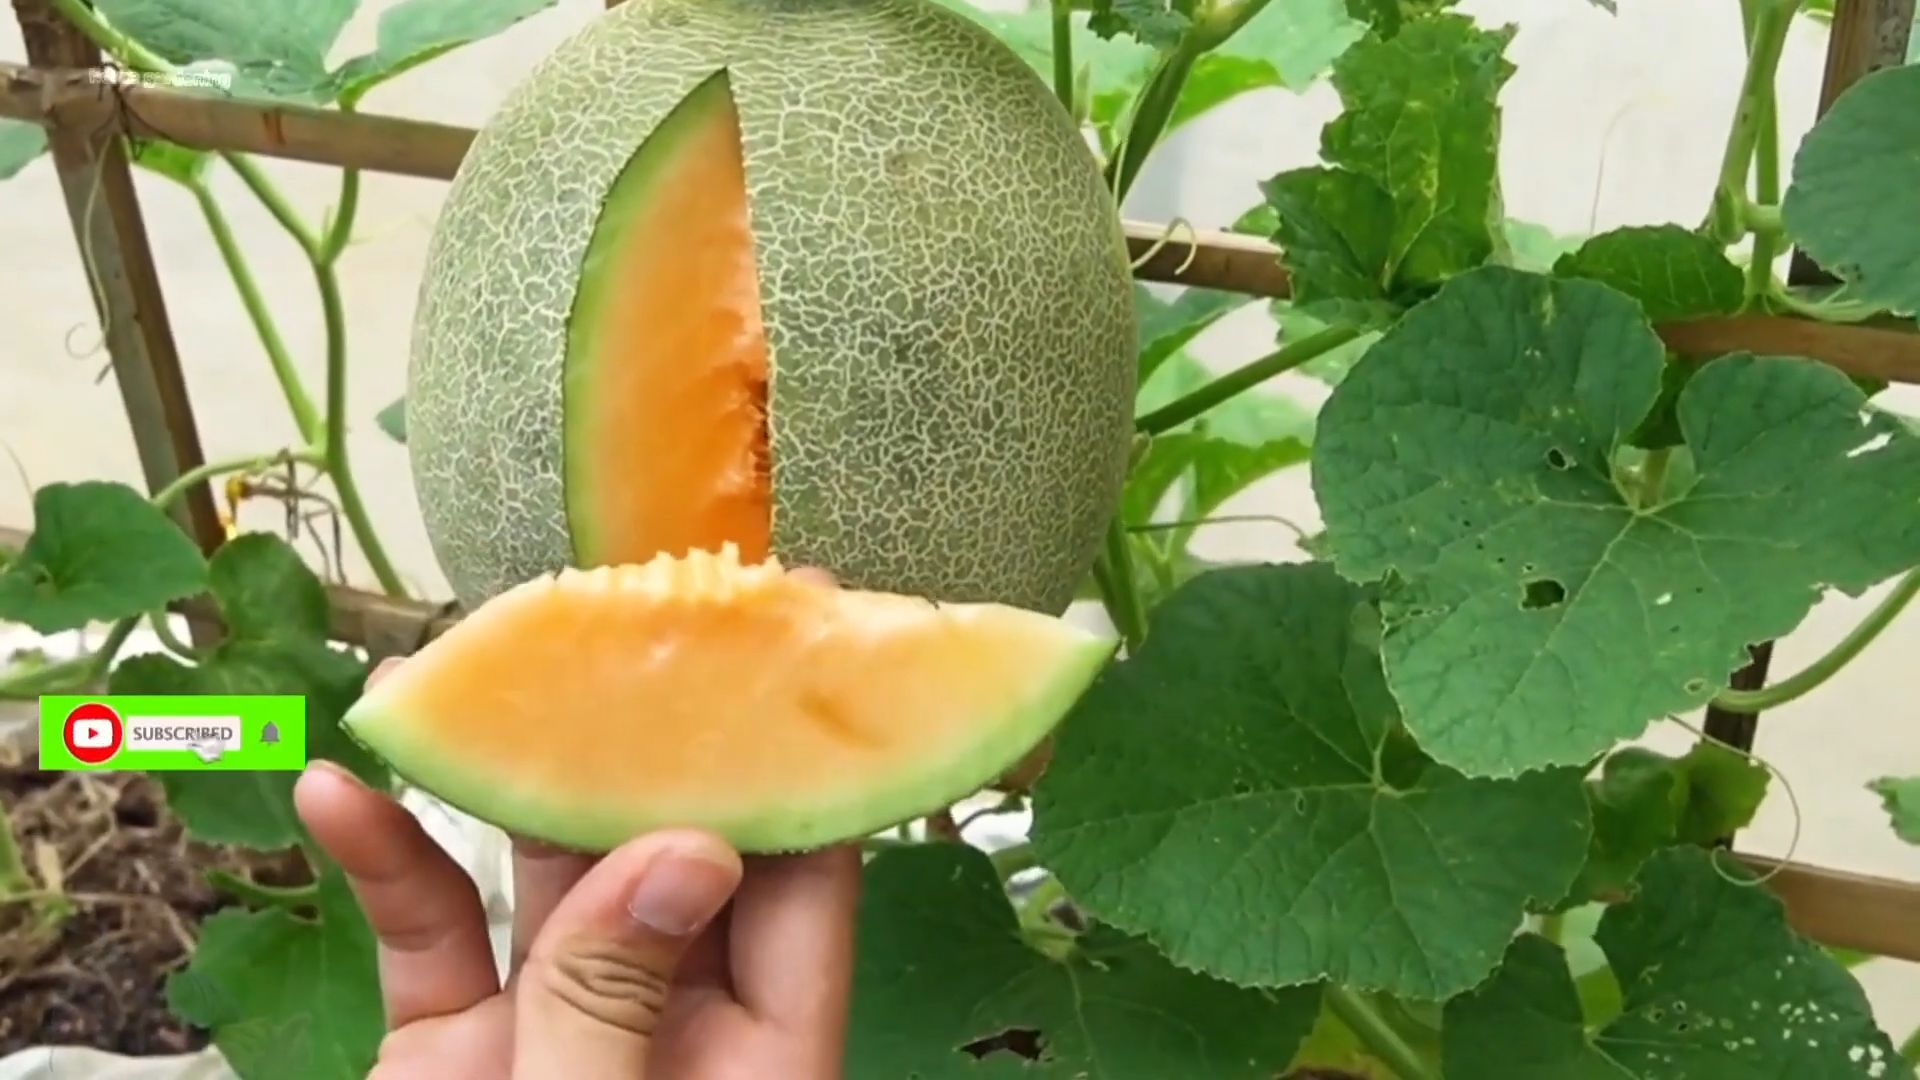
3. Enjoy Your Harvest: Slice open your homegrown watermelon and savor the sweet, juicy flavor!
Troubleshooting: Addressing Common Issues
Even with the best care, you may encounter some challenges along the way. Here are a few common issues and how to address them:
* Yellowing Leaves: This could be a sign of overwatering, underwatering, nutrient deficiency, or disease. Check the soil moisture, fertilize regularly, and inspect the plant for pests and diseases.
* Lack of Fruit Set: This could be due to poor pollination, lack of sunlight, or extreme temperatures. Hand-pollinate the flowers, ensure that the plant is getting enough sunlight, and protect it from extreme temperatures.
* Cracked Watermelons: This is usually caused by inconsistent watering. Water regularly and deeply, especially during hot weather.
* Root
Conclusion
So, there you have it! Growing watermelons in bags isn’t just a quirky gardening experiment; it’s a game-changer for anyone with limited space, challenging soil, or a desire for an earlier harvest. We’ve walked through the process, highlighting the benefits and addressing potential pitfalls. Now, it’s time to take the plunge and experience the joy of nurturing your own juicy watermelons, even if you only have a balcony or a small patio.
The beauty of this method lies in its adaptability. Feel free to experiment with different bag sizes to accommodate various watermelon varieties. Consider using self-watering bags to minimize the need for constant monitoring, especially during hot summer months. You can also try adding a trellis or support system to help the vines climb, maximizing space and improving air circulation. Don’t be afraid to get creative with your soil mix, incorporating compost, aged manure, or other organic amendments to provide your watermelons with the nutrients they need to thrive.
Growing watermelons in bags offers a unique opportunity to control the growing environment, protect your plants from pests and diseases, and enjoy a bountiful harvest of delicious, homegrown fruit. It’s a rewarding experience that connects you with nature and allows you to appreciate the miracle of life.
We’re confident that you’ll find this DIY trick to be a valuable addition to your gardening repertoire. But don’t just take our word for it! We encourage you to try growing watermelons in bags yourself and share your experiences with us. Let us know what varieties you’ve grown, what challenges you’ve faced, and what successes you’ve achieved. Your feedback will help us refine this method and inspire other gardeners to embrace this innovative approach.
Share your photos, tips, and stories in the comments section below. Let’s build a community of watermelon enthusiasts who are passionate about growing their own food, one bag at a time. Happy gardening!
Frequently Asked Questions (FAQs)
What are the main advantages of growing watermelons in bags compared to traditional in-ground planting?
Growing watermelons in bags offers several key advantages. First, it’s ideal for gardeners with limited space, such as those living in apartments or with small yards. Bags can be placed on balconies, patios, or decks, allowing you to grow watermelons even without a traditional garden. Second, it provides better control over the soil quality. You can create a custom soil mix that’s perfectly suited for watermelons, ensuring they receive the nutrients they need. Third, it can help protect your plants from soilborne diseases and pests. By isolating the roots in a bag, you reduce the risk of contamination. Finally, growing in bags can lead to an earlier harvest, as the soil in the bags warms up faster than the ground, promoting faster growth.
What size bag is best for growing watermelons?
The ideal bag size depends on the watermelon variety you plan to grow. For smaller, personal-sized watermelons like Sugar Baby or Bush Sugar Baby, a 15-20 gallon bag should suffice. For larger varieties like Crimson Sweet or Jubilee, you’ll need a larger bag, ideally 25-30 gallons or even larger. The key is to provide enough space for the roots to develop properly. A larger bag also holds more moisture, reducing the frequency of watering. Always err on the side of a larger bag if you’re unsure.
What type of soil mix should I use for growing watermelons in bags?
Watermelons need well-draining soil that’s rich in organic matter. A good soil mix would be a combination of equal parts of:
* Potting mix: Provides good drainage and aeration.
* Compost: Adds nutrients and improves soil structure.
* Peat moss or coco coir: Helps retain moisture.
You can also add a slow-release fertilizer to the mix to provide a steady supply of nutrients throughout the growing season. Avoid using garden soil directly in the bags, as it can become compacted and doesn’t drain well.
How often should I water watermelons grown in bags?
Watermelons are heavy drinkers, especially when they’re fruiting. You’ll need to water them regularly, especially during hot, dry weather. Check the soil moisture daily by sticking your finger into the soil. If the top inch feels dry, it’s time to water. Water deeply, until the water drains out of the bottom of the bag. Avoid overwatering, as this can lead to root rot. The frequency of watering will depend on the weather, the size of the bag, and the size of the plant.
Do watermelons grown in bags need fertilizer?
Yes, watermelons are heavy feeders and require regular fertilization. Start with a balanced fertilizer (e.g., 10-10-10) when planting. Once the plants start to flower, switch to a fertilizer that’s higher in phosphorus and potassium (e.g., 5-10-10) to promote fruit development. Fertilize every 2-3 weeks, following the instructions on the fertilizer label. You can also supplement with organic fertilizers like compost tea or fish emulsion.
How do I support the watermelon vines in bags?
Watermelon vines can get quite long and heavy, so it’s important to provide them with support. You can use a trellis, stakes, or even a tomato cage. Train the vines to climb the support structure as they grow. This will help keep the fruit off the ground, improving air circulation and reducing the risk of rot. For larger watermelons, you may need to provide additional support for the fruit itself, such as a sling made from netting or fabric.
How do I know when my watermelons are ripe?
There are several indicators that a watermelon is ripe:
* The tendril closest to the fruit will turn brown and dry.
* The spot where the watermelon rests on the ground (the “ground spot”) will turn from white to yellow.
* The watermelon will sound hollow when you thump it.
* The skin will become dull and less shiny.
It takes practice to learn to identify ripe watermelons, so don’t be discouraged if you don’t get it right the first time.
Can I grow different varieties of watermelons in bags?
Yes, you can grow different varieties of watermelons in bags. Consider the size of the mature fruit when choosing your varieties, and select bag sizes accordingly. Smaller, personal-sized watermelons are generally easier to grow in bags than larger varieties.
What are some common pests and diseases that affect watermelons grown in bags?
Common pests that can affect watermelons include aphids, squash bugs, and vine borers. Common diseases include powdery mildew, fusarium wilt, and anthracnose. Inspect your plants regularly for signs of pests or diseases, and take action promptly if you notice any problems. You can use organic pest control methods like insecticidal soap or neem oil to control pests. For diseases, ensure good air circulation and avoid overwatering.
What if my watermelon plant isn’t producing fruit?
There are several reasons why your watermelon plant might not be producing fruit. It could be due to poor pollination, lack of nutrients, or stress from heat or drought. Ensure that your plants are receiving adequate sunlight, water, and fertilizer. You can also hand-pollinate the flowers to improve fruit set. To hand-pollinate, use a small paintbrush to transfer pollen from the male flowers to the female flowers. Female flowers have a small swelling at the base of the flower, which will eventually become the watermelon.

Leave a Comment