
Quick lime cleaning tips are your secret weapon for a sparkling home, and I’m so excited to share them with you! Forget harsh chemicals and endless scrubbing – we’re going back to basics with a natural, effective, and surprisingly versatile cleaning agent.
Quick lime, also known as calcium oxide, has a fascinating history. For centuries, it’s been used in construction, agriculture, and even sanitation. Think ancient civilizations using it to build structures that still stand today! While its applications are broad, its cleaning power is often overlooked in modern households. But trust me, once you discover the magic of quick lime, you’ll wonder how you ever lived without it.
Why do you need these quick lime cleaning tips? Because life’s too short to spend hours battling stubborn stains and grime! We all want a clean and healthy home, but not at the expense of our time and well-being. Quick lime offers a powerful, eco-friendly alternative to commercial cleaners, saving you money and reducing your exposure to harmful chemicals. Plus, it’s incredibly satisfying to see the amazing results firsthand. So, let’s dive in and unlock the cleaning potential of this incredible natural resource!
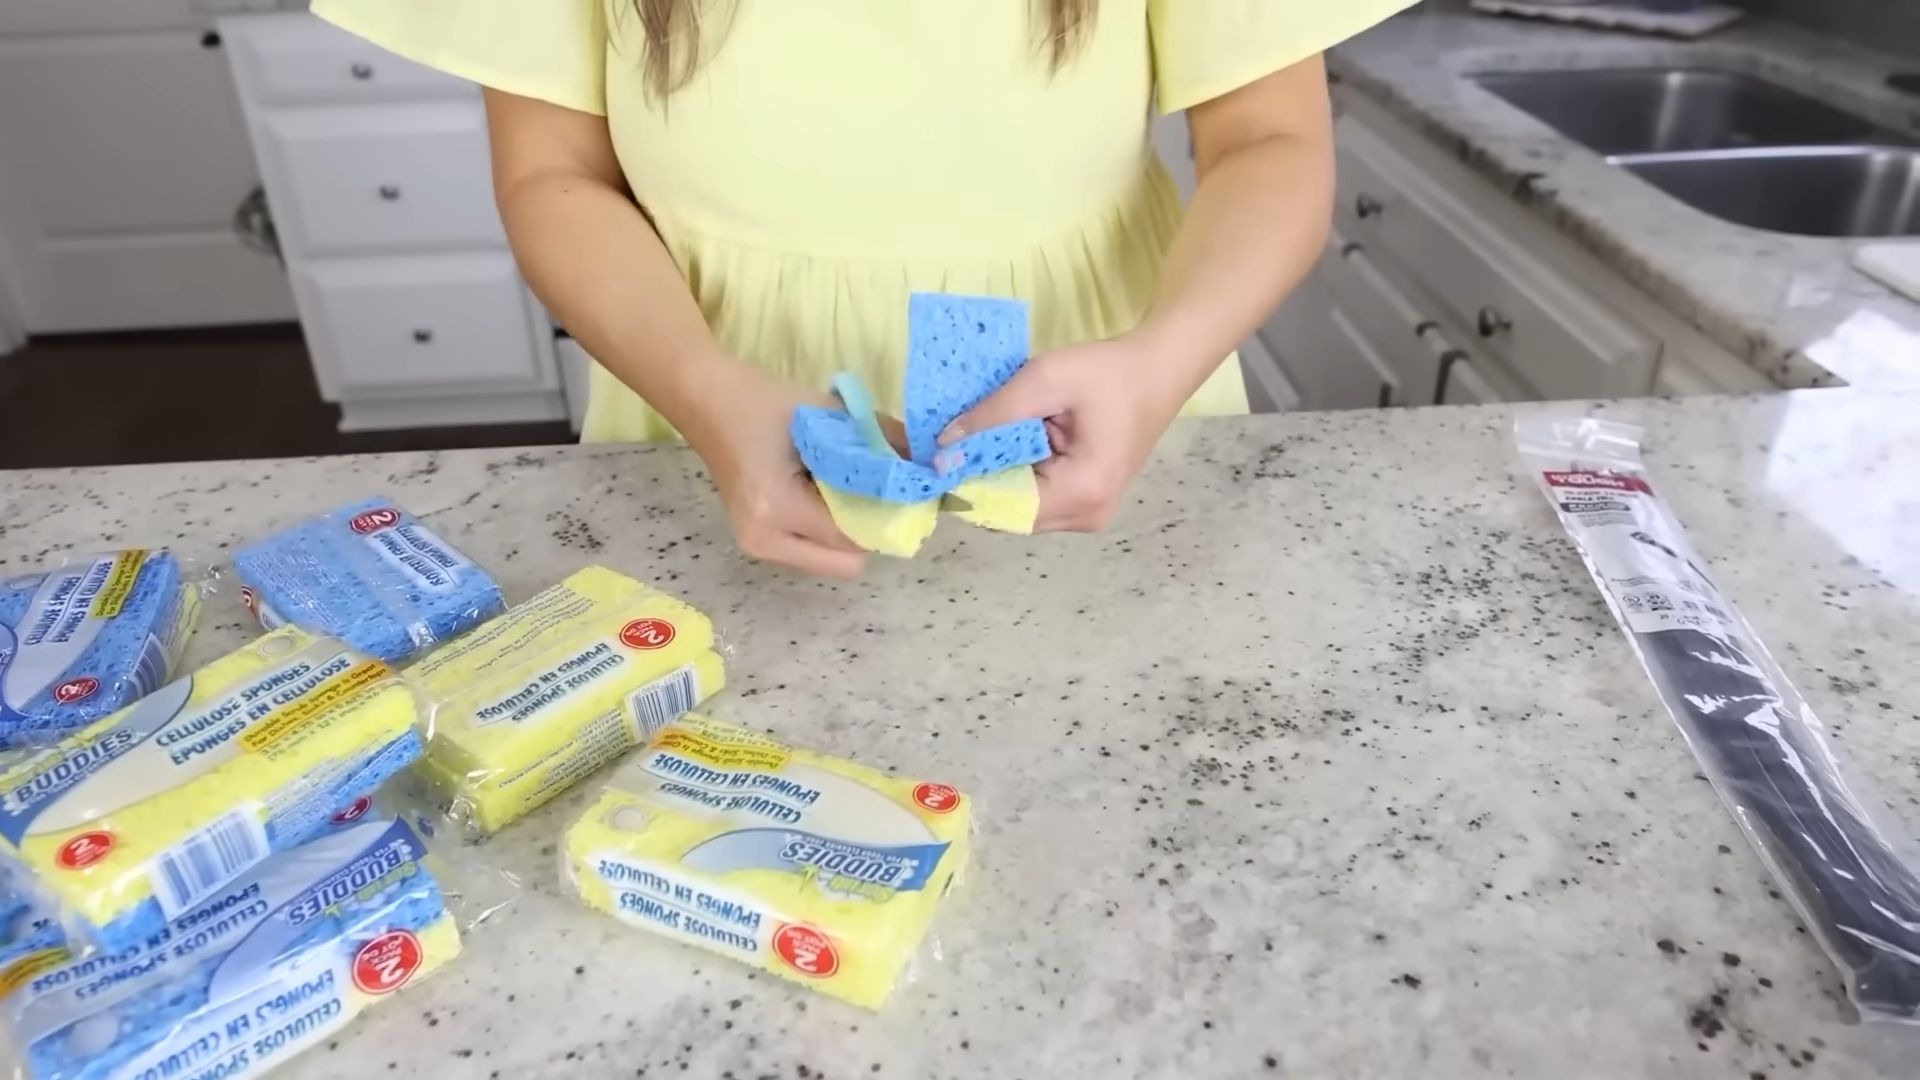
Revive Your Cleaning Game: Amazing Sponge Hacks You Need to Know!
Hey there, fellow cleaning enthusiasts! Are you tired of constantly tossing out sponges that seem to get grimy and gross way too quickly? I know I was! That’s why I’ve been experimenting with some awesome sponge hacks to extend their lifespan, boost their cleaning power, and even repurpose them in creative ways. Get ready to revolutionize your cleaning routine with these simple yet effective tricks!
Sanitizing and Deodorizing Your Sponges
Let’s face it, sponges are bacteria magnets. But don’t worry, you don’t have to throw them away after just a few uses. Here are a few ways to keep them fresh and clean:
* Microwave Method: This is my go-to for a quick and easy sanitization.
* Bleach Solution: A classic for a reason – it’s super effective.
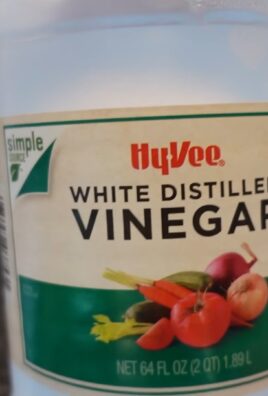
* Vinegar Soak: A natural and gentler alternative.
Microwaving Your Sponge: A Quick Clean
1. Wet the Sponge Thoroughly: Make sure your sponge is completely saturated with water. This is crucial! A dry sponge can catch fire in the microwave (yikes!).
2. Place in Microwave: Put the wet sponge in the microwave. I usually place it on a microwave-safe plate just in case.
3. Microwave for 2 Minutes: Set the microwave for 2 minutes on high.
4. Let it Cool: Carefully remove the sponge (it will be HOT!) and let it cool down before using. I usually use tongs to avoid burning myself.
5. Squeeze Out Excess Water: Once it’s cool enough to handle, squeeze out the excess water. Your sponge is now sanitized and ready to go!
Bleach Solution: The Powerhouse Clean
1. Prepare the Solution: In a clean container (like a bowl or sink), mix 3/4 cup of bleach with one gallon of water. Always add bleach to water, never the other way around, to avoid dangerous fumes.
2. Soak the Sponge: Submerge the sponge completely in the bleach solution.
3. Soak for 5 Minutes: Let the sponge soak for at least 5 minutes to kill bacteria.
4. Rinse Thoroughly: Rinse the sponge extremely well under running water until all traces of bleach are gone. This is super important to avoid contaminating surfaces you clean later.
5. Squeeze Out Excess Water: Squeeze out the excess water and let the sponge air dry.
Vinegar Soak: The Natural Option
1. Prepare the Vinegar Solution: Fill a bowl or container with undiluted white vinegar.
2. Soak the Sponge: Submerge the sponge completely in the vinegar.
3. Soak for 1 Hour: Let the sponge soak for at least an hour to allow the vinegar to work its magic.
4. Rinse Thoroughly: Rinse the sponge thoroughly under running water.
5. Squeeze Out Excess Water: Squeeze out the excess water and let the sponge air dry. The vinegar smell will dissipate as it dries.
Extending the Life of Your Sponges
Want to make your sponges last longer? Here are some tips and tricks I’ve found helpful:
* Rinse After Every Use: This seems obvious, but it’s crucial!
* Air Dry Properly: Don’t leave your sponge sitting in a puddle of water.
* Alternate Sponges: Give your sponges a break!
Rinsing After Every Use: The Golden Rule
1. Rinse Under Hot Water: After each use, rinse your sponge thoroughly under hot running water.
2. Squeeze Out Food Particles: Make sure to squeeze out any food particles or debris that may be trapped inside.
3. Repeat Until Clean: Keep rinsing and squeezing until the water runs clear.
Air Drying Properly: Preventing Mold and Mildew
1. Squeeze Out Excess Water: After rinsing, squeeze out as much water as possible.
2. Store in a Well-Ventilated Area: Place the sponge in a well-ventilated area where it can air dry completely. I like to use a sponge holder that allows for air circulation. Avoid leaving it in the bottom of the sink or in a closed container.
3. Consider a Sponge Holder: A sponge holder with good drainage is a great investment.
Alternating Sponges: Giving Them a Break
1. Have Multiple Sponges: Keep at least two sponges on hand.
2. Rotate Daily: Use one sponge one day and the other sponge the next day. This allows each sponge to dry completely between uses, which helps prevent bacteria growth and extends its lifespan.
3. Sanitize Regularly: Remember to sanitize both sponges regularly using one of the methods described above.
Repurposing Old Sponges: Creative Uses Beyond Cleaning
Don’t just toss those old sponges! Here are some creative ways to repurpose them:
* Plant Watering: A clever way to keep your plants hydrated.
* Packing Material: Protect fragile items during a move.
* Craft Projects: Unleash your inner artist!
Plant Watering: Keeping Your Plants Happy
1. Cut the Sponge: Cut the sponge into smaller pieces, depending on the size of your plant pots.
2. Place in the Bottom of the Pot: When repotting a plant, place a piece of sponge in the bottom of the pot before adding soil.
3. Water as Usual: Water your plant as usual. The sponge will absorb excess water and release it slowly, helping to keep the soil moist and prevent overwatering.
Packing Material: Protecting Fragile Items
1. Cut to Size: Cut the sponges into pieces that fit snugly around the fragile items you want to protect.
2. Wrap and Secure: Wrap the sponges around the items and secure them with tape or rubber bands.
3. Pack Carefully: Pack the wrapped items carefully in a box, making sure they are well-cushioned.
Craft Projects: Unleashing Your Inner Artist
1. Sponge Painting: Cut the sponge into different shapes and use it to create unique textures and patterns on paper or fabric. This is a great activity for kids!
2. Stamping: Use the sponge to create stamps for various craft projects. You can carve designs into the sponge or simply use it to apply paint or ink to a surface.
3. Cleaning Paintbrushes: Use an old sponge to clean your paintbrushes. Simply wet the sponge and use it to wipe off excess paint.
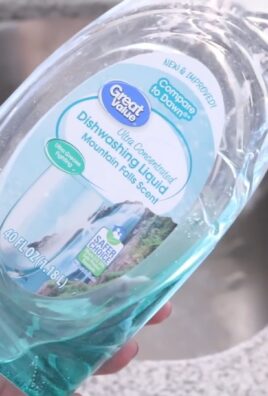
DIY Sponge Soap Dispenser
This is one of my favorite hacks! It’s so simple and makes doing dishes so much easier.
* Materials Needed: A clean sponge, a dish soap bottle (or any container with a pump), and a knife or scissors.
* Instructions:
1. Cut a Slit in the Sponge: Make a slit in the middle of the sponge, wide enough to fit the pump nozzle of your dish soap bottle. Be careful not to cut all the way through the sponge.
2. Insert the Pump Nozzle: Insert the pump nozzle of the dish soap bottle into the slit you created in the sponge.
3. Fill with Soap: Fill the dish soap bottle with your favorite dish soap.
4. Test the Dispenser: Press down on the sponge to dispense soap. If it doesn’t work, you may need to adjust the size of the slit.
5. Use and Enjoy: Now you have a convenient sponge soap dispenser! Simply press down on the sponge to dispense soap directly onto your dishes.
DIY Scrubbing Sponges with Baking Soda
Need extra scrubbing power? This is the hack for you!
* Materials Needed: Sponges, baking soda, water.
* Instructions:
1. Wet the Sponge: Thoroughly wet the sponge with water.
2. Sprinkle with Baking Soda: Generously sprinkle baking soda onto the wet sponge.
3. Rub Together: Rub the sponge against itself to distribute the baking soda evenly.
4. Scrub Away: Use the sponge to scrub away stubborn stains and grime. The baking soda will act as a gentle abrasive, helping to lift dirt and grease.
5. Rinse Thoroughly: Rinse the surface you’ve cleaned with water to remove any remaining baking soda residue.
DIY Scented Sponges
Add a little aromatherapy to your cleaning routine!
* Materials Needed: Sponges, essential oils (like lemon, lavender, or tea tree), water.
* Instructions:
1. Wet the Sponge: Thoroughly wet the sponge with water

Conclusion
So, there you have it! This simple yet incredibly effective DIY trick using quick lime for cleaning is a game-changer. Forget spending a fortune on harsh chemical cleaners that often leave behind unpleasant odors and potential health hazards. This method is not only budget-friendly but also harnesses the natural power of quick lime to deliver exceptional results. The versatility of this cleaning solution is truly remarkable. From tackling stubborn grime in your bathroom to revitalizing your outdoor spaces, quick lime offers a powerful and eco-conscious alternative.
Why is this a must-try? Because it works! It’s a cost-effective, environmentally responsible, and surprisingly simple way to achieve a level of cleanliness you might not have thought possible. The satisfaction of seeing years of built-up dirt and grime disappear before your eyes is truly rewarding. Plus, you’ll be reducing your reliance on potentially harmful chemicals, contributing to a healthier home and planet.
Looking for variations? Consider adding a few drops of your favorite essential oil to the quick lime solution for a pleasant fragrance. Lavender, lemon, or tea tree oil are excellent choices, offering not only a delightful scent but also additional antibacterial properties. For particularly stubborn stains, create a paste by mixing quick lime with a smaller amount of water and applying it directly to the affected area. Let it sit for a few minutes before scrubbing gently. Remember to always test in an inconspicuous area first to ensure it doesn’t damage the surface.
Another variation involves using hydrated lime (also known as slaked lime) instead of quick lime. Hydrated lime is less caustic and therefore safer to handle. While it might not be as potent as quick lime, it still offers excellent cleaning power, especially for less demanding tasks. You can find hydrated lime at most garden centers or hardware stores.
We are confident that once you try this DIY quick lime cleaning trick, you’ll be amazed by the results. It’s a simple, effective, and environmentally friendly way to keep your home sparkling clean.
Don’t just take our word for it! We encourage you to give this method a try and share your experiences with us. Let us know what surfaces you cleaned, what variations you experimented with, and what results you achieved. Your feedback will not only help us refine this guide but also inspire others to embrace the power of natural cleaning solutions. Share your before-and-after photos and cleaning tips in the comments section below. We can’t wait to hear from you!
Frequently Asked Questions (FAQs)
What exactly is quick lime, and where can I buy it?
Quick lime, also known as calcium oxide (CaO), is a chemical compound produced by heating limestone. It’s a white, caustic, alkaline substance that reacts vigorously with water. You can typically find quick lime at building supply stores, agricultural supply stores, or online retailers that specialize in construction or gardening materials. When purchasing, ensure you are buying pure quick lime and not a product mixed with other additives. Always read the product label carefully.
Is quick lime safe to use for cleaning? What precautions should I take?
Quick lime is a powerful cleaning agent, but it is also caustic and can cause burns if not handled properly. Safety is paramount when working with quick lime. Always wear appropriate personal protective equipment (PPE), including gloves, eye protection (goggles or a face shield), and a long-sleeved shirt and pants to protect your skin. Work in a well-ventilated area to avoid inhaling any dust or fumes. When mixing quick lime with water, always add the quick lime to the water slowly, stirring constantly. Never add water to quick lime, as this can cause a violent reaction. Keep quick lime and the cleaning solution out of reach of children and pets. If quick lime comes into contact with your skin or eyes, rinse immediately with plenty of water and seek medical attention.
What surfaces can I safely clean with quick lime?
Quick lime is effective on a variety of surfaces, including concrete, brick, tile, and grout. It’s particularly useful for removing stubborn stains, mildew, and algae. However, it’s crucial to exercise caution and test the solution in an inconspicuous area before applying it to the entire surface. Avoid using quick lime on delicate surfaces such as painted walls, wood, aluminum, or polished stone, as it can cause damage or discoloration. Always rinse the cleaned surface thoroughly with water after applying the quick lime solution.
How do I dispose of the quick lime cleaning solution safely?
The used quick lime cleaning solution should be neutralized before disposal. You can neutralize it by adding a mild acid, such as vinegar or lemon juice, to the solution until the pH is neutral (around 7). You can use pH test strips to check the pH level. Once neutralized, the solution can be safely poured down the drain with plenty of water. Solid quick lime waste should be disposed of according to local regulations. Contact your local waste management authority for specific guidelines.
Can I use quick lime to clean my toilet?
While quick lime can be effective for cleaning toilets, it’s essential to proceed with caution. The strong alkaline nature of quick lime can damage the porcelain if used improperly. It’s best to use a diluted solution and avoid prolonged contact with the toilet bowl. Always flush the toilet thoroughly after cleaning to remove any residue. Consider using alternative, less harsh cleaning methods for your toilet if you are concerned about potential damage.
How often can I use quick lime for cleaning?
The frequency of using quick lime for cleaning depends on the surface and the level of grime. For heavily soiled areas, you may need to use it more frequently. However, it’s generally recommended to avoid overuse, as the strong alkaline nature of quick lime can potentially damage surfaces over time. Monitor the condition of the cleaned surfaces and adjust the frequency accordingly.
What is the difference between quick lime and hydrated lime? Which one should I use?
Quick lime (calcium oxide) is the raw form of lime produced by heating limestone. Hydrated lime (calcium hydroxide), also known as slaked lime, is produced by adding water to quick lime. Hydrated lime is less caustic and therefore safer to handle. While quick lime is more potent and effective for heavy-duty cleaning, hydrated lime can be a suitable alternative for less demanding tasks or when safety is a primary concern. If you are unsure which one to use, start with hydrated lime and assess its effectiveness before considering quick lime.
Can I use quick lime to clean mold?
Yes, quick lime can be effective in killing mold and preventing its regrowth due to its high pH. However, it’s important to address the underlying cause of the mold, such as moisture problems, to prevent it from returning. After cleaning with quick lime, ensure the area is properly ventilated and dry. For severe mold infestations, it’s best to consult with a professional mold remediation service.
Does quick lime have an expiration date?
Quick lime can absorb moisture from the air, which can reduce its effectiveness over time. Store quick lime in a tightly sealed container in a cool, dry place to prolong its shelf life. While it doesn’t technically have an expiration date, it’s best to use it within a reasonable timeframe (e.g., within a year of purchase) to ensure optimal performance. If the quick lime has become clumpy or hardened, it may have absorbed too much moisture and may not be as effective.

Leave a Comment