
Sponge cleaning hacks – who knew such simple household items could be the key to unlocking a sparkling clean home with minimal effort? For generations, sponges have been our go-to for tackling dishes and wiping down surfaces. Think about your grandmother, diligently scrubbing away with her trusty sponge – it’s a cleaning ritual passed down through time! But let’s be honest, sometimes it feels like we’re just moving the mess around, right?
That’s where these ingenious DIY sponge cleaning hacks come in! I’m going to share some game-changing tips and tricks that will not only extend the life of your sponges but also make your cleaning routine faster, more effective, and even a little bit fun. We all want a clean and healthy home, but who has the time to spend hours scrubbing? These hacks are designed to save you time, money, and elbow grease.
From sanitizing your sponges in the microwave to using them in unexpected ways around the house, you’ll be amazed at the versatility of these humble cleaning tools. Get ready to transform your cleaning game with these simple yet powerful sponge cleaning hacks – you’ll wonder how you ever lived without them!
DIY Sponge Cleaning Hacks: Extend the Life of Your Kitchen Companion!
Hey there, fellow DIY enthusiasts! Let’s face it, sponges are the unsung heroes of our kitchens. They tackle everything from greasy pans to sticky countertops. But, because they work so hard, they can quickly become breeding grounds for bacteria and, well, just plain gross. Instead of constantly tossing them out, I’m going to share some amazing DIY sponge cleaning hacks that will not only sanitize them but also extend their lifespan. Get ready to save some money and reduce waste!
Hack 1: The Microwave Sanitization Method
This is probably the quickest and easiest way to give your sponge a good clean. It uses the power of microwave radiation to kill off most of the nasty bacteria lurking within.
What You’ll Need:
* Your dirty sponge
* Water
* Microwave-safe bowl or plate
Step-by-Step Instructions:
1. Rinse the Sponge Thoroughly: Start by rinsing your sponge under running water to remove any loose food particles or debris. Squeeze out as much excess water as possible.
2. Soak the Sponge: Place the damp sponge in a microwave-safe bowl or on a plate. Add enough water to completely submerge the sponge. The water helps to distribute the heat evenly and prevent the sponge from drying out and potentially catching fire.
3. Microwave on High: Microwave the sponge on high power for 2 minutes. This is usually sufficient to kill most bacteria. However, if your microwave is less powerful, you might need to increase the time to 3 minutes. Be careful when removing the bowl from the microwave, as it will be very hot!
4. Let it Cool: Allow the bowl and sponge to cool down for a few minutes before handling them. The water will be extremely hot, and you don’t want to burn yourself.
5. Squeeze and Rinse: Once the sponge is cool enough to handle, carefully squeeze out the excess water. Rinse it thoroughly under running water to remove any lingering dead bacteria or debris.
6. Air Dry: Allow the sponge to air dry completely. This helps to prevent the growth of new bacteria. You can place it on a sponge holder or in a well-ventilated area.
Important Considerations:
* Never microwave a dry sponge! This is a fire hazard. Always make sure the sponge is thoroughly soaked in water.
* Avoid microwaving sponges with metal scrubbers or components. Metal can spark and damage your microwave.
* The microwave method is effective for sanitizing sponges, but it won’t remove stubborn stains or odors. For those, you’ll need to try other methods.
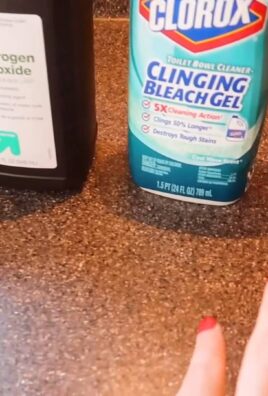
Hack 2: The Bleach Solution Soak
Bleach is a powerful disinfectant, and a diluted bleach solution can effectively kill bacteria and remove stains from your sponges. However, it’s important to use bleach safely and responsibly.
What You’ll Need:
* Your dirty sponge
* Bleach (unscented)
* Water
* Bowl or sink
Step-by-Step Instructions:
1. Rinse the Sponge: As with the microwave method, start by rinsing your sponge under running water to remove any loose debris.
2. Prepare the Bleach Solution: In a bowl or sink, mix 3/4 cup of bleach with one gallon of cold water. It’s crucial to use the correct ratio of bleach to water to avoid damaging the sponge or creating harmful fumes.
3. Soak the Sponge: Submerge the sponge completely in the bleach solution. Make sure it’s fully saturated.
4. Let it Soak: Allow the sponge to soak in the bleach solution for 5 minutes. This is enough time for the bleach to kill most bacteria and loosen stains. Don’t soak it for longer than 10 minutes, as this can damage the sponge.
5. Rinse Thoroughly: After soaking, rinse the sponge extremely thoroughly under running water. Make sure to remove all traces of bleach. Bleach residue can be harmful if ingested or if it comes into contact with your skin.
6. Squeeze and Air Dry: Squeeze out the excess water and allow the sponge to air dry completely.
Important Considerations:
* Always use unscented bleach. Scented bleach can contain additives that can be harmful or leave a residue on your sponge.
* Wear gloves when handling bleach. Bleach can irritate your skin.
* Never mix bleach with ammonia or other cleaning products. This can create toxic fumes.
* Ensure proper ventilation when using bleach. Open a window or turn on a fan to avoid inhaling fumes.
* This method may fade colored sponges.
Hack 3: The Vinegar Soak
Vinegar is a natural disinfectant and deodorizer. It’s a great alternative to bleach for those who prefer a more eco-friendly cleaning solution.
What You’ll Need:
* Your dirty sponge
* White vinegar
* Water
* Bowl or sink
Step-by-Step Instructions:
1. Rinse the Sponge: Rinse your sponge under running water to remove any loose debris.
2. Prepare the Vinegar Solution: In a bowl or sink, mix equal parts white vinegar and water. You can adjust the amount depending on the size of your sponge and container.
3. Soak the Sponge: Submerge the sponge completely in the vinegar solution.
4. Let it Soak: Allow the sponge to soak in the vinegar solution for at least one hour, or even overnight for heavily soiled sponges. The longer it soaks, the more effective the vinegar will be at killing bacteria and removing odors.
5. Rinse Thoroughly: After soaking, rinse the sponge thoroughly under running water. The vinegar smell will dissipate as it dries.
6. Squeeze and Air Dry: Squeeze out the excess water and allow the sponge to air dry completely.
Important Considerations:
* Vinegar is a milder disinfectant than bleach, so it may not be as effective at killing all types of bacteria. However, it’s still a good option for regular cleaning and deodorizing.
* The vinegar smell may be strong at first, but it will fade as the sponge dries.
Hey there, fellow DIY enthusiasts! Let’s face it, sponges are the unsung heroes of our kitchens. They tackle everything from greasy pans to sticky countertops. But, because they work so hard, they can quickly become breeding grounds for bacteria and, well, just plain gross. Instead of constantly tossing them out, I’m going to share some amazing DIY sponge cleaning hacks that will not only sanitize them but also extend their lifespan. Get ready to save some money and reduce waste!
Hack 1: The Microwave Sanitization Method
This is probably the quickest and easiest way to give your sponge a good clean. It uses the power of microwave radiation to kill off most of the nasty bacteria lurking within.
What You’ll Need:
* Your dirty sponge
* Water
* Microwave-safe bowl or plate
Step-by-Step Instructions:
1. Rinse the Sponge Thoroughly: Start by rinsing your sponge under running water to remove any loose food particles or debris. Squeeze out as much excess water as possible.
2. Soak the Sponge: Place the damp sponge in a microwave-safe bowl or on a plate. Add enough water to completely submerge the sponge. The water helps to distribute the heat evenly and prevent the sponge from drying out and potentially catching fire.
3. Microwave on High: Microwave the sponge on high power for 2 minutes. This is usually sufficient to kill most bacteria. However, if your microwave is less powerful, you might need to increase the time to 3 minutes. Be careful when removing the bowl from the microwave, as it will be very hot!
4. Let it Cool: Allow the bowl and sponge to cool down for a few minutes before handling them. The water will be extremely hot, and you don’t want to burn yourself.
5. Squeeze and Rinse: Once the sponge is cool enough to handle, carefully squeeze out the excess water. Rinse it thoroughly under running water to remove any lingering dead bacteria or debris.
6. Air Dry: Allow the sponge to air dry completely. This helps to prevent the growth of new bacteria. You can place it on a sponge holder or in a well-ventilated area.
Important Considerations:
* Never microwave a dry sponge! This is a fire hazard. Always make sure the sponge is thoroughly soaked in water.
* Avoid microwaving sponges with metal scrubbers or components. Metal can spark and damage your microwave.
* The microwave method is effective for sanitizing sponges, but it won’t remove stubborn stains or odors. For those, you’ll need to try other methods.
Hack 2: The Bleach Solution Soak
Bleach is a powerful disinfectant, and a diluted bleach solution can effectively kill bacteria and remove stains from your sponges. However, it’s important to use bleach safely and responsibly.
What You’ll Need:
* Your dirty sponge
* Bleach (unscented)
* Water
* Bowl or sink
Step-by-Step Instructions:
1. Rinse the Sponge: As with the microwave method, start by rinsing your sponge under running water to remove any loose debris.
2. Prepare the Bleach Solution: In a bowl or sink, mix 3/4 cup of bleach with one gallon of cold water. It’s crucial to use the correct ratio of bleach to water to avoid damaging the sponge or creating harmful fumes.
3. Soak the Sponge: Submerge the sponge completely in the bleach solution. Make sure it’s fully saturated.
4. Let it Soak: Allow the sponge to soak in the bleach solution for 5 minutes. This is enough time for the bleach to kill most bacteria and loosen stains. Don’t soak it for longer than 10 minutes, as this can damage the sponge.
5. Rinse Thoroughly: After soaking, rinse the sponge extremely thoroughly under running water. Make sure to remove all traces of bleach. Bleach residue can be harmful if ingested or if it comes into contact with your skin.
6. Squeeze and Air Dry: Squeeze out the excess water and allow the sponge to air dry completely.
Important Considerations:
* Always use unscented bleach. Scented bleach can contain additives that can be harmful or leave a residue on your sponge.
* Wear gloves when handling bleach. Bleach can irritate your skin.
* Never mix bleach with ammonia or other cleaning products. This can create toxic fumes.
* Ensure proper ventilation when using bleach. Open a window or turn on a fan to avoid inhaling fumes.
* This method may fade colored sponges.
Hack 3: The Vinegar Soak
Vinegar is a natural disinfectant and deodorizer. It’s a great alternative to bleach for those who prefer a more eco-friendly cleaning solution.
What You’ll Need:
* Your dirty sponge
* White vinegar
* Water
* Bowl or sink
Step-by-Step Instructions:
1. Rinse the Sponge: Rinse your sponge under running water to remove any loose debris.
2. Prepare the Vinegar Solution: In a bowl or sink, mix equal parts white vinegar and water. You can adjust the amount depending on the size of your sponge and container.
3. Soak the Sponge: Submerge the sponge completely in the vinegar solution.
4. Let it Soak: Allow the sponge to soak in the vinegar solution for at least one hour, or even overnight for heavily soiled sponges. The longer it soaks, the more effective the vinegar will be at killing bacteria and removing odors.
5. Rinse Thoroughly: After soaking, rinse the sponge thoroughly under running water. The vinegar smell will dissipate as it dries.
6. Squeeze and Air Dry: Squeeze out the excess water and allow the sponge to air dry completely.
Important Considerations:
* Vinegar is a milder disinfectant than bleach, so it may not be as effective at killing all types of bacteria. However, it’s still a good option for regular cleaning and deodorizing.
* The vinegar smell may be strong at first, but it will fade as the sponge dries.
* Vinegar can help to remove hard water stains and soap scum from your sponge.
Hack 4: The Dishwasher Cycle
Your dishwasher can be a surprisingly effective tool for cleaning and sanitizing your sponges. The high heat and strong detergents can kill bacteria and remove food particles.
What You’ll Need:
* Your dirty sponge
* Dishwasher detergent
Step-by-Step Instructions:
1. Rinse the Sponge: Rinse your sponge under running water to remove any loose debris.
2. Place the Sponge in the Dishwasher: Place the sponge in the top rack of your dishwasher. Make sure it’s secured so it doesn’t fall through the rack during the cycle. You can use a utensil basket or a clip to hold it in place.
3. Run a Normal Cycle: Run a normal dishwasher cycle with your regular dishwasher detergent. Make sure to select the “heated dry” option, as this will help to kill bacteria and dry the sponge thoroughly.
4. Remove and Cool: Once the cycle is complete, carefully remove the sponge from the dishwasher. It will be hot, so let it cool down before handling it.
5. Squeeze and Air Dry: Squeeze out the excess water and allow the sponge to air dry completely.
Important Considerations:
* Avoid washing sponges with metal scrubbers or components in the dishwasher.
* The dishwasher method may not be suitable for all types of sponges. Some sponges may break down or disintegrate in the dishwasher.
* This method is best for sponges that are not heavily soiled or stained.
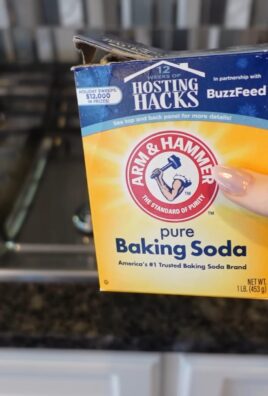
Hack 5: The Baking Soda Paste
Baking soda is a natural abrasive and deodorizer. A baking soda paste can help to remove stubborn stains and odors from your sponges.
What You’ll Need:
* Your dirty sponge
* Baking soda
* Water
Step-by-Step Instructions:
1. Rinse the Sponge: Rinse your sponge under running water to remove any loose debris.
2. Make a Baking Soda Paste: In a small bowl, mix baking soda with enough water to form a thick paste.
3. Apply the Paste: Apply the baking soda paste to the entire surface of the sponge.
4. Scrub the Sponge: Use your fingers or a small brush to scrub the baking soda paste into the sponge. Pay special attention to areas with stains or odors.
5. Let it Sit: Allow the baking soda paste to sit on the sponge for at least 15 minutes, or even longer for heavily soiled sponges.
6.

Conclusion
So, there you have it! Transforming your cleaning routine with these simple sponge cleaning hacks is not just about saving money; it’s about embracing a more efficient, hygienic, and ultimately, more satisfying way to keep your home sparkling. We’ve explored how to sanitize your sponges effectively, extend their lifespan, and even repurpose them for specialized cleaning tasks. The beauty of these methods lies in their simplicity and accessibility. You likely already have everything you need right in your pantry or under your sink.
But why is this a must-try? Because a clean sponge is the foundation of a clean home. Think about it: you use your sponge to wipe down counters, wash dishes, and tackle spills. If your sponge is harboring bacteria and grime, you’re essentially spreading that mess around instead of cleaning it up. These hacks ensure that your sponge is a tool for cleanliness, not a breeding ground for germs.
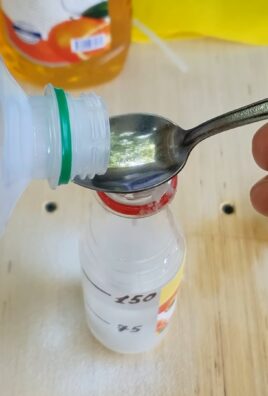
Beyond the basic methods, there’s room for experimentation. For instance, if you’re dealing with particularly stubborn grease, try soaking your sponge in a solution of hot water, dish soap, and a tablespoon of baking soda before microwaving or boiling it. For a refreshing scent, add a few drops of your favorite essential oil (like lemon or tea tree) to the soaking water. If you’re concerned about the environmental impact of disposable sponges, consider switching to reusable cellulose sponges or even making your own from natural materials like loofah or cotton scraps. These can be cleaned using the same methods we’ve discussed, further reducing waste and promoting sustainability.
Don’t underestimate the power of a clean sponge! It’s a small change that can make a big difference in the overall cleanliness and hygiene of your home.
We encourage you to try these sponge cleaning hacks and see the difference for yourself. Start with the microwave or boiling method for a quick and easy sanitization. Then, experiment with the vinegar soak for tackling tough odors and stains. Once you’ve mastered the basics, get creative with repurposing old sponges for specialized cleaning tasks.
Most importantly, share your experience with us! Let us know which hacks worked best for you, any variations you tried, and any tips you’ve discovered along the way. Your feedback will help us refine these methods and share even more effective cleaning solutions with our community. Together, we can create a cleaner, healthier, and more sustainable home environment, one sparkling sponge at a time. So go ahead, give these sponge cleaning hacks a try – you (and your home) will be glad you did!
Frequently Asked Questions (FAQ)
1. How often should I clean my kitchen sponge?
Ideally, you should clean your kitchen sponge daily. At the very least, aim to sanitize it every other day. Sponges are breeding grounds for bacteria, so frequent cleaning is crucial for maintaining a hygienic kitchen. Daily rinsing and squeezing out excess water after each use is also important.
2. What’s the best way to sanitize a sponge – microwave, boiling, or bleach?
Each method has its pros and cons. Microwaving is quick and easy, but it’s important to ensure the sponge is thoroughly wet to prevent it from catching fire. Boiling is also effective, but it can be time-consuming. Bleach is a powerful disinfectant, but it can be harsh on your skin and the environment. The best method depends on your preferences and the level of cleaning required. For regular sanitization, microwaving or boiling are good options. For heavily soiled sponges, a bleach solution might be necessary. Remember to always rinse the sponge thoroughly after using bleach.
3. Is it safe to microwave a sponge?
Yes, it is generally safe to microwave a sponge, but there are a few precautions to take. First, make sure the sponge is thoroughly wet. A dry sponge can catch fire in the microwave. Second, microwave the sponge for no more than two minutes. Third, let the sponge cool down before handling it, as it will be very hot.
4. Can I use the same sponge for cleaning everything in my kitchen?
No, it’s not recommended to use the same sponge for cleaning everything. Using the same sponge for multiple tasks can spread bacteria from one surface to another. It’s best to have separate sponges for different tasks, such as washing dishes, wiping counters, and cleaning the sink. Color-coding your sponges can help you keep track of which sponge is used for which task.
5. How long should a kitchen sponge last?
Even with regular cleaning, kitchen sponges should be replaced every one to two weeks. Over time, sponges can become worn out and less effective at cleaning. They can also accumulate bacteria that are resistant to cleaning methods. If your sponge starts to smell bad or looks visibly dirty, it’s time to replace it.
6. Are there any alternatives to traditional kitchen sponges?
Yes, there are several alternatives to traditional kitchen sponges that are more sustainable and hygienic. These include:
* **Cellulose sponges:** These are made from wood pulp and are biodegradable.
* **Loofah sponges:** These are made from the dried fruit of the loofah plant and are naturally abrasive.
* **Silicone sponges:** These are non-porous and easy to clean, making them more hygienic than traditional sponges.
* **Dishcloths:** These can be washed and reused, making them a more sustainable option.
* **Reusable Swedish dishcloths:** These are super absorbent and can be washed in the washing machine.
7. Can I clean my sponge in the dishwasher?
Yes, you can clean your sponge in the dishwasher. Place the sponge on the top rack of the dishwasher and run a normal cycle with detergent. The hot water and detergent will help to sanitize the sponge. However, keep in mind that dishwashing alone may not be as effective as microwaving, boiling, or using a bleach solution.
8. What can I do with old sponges instead of throwing them away?
Instead of throwing away old sponges, you can repurpose them for other cleaning tasks. Here are a few ideas:
* **Cleaning grout:** Cut the sponge into smaller pieces and use them to scrub grout lines.
* **Washing your car:** Use an old sponge to wash your car.
* **Cleaning shoes:** Use an old sponge to clean your shoes.
* **Dusting plants:** Use a damp sponge to gently dust the leaves of your plants.
* **Protecting furniture:** Place small pieces of sponge under furniture legs to protect your floors from scratches.
9. How does vinegar help clean sponges?
Vinegar is a natural disinfectant and deodorizer. It can help to kill bacteria and remove odors from your sponge. Soaking your sponge in a vinegar solution can also help to loosen dirt and grime, making it easier to clean.
10. What are the signs that my sponge needs to be replaced immediately?
Even with regular cleaning, there are times when a sponge simply needs to be replaced. Here are some telltale signs:
* **Persistent odor:** If your sponge has a lingering bad smell even after cleaning, it’s time to toss it.
* **Visible mold or mildew:** Any signs of mold or mildew growth indicate that the sponge is beyond saving.
* **Excessive wear and tear:** If the sponge is falling apart or losing its shape, it’s no longer effective.
* **Sticky or slimy texture:** A sticky or slimy texture is a sign of bacterial buildup.
Leave a Comment