
Grow Large Purple Cabbages, and prepare to be the envy of your neighborhood garden club! Have you ever dreamed of harvesting cabbages so magnificent, so vibrantly purple, they look like they belong in a fairytale? I know I have! For centuries, cabbages have been a staple in diets around the world, from the humble peasant’s stew to the elaborate feasts of royalty. But the purple cabbage, with its striking color and slightly sweeter flavor, adds a touch of elegance and intrigue to any dish.
But let’s be honest, achieving those prize-winning, enormous purple heads can feel like a daunting task. That’s why I’m so excited to share these tried-and-true DIY tricks and hacks that will help you grow large purple cabbages with ease. Whether you’re a seasoned gardener or just starting out, these tips will empower you to cultivate a thriving cabbage patch. Imagine the satisfaction of serving a vibrant purple slaw made entirely from your own garden!
In this article, we’ll delve into everything from soil preparation and nutrient optimization to pest control and harvesting techniques. So, grab your gardening gloves, and let’s embark on this journey to cultivate the most impressive purple cabbages you’ve ever seen!
Growing Giant Purple Cabbages: A DIY Guide to Bumper Crops
Okay, so you want to grow massive, vibrant purple cabbages that will be the envy of the neighborhood? I’m here to tell you it’s totally achievable! It takes a little planning, some elbow grease, and a whole lot of love, but the reward of harvesting those gorgeous, hefty heads is absolutely worth it. Let’s dive into how I do it!
Choosing the Right Variety and Starting Seeds
First things first, you need to pick the right cabbage variety. Not all purple cabbages are created equal when it comes to size. I’ve had great success with these varieties:
- ‘Red Acre’: A reliable, medium-sized variety with a beautiful deep purple color. Good for general use.
- ‘Ruby Perfection’: This one lives up to its name! It produces dense, round heads with excellent color and storage potential.
- ‘Scarlett O’Hara’: A slightly flattened head shape, but the color is stunning and it’s known for its good flavor.
- ‘Mammoth Red Rock’: If you’re *really* aiming for size, this is your go-to. It can produce truly enormous heads under the right conditions.
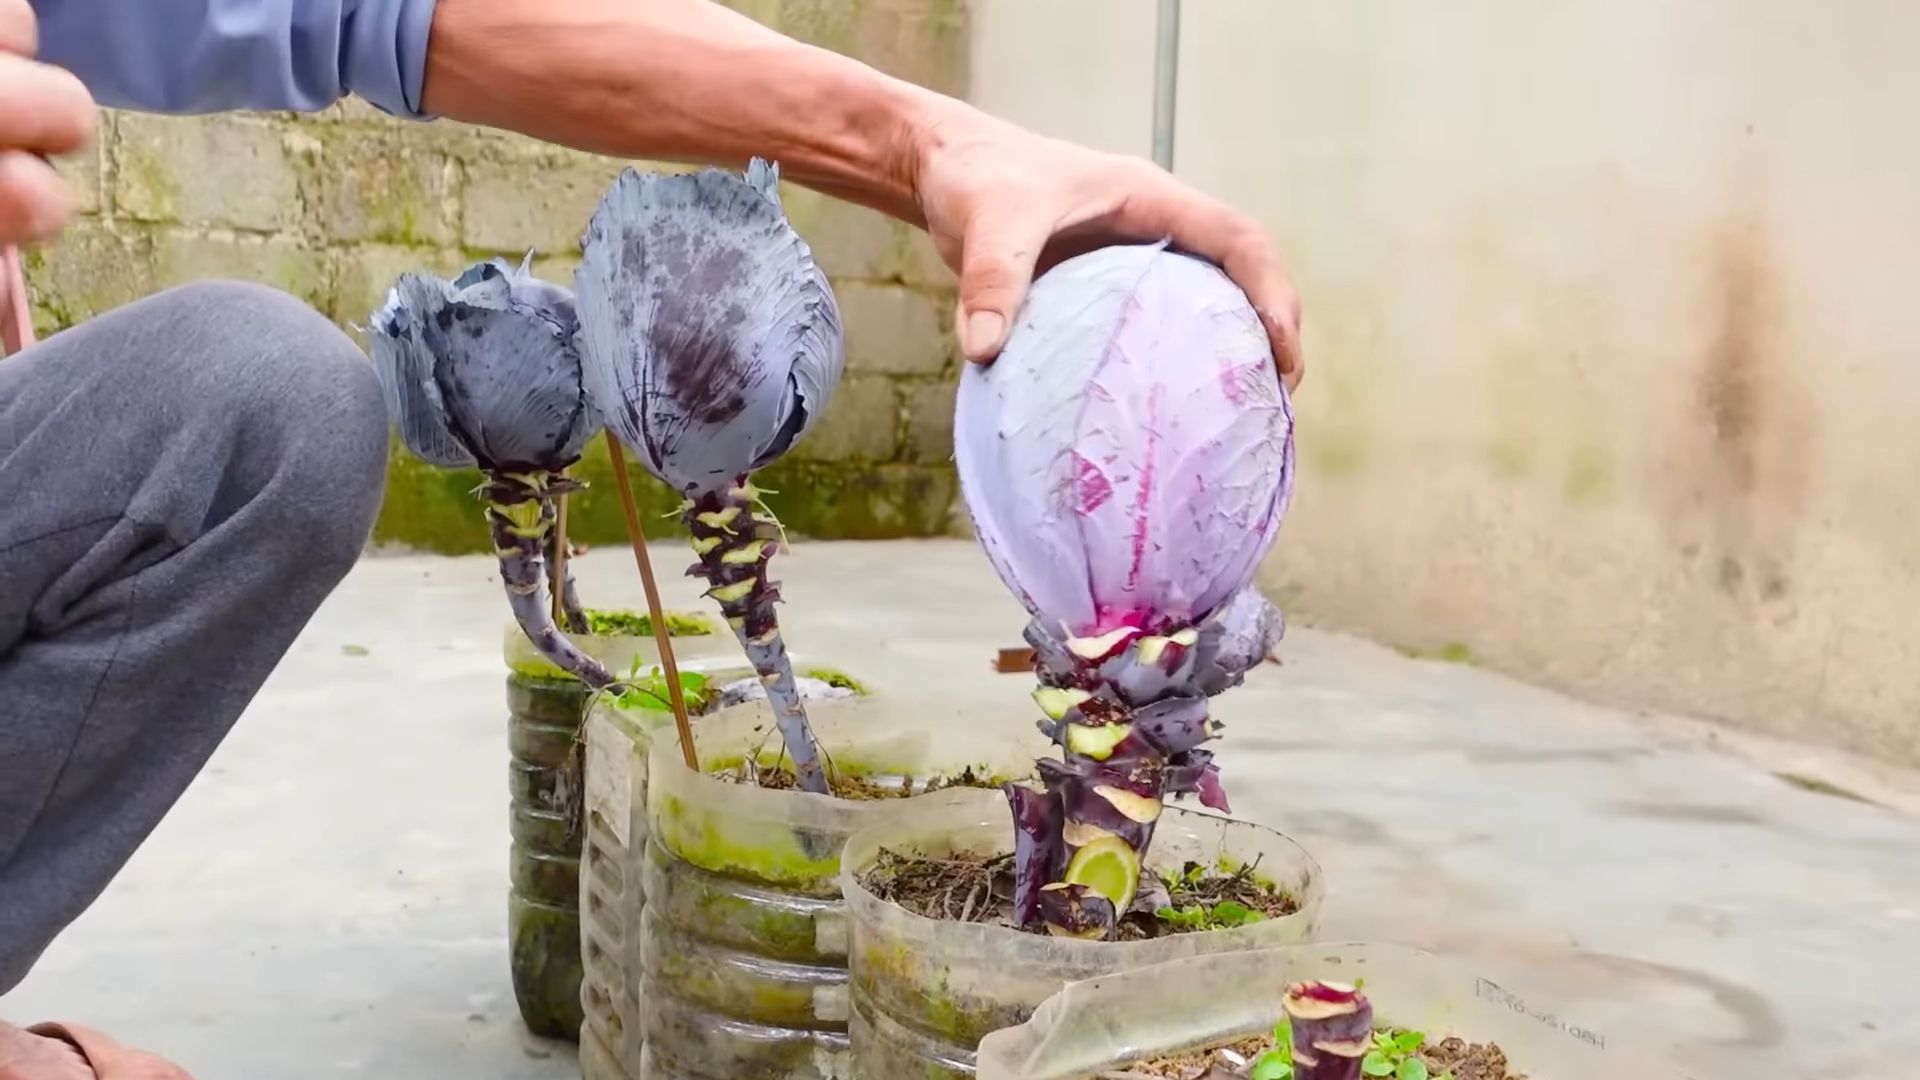
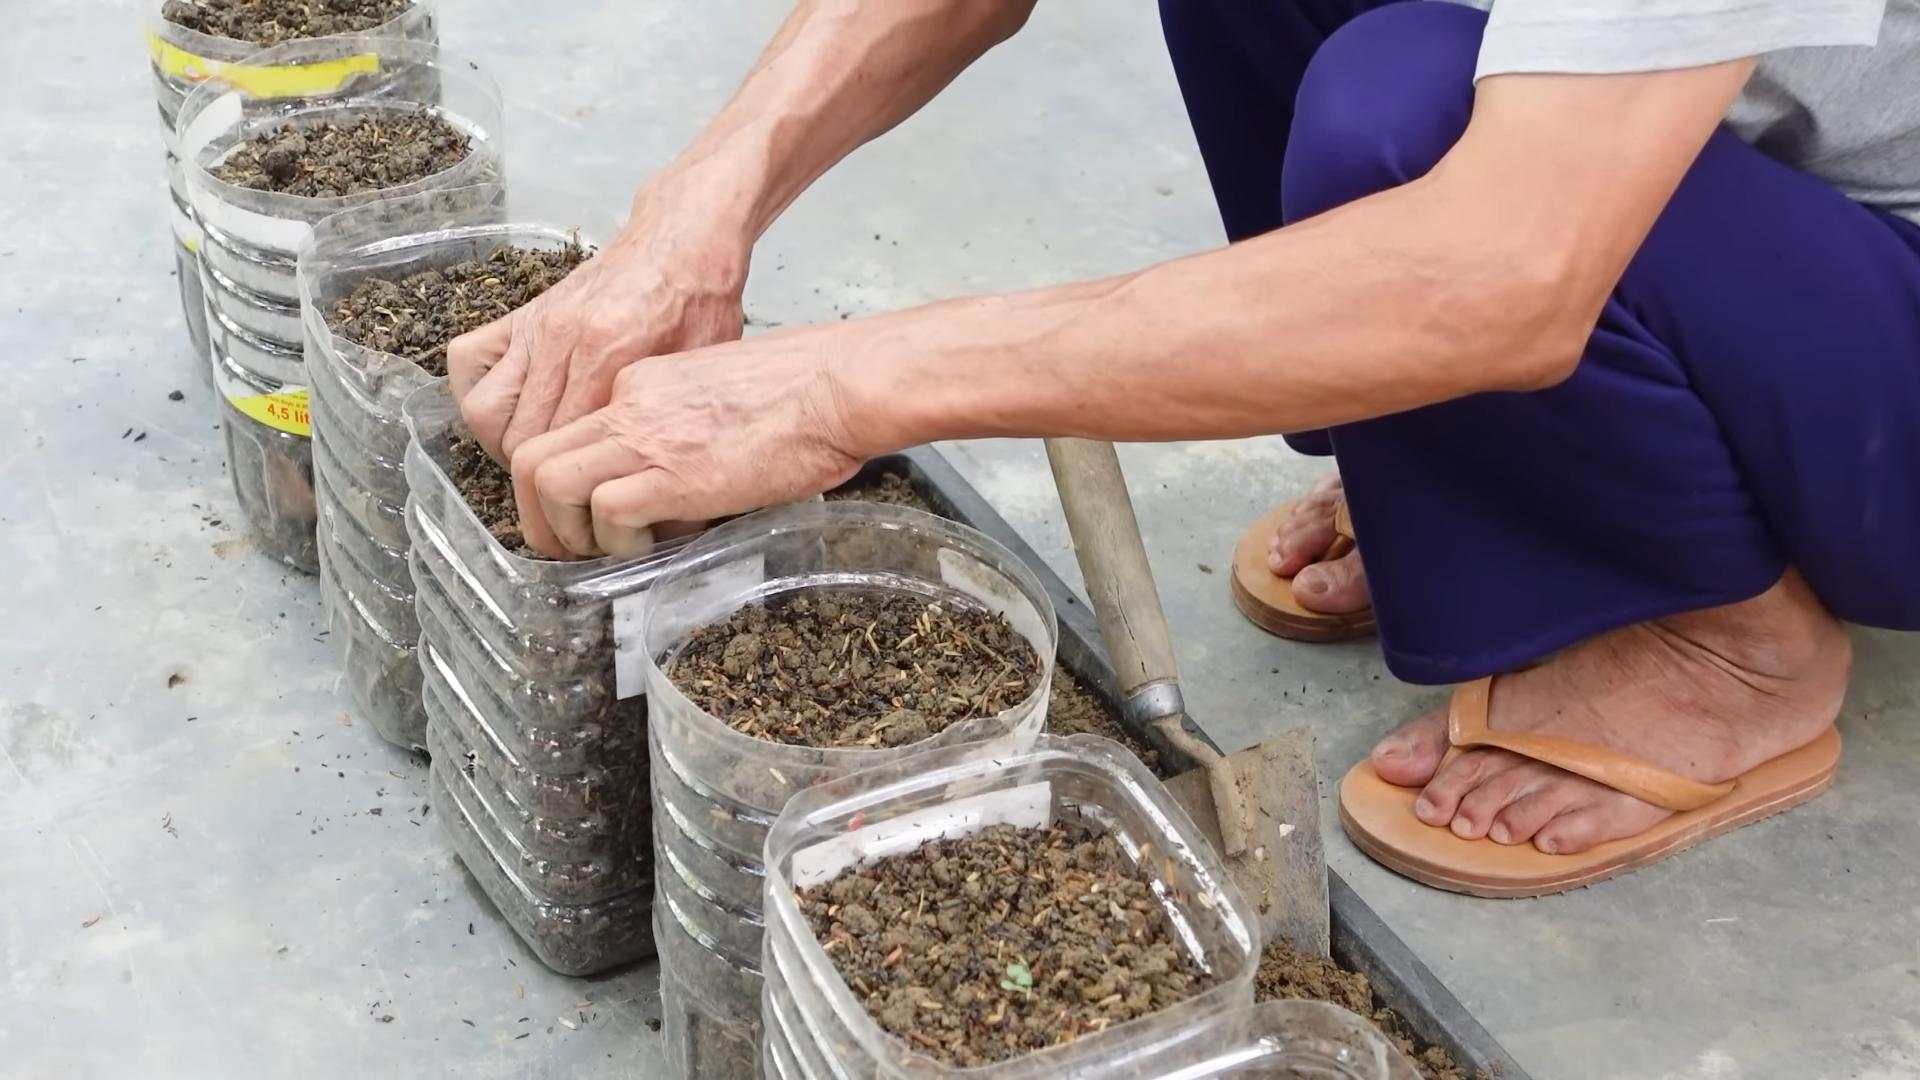
Once you’ve chosen your variety, it’s time to start the seeds. I prefer to start my cabbage seeds indoors, about 6-8 weeks before the last expected frost. This gives them a head start and ensures a longer growing season.
- Gather your supplies: You’ll need seed starting trays or small pots, a good quality seed starting mix, a spray bottle, and your chosen cabbage seeds.
- Prepare the seed starting mix: Moisten the seed starting mix thoroughly. It should be damp but not soggy.
- Sow the seeds: Sow 2-3 seeds per cell or pot, about ¼ inch deep.
- Water gently: Use a spray bottle to gently water the seeds. Avoid overwatering, which can lead to damping off (a fungal disease that kills seedlings).
- Provide warmth and light: Place the seed starting trays in a warm location (around 70-75°F) and provide plenty of light. A grow light is ideal, but a sunny windowsill can also work.
- Keep the soil moist: Check the soil moisture daily and water as needed to keep it consistently moist.
- Thin the seedlings: Once the seedlings have emerged and have a couple of true leaves (the second set of leaves), thin them to one seedling per cell or pot. Choose the strongest, healthiest-looking seedling.
Preparing the Garden Bed: Soil is Key!
Cabbages are heavy feeders, meaning they need a lot of nutrients to grow big and strong. Preparing the garden bed properly is crucial for success. I can’t stress this enough: good soil equals good cabbages!
- Choose a sunny location: Cabbages need at least 6 hours of sunlight per day.
- Test your soil: A soil test will tell you the pH and nutrient levels of your soil. Cabbages prefer a slightly acidic soil pH of 6.0-6.8.
- Amend the soil: Based on your soil test results, amend the soil with compost, well-rotted manure, or other organic matter. I like to add a generous amount of compost to improve drainage and fertility.
- Add fertilizer: Cabbages need a balanced fertilizer with plenty of nitrogen, phosphorus, and potassium. I use a slow-release fertilizer formulated for vegetables. Follow the instructions on the fertilizer package.
- Work the soil: Dig or till the soil to a depth of at least 12 inches. This will help improve drainage and allow the cabbage roots to grow deep.
- Create raised beds (optional): Raised beds can improve drainage and warm up the soil faster in the spring.
Transplanting the Seedlings
Once the seedlings are about 4-6 inches tall and the danger of frost has passed, it’s time to transplant them into the garden.
- Harden off the seedlings: Before transplanting, you need to harden off the seedlings. This means gradually exposing them to outdoor conditions over a period of 7-10 days. Start by placing them outside for a few hours each day in a sheltered location, gradually increasing the amount of time they spend outdoors.
- Choose a cloudy day: Transplanting on a cloudy day will help reduce stress on the seedlings.
- Dig holes: Dig holes that are slightly larger than the root balls of the seedlings. Space the holes 18-24 inches apart, depending on the variety. Larger varieties will need more space.
- Remove the seedlings from their containers: Gently remove the seedlings from their containers, being careful not to damage the roots.
- Plant the seedlings: Place the seedlings in the holes and backfill with soil. Make sure the top of the root ball is level with the soil surface.
- Water thoroughly: Water the seedlings thoroughly after planting.
- Mulch: Apply a layer of mulch around the seedlings to help retain moisture, suppress weeds, and regulate soil temperature. I like to use straw or shredded leaves.
Watering and Fertilizing: Keeping Your Cabbages Happy
Cabbages need consistent moisture and plenty of nutrients to thrive.
- Water regularly: Water the cabbages deeply and regularly, especially during dry periods. Aim for about 1-1.5 inches of water per week.
- Fertilize regularly: Side-dress the cabbages with fertilizer every 3-4 weeks. Use a balanced fertilizer or a fertilizer specifically formulated for vegetables. Follow the instructions on the fertilizer package. I sometimes use a liquid seaweed fertilizer for an extra boost.
- Watch for pests and diseases: Cabbages are susceptible to a variety of pests and diseases, such as cabbage worms, aphids, and clubroot. Inspect your plants regularly and take action if you see any problems. I prefer to use organic pest control methods whenever possible.
Dealing with Common Cabbage Problems
Let’s be real, growing anything comes with its challenges. Here’s how I tackle some common cabbage issues:
- Cabbage Worms: These little green caterpillars can decimate your cabbage leaves. I handpick them off whenever I see them (early morning is best) and use Bacillus thuringiensis (Bt), a natural bacteria that kills caterpillars, as a preventative measure.
- Aphids: These tiny insects suck the sap from plants, weakening them. A strong blast of water from the hose can often dislodge them. You can also use insecticidal soap or neem oil.
- Clubroot: This fungal disease causes swollen, distorted roots and stunted growth. The best way to prevent clubroot is to improve soil drainage, maintain a slightly acidic soil pH, and practice crop rotation. If you have clubroot in your soil, avoid planting brassicas (cabbage, broccoli, cauliflower, etc.) in that area for several years.
- Splitting Heads: This happens when the cabbage head grows too quickly, often due to excessive watering or fertilization. To prevent splitting, water consistently but not excessively, and avoid over-fertilizing. If you see a head starting to split, harvest it immediately.
Harvesting Your Giant Purple Cabbages
The moment you’ve been waiting for! Knowing when to harvest is key.
- Check for firmness: The cabbage head should feel firm and solid when you squeeze it gently.
- Check the size: The size of the head will depend on the variety, but generally, you want it to be a good size for its type.
- Cut the head: Use a sharp knife to cut the head from the stem, leaving a few outer leaves attached.
- Store properly: Store the harvested cabbages in a cool, dry place. They can last for several weeks in the refrigerator.
Tips for Maximizing Size and Color
Want to push your cabbages to the limit? Here are a few extra tips I’ve learned along the way:
- Consistent watering is crucial: Don’t let your cabbages dry out, especially during head formation.
- Fertilize regularly: Cabbages are heavy feeders, so keep them well-nourished.
- Provide plenty of sunlight: At least 6 hours of direct sunlight per day is essential.
- Protect from pests and diseases: Keep an eye out for problems and take action quickly.
- Consider using a row cover: Row covers can protect your cabbages from pests and diseases, and they can also help to warm the soil in the spring
Conclusion
So, there you have it! Growing large purple cabbages doesn’t have to be a gamble. By implementing these simple yet effective DIY tricks, you’re significantly increasing your chances of harvesting impressive, vibrant heads of cabbage that will be the envy of your garden club. We’ve covered everything from soil preparation and nutrient boosting to pest control and watering techniques, all tailored to maximize the size and health of your purple cabbage.
This isn’t just about growing any cabbage; it’s about cultivating truly magnificent specimens. Imagine the stunning visual impact of these deep purple beauties in your garden, and the delicious, nutritious meals you can create with them. From vibrant slaws and colorful stir-fries to hearty soups and fermented delights, the possibilities are endless.
But the real magic lies in the hands-on experience. There’s a unique satisfaction in nurturing a plant from seed to harvest, and knowing that you played a crucial role in its success. And with these DIY methods, you’re not just following a recipe; you’re becoming a more knowledgeable and resourceful gardener.
Why is this a must-try? Because it empowers you to take control of your garden’s success, reduces your reliance on expensive store-bought solutions, and ultimately, delivers superior results. You’ll be amazed at the difference these techniques can make.
Looking for variations? Consider experimenting with different types of organic fertilizers. Compost tea, for example, is a fantastic option for providing a gentle, slow-release nutrient boost. You can also try companion planting with herbs like rosemary or thyme, which can help deter pests naturally. Another variation is to adjust the soil pH slightly depending on your specific soil conditions. A soil test kit can be invaluable in determining the optimal pH level for your purple cabbages. Remember, every garden is unique, so don’t be afraid to adapt these techniques to suit your own environment.
We are confident that with a little effort and these DIY secrets, you’ll be well on your way to growing the largest, most beautiful purple cabbages you’ve ever seen. Don’t just take our word for it, though. Get out there, get your hands dirty, and experience the joy of successful gardening firsthand.
We encourage you to try these DIY tricks and share your experiences with us! Post pictures of your impressive purple cabbages on social media using #PurpleCabbageDIY and let us know what worked best for you. Your insights could help other gardeners achieve similar success. Let’s build a community of thriving purple cabbage growers! We can’t wait to see your amazing results. Happy gardening!
Frequently Asked Questions (FAQ)
What exactly makes these DIY tricks better than just using store-bought fertilizer?
Store-bought fertilizers can be effective, but they often contain synthetic chemicals that can harm the soil ecosystem over time. DIY methods, especially those using organic materials, are gentler on the environment and promote long-term soil health. They also allow you to customize the nutrient blend to meet the specific needs of your purple cabbages. Furthermore, DIY solutions are often more cost-effective, especially if you have access to readily available resources like compost or kitchen scraps. The DIY approach also allows for a more sustainable gardening practice, reducing your reliance on commercially produced products and minimizing your environmental footprint.
How often should I be watering my purple cabbages, and how much water do they need?
Watering frequency depends on several factors, including your climate, soil type, and the age of the plants. As a general rule, aim to keep the soil consistently moist but not waterlogged. Check the soil moisture level by sticking your finger about an inch deep into the soil. If it feels dry, it’s time to water. Young seedlings need more frequent watering than mature plants. During hot, dry weather, you may need to water daily, while during cooler, wetter periods, you can reduce the frequency. When watering, apply enough water to thoroughly saturate the root zone. Avoid shallow, frequent watering, as this can encourage shallow root growth. Using a soaker hose or drip irrigation system can help deliver water directly to the roots, minimizing water waste and reducing the risk of fungal diseases.
What are the most common pests that attack purple cabbages, and how can I control them using DIY methods?
Common pests include cabbage worms, aphids, flea beetles, and cabbage root maggots. For cabbage worms, handpicking them off the plants is an effective method, especially for smaller infestations. You can also use Bacillus thuringiensis (Bt), a naturally occurring bacteria that is safe for humans and beneficial insects but deadly to cabbage worms. For aphids, a strong blast of water from a hose can dislodge them. You can also make an insecticidal soap spray using dish soap and water. For flea beetles, diatomaceous earth (DE) can be sprinkled around the plants to deter them. For cabbage root maggots, placing collars around the base of the plants can prevent the flies from laying their eggs in the soil. Companion planting with herbs like rosemary or thyme can also help repel pests. Regularly inspecting your plants for signs of infestation is crucial for early detection and control.
My purple cabbages are growing, but they’re not forming tight heads. What could be the problem?
Several factors can contribute to loose or poorly formed heads. Insufficient sunlight is a common cause. Purple cabbages need at least 6 hours of direct sunlight per day to form tight heads. Lack of nutrients, particularly nitrogen and potassium, can also hinder head formation. Make sure you’re providing adequate fertilization throughout the growing season. Overcrowding can also be a problem, as plants need enough space to develop properly. Thin out your seedlings to ensure they have adequate room to grow. Inconsistent watering can also stress the plants and prevent them from forming tight heads. Maintain consistent soil moisture levels. Finally, some varieties of purple cabbage are simply more prone to forming looser heads than others. Consider trying a different variety next time.
How do I know when my purple cabbages are ready to harvest?
The best way to determine ripeness is to check the firmness of the head. Gently squeeze the head; it should feel firm and solid. The size of the head will also vary depending on the variety, but generally, they should be at least 6-8 inches in diameter. The color should be a deep, vibrant purple. If the head feels soft or spongy, it’s not ready to harvest. You can also check the outer leaves; they should be tightly wrapped around the head. If the outer leaves are starting to split or yellow, it’s a sign that the cabbage is overripe. To harvest, use a sharp knife to cut the head from the stem, leaving a few outer leaves attached.


Leave a Comment